
This post is titled:
Malaysian Marudai Manufactory
Our friends who do combat archery in the SCA have a phrase that describes what a room looks like when they all get together as a group to produce SCA-legal combat arrows. They call it, the "Guatemalan Arrow Factory." (This is not meant as a racial epithet, but as a tribute to the hard work in poor conditions of the third-world workers who usually get taken for granted.)
Right now, my basement is full of pieces to make Marudai. Here are some pictures of what it looks like:
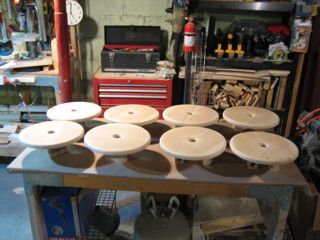
Mirrors
for eight marudai
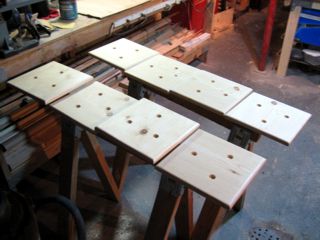
Square bases
for eight marudai
The bases and mirrors are up on blocks so that their wet edges don't rest on anything while they dry. By the time I'm done finishing one side of all 16 pieces, the first pieces are dry enough to be flipped and have their other sides done. I finish the bottom surfaces first, so the top (visible) surfaces have more time to dry in their final position. Sanding usually has to wait until the next day to let the finish cure completely.
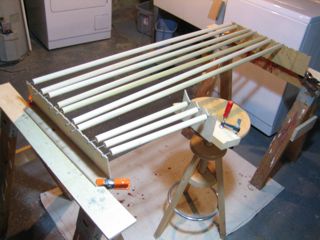
Dowels for legs
for eight marudai
Thankfully, I realized that I could do some preliminary finishing on the dowels before cutting them up into 15 inch pieces. Unfortunately, I'd already cut up one dowel; that's why there are three shorties in that picture.
So far, these are the steps I've completed on the build:
- Cut squares for bases.
- Cut squares for mirrors.
- Cut mirrors into circles.
- Drill holes for legs in bases mirrors.
- Drill big holes in center of mirrors.
- Route all lower edges with 1/8" roundover bit.
- Route all upper edges with 3/8" roundover bit.
- Sand with 80 grit to remove saw marks and complete shaping.
- Sand with 120 grit to smooth.
- Finish with sanding sealer.
You'd think steps one and two could be the same, but it turns out that not all 1x12 lumber is the same width. One 8 foot 1x12 I bought was 11 inches wide, and the other was 11 3/8 inches wide. Craziness. I used the wider lumber for the circles, since I was cutting 11 inch circles out anyway, and it would be easier if I had a bit of margin while cutting.
Next is:
- Sand with 220 grit to smooth.
- Finish with polyurethane.
- Cut dowels into legs.
- Sand with 320 grit to smooth.
- Assemble marudai.
- Finish with polyurethane.
- Sand top surfaces and edges of mirrors and bases with 440 grit to smooth.
- Finish sanded surfaces with polyurethane.
- Wet sand top surface of mirror using 1200 grit.
- Finish sanded surfaces with polyurethane.
So, mostly the hard hard work is over, but assembly and finishing will take another week or two. Making four marudai at a time was fun, but eight at a time is somewhat grueling. The plan is to sell the nicer half dozen, and use the less nice half dozen to teach classes.
2009.04.13 at 12:00am EDT
All text and graphics copyright © 2007-2013 Elliott C. Evans except where otherwise noted.
[Visit my web site] [Subscribe via RSS]
