Porch Footrest
Furniture Hacking for Fun and Comfort
August 2008
August 2008
Back when Sharon was having some renovations done in the living room, the footstool that usually lives in the living room spent a summer out on the porch. We spend a lot of evenings on the porch in the summer time, and we got used to having a footrest out there.
When the renovations were completed and the footstool moved back inside, Sharon asked if maybe I could make another footstool to keep out on the porch. The discussion turned to how I could make one that matched the two porch chairs, and I suggested deconstructing a chaise longue that already matched the chairs, and using the pieces to make a footrest. We never used the chaise, so I knew it wouldn't be missed.
I actually began this project in the summer of 2007, but the last coat of finish didn't go on until 2008. We used it a bunch in 2007 and 2008, and it works great. It's a little lower than the footstool, which is actually more comfortable. It's a bit too flexible to stand on safely, but it's strong enough for a light person to sit upon without danger.
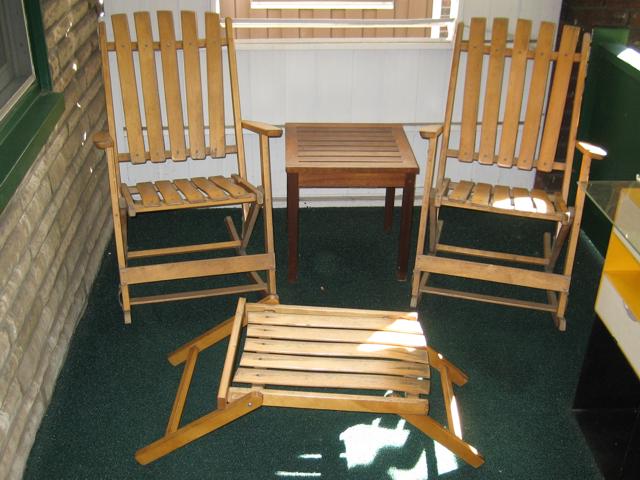
The "platform" of the footrest is constructed of the part of the chaise that already was a footrest. The right-hand set of legs was already attached and is used the same way it always was. The left-hand set of legs is modified from a pair of legs from the seating part of the chaise, as is the "stop" that holds the unfolded legs in position. The modified components are attached with hardware scavenged during disassembly of the chaise.
Taking apart the chaise was a pain. Some parts of it were held together with screws, and those were easy, but others were held together with thick ring nails. Ring nails have ridges in them that are like circular barbs. Getting them out required a crowbar, and not destroying the wood took great care.
One structural member of the chaise became the stop at the left end of the footrest. I cut this to length, and stained the cut ends with a "Maple' stain. Then, I drilled holes to accept the ring nails, and hammered them home.
Once I had that in place, I was able to take the support legs from a different part of the chaise, position them against the stop and over some existing attachement holes, and determine the correct length for the legs. I cut and rounded the legs, then stained the cut ends as before and drilled new attachment holes. A couple more ring nails and the construction was complete.
A bunch of sanding to clean off the flaking old finish and a few coats of wipe-on polyurethane to seal were all it took to finish the footrest.