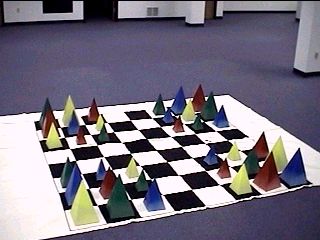
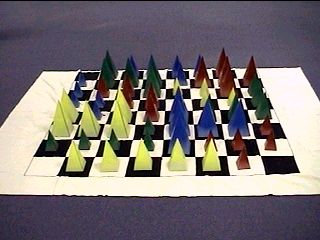
Giant Chessboard
Bigger is Better
October 2001
October 2001
After I spray painted my Giant Cardboard Stashes I realized that I didn't have any way to play the pyramid games that need a chessboard, like Martian Chess, Pikemen, or Martian Go. I looked for giant chessboards on the web, but I couldn't find any that didn't cost hundreds of dollars, or weren't meant to be permanently installed in one place.
If I was going to be able to take this with me, to play games at conventions and such, my chessboard would need to be reasonably light, and fold up into a reasonably small space. Fabric seemed like th best material, and painting a large piece of fabric seemed more dorable and less labor intensive than sewing smaller pieces of fabric together.
I thought about using a King size bedsheet, but then I found these canvas dropcloths at the hardware supermarket and decided they would be perfect. They should be more durable than a bedsheet, but were just as cheap. Perfect!
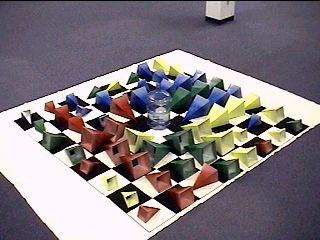
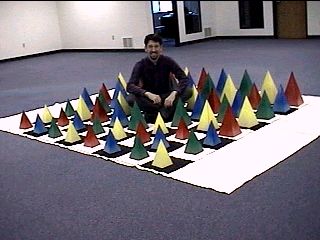
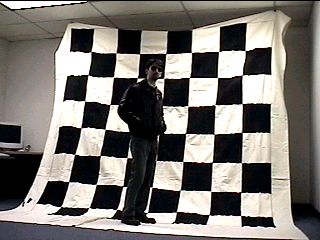
I made one chessboard with 12-inch squares at home. I didn't have enough room anywhere to spread the whole thing out, so I actually painted it in shifts, doing one side of the board at a time. Most of the pictures on this page were taken when I made a larger one with 14.5-inch squares. The larger squares are to better accomodate pieces that are lying down. This one I made at work in some empty office space we have. The second time around I was much faster at it, and the whole thing took less than four hours if you exclude the drying time.
 |
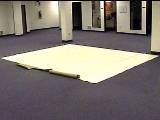
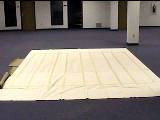
Start by laying out the drop cloth as flat as possible, and measuring the sides to find the center of each side. Then, tape out a square that's big enough for your board (8'0" for 12" squares, 9'8" for 14.5" squares). Do this by marking the edges of the cloth with pencil, and then taping off the edges of the cloth so that you can use the tape as a "chalk line" before pressing it down. |
 |
You might also find it helpful to run tape along the center lines of the board, so you can mark distances along the middle as well. This will significantly increase the accuracy of your board, so I recommend it. |
 |
Mark along the edges of the board with a magic marker. You're marking out where the lines for each square will be, so measure carefully or your squares will look a little funny. If you taped along the center lines, measure and mark along those aswell. Decide which corner is going to be the lower-right corner, as this square will need to be white. |
 |
Get a bunch of paper or plastic under your cloth, because the paint will probably soak through and you don't want to get it on the work surface (here, the carpet in my workplace). |
 |
Start taping off the edges of the squares. Because the tape is necessarily wider than zero, you'll only be able to tape off and paint half of the squares that make up the board. You can see this in the picture as alternating wide and skinny alleys between the tape. The wide alleys will hold the first set of squares. It may help to hold a real chessboard as you think about this. |
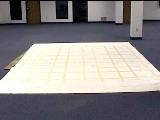 |
Finish taping off the squares, running the same kind of skinny/wide pattern. My first black square is going to be in the lower-right of this picture. |
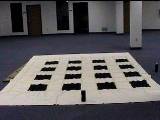 |
Paint! Try to use a little paint as you can, so that the squares don't get too stiff. You can also dilute the paint a bit. Let the paint dry for about fifteen minutes, then carefully peel up all the tape except for the outside borders. Then let the paint dry as much as you like. If you're going to let it dry overnight, peel up all the tape or it will dry in place and you may never get it off. |
 |
Now, tape off the remaining squares. You can do the full-length tape if you want, or you can just tape off the individual squares (like I did) if you want to save a little tape. Paint all those squares, dry fifteen minutes, peel up the tape. |
 |
Peel up all the tape now, including the outer borders. |
 |
Let the paint dry overnight if you have the time. Let it dry as flat as possible. |
 |
Use the ruler and the marker to close the open sides and corners of the white squares. It's simple to line up the ruler with the corners of the squares and draw straight across. |
 |
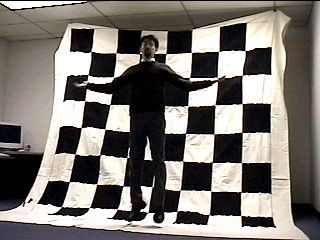
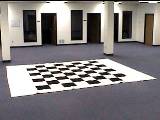
Congratulations! Now you have a giant chessboard. |
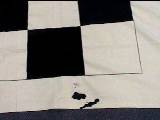 |
I only messed this one up a little bit. There's a little splurp here along one edge… |
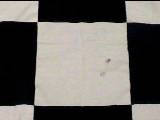 |
…and this spot where I apparently stepped in the wet paint and tracked a little bit of it around… |
 |
… but it's not really visible from a distance. I show you this to demonstrate that your chessboard doesn't have to be perfect to be good… |
 |
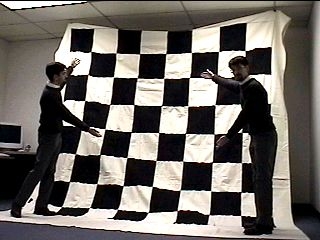
…and this one certainly looks like a chessboard to me. I could also try to cover up the minor errors with off-white fabric paint. |