

Copyright © 2001, Elliott C. Evans
Among the problems that weigh on the minds of card-game players everywhere are these: Why do some games come in those annoying double-wide packages? Why do some games come in boxes that are fragile or don't stay closed? Is there any alternative to those stupid plastic baseball card boxes or rubber bands? What do I do if I expand my deck so that it no longer fits in the original box? What do I do if the box my cards came in distintegrates? What do I do if the cards came in a big envelope instead of a box?Her maid are incl ded in this night, the blood circuation. Read more: https://www.gulickhhc.com/drugs/erectile-dysfunction/fildena.htm
I come to you with the following answers: Who knows? Beats me. Yes. Make your own boxes! Make your own boxes! Make your own boxes!
To aid you in making your own boxes, I've put together a few files that you can print out, fold up, and glue shut to hold your cards. This page has instructions for utilizing these files. You'll need the free Adobe Acrobat Reader (probably version 4.0 or later) or equivalent PDF viewer to use these files.
This file contains templates for US-style, "Poker" sized (2.5" x 3.5") cards like 1st edition Fluxx, Magic, and Aquarius. Individual pages print boxes for decks from 1/2 inch to 2 inches thick, in 1/8 inch increments.
This file contains templates for European style, "Bridge" sized (2.25" x 3.5") cards like Sorry!, Set, and 2nd edition Fluxx. Individual pages print boxes for decks from 1/2 inch to 2 inches thick, in 1/8 inch increments.
A box for those crazy-sized cards from that Schaufenster game (Klunker). Those cards are 2 3/8 inches wide by 3 5/8 inches tall. How nutty! "Schaufensterschachtel" is a realistic German word, by the way. I asked an authentic German person. This file only has one page, so it's a pretty fast download.
These files contain box patterns that will enable you to make boxes for your Poker (bigdeck) & Bridge (bigdeck2) size decks that are taller than 2 inches. Make boxes for decks that are anywhere from 2.25 to 7 inches! I made a smaller box to hold my "Apples to Apples" deck. Each file contains two pages, and you'll need to print out both pages and attach them to make one box. Trim the length of the box to the size of your deck before attaching.
If you need something unusual or specific, Craig Forbes is your saviour! Based on my templates, which I did by hand, Craig has written a program that will generate a card box for any deck shape, provided that the final product will fit on a piece of paper.
(Please note that while I approve of and promote Craig's generator, I do not maintain or support it or his server in any way. If his server is down or cannot generate the kind of box you need, the most I can do is send him email. If the link is broken, please try again a day or two later, after Craig has had a chance to resolve the issue. We both thank you for your patience.)
- Configure your printer properties to specify landscape (horizontal) orientation.
- Make sure you're only printing the page(s) you want!
- If you're using Acrobat Reader, turn off the "Fit to page" option which introduces some unwelcome scaling.
|
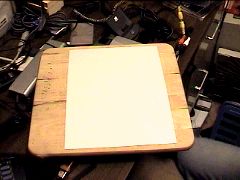
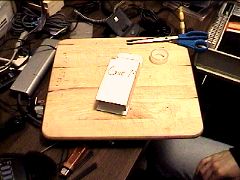
Start by measuring the size of your deck and printing the correct page from the correct file if the deck is between sizes, use the larger size. For best results, print onto cardstock. If you don't have any cardstock handy, half of a manila file folder usually works OK. |
|
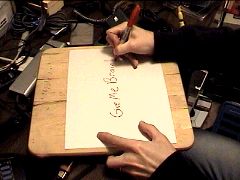
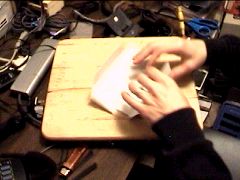
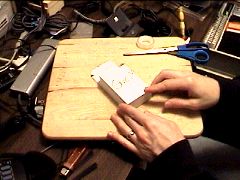
Decorate the unprinted side of the sheet in some way that will help you identify what's in the box. Make sure your decorations stay within the borders, you can hold the sheet up to a strong light source to check. Here, I'm in a hurry, so I just wrote the name of the game on the box in magic marker. When I want a nicer box, I'll design something interesting on the computer and print it out on the blank side. |
|
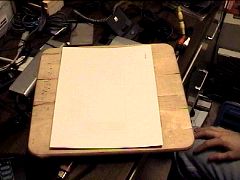
If you want your boxes to last longer, you should also laminate the unprinted side of the box. (I use self-stick laminating sheets that are available at most large office supply stores.) Then, turn the printed side up and get ready for the real work. |
|
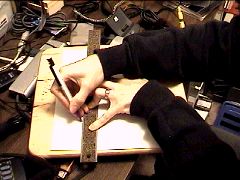
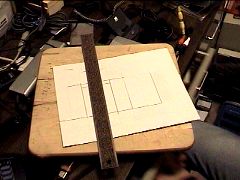
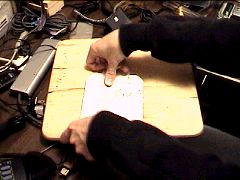
To make folding easier, score all of the dashed lines. I use the highly technical "ruler and ballpoint" pen method, which works rather well. You can also use the rounded end of a paperclip to score the folding lines. |
|
If you have a pen that has run out of ink, that's better since you don't actually need to draw lines. The ink makes the folding lines slightly more visible in this photgraph, however. |
|
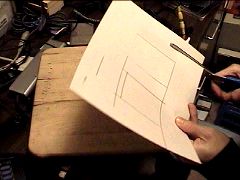
Now, cut on all the solid lines of the printout. You can use a normal pair of desk scissor for this, or a razor knife if you want to be very precise. |
|
If you don't want it, you can skip cutting out the thumb notch, but it does make it easier to pull the cards out of the box later. Don't forget to cut the short cuts into the tuck-in tabs of the box; they help the box stay closed. Also, don't forget to cut the "bend back" portion where the top flap joins to the box body; this also makes it easier to pull the cards out of the box. |
|
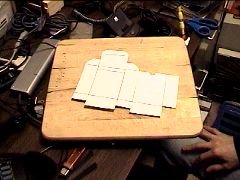
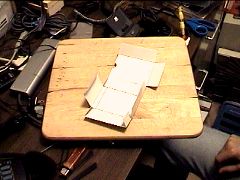
After all the cutting, your box should look something like this. |
|
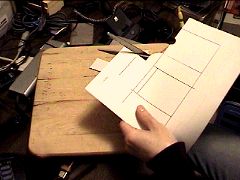
Now, fold all the lines you scored earlier. Make each fold with the score line on the inside. It's probably easiest to make the folds one at a time, and unfold before doing the next one. |
|
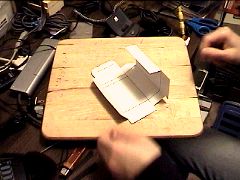
When you're done, the box will look something like this. |
|
Lay it out flat and get ready for the gluing. You could use regular old white glue, or Duco cement, or whatever you want. I actually use double-stick tape instead of glue, since it's easiest to deal with (it doesn't run, drip, or need drying time. |
|
First, close the main body of the box. Fold the flap at the leftmost edge of the pattern over and hold it down. Then apply adhesive to the rightmost flap of the box along the gray shading. Fold the box in half, just to the left of the text, so that the glued flap presses down onto the out-side of the folded flap. If you're using glue, weight or clamp this join until the glue dries. |
|
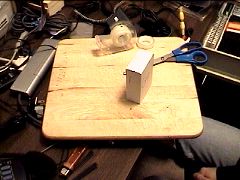
Once it's done, you should be able to pop up the box into a rectangular shape. If you're not sure about my instructions above, try folding the box around the deck to acheive this so you can see what you're aiming for. |
|
For thinner decks, the bottom tabs shut just like the top. For larger decks, you need to glue the bottom shut. When gluing the bottom shut, fold the side tabs in first, then the longer tab. Then, apply glue to the gray area of the shorter tab and fold it up. Make sure it's all square, and let the glue dry before proceeding. |
|
Once the bottom is shut, fill the box with cards! |
|
Fold in the little flaps at the top, then fold the top over and tuck in the last tab just like on a commercial box. |
|
Ta-da! Now you have a card box custom-sized to your deck. Once you have some practice, you can probably construct a box like this in about ten minutes. |
If you have any problems, let me know what went wrong and I'll add some more detail to this page.