Portable Bed Frame
Comfy sleeping while camping

July 2008

Explanation
After a few years of spending a full week at Pennsic,
you get tired of sleeping on the ground.
We have good ground pads,
but the land is never completely level,
and it's always colder, less comfortable, and dirtier down on the ground.
So, I was asked (by Sharon, naturally) to build a bed frame.
The key requirements for the frame were:
- That it be large enough to accomodate our double-side sleeping bag.
- That it be tall enough that the space underneath it could be useful for storage.
- That it be easily assembled/disassembled for portability.
This portable bed frame is the result,
and it works pretty well.
We've used it for two Pennsics as of this writing.
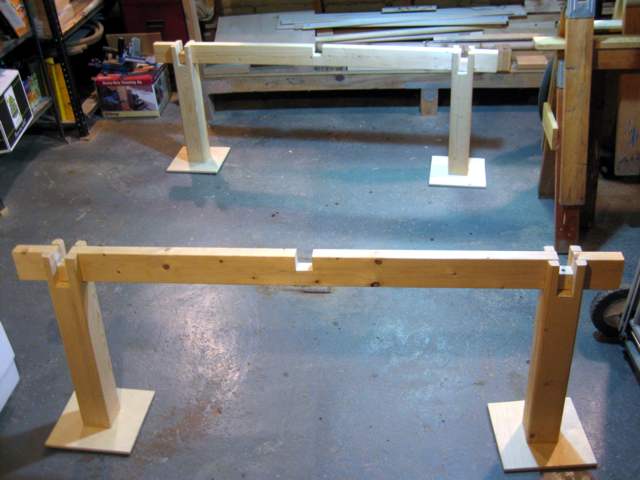
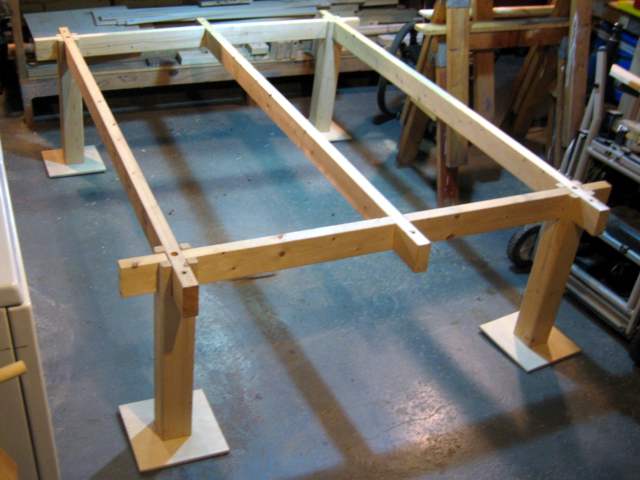
Large feet provide a stable base,
and tall legs provide a little altitude.
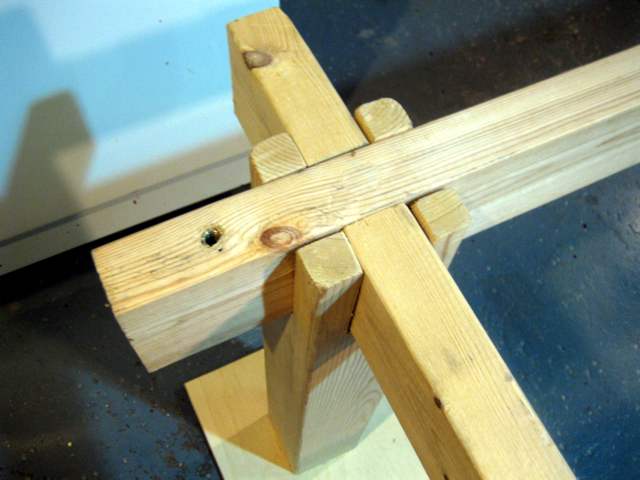
The legs are notched at the top
to accept the frame pieces.
The frame pieces are notched so they fit together rigidly.
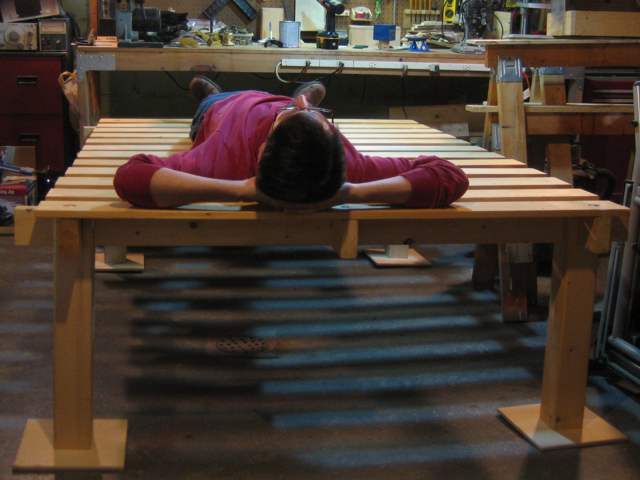
The slats are joined with webbing,
roll up into compact cylinder for travel,
and unroll on top of the assembled frame.
The ends of the slat roll are anchored to the frame
using bolts through the end slats
and threaded inserts in the frame.
Materials
From the bottom up:
- 4 11 inch squares of 1/2 inch plywood for the feet.
- 4 22 inch lengths of untreated 4-by-4 for the legs.
- 2 5 foot lengths of 2-by-4 for the short frame pieces.
- 3 6 foot lengths of 2-by-4 for the long frame pieces.
- 12 5-foot lengths of unknown lumber (approximately 1-by-4) for the slats. These were reclaimed
from a cheap IKEA futon frame.
- 3 approximately 6.5 foot lengths of nylon webbing.
- 6 5/16" threaded inserts
- 6 5/16" flat washers
- 6 5/16" by 1.5" hex-head bolts
- 12 2" wood screws (square drive!)
- Many 3/4" staples
The Process
- First, measure the ground pads and sleeping bag
to determine the required size of the frame.
- Cut
three long rail pieces and
two short crosspieces of 2-by-4.
- Notch the rails with
1.875" deep and
1.75" wide notches
3 inches in from each end
on their nominal bottom narrow surfaces.
I used three passes on the table saw with a dado set
to get the required width.
- Notch the crosspieces with
1.875" deep and
1.75" wide notches
3 inches in from each end
and in their centers
on their nominal top narrow surfaces.
- Cut four legs from a single 8 foot 4-by-4.
- Notch each leg with two
3.75" deep and
1.75" wide notches,
crosswise into one end.
- Cut four squares of plywood to make feet.
- Round the edges of each square to protect the tent floor.
- Attach one square
to the bottom (un-nitched) end
of each leg with screws,
centering the leg on the square,
and keeping the sides of the leg
parallel to the edges of the square.
- Stand the legs up in the workspace,
place the crosspieces into the leg notches
to set the width,
and place the rails into the leg notches and crosspiece notches
to set the length.

- Lay the bed slats out across the assembled frame,
distributing them evenly along the length of the frame
so that they go from the end of each rail to the other end.
- Lay three long strips of webbing on top of the slats,
one over each rail.
- Staple the webbing to the slats using a staple gun.
I put at least four staples at each slat.
If the staples do not set completely or evenly,
set them with a hammer.
- Turn the slat assembly over,
lining up the webbing strips with the rails.
- Drill through the center of each end slat into the center of each rail
using a 5/16" drill bit.
- Cut a 3/4" diameter countersink 3/8" deep on each slat on each hole.
- Move the slats out of the way,
and widen the holes on each rail to
accept the threaded inserts.
- Install the threaded inserts,
one to each hole.
- Place the slats back into position,
put a washer in the bottom of each countersink,
and drive a bolt through each hole into each rail.
- Unroll the bedding and take a nap!
 [Physical Objects]
[Flourishing Branch]
[Home Page]
[Physical Objects]
[Flourishing Branch]
[Home Page]