Fiber Management Tools
Kowaku, Tondo, Zaguri
September 2009


September 2009
When buying yarn and thread in bulk, the material usually comes in skeins. These are just bundles of material with no core or solid structure to hold them. Knitters usually take skeins and make yarn balls, either using a mechanism of some kind or by having a helper hold the skein in their hands to keep it from tangling as the yarn is pulled away.
I've been buying yarn in skeins for my kumihimo, but the amount I've been pulling off the skein for each braid has been small enough that I usually just deal with the tangles as they occur.
For braid 64, I purchased a skein of silk thread from a Japanese supplier. Since the thread had to be bundled to create strands, I needed to pull yards and yards of thread for each strand, and thread is way too thin to consider making balls like with yarn. It was time to research and build some real equipment.
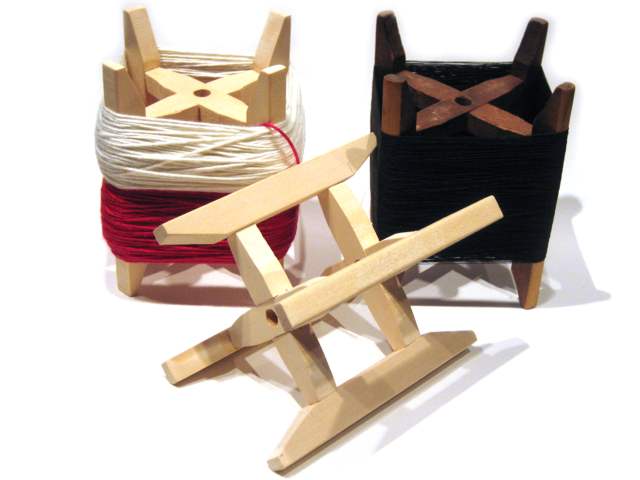
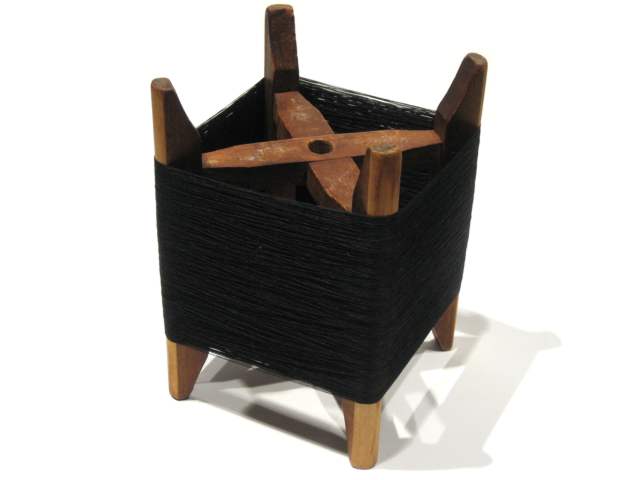
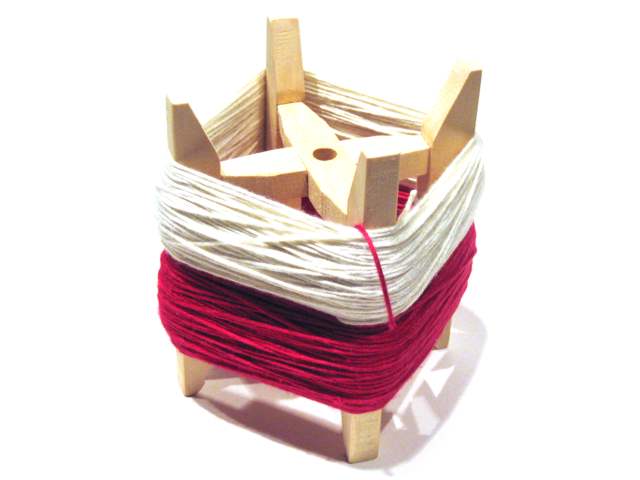
At the same time that I purchased the skein of silk, I bought some other thread that came on a traditional Japanese "kowaku" reel. I've seen these spools of thread in the supply photos of various kumihimo practitioners, but never held a real one in my hands. They're neat, about six inches tall and five inches across, they can hold quite a bit of thread or yarn. Now that I had one kowaku, I could figure out how to make more.
After carefully examining and measuring the purchased kowaku, I drew up plans for making more from basswood. Basswood is a bit heavier than balsa, but is also stronger. It's also available in 1/2" thickness for a reasonable price, which would save a step when shaping the pieces. Each kowaku is made of eight pieces, four copies each of two different shapes. The cross pieces fit together like Lincoln Logs, and have 1/4 inch tenons at the ends. The legs fit onto these tenons. The kowaku I bought is nailed together, but glue was sufficient for the ones I've made, and really the whole thing can be held together by the thread it holds.
After making the first kowaku, I loaded it with some yarn I had previously balled. It looks great this way, much more traditional, but how to get fiber out of the skein without a helper?

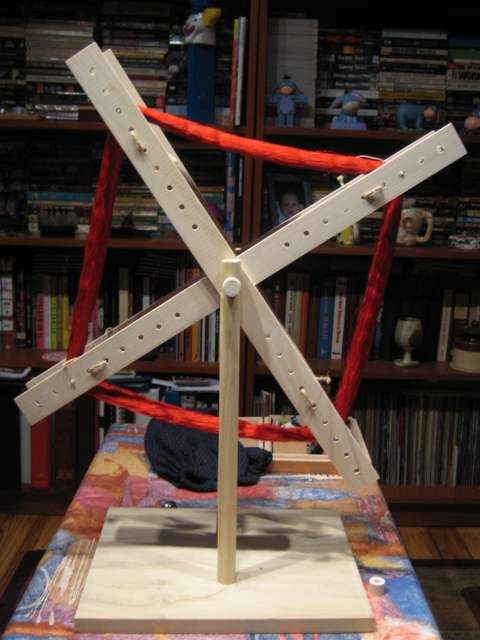
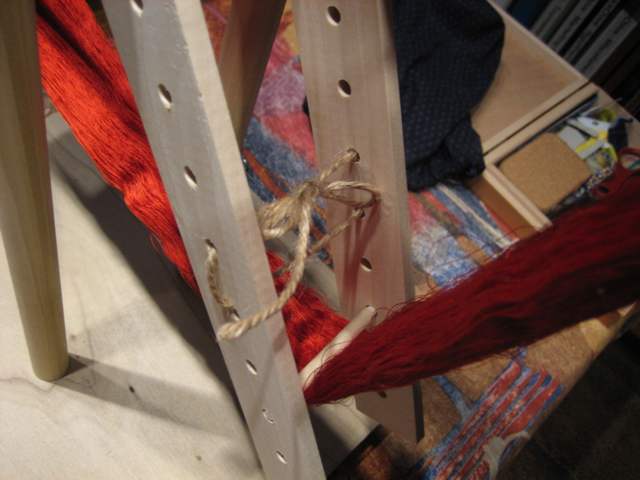
The traditional answer is called a tondo. The tondo is little more than an adjustable reel on which a skein can be mounted. Besides the adjustability, the tricky part is making the tondo so that the whole thing can be taken apart for the mounting process. The skein can't magically pass through a permanent axle, you know.
I didn't have an actual tondo to study, but a few pictures on the net were enough to give me enough to construct a workable model. Most pictures I saw had 6 "arms" per side, but i decided to go with just 4. The arms are just overlapping 24" wooden slats, with holes drilled every inch and a hole drilled at the center. The base is just a square of wood with two vertical dowels stuck in it. A wooden dowel acts as an axle, holding the two sides of the wheel. There's a drilled-out dowel slipped onto the axle between the sides to keep them apart. Short pegs go between the arms to hold the material out from the axle, These pegs are tapered at the ends so their tips fit in the holes in the arms. Loops of twine pull the arms together onto the pegs.
I spins pretty well, and keeps the material from tangling as it winds off the skein. How do you wind it onto the kowaku, though?

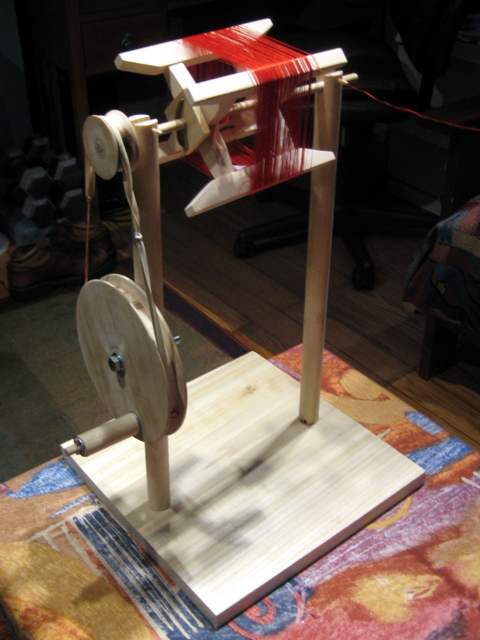
As you might have guess, the answer is called a zaguri. The zaguri spins holds the kowaku and spins it. If you can spin the kowaku, it can pull the fiber out of the skein (or off the coccoon, but I haven't gotten that far yet). The key here is gearing. You want the kowaku to spin several revolutions for each turn of the crank, or you will be doing and awful lot of cranking. I decided to attempt this simply by having two wheel of different sizes, and having a belt between them.
In all of my construction work, I have tried to stick with objects and stay away from machines. Machines are fiddly and small errors here and there can have a huge influence on their functioning. It seemed difficult to stay away from making some kind of contraption in this case, though.
The base of the zaguri is similar to that of the tondo, although I cut the axle holes open at the top so that the middle could be constructed and then dropped in instead of needing to be constructed in place. A short wooden peg acts a lock to keep the axel in place. The axle has a small wheel, about two inches in diameter permanently affixed to one end. Near the middle is a small square of wood with two metal arms. These arms hold the kowaku in place on the axle, and transfer the force of the spinning axle to the kowaku.
The larger wheel is about six inches in diameter. Its handle is made from a length of thin dowel glued into a hole in the wheel, a couple of metal washers, a drilled-out piece of 7/8" dowel, and a crosswise peg to keep the whole thing together. The larger wheel is mounted on the upright of the stand using a metal bolt because I had one that was the right length.
Both wheels have channels cut into their round edges to hold the belt in place as they spin. The big wheel was large enough that I could use a 1/2" rabbetting bit to quickly cut a nice flat channel. The little wheel was too small to do the same safely, so I wound up putting a bolt through the center hole and chucking it into my drill press as an impromptu lathe setup. Once the wheel was up to speed, I used a 1/2" sanding drum on the Dremel tool to carve a rounded channel out of its edge.
As a belt, I'm just using a few linked rubber bands. This slips a bit, but it's a good stop-gap until I can figure out something better.
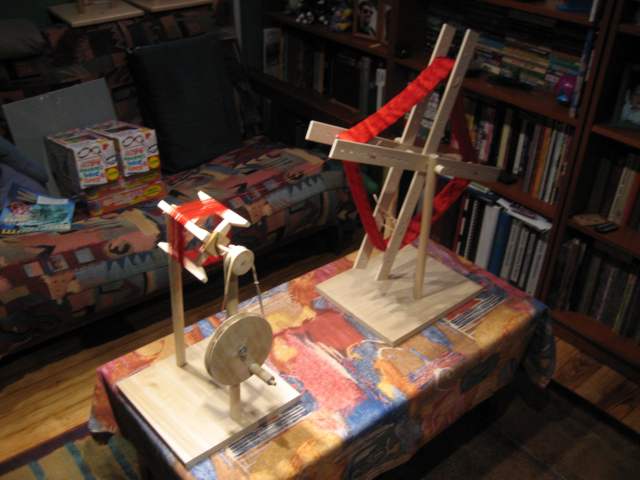
It works great! The various wheels rub in various inconvenient places, and the arms of the tondo need some sanding to keep from snagging the thread, but it works much better than I would have expected. I probably could have made it much faster with a good set of Tinker Toys, but this looks a smidge nicer.
The biggest problem is that once the tondo gets moving, it has a lot more momentum than the zaguri/kowaku. It will continue to spin for a bit after you stop cranking the zaguri unless you stop it with your hand.
The materials are mostly poplar plank (started with 1x12), poplar scant (1/4" by 2"), and poplar dowels (7/8", 5/16", 1/4", and 1/8"). There's some metal hardware and rubber band as noted.
This whole set-up took me about four evenings. Two short nights to make the two types of kowaku pieces, one long night for the tondo, and one long night for the zaguri. I need to make a bunch more kowaku, though, so I should figure out a faster method for that.