The Pez Rack
A Rack for Displaying Pez Dispensers

1997

1997

I've collected PEZ dispensers since the late 1980s. I'm not what you could call a serious collector (I don't buy dispensers off Ebay or seek them out in antique shops), but over the years I've built up a decent selection. I have over a hundred items in my collection, with about 100 of them being dispensers.
As anybody who collects dispensers can attest, displaying them is not as easy as it might seem. If you stand up a bunch of dispensers on a shelf, eventually they will get knocked over. The dreaded "domino effect" causes a small shock to disrupt your entire collection sometimes.
With the current popularity of PEZ dispenser collecting, there are actually several commercial solutions to this problem that you can buy. Back in 1997, I developed my own solution that I could construct in my home, with no special tools, for not much money. I started constructing the PEZ rack layer by layer out of "foam core".
The rack is nearly entirely "foam core" display board. in case you're no familar with this stuff, it's basically two layers of poster board with a quarter inch of plastic foam between them. It's thick and resilient, but light, and soft enough to cut with a razor knife. You can get it with various color faces on it, but I like black. You can also get it with black foam insides instead of white foam, so when you cut it it still only shows black.
Wooden blocks from a set of play blocks support the different levels. You could probably also cut supports from more foam core, if you'll be making a bunch of layers at the same time.
The assembly is mostly constructed with hot-glue, though some layers are constructed with Duco cement instead. There are also washers and pennies used as spacers.

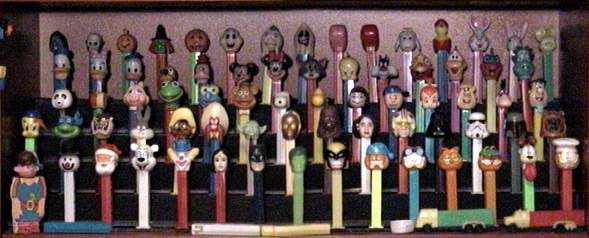
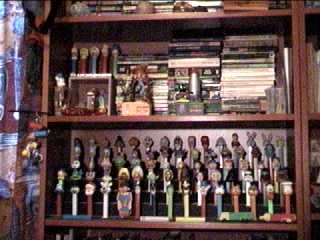
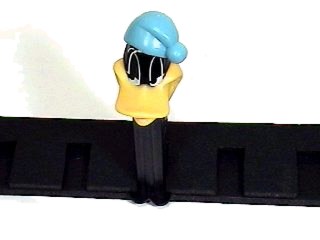
The bookshelf I'm using is a wide IKEA bookshelf. Each shelf just happens to be the same width as a sheet of foam-core, so I don't have to make as many cuts as I might. Each level of the rack has two pieces, the base and the holder. Both are about 1.5 inches deep. The holder has slots cut into it, roughly 1 inch wide and 0.5 inch deep. The slots are sepearated by about 1 inch, or 1.5 inches, depending on mow many dispensers you would like to fit per level. When you're making multiple layers, I suggest 1.5", and then move the slots 0.5" to the side for each layer up, so you get the chorus effect shown in the photo at the top of this page.
If you have any early dispensers that don't have feet, cut the slots in the holder a little narrower than 0.5 inches. You'll have to force the dispenser into the slot, but friction will keep it from tipping over.
When you glue the holder to the base, make sure to put washers of pennies between the layers to act as spacers. This will leave space between the layers for the feet of the dispensers to slide into. Don't glue thee whole surface, a stripe of glue near the back is enough to hold it together. If you're making multiple layers, you can also put strips of foam core along the front of each riser to hide the empty space.