Shoji Screens
Wood and Paper Screens
February 2009
February 2009
Shoji screens are wooden frames that support translucent paper. A more period term form them would be "souji", with the "ou" voiced as a long "O" as in the English word, "so". They are used as space dividers inside a building, and as external walls. Often they are mounted in tracks that enable them to slide back and forth as doors, but they can be permanently mounted, free standing, or hanging.
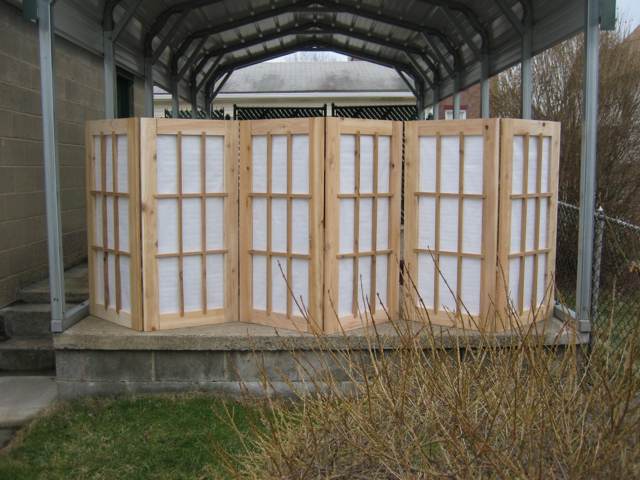
Often, each panel measures 3 feet by 6 feet, matching the size of a traditional tatami floor mat. For my shoji, each panel measures 23 inches wide and 47 inches tall. I created six panels in all, and they are hinged together in pairs to make them self-supporting but easily portable.
The screens are made of cedar and washi paper. While the screens were not made with period techniques or tools, these materials were used in period and are still used today.
I purchased nine 1x4x8' boards and two 1x8x8' boards commercially. This was enough for all six panels. For only two panels, three 1x4 boards and one 1x8 board would be sufficient. This lumber was very affordable as it is largely intended for outdoor construction (Cedar is naturally resistant to moisture damage.) and was only planed on one side. This created more work for me later, but decreased costs. If you have a thickness planer (which I do not), I recommend planing the boards to a uniform 3/4" thickness before you begin.
The frame pieces are cut to match the dimensions of the panels, meaning that each panel consists of two 47" pieces of 1x4 and two 23" pieces of 1x4. These dimensions were chosen to enable cutting all eight pieces for two panels from three 8' boards. Two boards yielded the four vertical pieces, and the third board yielded all four horizontal pieces. I made my cuts on a miter saw to assure clean angles, but any cross-cutting power or hand saw could be used.
The corners of the frames are joined with full lap joints. Each end of each frame piece has a ~3/8" deep and 3 1/2" rabbet. The back side of each vertical frame piece is cut, and the front side of each horizontal piece is cut. If the rabbets are cut accurately, this enables the lapped joint to match the thickness of the boards and enforces right angles at each corner. I cut these joints on a table saw using a tenoning jig, but they could be cut using multiple passes with a dado cutter, or by hand with a saw or saw and chisel.
The joints are secured with glue and 3/4" finishing brads. The brads were driven in from the back to preserve the front surface of the screen. While glue is period, wire finishing brads are not. Most likely, if mechanical fasteners were required in period, wooden pegs would have been used and sanded flush to the surface.
Shoji have kumiko crossbars to support and protect the paper. Shoji used for external walls typically have more kumiko for more protection, and internal shoji are typically more open. The number and arrangement of the kumiko varies widely, and numerous versions can be seen in period illustrations.
I decided to use four kumiko per panel, two horizontal and two vertical, separating the screen into nine roughly equal portions. While this is perhaps not the most artistic arrangement, I felt this would provide strong support for the frame and reasonable protection for the paper.
I began by cutting pieces of 1x8 to my desired length. The 1x4 lumber of the frames is actually 3 1/2 inches wide, leaving a central opening 40" tall and 16" wide. My kumiko overlap the frames by 3/4" at each end, so I cut two pieces of 1x8 to 41.5" and two pieces to 17.5" long. This was enough to make kumiko for all six screens.
I decided to cut the joinery for the kumiko before ripping the boards into individual kumiko. I cut a 1/2" deep and 3/4" wide rabbet into the back side of each end of each board using a stacking dado set on a table saw. Then, I cut dadoes ~3/8" deep and 3/4" wide approximately 13.5" in from each end of each long piece and approximately 5.5" in from each end of each short piece. The dadoes were cut into the back of the long pieces and into the front of the short pieces.
Then, I ripped each piece into as many 3/4" wide kumiko as I could using a table saw with a standard width blade. Traditionally, the 3/4" by 3/4" square rods would have been formed first by splitting a board lengthwise using wedges and a hammer. Then, the joinery would have been cut individually on each kumiko using a hand saw and chisel, or entirely by chisel.
Once the cutting and shaping was complete, I sanded all surfaces as smooth as I could using a belt sander. Traditional hand planing techniques leave a smoother surface on the wood than modern saw blades, so this step would probably have been less necessary in period. I needed to pay particular attention to the back sides of each board, smoothing out their unplaned surface.
Shaping and smoothing completed, it was time for assembly. The following steps were executed one panel at a time, as I lack the space and equipment to complete them in parallel.
First, I lay two long frame pieces face down on the assembly table and applied glue to the face of the join. Then, I lay the short pieces face down across the top and bottom to arrange the frame. Pieces in place, I secured each corner in turn by driving four 3/4" finishing brads through the joint, taking care to line up the edges of the joint to assure a right angle. I used a nail gun to drive the brads. As previously noted, period craftsmen would have used pegs instead of nails. It's even more likely that a different kind of joint was used, one that did not require mechanical fasteners, but only glue, such as a mortise and tenon joint. I then clamped the joints so I could remove the frame from the table, and set the frame aside.
Next it was time for assembling the kumiko. I lay two long kumiko face down on the assembly table and put small dots of glue inside the cut notches. Then, I lay two short kumiko across the long ones, and pressed the four joins together. With the nail gun, I drove a brad into each join to help keep it clamped together. Finally, I put small dots of glue on the face of the tenon at the end of each kumiko.
Finally, it was time to join the kumiko to the frame. I removed the clamps from the frame and placed it face down on top of the joined kumiko. After a bit of shifting, the kumiko fit into the opening in the middle of the frame. A brad through the back of the frame and into the end of each kumiko completed the assembly. More clamping to add stability for drying, and it was on to the next frame.
Once all the frames were completed, it was time to join them up together in pairs. I simply lay them face down on the floor and attached the cabinet hinges in between using the supplied screws. These hinges and screws are probably the very least period thing about these screens, but they were quick and easy.
Lastly, attaching the paper. Kozo paper comes in long rolls that are 18 inches wide. Since the openings in my shoji are 16 inches wide, this width is nearly perfect. I stuck double-sided tape all the way around each opening and across the kumiko, then I just unrolled the paper onto the adhesive, and cut it to length once it was in place.
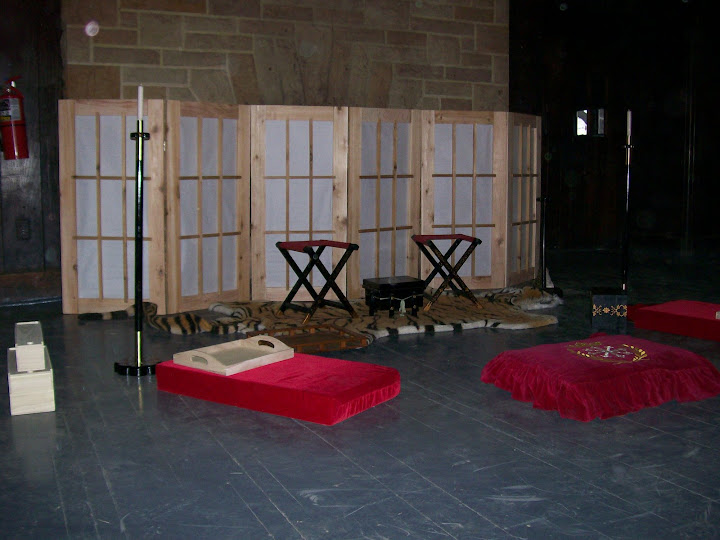
These shoji screens were used at the 2009 Mi-no-Hi festival to help create a "teahouse" area for Lady Solveig's tea ceremony demos and to decorate the royal dais for court.