Storage Shelves
Heavy Duty Basement Storage
January 2002
January 2002
After the holidays in December of 2001, Sharon decided that she was tired of storing all her holiday stuff in the same cardboard boxes she'd been using for the past dozen or so years, so she went out and bought a bunch of plastic storage containers in various sizes to hold it all. Then, she decided that she didn't want to stack the new containers on the same pallets that she used to stack the cardboard boxes on, so she asked me to build some storage shelves for her. I knew this wasn't going to be difficult, but I also knew it wasn't going to be quick.
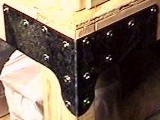
My experience building the 8 Foot Workbench made me very familiar with the Simpson Strong-Tie line of galvanized steel brackets made me confident that building a sturdy set of storage shelves was as simple as cutting the lumber to size and driving more screws than you can possibly imagine into the wood until it looked like shelves.
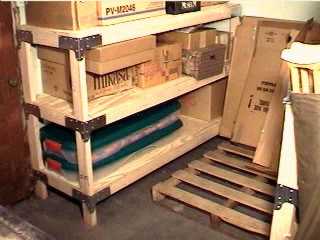
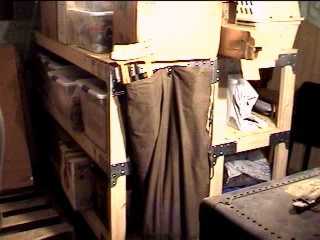
They came out pretty good. I wound up building three units, each 2'x6'. One is pushed up against the back wall of the house, and the other two are pushed together nearer the middle of the basement. They're about 4 feet high total, and each has three shelves. That means I created a total of about 108 ft2 of storage space, all of it more than 6 inches up off the floor in case the sewer backs up into the basement again like it did on Thanksgiving in 1998. As an added benefit, putting all that freshly sawn lumber in the basement makes it smell like pine sap instead of musty mold and dusty spider webs.
The shopping list for this project was something like:
Toss a miter saw on top to make cutting the 2x4s a bit easier, and add a bunch of nails for attaching the shelf surfaces, and you have yourself enough to fill Sharon's station wagon enough to turn the ABS light on. There wasn't actually enough room in her car for me to accompany her home; she had to drive home by herself, then come back to the store in my car to pick me up.
First, I cut all of the lumber to size. We had the plywood cut at the Home Despot because they have the big panel saw there. I cut all the 2x4s at home with my brand new miter saw. The was actually easier than I though it was going to be, because the length stop on the saw just happened to be positioned just right to cut the shortest pieces. That enabled me to just zip through cutting those 18 pieces.
Once I had all the cutting done, I started assembly by attaching the brackets to the verticals. This took some careful attention because I had to make sure to make half of them lefty and half of them righty. Let me stress at this point that you don't want to do this project at all unless you have a power screwdriver of some kind. Each bracket takes 20 screws, and that's a lot of wrist twisting.
With the verticals all set up, I could construct the ends by laying the whole thing down and screwing it together. It was easier to do the inside screws first, so that the lumber was all resting on the floor. Once the lumber was secured to the brackets, I flipped it over and drove in the outside screws.
After the ends were all constructed, I could set up the skelton of the shelves by laying the 6' rails into the brackets and then clamping them in place. Then, I drove the screws in, alternating corners in a vague attempt to keep things even. It helped that there's a support pole in the middle of the basement that I could push against while trying to drive the screws. It also helped to have a rubber mallet handy to force lumber into the brackets. I figured out you can clamp something in place about 85% tight and 90% in position, then pound it the rest of the way with the mallet and the clamp will hold it long enough for you to tighten the rest of the way down.
Then, it was time to attach the plywood shelves. Actually, first it was time to cut the corners off 2/3 of the shelves to accomodate the vertical 2x4s. Then, it was time to figure out the exact oblique angle that would enable the shelves to fit into the space. It took some forcing and some wood bending, but eventually the shelves were resting on the frames. Then, I took the fast path and used nails instead of screws to attach the shelves. Driving in a nail every 12 or so inches made me feel like I was pounding shut the coffin on this project.
It took me one night to cut all the lumber, another night to assemble all the verticals, and about a night apiece to do final construction on each shelving unit. That's not bad. Woodworking sure goes quickly when you know most visitors to your house will never see the final product, and it doesn't need any kind of finish.