Brass Strike Plate
Why Buy?
August 2007
August 2007
As part of some recent home renovations, Sharon had a coat closet built in the living room, just inside the front door. The carpenter did a terrific job building it, and even went to Construction Junction and found a great old door that matches the other doors in the house and has never been painted. It also did not come with hardware. A quick trip back to CJ and I bought a couple of good plates and a nice glass knob, but the strike plate for this door (and most doors, it seems, as CJ only had a couple) was probably left in the original building.
I looked at what was available, but nothing seemed like a good match. There were some places on the web with very nice restoration hardware, but those were also expensive. I figured that we could always buy a new one later, but to just get something in place, it would be faster, easier, and cheaper to make something from scratch.
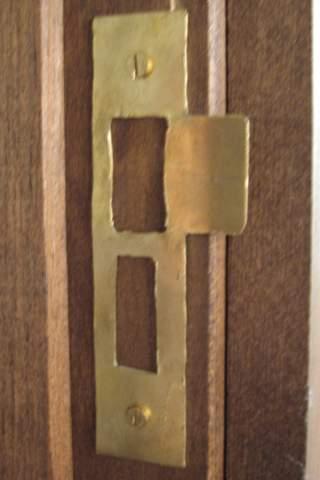
This came out pretty good. It's not beautiful, but it works well and I didn't even have to cut a mortise into the door frame. The thickness of the plate is enough to catch the door latch and keep the door closed.
I actually had a 0.032" brass sheet from K&S Engineering sitting around that I'd bought from the clearance table of an art store a year or two before. That, plus a couple of wood screws for attaching, was all I needed.
First, I measured the latching mechanism of the door, and designed a pattern in a computer drawing program to match those measurements. Then, I printed the pattern onto a sticker and affixed it to the sheet brass. I cut the brass using an array of saws, chisels and grinders too numerous to mention. Then, I filed and ground the edges to remove burrs. Lastly, I drilled a couple of holes and screwed the strike plate to the door frame.
 The closet itself |
 The door knob and plate |
This closet upstairs never really had a strike plate. There was a mortise cut into the door frame, but no plate. The mortise was enough to hold back the door bolt, until I accidentally split off the vital quarter inch of wood. Time for another strike plate!
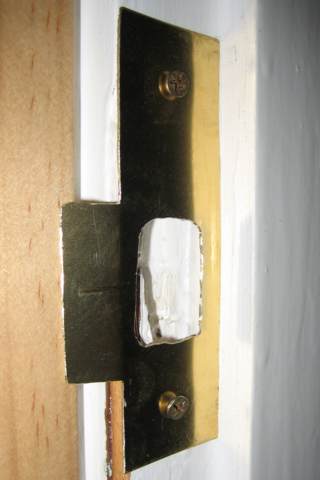
I needed to make sure it was big enough to bridge the entire mortise, and that it had a strike and a hole in the right place for the door bolt. I didn't bother with the printersticker method this time, I just layed-out the design directly on the brass with a marker, and got to cutting. The inside cuts were pre-drilled, and then made using a spiral cutting bit on the dremel. This went much more smoothly than the last time, although the bit chattered a bit, making the hole a bit wobbly. The outside cuts were all made on the band saw, followed again by the grinding and filing.
It looks a bit silly installed with one screw crooked like that, but the alternative was to putty the whole door jamb, paint it, then apply the strike plate. I think I'll save all that for the day we find a real strike plate that matches the bolt placement. In the mean time, it's just screwed down over all the 100 years of old holes already in the wood.