Suikan
More Formal Japanese Garb
March 2011
March 2011
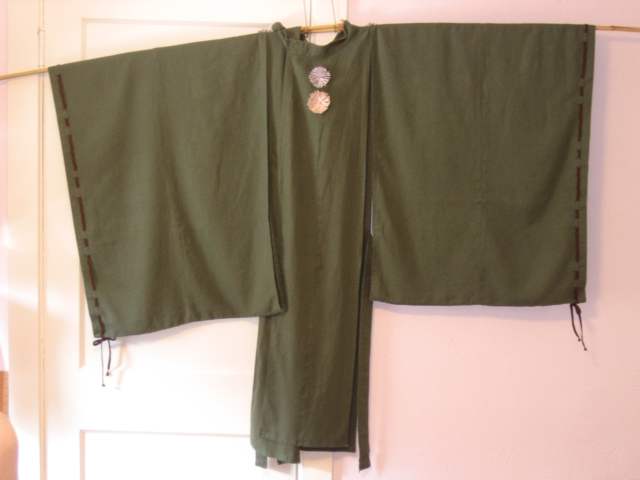
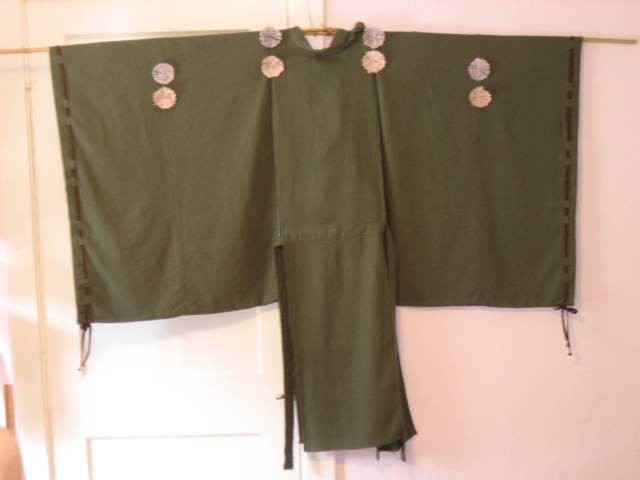
A suikan is a slightly more formal piece of Japanese clothing, a sort of over-robe. It has very large sleeves that are only attached for a few inches behind the shoulder. The body is a single-panel of fabric wide, and the sides of the body are left open to display whatever clothing you're wearing underneath.
This one is made from soft green linen. The solid color and simple fabric mark this one as being either slightly less formal, or formal for slightly lower class of courtier.
There's a frog closure at the neck. I made it from the same fabric as everything else. The knot for the frog is the "Button Knot" from Chinese Knots for Beaded Jewelry by Suzen Millodot (Search Press Limited, 2003). The ends of the knot "cord" are tucked into the end of the collar and sewn in place. The shoulder loop is tacked in place where the collar meeat the shoulder.
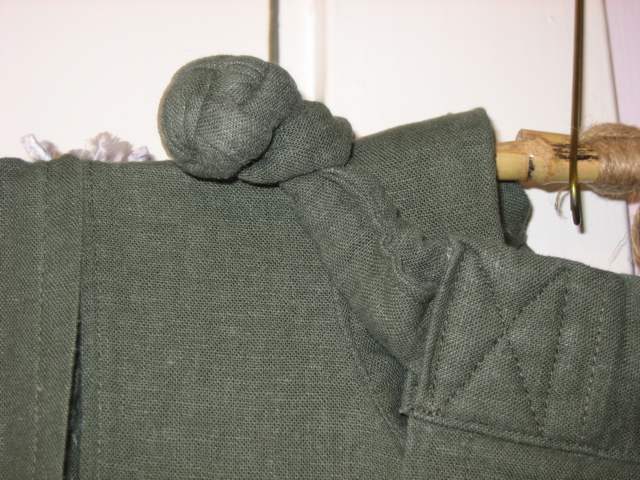
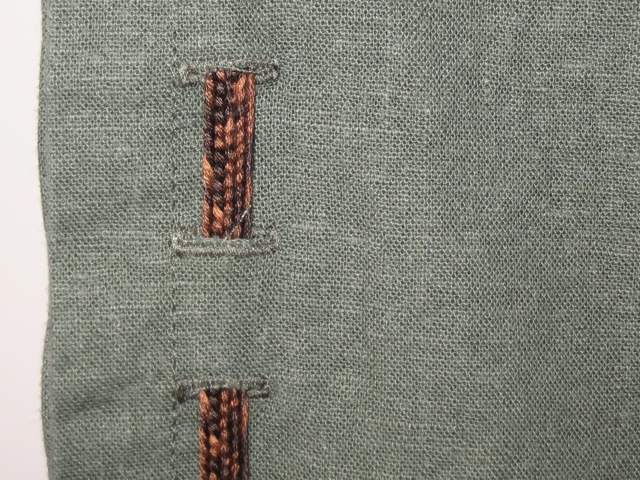
The kikutoji are mostly decorative, though the theoretically help reinforce stressful points in the clothing. Mine are made from silk yarn. They really are just pom-poms that I've ironed flat. I'll probably have to take them off when I launder the suikan or they'll totally fuzz out.
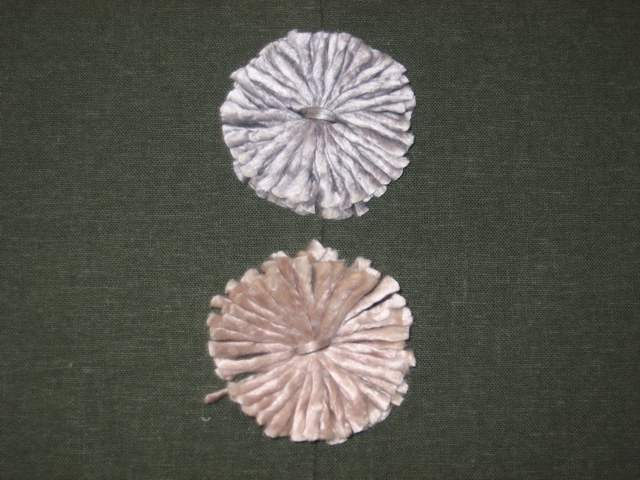
If you're looking for instructions on how to make kikutoji from yarn, here are my instructions for making two kikutoji. Take a good yarn of about 1/16" in diameter and wrap it 32 times around a credit card. Cut the yarn off the ball and tie the two loose ends together. Cut two pieces of yarn about 6 inches long. Using those pieces, tie the bundle of yarn together in the middle of each side of the credit card. Pinch those knots tight against the card, and use scissors to cut along each edge of the card, creating two bundles. Arange each bundle into a circle on the ironing board, and iron each as flat as possible.
The lacing is 14 feet out of braid 95. It's a 17-strand twill braid made with cotton embroidery floss. It passes through 38 button holes sewn into the cuff of each sleeve. 76 button holes is a large number of button holes.
I started by cutting my fabric into "panels" that are each one quarter of the width of the fabric. My fabric was about 55 inches wide, and four yards long. If you're working from 45" fabric, start with 5 yards of fabric, and shuffle the belt, collar, and closure pieces to the ends of the panels. The belt pieces can actually be shorter, since you'll sew them together end to end, so shuffle them to the end of a sleeve panel. The overlap panels can be about three inches shorter than shown, so use that extra length to make the collar and closure pieces a little longer than a yard. Here are cutting patterns for ~55" wide fabric and for ~45" wide fabric.
I'm a smaller person (5'9" tall, 32" waist, 36" chest), so starting with the 13.75" wide panels shown works pretty well for me. If you re a larger person, starting with 45" fabric and 15" wide panels might be better for you. If you are much larger person, you might even want to start with 55" fabric and 18" wide panels. If you are much taller or shorter than I am, you may also wish to lengthen or shorten the design. Four feet puts the back hem of the body down behind my calves.