Suito
Japanese Drinking Gourd
June 2007
June 2007
My Internet research indicates that dried and hollowed gourds have been used throughout history by cultures all over the world. When used as a Japanese miltary canteen, they were apparently called "suito". I've also seen them called "suibyou" and "hyoutan".
Since we mostly do the Japanese thing when camping with Clan Yama Kaminari at Pennsic in the middle of the summer, hydration is very important. Usually, it's possible to hide a water bottle in a bag, or walk around with a mug of water, but I decided to go for the gold when I found an appropriately-shaped bottle gourd in a local shop.
 |
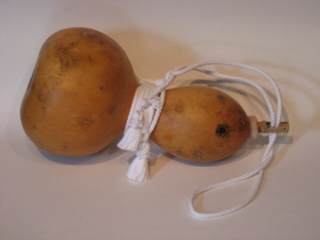
Here's what the gourd looked like before I started. (That image is a link to a larger version.) It's about a foot tall, and the lower bulb is about six inches in diameter. Once I hollowed it out, I discovered that the interior volume is about a half gallon! That's a full day's drinking water for me, if I don't mind carrying around more than four pounds worth of water gourd. I bought this gourd at a place here in Pittsburgh's "Strip District" called "Roxanne's Dried Flowers". They had little mini decorator gourds out, and I asked if they maybe had a larger one. Score! The gourd cost me eight dollars, I think, but that's not too bad. You can find them cheaper by searching the net, especially if you want to order a box of them. |
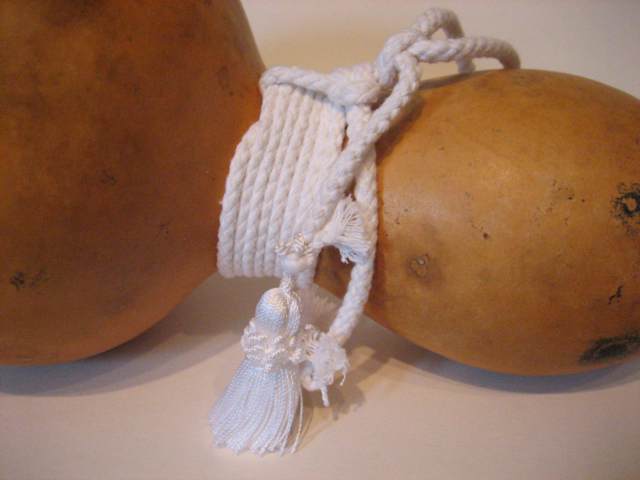 |
The cord is cotton cord from the trim section of the fabric store. They had this cord in several different colors, but I couldn't decide, so I went for plain old white. I almost got a hemp-looking off-white, but it seemed a little scratchy for carrying comfort. The tassels are just little decorative tassels from the fabric store. They're just tied onto the ends of the cords. I'm going to try to figure out better way of ttaching them, or maybe just wait until the get lost and leave them gone. |
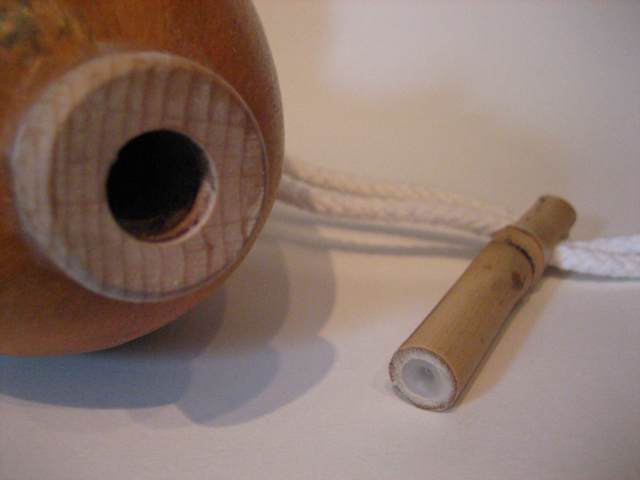 |
The neck-piece of the gourd is a cork from a scotch bottle. The cork already had a disk of wood attached to the top. I drilled a hole down through the wood and the cork. The stopper is a short length of bamboo. The shaft flares up towards the node, which makes it good stopper. |
First, I bought the gourd at place here in Pittsburgh called "Roxanne's Dried Flowers" down in the Strip district. They didn't have any on display, but a basket full of small decorative gourds inspired me to ask if they had "any just like this only, you know, larger?" Success!
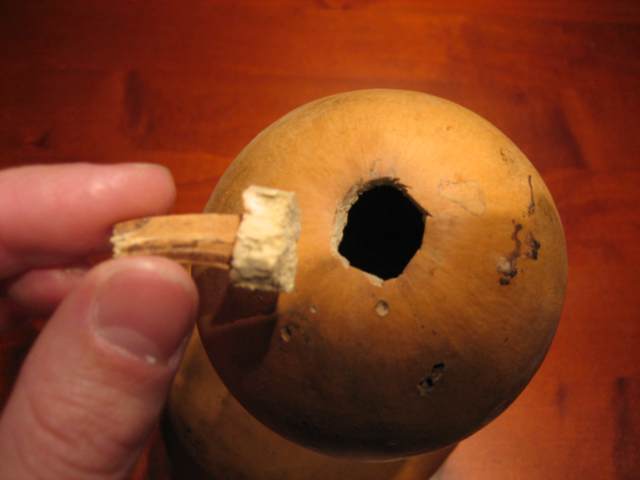
After washing and drying, I cut the opening around the stem at the top of the gourd. I just used a razor knife, and was careful to keep the hole as small as I could and not cut off any part of my precious fingers.
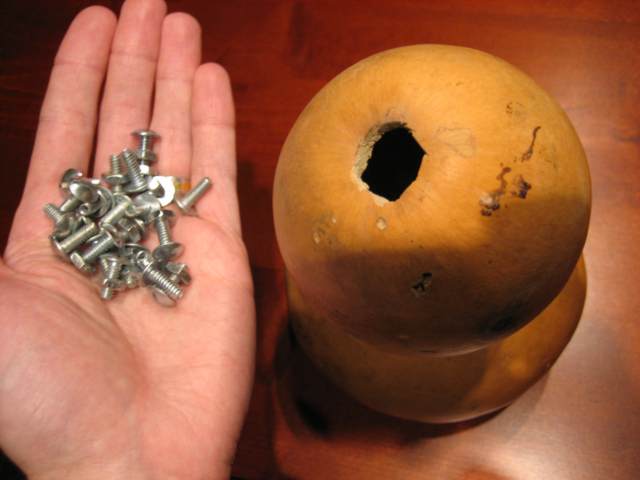
After opening, I dumped a handful of nuts and bolts into the gourd cavity and shoook them around a bunch. Two or three rounds of this was enough to grind up all of the big stuff inside. I then gave the interior a few shakes and rinses with water to clean out as much of the small stuff as possible.
Following instructions I found on the Internet, I placed the gourd in a pre-heated and extinguished oven to warm it up. Then, I melted two bars of canning paraffin in a double boiler and poured the molten wax into the gourd. I swirled and shook the gourd to coat the interior with wax and hopefully allow some to soak in. When it sounded like the wax was starting to harden inside, I poured out the extra wax and allowed the gourd to cool.
The stopper assembly, as I mentioned above, is made from a scotch cork that I drilled through and inserted into the opening, and a short length of bamboo as the stopper. I also drilled a slot transversely through the bamboo to attach the cord. The stopper is also waxed around the base of the wooden disk part to seal it to the gourd.
The cord is wrapped and knotted in a manner resembling the suito I was able to find pictures of on the Internet. I mostly just imitated those things and used what I know about knots. I have no idea if this is the right way or not.
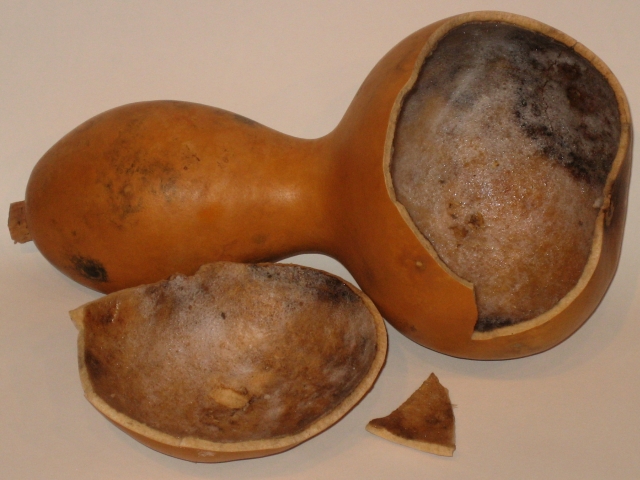
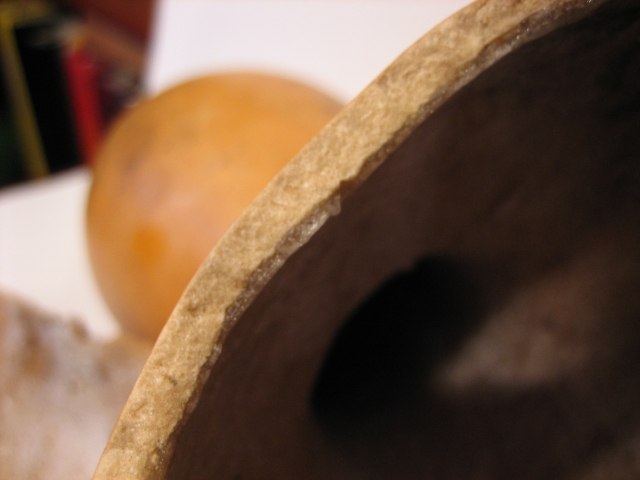
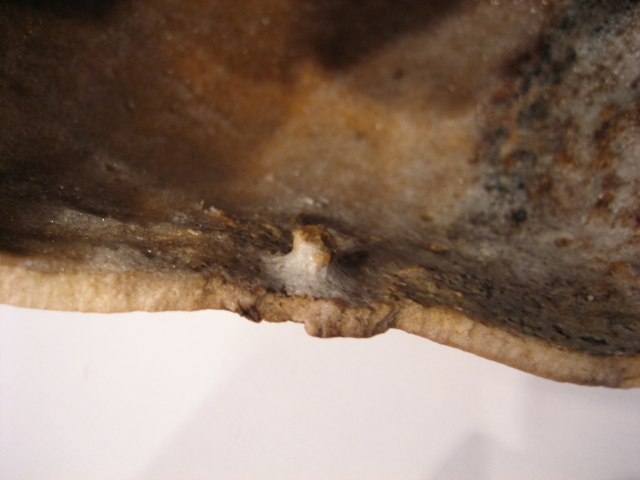
Ok, so I dropped this on the ground while it was full of water and busted it. Sigh. This destruction taught me two things, however. One, these things are pretty fragile. Two, the wax coating on the inside really does work, except for the very bottom where extra wax is needed.
Here are some pictures of the wreckage:
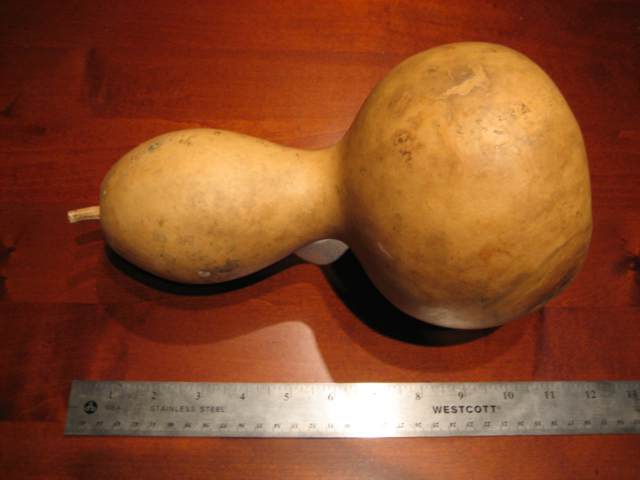
I got myself that new gourd. I followed the same process I did last time, only I used more wax, and let more of it settle to the bottom. I also did a more thorough job of cleaning the gourd inside and out before finishing. I had a harder time cleaning the gourd out; but found that running a few rounds of hot water through softened up some of the pulp that was hard to get out when it was dry. I was able to re-use my cork and stopper arrangement, and the cotton cord. Here it is:
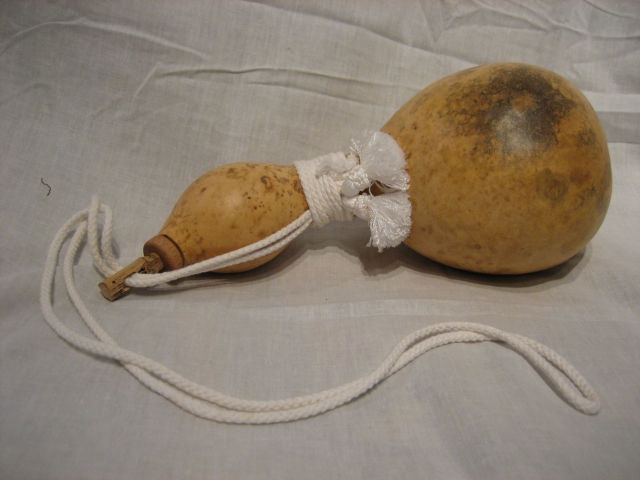
One thing different, this gourd was full of seeds, which I don't remember from the last one. You can see the shapes are different also, and this gourd is a little smaller. That should make it a little lighter when it is full.
Anyway, I'm happy this one turned out so well, and happy to have a replacement. I'll try to be more careful with this on.