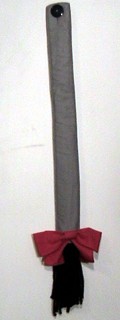
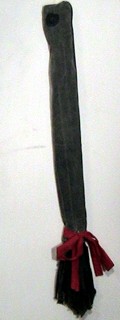
New Eeyore Tail
The Old One is History

September 2005

Explanation

Back in December of 1989,
I made an Eeyore tail to wear to the TinyMUD party at
EveCon 7.
(It's pictured at right.)
This tail was hastily crafted from scrap material I had around.
The shell of the tail is one leg from an old pair of washed-out black jeans.
The tail hairs are fabric from a torn-up pair of black gym shorts.
The original bow was made pieces of a mauve Izod polo shirt,
though the bow has been replaced two or three times sine then.
It's stuffed with and old pair of thermal underwear.
The whole thing was sewn by hand,
and I'm amazed that it's lasted all of these years.
I've worn it to conventions ever since.
It is a great tail,
and it swings back and forth very nicely when I walk,
but it's getting a bit old and tired.
I decided to replace it before it totally gave up the ghost.
I've learned quite a bit about sewing since then,
and I made a smaller Eeyore tail for my
Eeyore Lab Coat
project.
So, I decided to scale up that design a little bit,
and make it so that it could be mounted on a belt
instead of having to button to another garment.
Materials
This tail is made from scratch with all new materials.
No repurposed garment scrap here!
- The shell of the tail is a nice gray cotton twill.
- The tail hairs are more of the black wooly yarn from the lab coast tail.
- The bow is red cotton quilting fabric.
- The fill is cotton quilt batting.
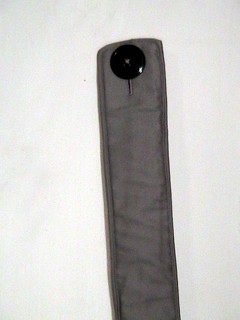
- The button is a brand new LaMode button 1.5" in diameter
The Process
- Cut a rectangle of fabric 5.5" wide and about 28" long,
and an identically sized piece of batting.
- Make two belt loops.
- Cut a strip of fabric 2" wide and 7" or 8" long.
- Fold the strip in half lengthwise and press.
- Fold the outer edges into the fold and press.
- Stitch close to both edges of the strip.
- Cut the strip in half, making two 3.5" to 6" pieces.
- Turn the ends of the loops under and sew them to the large rectangle of fabric,
about 0.75 inches in from the edges, and about 1" down from the top.
Make them look like the belt loops on a pair of pants.
- Use a black marker to make a line
- Sew a 2 inch long button hole starting
- Fold the rectangle in half along the long axis, with the belt loops on the inside.
- Fold the batting in half along the long axis, over the rectangle.
- Sew or serge the long edge.
- Sew or serge the top edge, near the belt loops.
- Turn the tail rightside out.
- Tuck the raw edge at the bottom of the tail up into the tail.
- Flatten the tail so that the seam is in the middle of one side and press.
- Edge stitch the long sides and top of the tail.
- Make the tail tuft.
- Wrap yarn around a 7" long piece of cardboard until the bundle is about 2.5" wide.
- Slide bundle off edge of card, keeping mostly flat.
- Insert 1 inch of the tail tuft into the open end of the tail.
- Sew the bottom end shut, which also sews the tuft yarn into place.
- Cut open the bottom loops of the tail tuft.
- Make the bow.
- Attach the bow to the front of he tail, just above the tuft.
- Sew the button to the front of the tail, about a half inch down the "buttonhole".


 [Physical Objects]
[Flourishing Branch]
[Home Page]


