Tamabako
A useful stack of boxes for putting Tama in
November 2009
November 2009
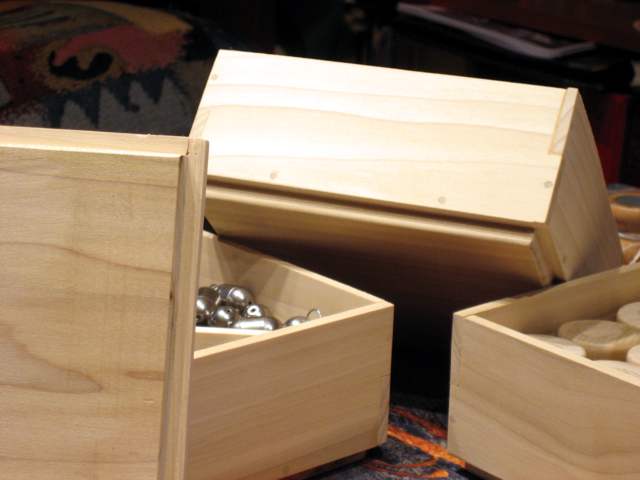
Tama are the weighted bobbins used when making kumihimo braids on the marudai. I've made three sets of eight tama, and been given another set of eight. I also have a large collection of fishing weights that I use for counterweights and improvised tama. This project was an attempt to make storage boxes for all of that stuff.

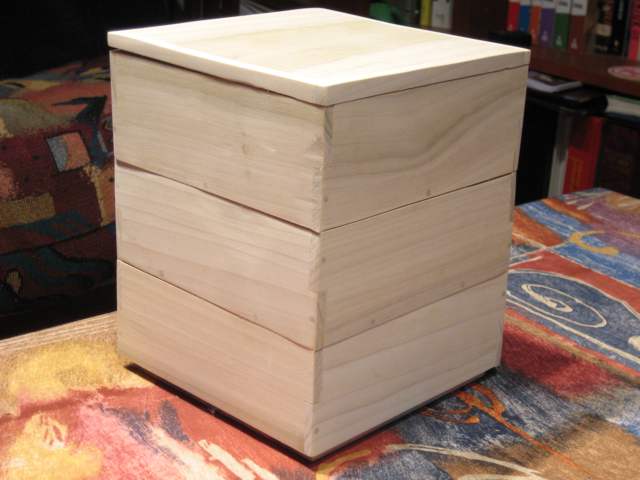
It's actually a stack of smaller boxes. There are three levels, and each level is the lid for the one below it. The top level is just a lid. The design is based on a type of box called a jubako. Most people are familiar with this type of stacking box due to its frequent use for bento lunch boxes. Really, it can be used for anything.
I even made dividers to fit in the boxes and keep the weights separate.
The walls are all joined using traditional overlap joins. Instead of just gluing, I secured the corners with pegs, which I'm told is not traditional. I also used pegs to secure the bottoms within each box. The lid piece is basically a bottom piece, only instead of having box walls attached to it, it only has 3/8 inch tall strips of scant attached to it.
The individual boxes are not perfect, but they're OK. They don't fit together perfectly, but they fit OK. I realized that if I sanded the stack to make the whole thing perfectly smooth when assembled, I'd have to keep track of which level was which, and which direction was which on each level. I decided to just leave it raw. I didn't even finish the wood.
These boxes are made entirely of poplar and glue. The bottoms are 3/4 inch thick poplar board. The walls are 1/4 inch by 2.5 inch poplar scant. Instead of nails, I used 1/8 inch poplar dowels.
There is no hardware or finish of any kind, though there's a bit of wood filler on some of the less precise joins.
First, I cut a small stack of 6.25 inch squares from poplar board. I used the table saw for this, so that all the squares would be the same size. I was able to reclaim some small pieces of board that were otherwise clogging the scrap pile, so that was nice. I also rounded off the bottom edges of each square to make assembly easier later.
Next, I cut 12 pieces of scant, each 6.75 inches long. That's one half inch longer than the edge measurement of the bottoms, to account for the thickness of the wood. The overlap joinery at the ends means that all sides need to be longer than the bottom, not just two of them as with some construction methods. After cutting to length, I notched all the pieces for joinery. Each notch is a quarter inch deep to accommodate the thickness of a scant, and half the width of the the scant to accommodate the 50/50 overlap joinery.
To assemble each box, I marked the corners of each box bottom 3/8 inch (half way) up from the bottom. Then, I glued the upper half of one edge of the box bottom, lined up the bottom of a scant with those marks and the notch edge of that scant with the corner edge of the box bottom. Applying the three remaining sides one after the other, I also glued the joinery at eacg corner. Then, to keep the box from getting too small at the top, I slid an unglued box bottom into the open top of the box. If you do it carefully, it only takes four large bar clamps to get the whole box clamped tightly.
Once the glue was dry, I could remove the loose box bottom, drill holes into the corners, re-glue any loose joins, and insert pegs to secure the joinery. I also drilled holes around the bottom of each box, and inserted pegs to secure the sides to the bottom. It took some time to get all this done, because I mostly did the boxes one at a time. I had some real trouble getting the joinery to stay gued, and woud up re-gluing and re-clamping most of the boxes several times. As stated previously, I also used wood filler to smooth out some joins that were gappy.
Since I decided to not finish this project, the last step was sanding. Sanding is the big secret of joinery. I used a belt sander with a 220 grit belt to even out all the joinery, smooth the surfaces scarred by sawing off the pegs, and make the stack of boxes a little more monolithic.
Filled with tama and weights, the whole stack weighs about ten pounds.