Japanese Tool Chests
Traditional Wooden Toolboxes
September 2009 and April 2010
September 2009 and April 2010
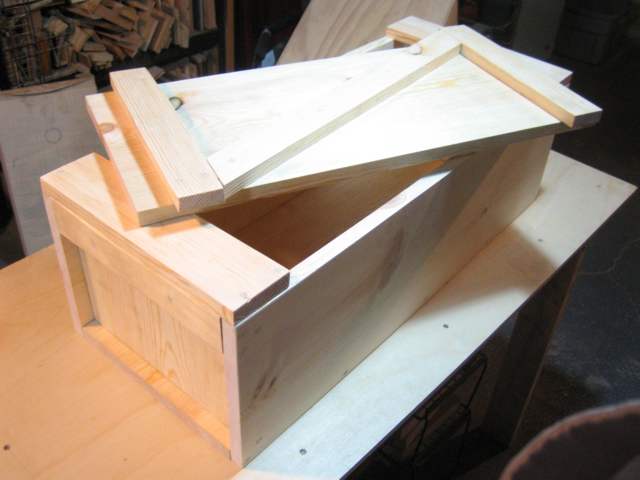
Some friends of mine asked me if I'd make a Japanese tool chest for another friend as a gift. I said I was willing, but I didn't know anything about traditional Japanese tool chests. One quick trip to Google later, and I'd found plans for these great and simple chests by master woodworker Toshihiro Odate. I modified the plans slightly to accomodate Western lumber, and made the gift chest out of pine. It came out OK, but much too large for my personal preferences. It's about 30" long, 10" high, and 14" wide.
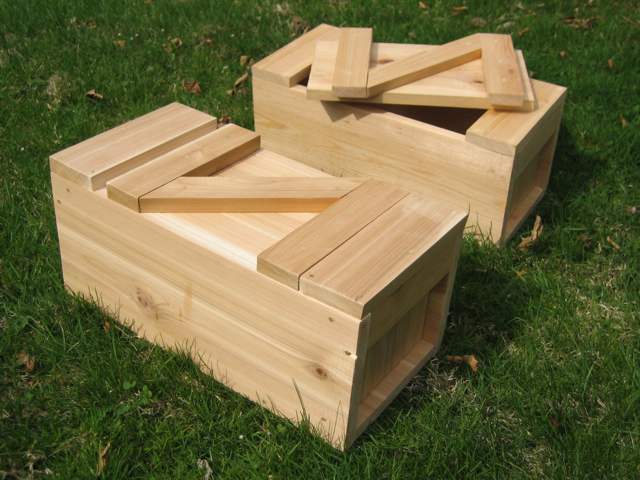
A few months later I saw some nice looking cypress lumber and bought a couple of 8 foot 1x8 boards. I had to modify the plans still further to accomodate the smaller lumber, but I liked the results. Sharon liked the results so much that she asked me to make one for her. Hers is made from cedar, but the dimensions are the same.
The larger chest is made from 1x10 lumber and 1x12 lumber. The skinnier pieces were ripped from wider wood. I bought shelf-grade pine at the local big box home center, but even given the amount of wood it didn't cost that much.
The two smaller chests are each made from about 9 feet of 1x8 lumber. Again, the skinnier pieces are ripped from 1x8. I bought two 8 foot boards and have plenty extra. You could probably get away with a single 6 foot 1x8 if you bought a 6 foot 1x4 for the skinnier pieces. Or, you could cut it all from a single 8 foot board if you cut down on the overall length of the box.
I bought the cedar at the local Lowe's, which has a large stock of this material for some reason. Not all Lowe's do. It's intended for decking material, I guess, and it's only planed on one side. The cypress is from a hardware store out in the suburbs. It's the only place I've ever seen cypress in this kind of quantity, and it's actually cheaper than the cedar. It, too, is only planed on one side. Both cypress and cedar are good moisture-resistant woods, so they should hold up well if we take them up to Pennsic, even if they aren't finished.
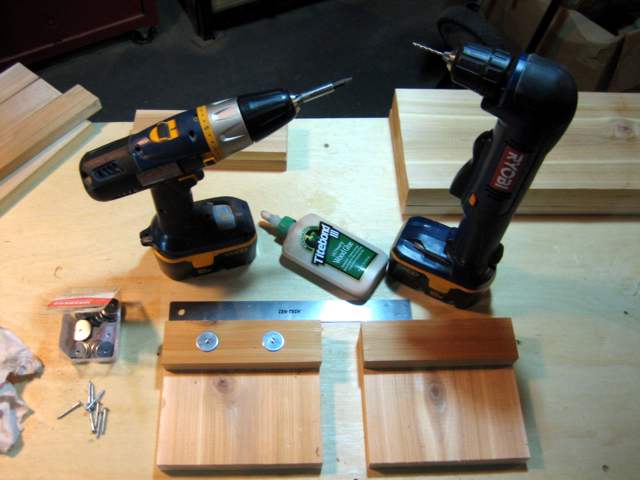
I also used the following additional supplies:
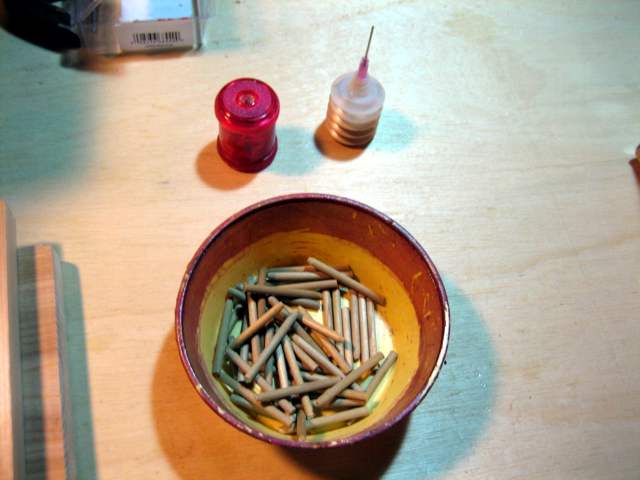
All the boxes are fastened with glue and wooden dowels. Some metal fasteners are used during construction, but the completed chests have no metal in them at all. I wish I was able to make my own dowels for fastening, but I've been buying 48" dowels and cutting them down. I think they're just poplar.
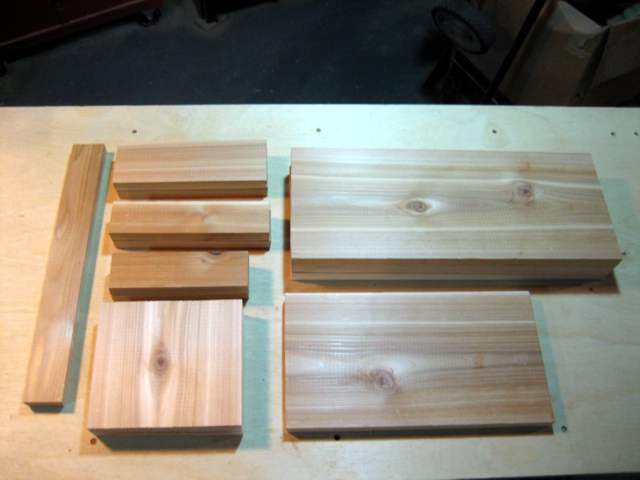
First, I did all my cutting. If you modify the plans to deal with the width of your wood, you can save yourself a lot of work. Just keep in mind that the actual width of dimensional lumber can vary quite a bit, and if you're not planing the lumber yourself, so can the thickness.
The pictures in this section are all from the build of Sharon's cedar chest, so any numbers are based on that project. I'll try to give you equations where they make sense, so you can modify as needed.
| Piece | Quantity | My Size | Equation |
|---|---|---|---|
| Sides and Bottom | 3 | 18" x 7.25" | (Length of box) by (Width of wood) |
| Lid | 1 | 13.25" x 7.25" | (Length - 4.75") by (Width) |
| Ends | 2 | 6.5" x 7.25" | (Width - Thickness of wood) by (Width) |
| Handles | 2 | 7.25" x 2" | (Width) by 2" |
| End Battens | 2 | 8.75" x 3" | (Width + (2 x Thickness)) by 3" |
| Lid Battens | 2 | 8.75" x 2" | (Width + (2 x Thickness)) by 2" |
| Angled Lid Batten | 1 | Long x 2" | 2" wide and you'll trim it to length later. |
The first dimension for each piece is along the grain. The second dimension is across the grain. If you're careful, you can rip all the batten pieces from a single length of 1x8. I recommend using the center strip as the angled batten, as its exact width is less vital. Since the handle pieces are shorter, they are easier to cut from a single short length of board.
You'll notice that all adds up to more than 96". I bought two 8 foot boards and just have a lot of extra. You could get a 6 foot board and a 4 foot board and have a little bit of waste, If you want to get the whole thing from a single 8 foot 1x8, your box length should be 15.25". If you can get a 10 foot 1x8 board (and get it home from the store), you can boost the box length up to 20".
I cut all this by hand with a Japanese pull saw, because I need much more practice with my pull saw. You could use any saw you want, really, since all the cuts are straight. I'd be careful cutting some of the smaller pieces with a circular saw, though.
I decided to save the planing of the unplaned side of the board until after I'd cut the pieces to size. This made it easier to put the pieces in my bench vise. I also planed the edges of the rip-cut pieces, to remove the saw marks and attempt to square up the edges. Like I said, I need more practice with my pull saw. With the cedar, I managed to get my plane so sharp and so well adjusted that it was actually a joy to use. I had to be careful not to do too much planing on the pieces.
I also took some fine 220 sandpaper and smoothed all the end grain down a bit on the pieces, then rounded the sharp edges a little bit just to soften them.
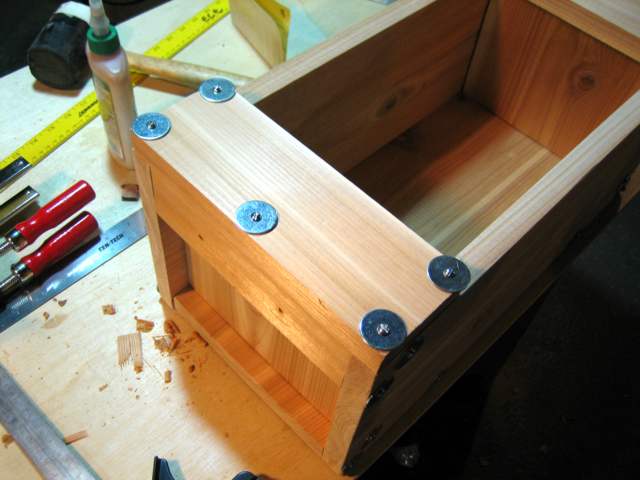
Actual construction began with attaching the handle pieces to the end pieces. I glued the back of a handle piece, lined it up with the top edge and corners of an end piece, drilled pilot holes 2" in from each end of the handle, and screwed it into place. I used a big fender washer on each screw to distribute the force of the screw and keep the head from digging into the wood. These screws will only stay in place until the glue sets. Their exact placement is not so important, so I mostly just eye up positioning.
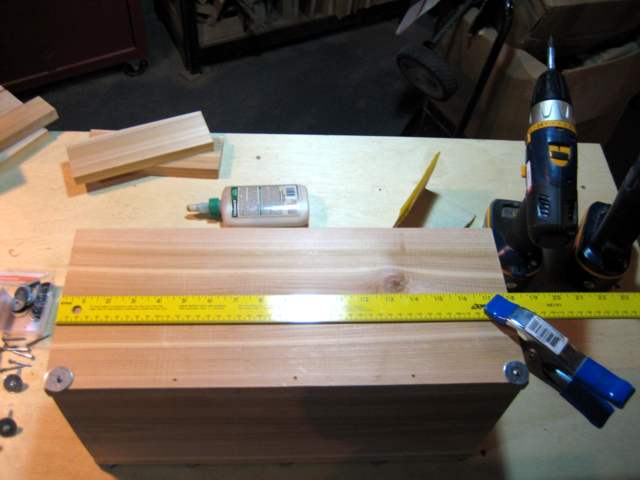
While those two were drying, I attached the sides to the bottom. I glued one edge of the bottom, lined up the bottom edge of a side, drilled a pilot hole near one end, and screwed that end lightly in place. Then, I made sure the other corner was lined up, drilled, and fastened it. Finally, I drilled three more evenly spaced pilot holes and fastened the middle of the side to the bottom. I repeated all that for the other side, making the bottom captive between the two sides.

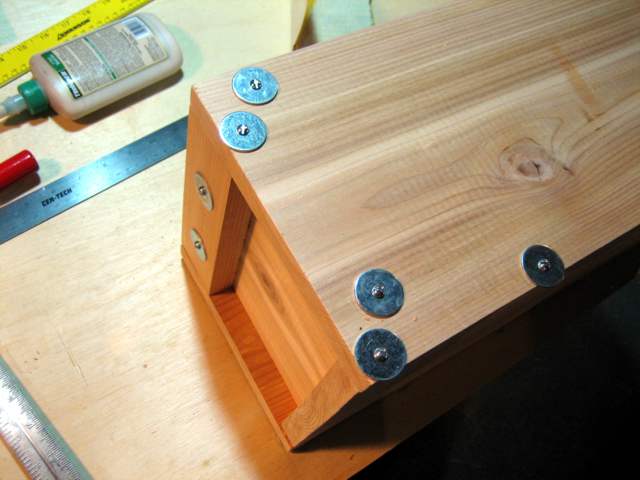
Then it was time to add the ends to the box. I test fit the ends to make sure they could fit between the sides, that the bottom edge of each end would rest reasonably flat against the bottom of the box, and that the top of each end would be reasonably flush with the top edges of the sides. I couldn't figure out how to glue these without smearing glue in too many places, so the ends are not glued in place. I measured in 3/4" from the edge of the bottom, so that the ends would be reasonably vertical, and made a pencil mark. Then, it was just a mater of lining the bottom edge of the end up with the mark, and the top corners of the handle pieces up with the top corners of the sides, and fastening the ends in place. I drilled pilot holes and drove screws through the sides of the box into the top and bottom corners of the end piece, and into the bottom corners of the handle piece. I needed to use clamps to keep everything lined up during fastening.
Next was attaching the end battens to the top. I glued the top edges of the end and the handle, as well as the last 3 inches of each side. Then, I lined up the corners of the batten with the end of the box and fastened all four corners. I also fastened through the center outer edge of each end batten down into the handle.

Now, the body of the box was completely assembled, and could be set aside to allow the glue to set. It was then time to assemble the lid.
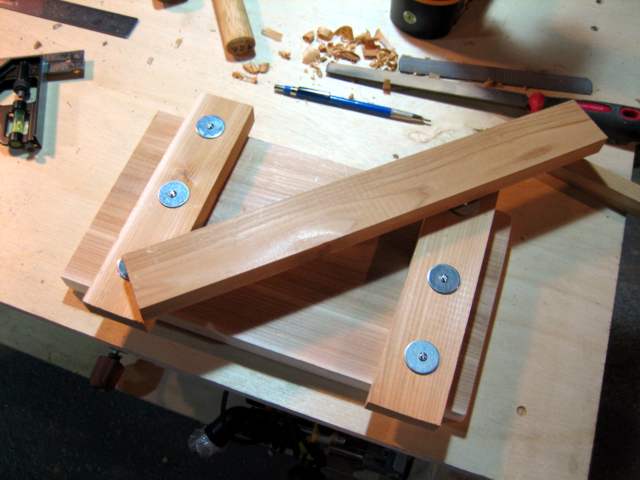
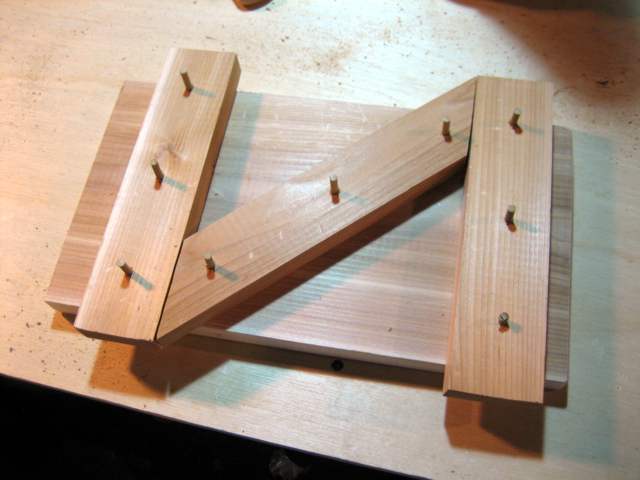
First, I measured in 1.5" from one end of the lid and drew a pencil line. Then, I measured in 0.75" and drew another line. I picked which lid batten was going where, held each in place against its pencil line, and drew a pencil line along the inside edge. These lines showed me where to apply glue, which I did. Then, I centered each batten crosswise in place, drilled, and fastened each in place.

To complete the lid, I needed to figure out the exact angle and length of the angled lid batten. The easiest way was to place the long piece diagonally across the two existing battens, then trace along the underside with a pencil. Then, on with the cutting, gluing, drilling, and fastening.
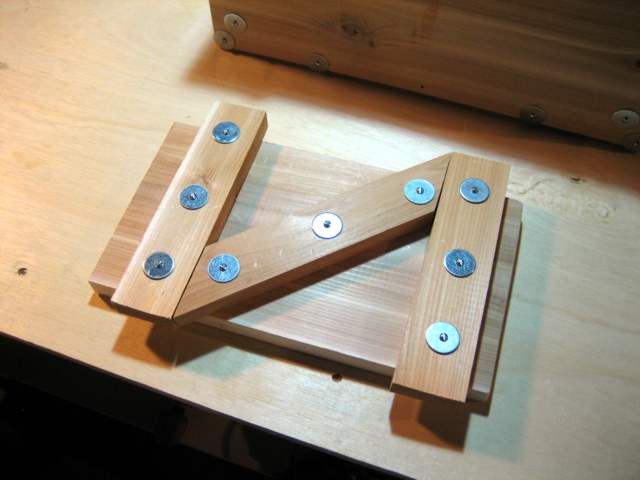
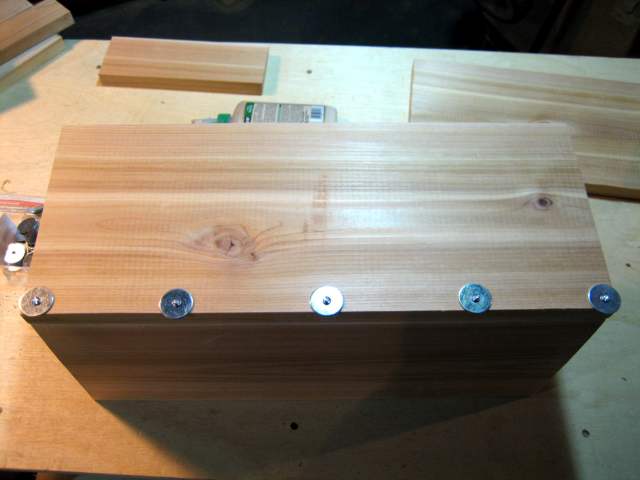
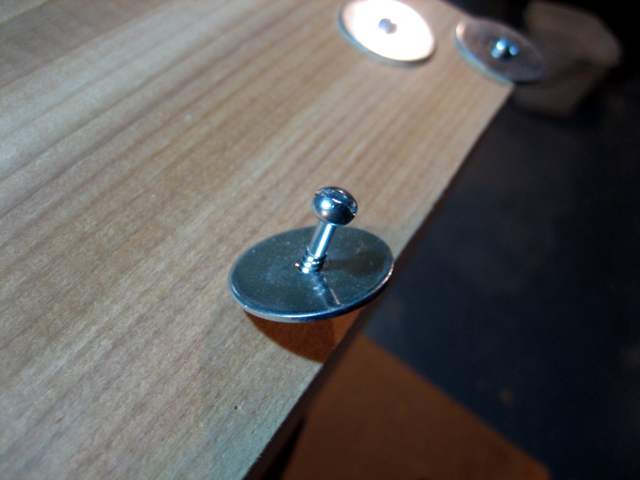
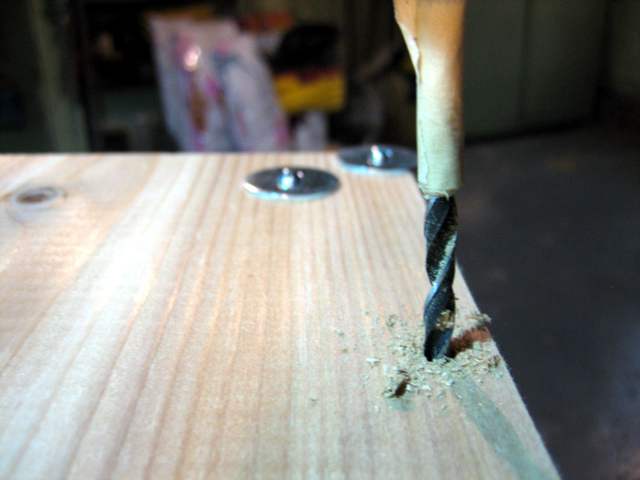
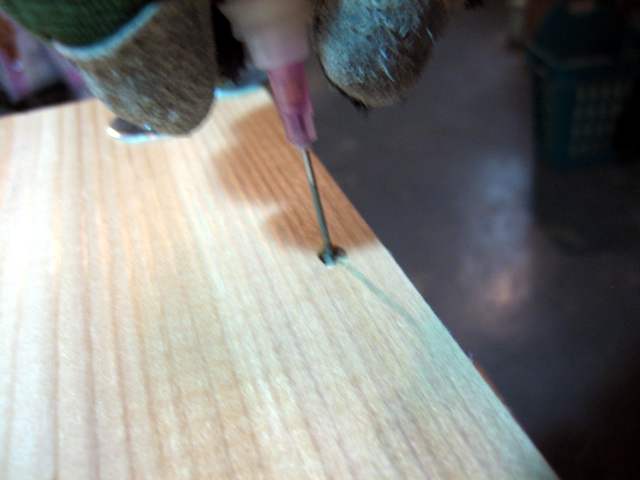
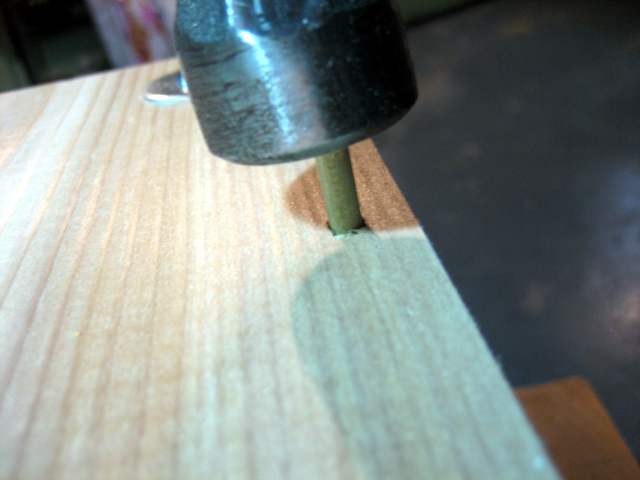
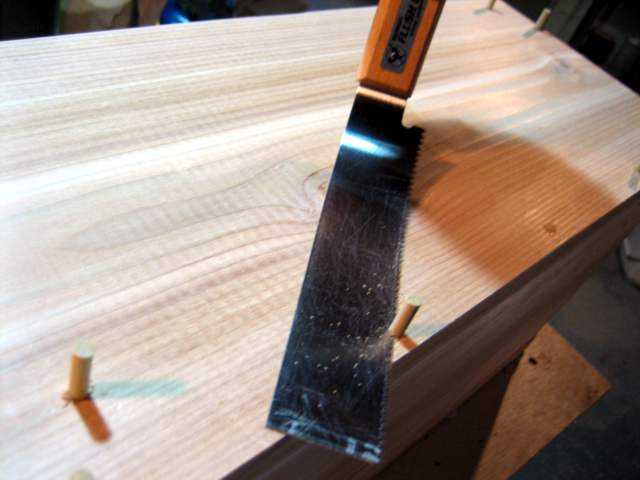
Once the box and lid were completely assembled, the last task was to remove the screws and replace them with wooden pegs. If you don't care about using wooden pegs, you could use nails for assembly instead of screws, in which case you'd be done right now. Or, you could countersink all the screws and cover them over with wooden plugs. In my case, I backed out the screws a few at a time, enlarged the holes with a 3/16" drill bit (tape on the bit kept me from drilling too deeply), dribbled a little glue in each hole (I have a syringe-tip glue applicator for this), tapped a short dowel piece into each hole (it helps if you taper one end of the dowel with a pencil sharpener), then trimmed off the excess with a saw (Yay flexible flush-cut saws!). I only did three or four at a time, so that there was never a time where a piece wasn't held in place with at least a couple of fasteners.
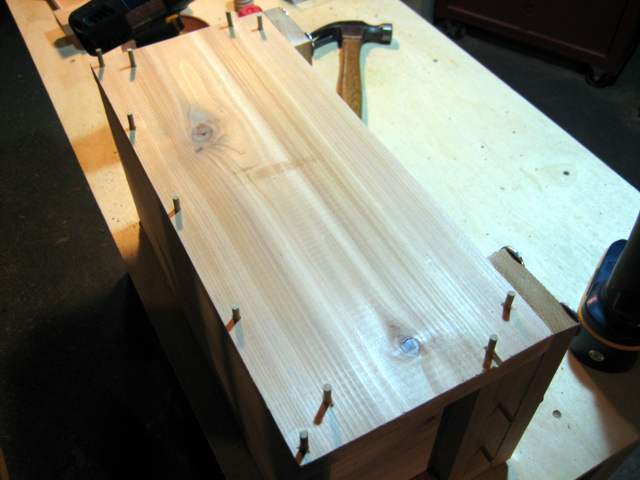
Once it was fully assembled, I let it sit for a little while to settle, then I trimmed the dowels a little more and tuned the lid for smooth sliding. If your lid is too tight, sand the exposed undersides of the lid battens, and the edges of the lid.
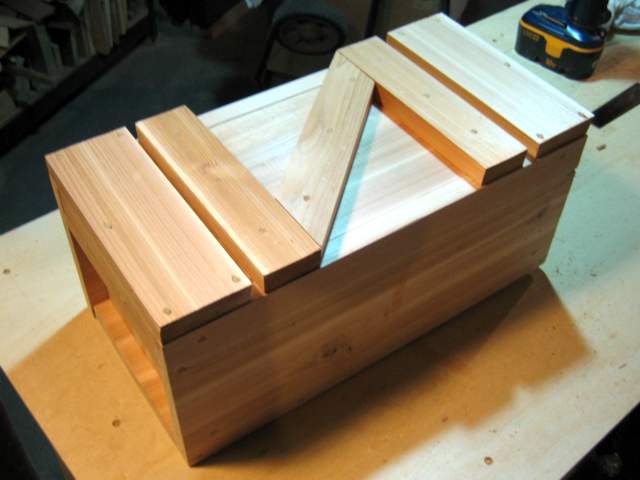
I've left all of them unfinished, since they are supposed to be workmen's items and not furniture. Plus, the cedar and cypress both have interesting aromas that build up inside the boxes when they are closed.
Anyway, now that I've made a few of these, I have my method pretty much down. I think I want to make a medium-size one next, just to fill the middle ground. The small boxes are a bit too small to carry enough useful stuff, although the large one is so big that if you fill it with stuff you probably can't lift it.