Easy Volcano Board
Not Very Pretty, But It Works
January 2003
Explanation
I've noticed lately that some of my projects a getting a bit
too elabrate for the average person to replicate at home without
the power tools, access to specialty stores for esoteric supplies,
and odd experience that I have. As much as I like having these
nice things for myself, I set about thinking how an average person
might go about making an average
Volcano
board.
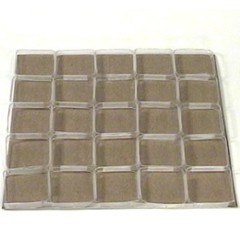
I needed some easy way to make raised squares, and eventually
I realized that I had a great stack of squares that were exactly
the right size! The
plastic tubes
that
Icehouse
Pieces
come packaged in these days have a square cross-section
that's obviously just the right size.
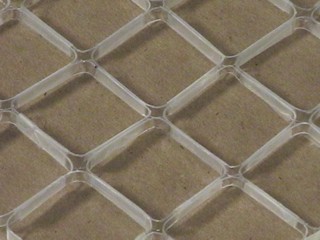
Once you have a pile of little squares,
they just have to be aggregated and attached to a base
of some kind.
Heavy cardboard (which many people call "shirt" cardboard)
makes a good base.
Tape makes a good adhesive.
There you go! No special tools needed. No supplies you
can't get at the average supermarket. It takes a bit of time,
and the end result reminds me a bunch of some craft projects
I did as a kid that used the plastic rings from a six-pack,
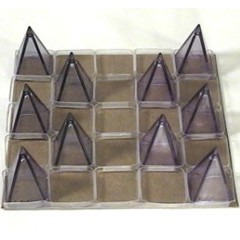
but this is certainly a useable Volcano board. Also, except
for a few steps at the beginning, this is a craft
project that a kid could do!
What You Need
Materials
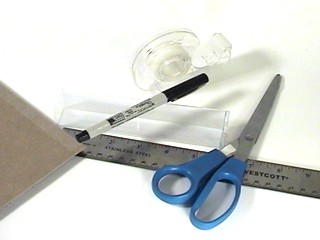
- One empty stash tube
- A square of heavy cardboard, 5 5/8" on a side
- A roll of adhesive tape (clear "scotch" type tape works well)
If you don't have any extra tubes, spare ones only cost a dollar.
If you don't have any shirt cardboard, mat board or foam core
should work OK. I guess you could use corrugated cardboard, but
that would be even less attractive.
If you don't have any tape, go to the store and get some.
If you can, buy the kind that comes in a dispenser, since
you're going to need to cut a bunch of pieces and cutting
them with the scissors is a pain.
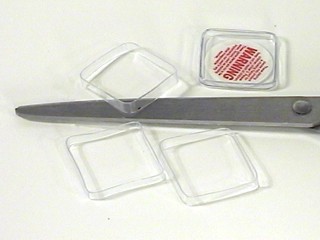
Tools
- A ruler marked in sixteenths of an inch
- A fine permanent marker
- A sharp "razor" knife of some kind
- A sharp pair of scissors
The Process
Preparation
If you're helping a kid do this project, you might want
to do these steps yourself. If you are a kid, you might
want to get an adult to do these steps because they've
had the use of their fingers for longer, and won't mind
losing a few as much, should it come to that.
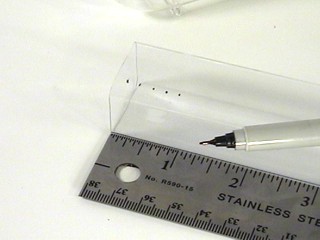
- Starting at the open top, mark the tube every
3/16 of an inch using the marker.
You might want to do this on a couple of corners of the tube.
- Using the razor knife, cut off the closed end of the
tube.
- Squish the tube somewhat flat, and begin cutting off
squares using the scissors. Don't worry if they get a little
crooked, but try to straighten out the scissors if you notice
that your cuts are not fully parallel.
- Straighten out the squares until they are as square as
possible. Don't worry if they're not perfect.
- If the cardboard is too large, cut it down using either
the razor knife and ruler, or the scissors. It should be
5 5/8" on a side.
You're now ready to begin assembly.
Assembly
- Start by picking up two squares and evening up the edges
so the corners line up.
- Cut a piece of tape about a half-inch long, and wrap it
around the sides of the squares, joining the two squares
together. Wrap the tape around as many times as you need to
use up all the tape, or cut off little pieces that are extra.
- Do the above steps 39 more times until you have a 5 by 5
grid of squares, with every pair of squares that's next to each
other joined together with tape. try ot keep everything lined
up, and use the tensions between squares to keep everything
at 90 degree angles when you can.
- Attach a long piece of tape to one edge of the square,
with the edge of the tape line up with the top edge of the
grid.
- Center the grid on the square of cardboard and wrap the
tape underneath the cardboard to attach that edge of the grid
to the base.
- Attach a long piece of tape to the opposite edge of the
square, and attach that edge to the square.
- You can either tape down the remaining two edges to the
base, or leave them open so that you can slide layouts between
the grid and the base.
That's it!
[Physical Objects]
[Flourishing Branch]
[Home Page]