Drop Proofing Your PalmIII

Copyright © 2000, Elliott C. Evans
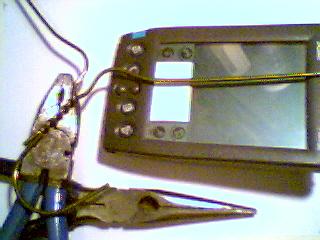
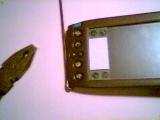
Introduction

Way back in November of 1998, I had my PalmIII in a shirt pocket, and when I leaned over to pick up a dropped pen, it slid out onto the floor, resulting in a cracked screen. One hundred dollars later, I started thinking about ways to keep this from happening again. I experimented with cases and belt clips and such, but every single one was either too large to be convenient or made me feel like a complete dweeb.
I saw that a company called Force Technology was producing a product called The Bond™ Latch, which looked very promising, but I decided I was unwilling to spend the money (approximately US$30 at the time of this writing) for this device until I was sure I'd like the result. I don't wish to denigrate Force Technology, their device looks very nice (in particular, the "latching" feature seems really spiffy), and it may be worth every penny, but it's a bit too large of a gamble.
I'm a bit handy in the workshop, so I figured I could make something that wasn't nearly as nice, but would allow me to evaluate the concept. After about an hour with some pliers and a shirt hanger, I had a reasonable drop-proofer.

Warnings

Do not follow these instructions if you Hotsync using the cradle.

I Hotsync via infrared, so this isn't a problem for me, but you won't be able to use the cradle, or the "Laptop Hotsync Cable" with this thing installed. The drop-proofer is impossible to remove without pliers. Also, removing it may damage your Palm, and will probably bend your wire into unusability. Mine is not a convenient solution, merely a cheap one.

Do not follow these instructions if you are afraid of damaging your Palm.

It is very easy to cause minor cosmetic damage to the unit when installing the drop-proofer, and not that difficult to cause major structural damage.

These instructions have only been tested with a PalmIII.

In theory they should work (with minor changes) on all Palm devices, but I won't promise you anything.

I (Elliott C. Evans) am not responsible for any damage to yourself or your property that may result from following these instructions.

It's your Palm. It's your neck.

Please Consider Purchasing The Bond™ Latch

After all, it is their idea, they seem to have done a very nice job on their product, and I think they deserve to make money off of it. I don't want anybody to think that this is a reasonable replacement for The Bond, it's just a quick&dirty proof of concept.

Step-By Step

Before you begin You'll need:
  • A PalmIII PDA. It will be very hard to check the fit without having one handy.
  • Sturdy pliers with wire cutters. I like "linesman's pliers" which have a good cutter for thick wire.
  • A source of wire. I used a shirt hanger from the dry-cleaners. Any wire that's too sturdy to be bent with the fingers is fine.
Snip off a straight piece of wire Snip off a straight section of the wire hanger. You'll only need about 5.25 inches, but it doesn't hurt to snip off the entire straight section, and actually it might help.
Curl a hook at one end 
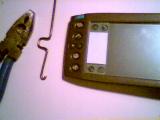
Curl one end of the straight piece into a hook. You only need about 1/8 of an inch of hook, but it's OK to bend the hook a little larger than that. In fact, bending a half-inch hook may be easier, because of the leverage.
Trim the hook to fit 
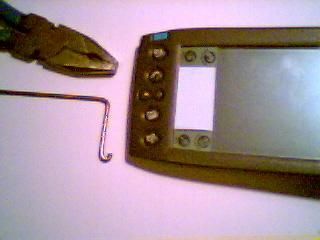
Trim the hook until it fits into one of the "modem latch" holes at the bottom. You should aim for a nice tight fit, with the hook going all the way in, and the rest of the wire resting flat against the bottom of the PalmIII. If you mess it up, snip off your hook and start over. That's one of the reasons to start with a much larger piece than necessary.
Bend the wire out About an inch and a quarter (1.25 inches) in from the hook, bend the wire out to a right angle. this is the begining of the loop that you're going to be hanging the PalmIII from. Make the start of the bend just a little before the paging buttons, since you probably want the loop centered on the PalmIII.
Bend the wire back 
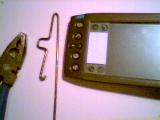
Three more right angle bends complete the loop. If you know you're going to want to be able to hook something very large into this loop, take this into account when you make it. The interior of the loop will be a little smaller after installation, so make it a bit larger than you think you need.
You're almost done 
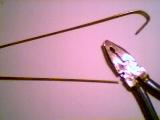
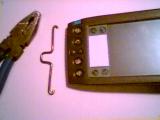
About an inch and a quarter (1.25 inches) out from the loop, curl the wire into another hook. You probably want to try to make it as symmetrical as possible.
Finished! Snip off the extra wire, and finish the hook on the end. you should have a good idea how large the hook needs to be from the first one, and you can try it out in the modem latch just like you did earlier.
Final Inspection At this point, you should perform a final inspection on your work. If it's not 2-dimensional, try to bend it back so it lays flat. If you're not completely happy with your work, toss it out and start again. Your second one will be much better than your first. Remember, once you install it, it will be difficult to remove, so fix any problems now. You'll be seeing any scratches or imperfections every day, and removing it later may damage your PalmIII, so think "perfect" and "forever" during this part.
Install the drop-proofer 
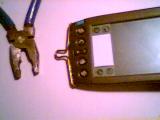
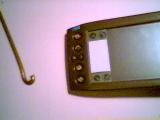
Put one hook into a modem latch hole of the PalmIII, and slowly crimp the loop together, making sure that the other hook goes into the other latch hole. Keep crimping until both hooks are firmly seated, but try to avoid digging the hooks into the case, damaging it.
Twist the loop You may also want to give the loop a little twist during the crimp. This will help keep your PalmIII lying flat against your chest if you hang it from your neck. This isn't necessary, however.
Hang it from a chain 
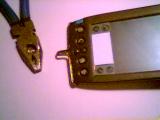
Sometimes, I clip on watch chain. This is pretty classy, and can be used to secure the PalmIII to my belt. I've also used this to attach the PalmIII to a button hole when carrying the PalmIII in a shirt pocket.
Hang it from your neck 
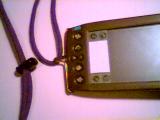
When I don't have any pockets big enough to hold the PalmIII, sometimes I just hang it from my neck. Here I've threaded a boot lace through the loop, and secured the ends with a "cord-lock" device. If worn under a sweat-shirt or sweater, the PalmIII can barely be perceived.

Removing the Drop-Proofer

The easiest way of removing the drop-proofer with the least risk of damaging your Palm is to snip the wire in the middle of the loop. You can also try uncrimping the loop, but be careful.

Conclusion

I've used my drop-proofer for several weeks now, and I'm happy with it. I don't mind wearing the PalmIII hanging from my neck, and it keeps me from leaving it on my desk at work. The peace of mind I've gained from having it secured against droppage vastly outweighs the fear I had of damaging the PalmIII. The Palm has not come out of the drop-proofer even once, and even withstands forceful tugging.
There are two down sides to my experience. One is that I've already lost one stylus since the silo opening is "down" when it's hanging from my neck. It should be easy to drop-proof the stylus as well, by drilling a small hole in the "fin" portion and securing it to the Palm with string. The other is that I've caused some minor cosmetic damage to the modem latch holes. Hopefully, this damage is not structural, since that would keep me from using The Bond Latch.
I think I'm going to start saving up my nickels for a Bond Latch, or tell somebody I want one for my birthday. The convenience of being able to easily remove the device is just about worth the money, now that I know I'll like the final result.

Eeyore Links: [Flourishing Branch] [Home Page]