Our Stereo Cabinet
A Custom Entertainment Center

July 2001
July 2001
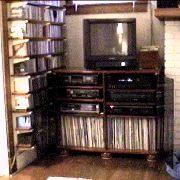
A few years ago, Sharon decided that her current stereo cabinet wasn't sufficient, and she wanted something better. She wanted something that could not only hold all of her music components, but all of the video components, too. Plus, she wanted it to be able to hold all of her LPs (that's vinyl, kids) and fit between the fireplace and the shelves I'd installed for her CD collection. Oh, and it should have glass doors to keep the kitties out.
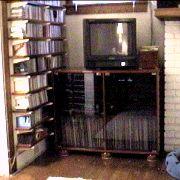
Here's the cabinet with the doors open. The doors are quite heavy and it took some doing to get the cabinet balanced so that they would stay open. The doors have the standard "push-pop" magnetic catches, and pivot hinges.
Door closed, you can see that they're smoked glass. I think glass doors on stereo cabinets should always be smoked glass. You can see that the cabinet is just the right size for the space, and has enough room on top for the TV and a box of 45's (more vinyl).
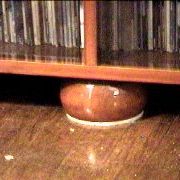
Here's a close-up of the big fat bun feet on the bottom. Basically, it's the feet an the doors that make this into furniture instead of it just being a big wooden box with shelves in it. There are six feet in all, and I put felt on the bottom of each foot so that it would be possible to move the cabinet at all.
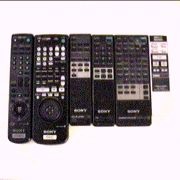
So here's the collection of remotes for this monstrosity. A few of these are superfluous, but we keep them all around. First person to correctly identify all six remotes, including the little silver one on the right, wins absolutely nothing.
Mostly, you know, a whole bunch of wood. I used the same wood that I used on the Pennsic Boxes so that the cabinet would match. Plus, it's cheaper than solid oak or something. The top and bottom pieces are the full width, and the verticals are all the same height.
There are six shelves, each a little less deep than the full depth of the box, to allow for the doors to be inside the box. The verticals of the box are drilled for standard 0.25 inch shelf pegs. I used a piece of pegboard to space the holes, which worked really well.
As noted above, there are six bun feet at the bottom. We bought these off the shelf at the Home Despot, and they are attached with standard table leg hardware. They're finished all over, and have a thick felt pad on the bottom.
You can't see them, but there are big wooden triangles nailed on the back to stabilize the construction and make dure there's some ventilation room behind the cabinet.
The finish is the same stuff I use on everything, Minwax Polyshades maple. Quite a number of people have complimented me on the depth of the color, which is mostly a side effect of having to put so many coats of finish on the wood to get it smooth.
The glass doors are probably the most expensive part of the project, since I had to have them custom made at a glass shop. They're tempered, so maybe I won't ever break them. I called around to about a half dozen places in Pittsburgh before I found the lowest price, which was still around eighty dollars. As I mentioned before, the doors use standard pivot hinges, and are held closed with magnetic latches.
Please imagine the vast spaces of time that occured between most of these steps.