Tabi
Japanese Split-Toe Footwear

October 2008, January 2009
October 2008, January 2009
When wearing geta or zori, unless you're going to go barefoot (no class!) you need special split-toed socks and foot covers. I have a bunch of tabi socks that I made by simply cutting into an athletic sock and stitching, but I really wanted something nicer. You can buy tabi and soled tabi, but they're pretty expensive. I researched patterns for a couple of years, and finally decided to just dive in and make some.
They came out pretty good, I think. It remains to be seen how well they stand up over time, and how comfortable they are to wear for long periods, but so far, so good.
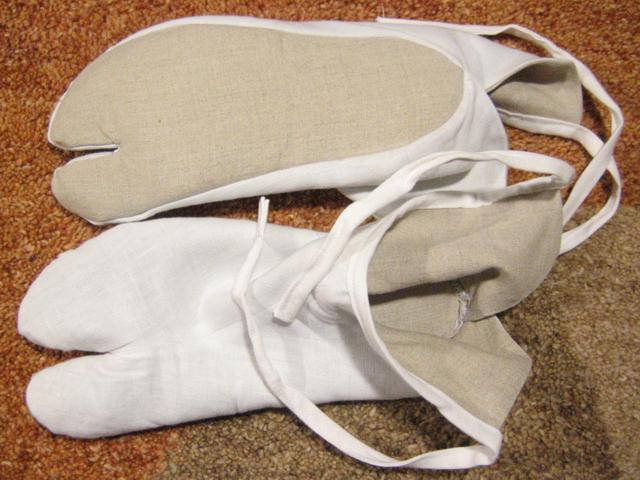
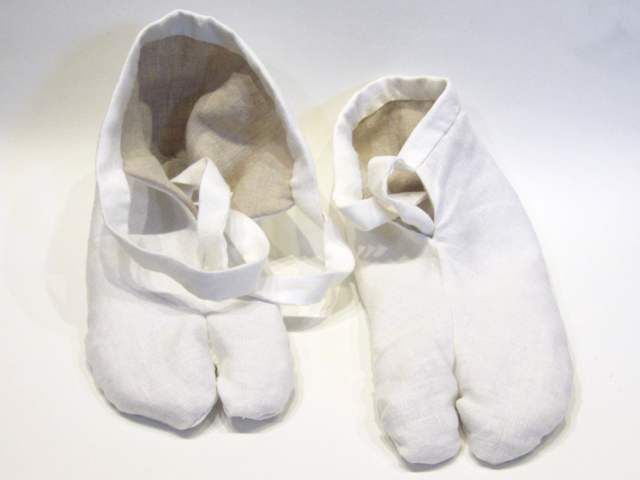
Unlike most tabi, these tie shut instead of using the hook thingies (kozane) that traditional tabi use. I've actually been told that medieval tabi, if I want to be truly accurate, would not just have tied closed, they would be open in front of the foot instead of behind the foot like these do. Oh well, I expect I'll make a few more pairs of these over time.
These tabi are made almost entirely of linen, with white linen for the shell and "natural" linen for the lining and sole. I used more white linen for the ties.
There is actually a layer of heavy interfacing between the two layers of the sole. I don't know if this is strictly necessary, and the polyester interfacing I used is definitely not period, but it seemed advisible to have a little padding. In the future I might use cotton batting or extra layers of cloth. I'd also like to coat the sole of at least one pair with latex so that the soles have more grip and are waterproof.
I used the pattern and instructions found in John Marshall's book, "Make Your Own Japanese Clothes". He provides a general pattern, and gives advice for modifying it to fit your foot. I made two unlined prototypes for fitting purposes before I took the plunge to make a finished pair. It was worth the extra effort to wind up with a pair that fits pretty well. I expect I will continue altering my pattern as time goes on.
Generally speaking, assembly goes as you expect. You sew the two upper pieces togetther for both the shell and the lining, then attach the two together. Then, you baste around the sole to hold the layers in place, and sew it to the upper. Finishing would normally mean sewing button holes and attaching kozane, but instead I sewed an "eighth width" cloth tie around the top of the foot opening using the same method I use for everything else. The top seam of the foot opening is completely inside the tie.
One thing I'm not sure about with this pattern is that the seam attaching the sole is just sitting there inside the tabi. It could wind up being uncomfortably abrasive. I think I have a method for getting rid of that. If I sew the shell and lining separately, I can insert the lining, then attach the two layers just by sewing my ties on around the top.
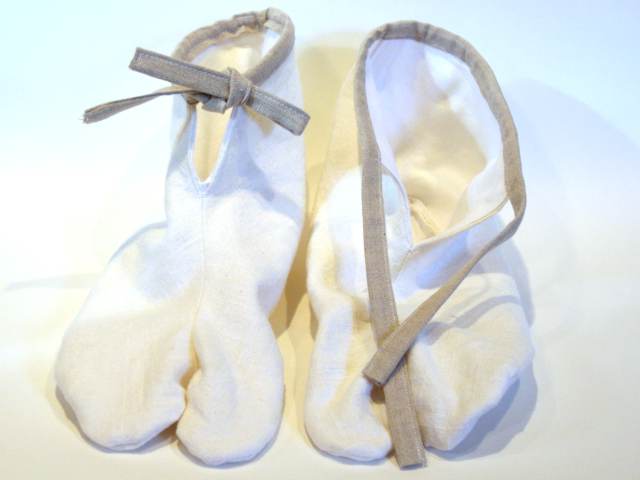
The second pair of tabi was made using the same pattern, only the tabi are closed at the back and open in the front. I'm told this is more accurate for medieval tabi. Sewing the split in front was tricky, and had to be done before the inner and out layers of the upper are basted together. Sewing the back closed was just sewing the completed back edges onto each other.
This makes the tabi a little more difficult to put on, but the back doesn't gap open and they're much more comfortable to wear. I'm going to do all future tabi with open fronts.
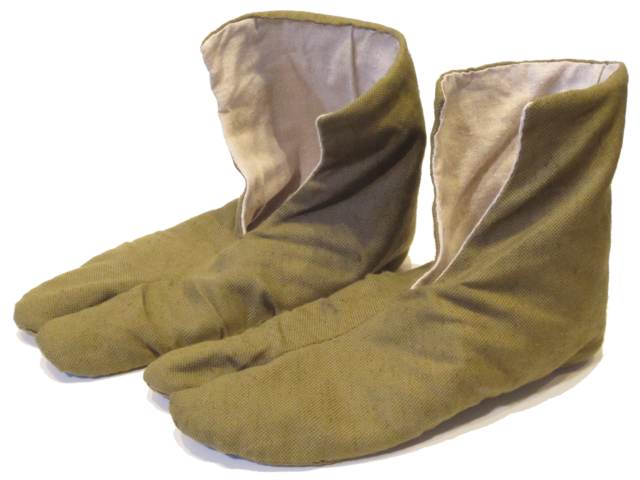
My first two pairs of tabi were made with relatively light fabric, and they were wearing out pretty quickly. Put your full body weight on a couple of seams and see what happens to the fabric. I managed to pick up a little bit of quite heavy off-white linen for this pair, and I lined it with some regular heavy-wieght white linen. These are holding up well, although even a single Pennsic is enough get them dirty and dingy, so the next pair I make will get worn off-season until they are already dingy-looking.
With the front opening I have been making, the ties have to be quite long. To tie in front, they have to start in the back, wrap to the front, wrap to the back to get a full tie, then go back to the front and be tied. That makes the cords quite long, and a little difficul to deal with when you're not wearing them. I decided to just make short ties on this pair that would go from the back to the front and be tied there. This turned out OK, but I don't really like the way it looks or works, so I probably won't make them with short ties again.
I started sewing these tabi in the normal way, on a machine, but remembered that sewing these on a machine doesn't really save you any time. So, I abandoned the machine after just one seam and did the rest by hand. I also experimented with a new tabi design whereby I sewed the lining and shell separately, then attached them so that all the raw edges are between the layers. Maybe this will make them a little stronger. It certainly made them a little easier to sew. Even though it meant sewing more seams, I was only ever having to make sure two layers were sewn, not four. Sewing the ties on at the top closed up the last seam.
The shell of these tabi is white linen, about a medium weight. The lining it unbleached linen, which I appear to be making traditional for my tabi.
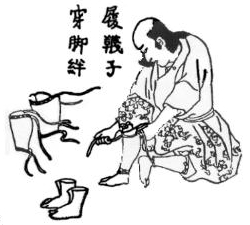
These tabi are made from a heavy hemp-linen blend. They are slightly taller than the previous examples, and have no ties. This is an attempt to match the below illustration from the Edo period "Tanki Yoriaku" armoring manual. Making them without ties was a little easier, but it means they basically must be worn with kyahan or they will have to be tied separately.
I sewed these entirely by hand, mostly to give myself something to do during Pennsic if I didn't feel like braiding. I applied the lining in the new way, to create a smoother interior. I'm not as happy with the way the gathers came out. This may be due to the heft of the fabric. Without the ties to cover the rim at the top of the opening, I folded in the raw edges and blind stitched them.