Recycling Bin
No More Cardboard Box


December 2005


December 2005
For years, I've been using a corrugated cardboard box to hold used office paper that's destined for recycling. Every few years the box starts to droop or the glue gives out or the cardboard rips, and I have to get a new box. These boxes are usually free for the taking in any office, but it gets to be a drag after a dozen years or so. I still have a pile of scrap plywood from the storage shelves project, (even after using some of it up on the Karabitsu project) so I decided to do away with the cardboard box once and for all.
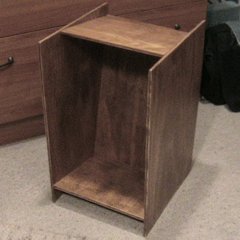
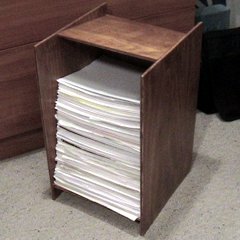
You can see that the basic design is that of a rectangular box
tipped back about 20 degrees so that the big stak of paper won't
come toppling out of the box as easily. I'd meant the bin to be
big enough to hold a cardboard box as a liner, but due to possibly
overzealous sanding, its interior is a little small for that. Now
that I look at it though
The recycling box is just five rectangles of 3/8" plywood. It's stained with Minwax "Cherry" stain, and finished with water based sanding sealer and water based satin clear "Polycrylic" wood finish.
It's held together with wood glue and nails. The nails just go through the sides into the edges of the plywood. This is not as nice as it could be, but it's just a recycling box, and the wire brads I used are barely visible. I suppose I could have set them and then puttied over them, but I stained the pieces before assembly, which would have made this more difficult.
Here's the cut list. Remember, this is for 3/8" plywood, so if you're using different thickness wood, you will have to account for that in your measurements.
- 2 Side Panels - 12.5" wide by 20.0" tall
- 1 Back Panel - 11.25" wide by 17.5" tall
- 2 End Panels - 11.25" wide by 9.5" tall
First, I sanded and stained all the pieces. Then, I glued and nailed the end panels onto the back panel. After that, I sandwiched the box body between the side panels, angling the box body so that its corners contacted three sides of the side panels, and nailed them on. Then I sealed, sanded, and sinished the box.
Attaching the side panels was probably the trickiest part, as I was drilling somewhat blind through the panels and trying to hit the center of the edge of the other pieces. It heled to get two nails in near the ends of each panel, and then draw a line between those nails for placing the rest. All of my nail holes were pre-drilled, so at least I knew if the nail was in a good spot or not before I began swinging the hammer.
I could have put a "kick plate" across the front at the bottom, but I decided not to get too fancy. I also could have put a flat top across the side panels, but I didn't. I still could do those things, but I probably won't.