This braid has been on the takadai for about six months. I have not been working on it constantly, of course, but still. It is a double-layer double-twill braid that used both the upper and lower arms, so it is essentially two braids stitched together at the edges. Even If I had been braiding at full speed, it still would have taken me twice as long as a single-layer braid, but I had so many other things to take care of and so many other braids to do.
The final braid is about a yard long and a little more than a half-inch wide. It’s all in silk lace-weight yarn and there are 52 (!) elements with 3 ends of yarn per element. There are plenty of errors in the braid. You can probably see a few in the photo. I’m still happy with it. It was a great learning experience.
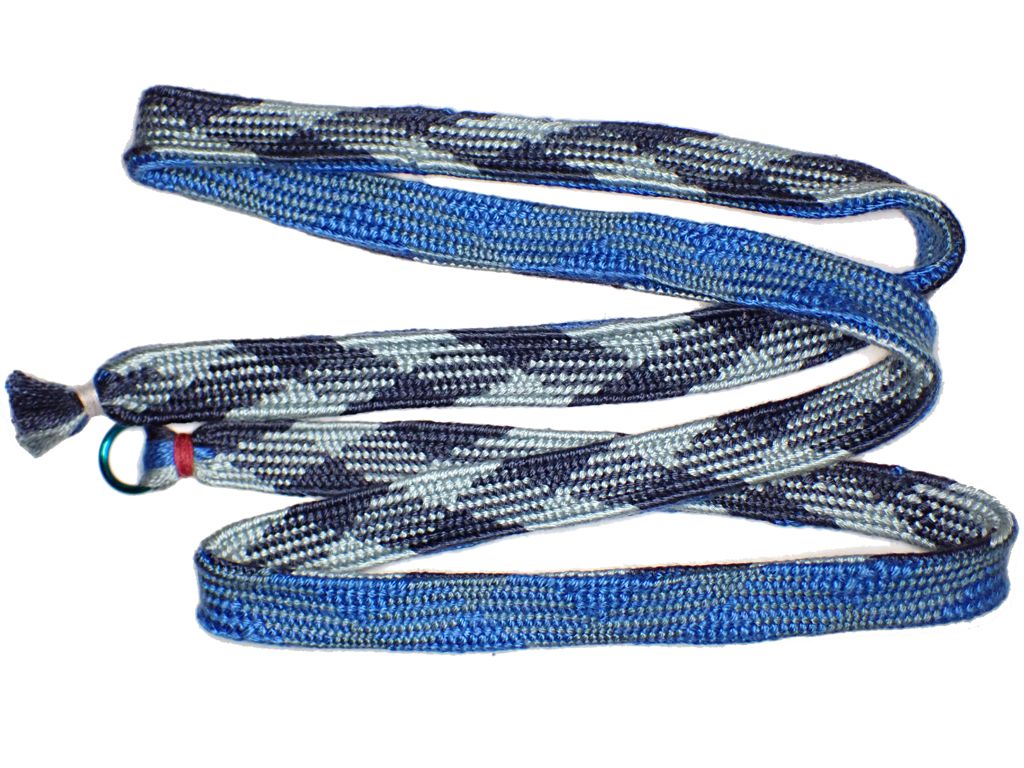
After like ten months, this braid is finally complete. Two ends of silk lace-weight yarn per tama in a 25-tama 3/3 twill braid. Yikes. I did a bunch of braids while this waited on the takadai, but I finally powered through it and cleared the takadai for new projects.
Anyway, it’s like 75 inches of braid, 3/8 of an inch wide.
For my third takadai braid, I decided to both continue my progression through Rodrick Owen’s book, but go a little less dainty with the braid. Changing two variables at once is always risky, and this did lead to some regret.
Takadai rep braid in reeled silk thread
It is about five feet long. The tension is inconsistent so the width varies, but it’s about 1.125″ wide and 0.375″ thick. Heavy.
The structure is called a “rep braid”. Each time you open a shed, 3 bobbins pass through it. This creates the big knobbly stitches and thickness.
I used 16 ends of reeled-silk thread per tama, and this braid is done with 43 tama. I used the new 100-gram tama that Sweetie gave me as a present.
I think that I was not beating hard enough at the beginning, and I was beating too hard at the end. I guess this will get more consistent with practice. If I did this with half as many ends per tama, it probably would be easier.
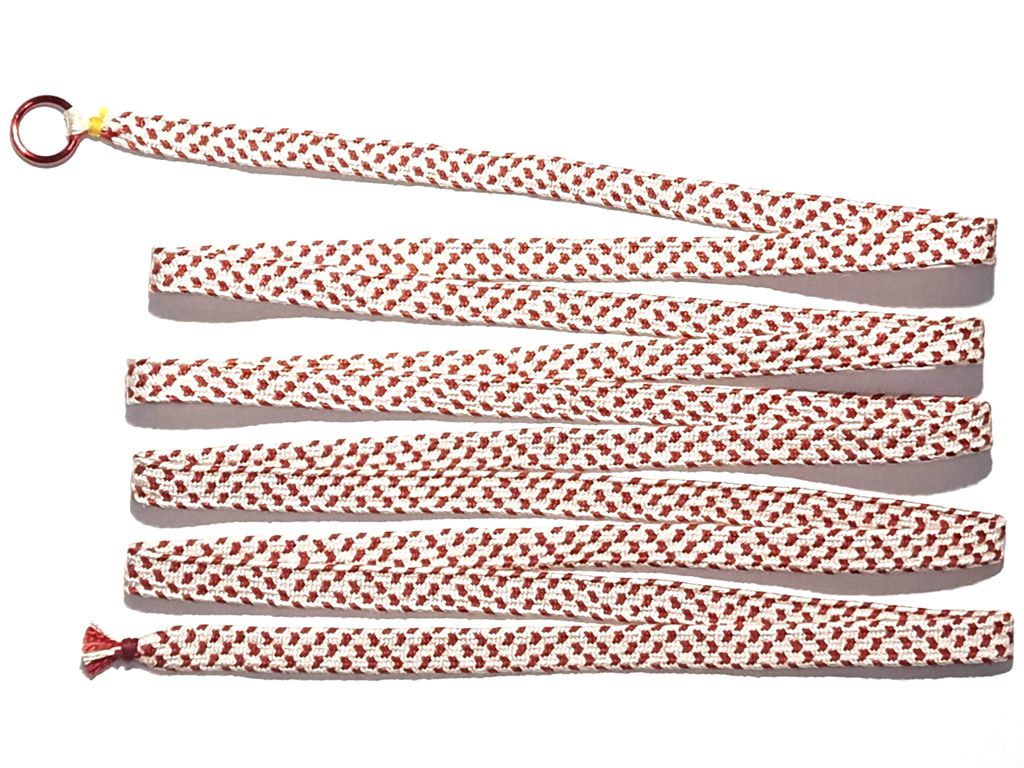
A second braid made on the takadai. This one is a 33-tama 2/2 twill braid made with four plies of reeled silk yarn per strand. 16 strands are rose pink, and 17 strands are scarlet. I started with twice the length of material as last time, and wound up with about 6 feet of braid.
Silk 2/2 Twill Takadai Braid, ~2 yards
Because I used reeled silk instead of plied silk yarn, the braid came out much smoother, flatter, and even than the first braid. The takdai does a lot of the work, of course, keeping the tension even and such, but I am really happy with this braid.
According to the takadai book that I have, the used takadai that I bought from a friend needs one more accessory to be complete. The raddle is used during set-up to keep the strands separated and in order before they are wound onto tama and placed on the koma. This takadai may not even have come with a raddle, since it is not 100% necessary for braiding. Having set up for two braids now, I can confirm it is optional. It does seem handy to have, though, so I decided to make one.
Takadai with Raddle
Thw raddle is the bar across the front of the takadai that is basically a row of pegs. I bought a piece of maple, and cut it down to the size I wanted. Then I drilled a line of 3/16″ holes along the length of the bar using the drill press, and rounded the top and side edges with a router.
Next, I cut a few 3/16″ diameter dowels into 1″ lengths. I rounded the ends of each peg with a Dremel grinding stone, and then glued one peg in each hole.
After attaching a couple of small blocks to the underside of the raddle so that it can be mounted in the slots of the outer arms, the raddle was ready to go.
I have been meaning to acquire a takadai braiding stand for years. They can be expensive, so I have been waiting until I decided that I was getting bored with marudai braiding, then I would probably make one. Braiding teacher Shirley Berlin broke the news to me several months ago that I would never really get bored of marudaikumihimo.
More recently, a friend of ours decided that she was ready to get rid of some surplus braiding equipment. She asked me if I knew anybody who was looking to buy a takadai, and quoted me a very good price.
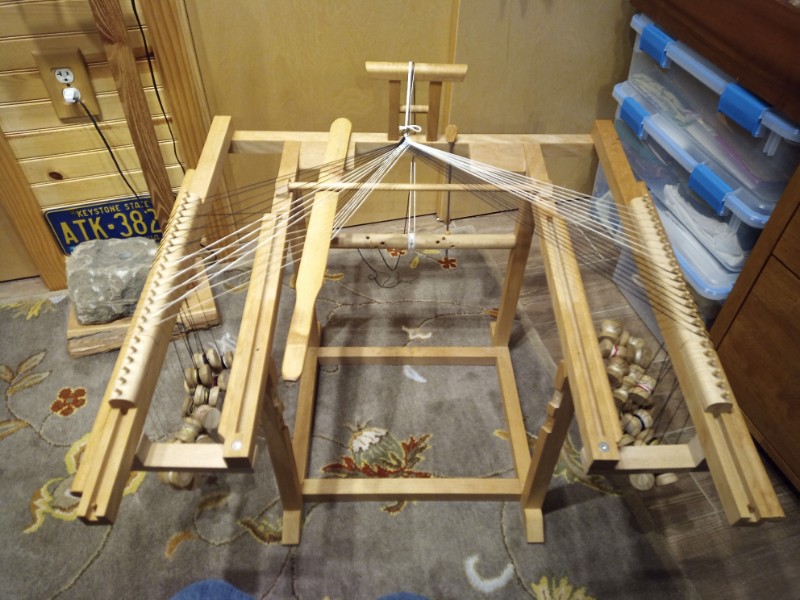
So, I decided to bite the bullet and get started. Once I got it assembled, it looked like this:
Ready for setup
The piece of bamboo resting diagonally across the lower arms is the beater sword used to tap stitshes into place. The pegs on the left and right upper arms are mounted in koma that slide along slots in the arms. At the top of the takadai is the tori. Lower down is the roller and standing vertically is the long metal pin that secures the roller.
To set up the takadai, you measure out a sufficient length of material and a sufficient number of threads of material for your braid. The definition of “sufficient” will vary based on the braid you are trying to make and the material you are using. (I measured out 34 55″ long threads of white 30/2 silk yarn and 32 55″ threads of black.) Then you tie a leader cord to the roller, pass it up over the tori, and tie it to the gathered end of your material. Then you separate out threads of material and wrap most of it around tama bobbins. (I wrapped two threads on each tama, so 17 white and 16 black.) Lastly, you hang strands over the koma, one tama per peg, on both arms of the takadai. (I started with all the white strands on the right, and all the black strands on the left.
Working a braid
To work a braid on this setup, you create a “shed” on one side of takadai by pushing some threads down. (I was making a simple weave braid, so my pattern was just alternating over (down) and under (up).) Then, you wedge the sword into the takadai so that it holds the shed open. Next, you pass the topmost strand from that side through the shed, and make it the bottommost strand on the other side. While you remove the sword and close the shed, use the sword to beat the point of braiding and tighten the braid. Repeat this process on the other side. Keep repeating this side to side and a braid will start to form.
Braid forming on the takadai
When a koma at the top of an arm is empty, move it to the bottom of that arm and slide the other koma upwards. If a tama is getting to close to the arm, unwrap it six or seven inches. If the point of braiding is no longer over the round stick that holds the sword down, crank the roller a little to wind up the leader.
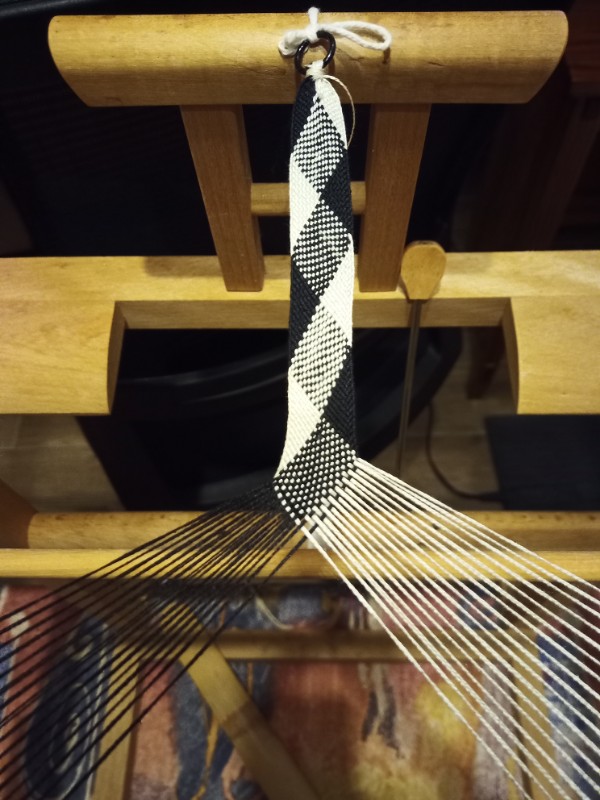
Braid getting long
Eventually, the braid will get long enough to wrap around the roller itself. Keep going. By this point, I was doing one full iteration (with the material returning to start position) about every forty minutes, making about 2.5 inches of braid.
Leaders starting to show
After even more time, the tama leaders will start to peep up over the edge of the koma. Now you are in the home stretch, but you are far from the finish line. Keep going until you are almost out of material.
Finished takadai braid
My braid came out 25 inches long and about an inch wide. You can see how the black and white strands pass back and forth through each other and themselves. Not bad for a first braid!