bookmark_borderKanmuri-bako

About two years ago, when I was preparing to be elevated to the Order of the Laurel, I was searching everywhere to try to buy a Kanmuri. The Kanmuri (which translates as “crown”) is the correct piece of headgear to wear with the Bunkan Sokutai that was to be my elevation garb. I eventually found an antique store in Japan that was willing to sell me one, however, theirs was in Thailand and would need to ship directly from there. I wound up picking it up at the post office the day before we went up to Pennsic. Since then, it has lived in a cardboard box, which was not the best place for this antique hat. Finally, I was able to make a couple of boxes to store and protect the pieces of the kanmuri.

Closed

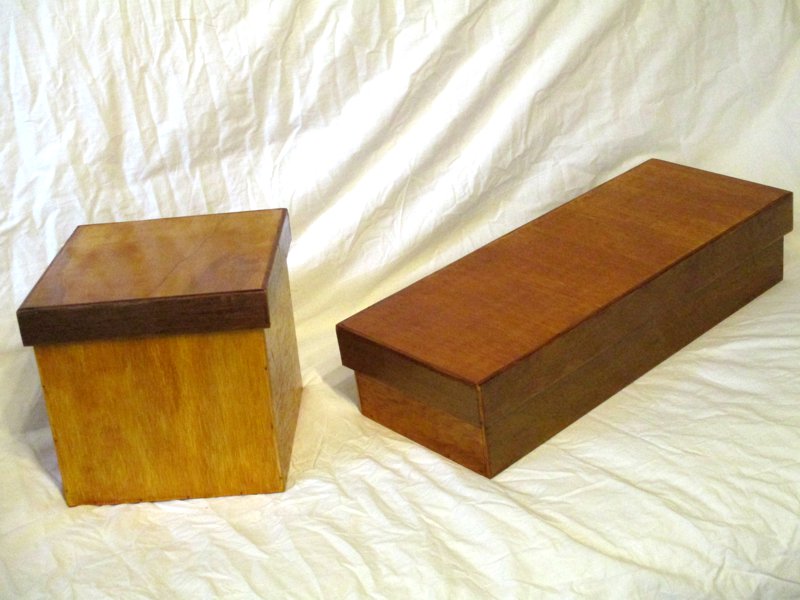
That’s what they look like closed. They’re just simple lidded boxes made from plywood and finished with shellac. I have a stack of smallish plywood scraps from the last 20 years of larger projects, so this project was also an opportunity to use up some of that.

Open

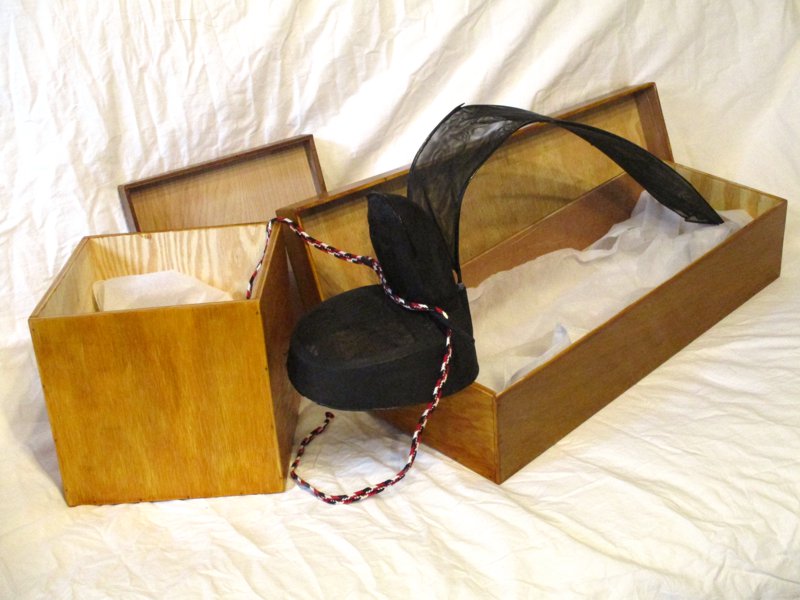
Here they are with the lids off, so you can see the kanmuri pieces nestled cozily inside. On the left is the “pillbox” portion with its upright and pin (All three pieces are attached on this kanmuri.), and on the right is the tail. There’s a lot of empty space inside the tail’s box, but I wanted the box to help maintain the proper shape of the tail, and I wasn’t up for trying to make a proper bentwood box.

Assembled

In case you’re unfamiliar with the kanmuri as an object, here’s what it looks like when all the pieces are assembled. The cord drapes over the pin and ties under your chin to keep the hat in place. You can see that this kanmuri is not in the best shape. I’ll embark on a restoration project eventually,

bookmark_borderEndai Stepstool

Long-time fans of my work my remember the nine endai benches (one, two, three through five, and six through nine) that I’ve made in the past. These are great, but they are 18 inches tall. As the endai is a half-step between the ground and the en of a Japanese dwelling, I wanted to make something that was a half-step between the ground and an endai. Even though there’s no Pennsic this year, I wanted to tackle this little project and get it off my list. I recently sorted through all of the surplus wood I have, so I knew I had enough lumber on hand to tackle this project without having to go and buy anything.

Endai Stepstool

It’s entirely red cedar, and much of a style with endai six through nine, but roughly half-scale. Instead of being 36″ long, 18″ deep, and 18″ tall; this one is 18″ long, 9″ deep, and 9″ tall. The legs are 2×2 instead of 4×4. It’s a mini-bench.

I’m a bit disappointed about the external fasteners on the legs. I wasn’t able to do the joinery I usually do on the legs, and there isn’t a lot of room inside the apron for screws. Even with four screws on the interior of each leg it was a still a little rickety, so I gave in and put some screws in from the outside.

I put a bit of boiled linseed oil on it, to enhance the color and keep the wood from drying out. I’m pretty happy with it.

bookmark_borderBlogrolling

A few weeks ago, Gareth Branwyn of the Cool Tools blog posted a request for suggestions to include in a “Maker Sartorial” feature. I had a couple of ideas, so I sent in some email, and my suggestions were just posted as part of the June 11th post.

https://kk.org/cooltools/quick-molding-with-sugru/

I talked about my my Shop Coat (which does not get much use these days, in the heat) and my enthusiasm for Keen safety footwear.

Always good to feel that my opinions are sometimes considered valid enough to share.

bookmark_borderTabi 2020

It’s not even half-way through the year, and I already have this year’s tabi foot coverings finished.

Tabi in blue linen

For those of my readers who are not familiar with this tradition, I started sewing my own tabi a few years ago to go with my Japanese garb. They are usually made from leftover fabric from garb projects, but it’s just regular fabric, so they tend to wear out pretty quickly. I found that if I make a pair a year, I can keep ahead of the curve and always have at least a few pairs of tabi that are not worn out and shabby looking. Usually, I wind up finishing a year’s tabi in January or February of the following year. Not this year! Free time and your wife hosting local sewing circles can do that.

These are made from the blue linen I used for the hippari top I made for the field clothing outfit from this past December. They’re sewn entirely by hand, including attaching the himo ties, which I normally do by machine. This was not a decision to be a stickler about it, just that I was sewing these to have some sewing to do while being social, so why not stretch it out a little bit?

These are apparently the eleventh or twelfth pair of tabi I have made for myself. Scary. Maybe the next pair will be impractically fancy. We still have some really nice silk brocade sitting around.

bookmark_borderArts&Crafts End Table Project

Quite often, things sit on my project “to do” list for a season or a year until I’m absolutely sure I still want to make that thing. This project entered my list just two months ago, but it was such a motivating idea that I jumped right in on it after completing the smallest karabitsu. I bought all the lumber and other materials at Home Depot, and used almost all the power tools in my shop, so this is nothing that took great talent, uncommon materials, or specialty tools. Probably the only “talent” that made this project possible is the ability to plan, and the ability to follow plans.

Anyway, here it is. It’s an end table (or side table, whatever) in the “Arts & Crafts” (or maybe “Craftsman”) style. Made from red oak, stained a slightly darker brown, and finished with amber shellac.

Arts and Crafts End Table

The exact style is important because I wanted this table to go right at the end of my desk, and match the look of the desk as closely as possible. I have a file cabinet at the other end of the desk, and it came from the same furniture collection, and I though that having two match each other and a third not match would be visually jarring. They don’t even sell this desk any more, so buying an end table from this collection was not going to happen. What the heck, I’m a woodworker, right? Let’s just make one.

Table before finishing, next to desk

The only problem with that is that I have never made real furniture like this before. Years ago, I made the stereo cabinet, but I kind of winged it. I had to make a bunch of decisions about how such a thing even should be made, because the desk itself is mostly fakery. For instance, the ends of the “through tenons” that you can see on the desk are glued on. They are not even end grain! The “tenon ends” just under the surface of the desk are taller than the horizontal members of which they are supposed to be the ends. My tenon ends are really the ends of the horizontal members. My mortises are really full through-mortises. The ends of the vertical “ribs” really are tenons that fit into blind mortises in the horizontal members. The “inset molding” beneath the surface is not just routed onto the underside of a thick piece of wood, it’s a four-piece frame of 3/8″ wood that attaches the frame to the underside of the surface.

When you do this much planning on a project, though. You start to think about the project as a bunch of parts. It becomes very important that the pieces match the specification, and that each match the quality requirements of the project. However, it’s still just a bunch of pieces.

The pieces of an end table

Then, as the project progresses, things start getting more coherent. The first swipe of the staining pad and a stick of lumber starts to look more like a table leg. The pieces start getting assembled, and suddenly there is a piece of actual furniture. It’s almost magical. Suddenly it’s furniture!

The unfinished table after dry-fit assembly.

Then you add two coats of shellac (three on the top surface) and write a blog post, and suddenly the project is complete!