
I am very excited to tell you about this next project because it has been “in progress” for a very long time. Once I made the tama storage trays, I started thinking about how to keep them all together in a tidy fashion. I could just put them into drawers, or I could make them into drawers. Sweetie and I have a couple of Japanese haribako sewing toolboxes, so I could base a small chest of drawers (kotansu) on the existing trays and that basic design.
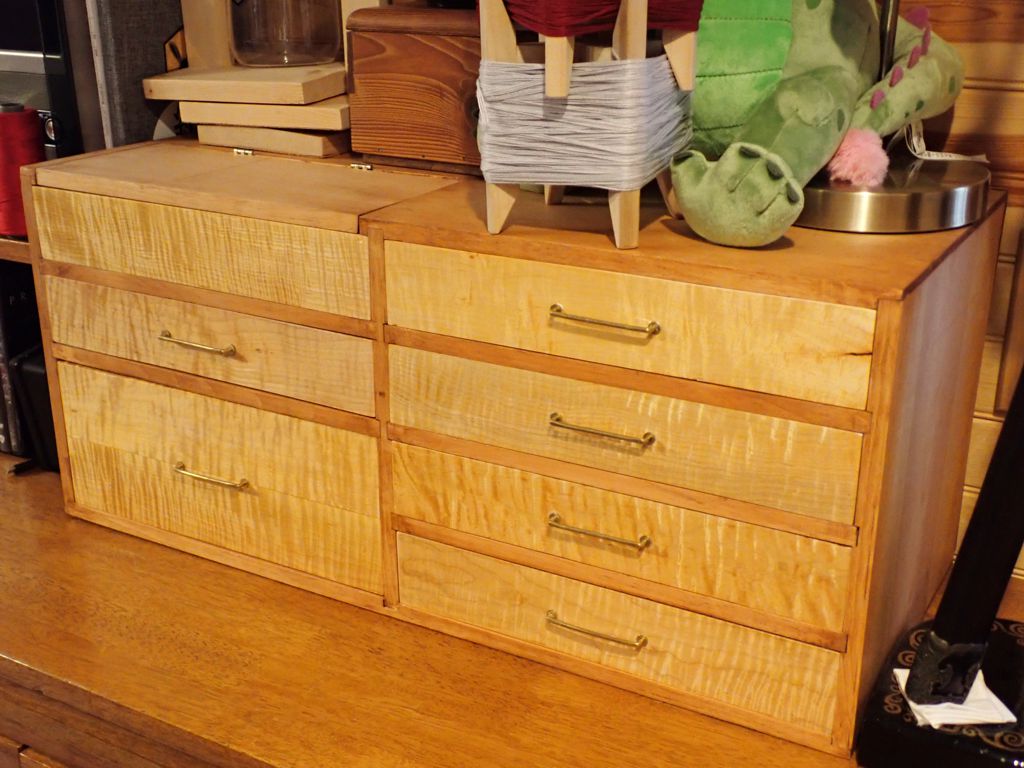
That went pretty well. I was able to make the carcass in a day or so. It is just pine common boards that I planed down to half-inch thickness to reduce bulk. Cutting the slots to hold the drawer supports in place was tricky, especially since I wanted to have the double-depth drawer in the lower left. There is also a not-drawer in the upper left which is actually top-loading bin with a hinged lid. I wound up cutting the lid for the bin with a traditional Japanese hand saw called an azebiki nokogiri which is designed to start cuts in the middle of a board. I bent the drawer pulls myself from brass rod. and installed them in the drawers in simple friction-fit holes. Since the carcass is deeper than the drawers, there are wood blocks behind each drawer to keep the drawer from sliding in too far.
The kotansu sat in an unfinished state for some time, until this summer when a friend of ours gave me some curly maple scants he had cut and planed for making knife handles. After cutting some of them to size to match the drawers, I finished them with shellac and glued them into place. Lining up the holes for the pulls was somewhat tricky, and fitting them closely to opening in the carcass took a lot of fine-tuning. Once the drawers were complete, I felt that the bare pine of the carcass was a bit too bright, so I gave it a light coat of wood stain just so it contrasted better with the maple.
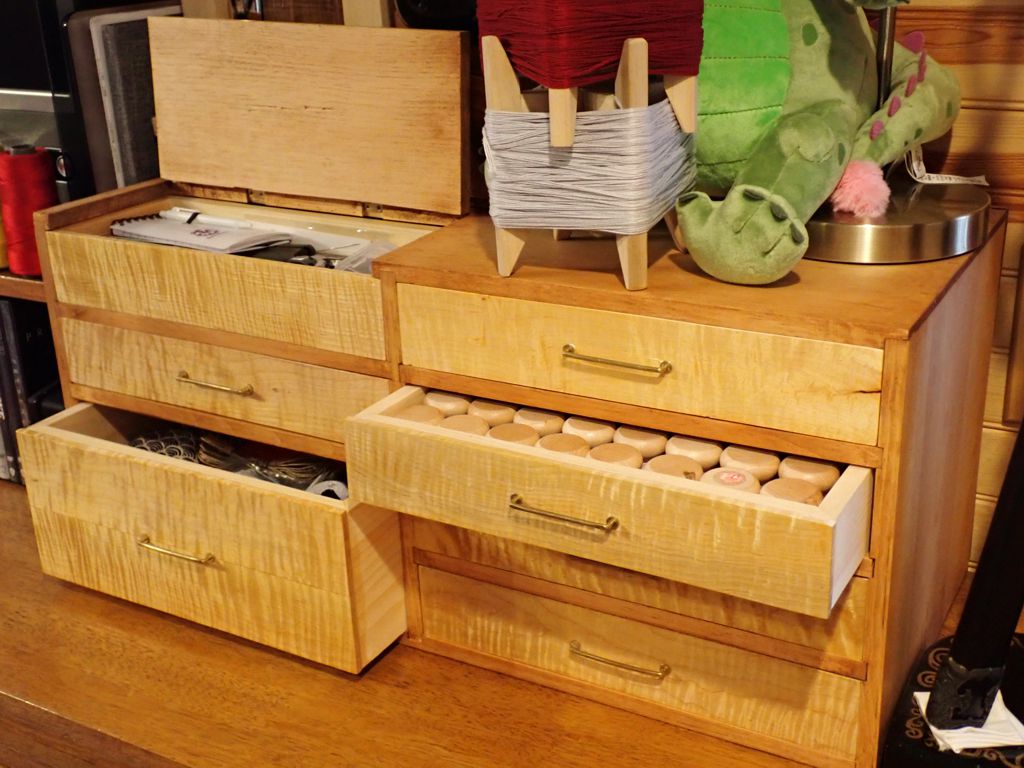
Now it looks like furniture! It is so satisfying to be able to finally call this project “done”. I made the original trays almost two years ago, and assembled the carcass about a year ago. Completing this third and final (?) phase is a big relief. I use the tools that I store in here all the time, which means I use this project all the time and having it look so much nicer is wonderful.


