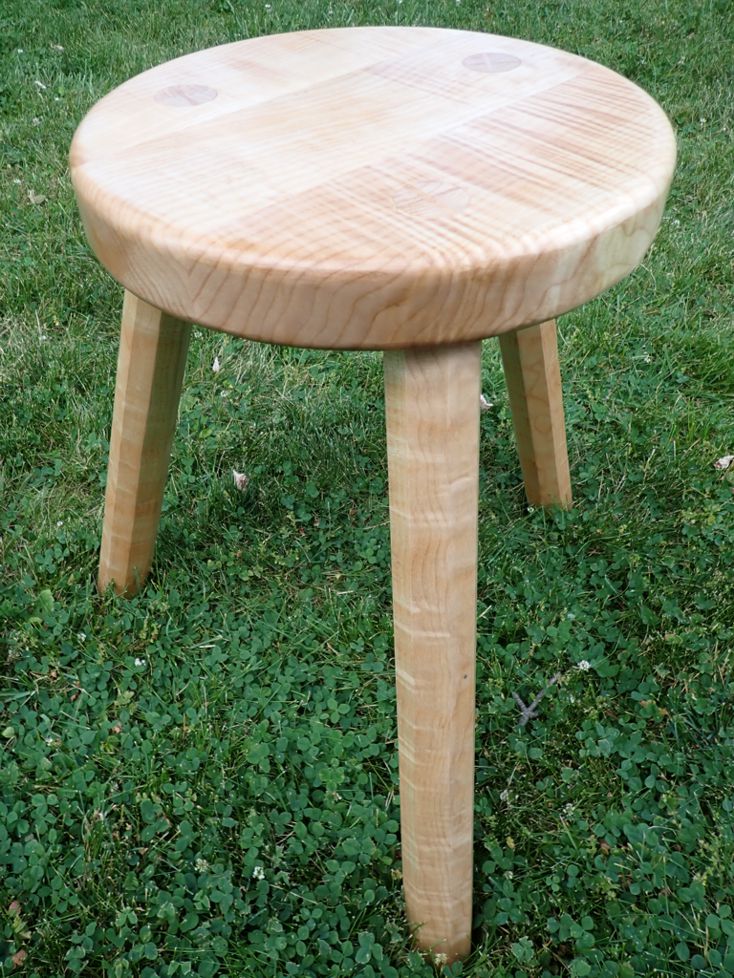
A friend of mine wanted a sturdy stool for shooting archery while seated. Another friend of mine gifted me with some surplus curly maple. I wanted to have fun making another stool, but I don’t really need more seating in the house. I love it when a plan comes together.
I glued up three pieces of the maple. then cut the round top on a band saw using my circle jig. Then, I cut the round through-mortises using a forstner bit.
From the remaining maple, I cut three legs using the band saw, then sawed off the corners to make octagonal legs. I roughed out the tenons on the band saw, then rounded them down by hand with a microplane rasp.
I rounded over the edges of the seat with a router, then all four pieces went through several stages of sanding. Once assembled, I wedged the legs in place. Then, I trimmed off the tops of the tenons using a ryoba hand saw. More sanding, then a few coats of General Finishes “Salad Bowl” finish which I wanted to try out.
My local Woodcraft location had some ambrosia maple cut-offs on sale for a reasonable price, so I picked up a ~5 foot long ~7″ by 1.5″ board and had to decide what to do with it. For the past few years, I’ve been thinking a lot about seating, so I decided to make a simple stool. Ishitani Furniture posted a video about making some 3-legged stools, and I thought about that, but I was not sure I had enough material for two stools. I decided to make one 4-legged stool.
I cut the board into two pieces. One 16″ piece I ripped into four leg pieces. I knocked the corners off those pieces with the intention of either using them as octagonal legs and later cutting tenons somehow, or turning them round. Then Chris Schwarz posted a video about turning tenoned chair legs on a lathe, and I decided to unpack the lathe and give it a try.
The legs came out about 1.375″ in diameter, with a 1″x2″ tenon turned on the end. Given that I am not super experienced at wood turning, and that this is the first time I have used the lathe in about 4 years, I think it went pretty well. They are not perfectly even, but the lathe makes everything perfectly round and smooth.
Next, I used a long, straight bit in the router to joint the edges of the board, then I used the same bit to cut a 1/2″ wide by 3/4″ deep slot into one edge of the board. I cut the board into two ~21″ long pieces, then cut a 1.5″ wide spline from some half-inch thick oak stock and used it to make a splined butt joint between the two pieces. I probably could have just glued the two edges together, but I wanted to try the splined joint, and the extra strength makes me feel better about sitting on the stool.
After letting the glue dry, I scraped off the squeeze-out and sanded it smooth. Then I pulled out a drilling guide and set it for ~10 degrees. I drew a 45 degree angle in from each corner, and clamped the drilling guide to the underside of the seat. I probably could have done this on the drill press, but I would have had to set up a jig to get a repeatable position on the seat. With the guide, I could align the guide to my pencil line, flush the corners of the guide with the edges of the board, clamp, and start drilling. I was using a 1″ Forstner bit to cut the mortises for the legs, so trying to do this by hand without a guide was not a good idea. Schwarz uses auger-tip spade bits for this job, but I hate spade bits with a passion, so that was out. Boring a 1″ hole at a 10 degree angle through a 1.5″ thick board was an athletic experience, but a little camellia oil in the hole kept the friction down so I was cutting and not burning my way through.
Then, I beveled the edges of the seat with a trim router. Normally, I soften the edges with a 1/8″ round-over, but I decided to go a little more angular and I’m really happy with the way it looks. The contrast between the angular seat and the round legs really works for me.
When I started to insert the leg tenons into the seat mortises, I realized it was going to be a very tight fit. I had thought that I would have to notch the tenons and wedge them into place, but as it was I needed to hammer them in and they are not coming out any time soon. Once the legs were in, I trimmed the tops of the tenons flush with the seat, and the bottoms of the legs parallel to the floor. Finally, a generous dosage of hemp oil finish.
That’s why you see it here in my drying cabinet/furnace room. I applied the oil before thoroughly reading the label and finding out that it takes a month to cure. All over but the waiting, I guess.
I just completed this shogi folding stool that uses a new design. Instead of the ends of the legs fitting into slots in the feet (like in the old design), the legs are joined to the feet using wedged through-tenons with shoulders that curve up around the feet. I also used a new method of sewing the fabric of the seat so that stress on the stitches is lateral instead of longitudinal.
Shogi 2020
The frame is made almost entirely from red oak planks and dowels. You can just about see the walnut wedges that secure the tenons in the mortises. There’s also a respectable amount of glue and filler, but that can be our secret. The hinge axles are brass-plated hinge pins that I custom cut to length and cross drilled to accept brass cotter pins.
I like this design for the shogi because it is more properly medieval, even though I used even more modern machine tools to make it than before. I used a table saw to cut the legs and dowels, and to cut the joinery I used a drill press, band saw, and mortising machine.