According to the takadai book that I have, the used takadai that I bought from a friend needs one more accessory to be complete. The raddle is used during set-up to keep the strands separated and in order before they are wound onto tama and placed on the koma. This takadai may not even have come with a raddle, since it is not 100% necessary for braiding. Having set up for two braids now, I can confirm it is optional. It does seem handy to have, though, so I decided to make one.
Takadai with Raddle
Thw raddle is the bar across the front of the takadai that is basically a row of pegs. I bought a piece of maple, and cut it down to the size I wanted. Then I drilled a line of 3/16″ holes along the length of the bar using the drill press, and rounded the top and side edges with a router.
Next, I cut a few 3/16″ diameter dowels into 1″ lengths. I rounded the ends of each peg with a Dremel grinding stone, and then glued one peg in each hole.
After attaching a couple of small blocks to the underside of the raddle so that it can be mounted in the slots of the outer arms, the raddle was ready to go.
Stuck in unmoving traffic on the Parkway East due to an incident on the Parkway West, I had this pleasant view of the 10th Street Bridge over Pittsburgh’s Monongahela River
All seven of these braids were made on the marudai using cotton crochet thread. I used four plies of thread per strand, four strands of green and four strands of black. The braids are a variety pack of 7 different braid shapes. All have ring and toggle closures and come with an extra jump ring so that they can be used as medallion cords. They are all approximately 30 inches long.
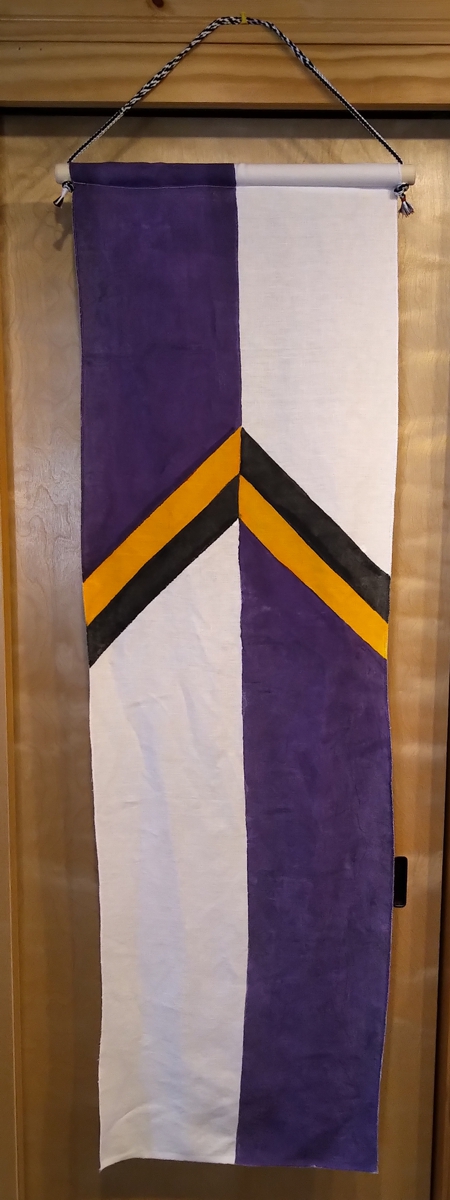
More catching up on projects I did months ago, here’s a banner I made for my friend Kieran MacRae. He changed his heraldry recently, and needed to rebuild his stock of tabards and banners from scratch. I decided to pitch in because I could.
Per pale and per chevron purpure and argent, a chevron counterchanged Or and sable
The fabric is some white linen I had in stock. The color is all “textile color” paint, which is more like a liquid pigment than the paint I normally use on linen. It soaks in and doesn’t change the hand of the fabric as much. It only works well on light fabric, though.
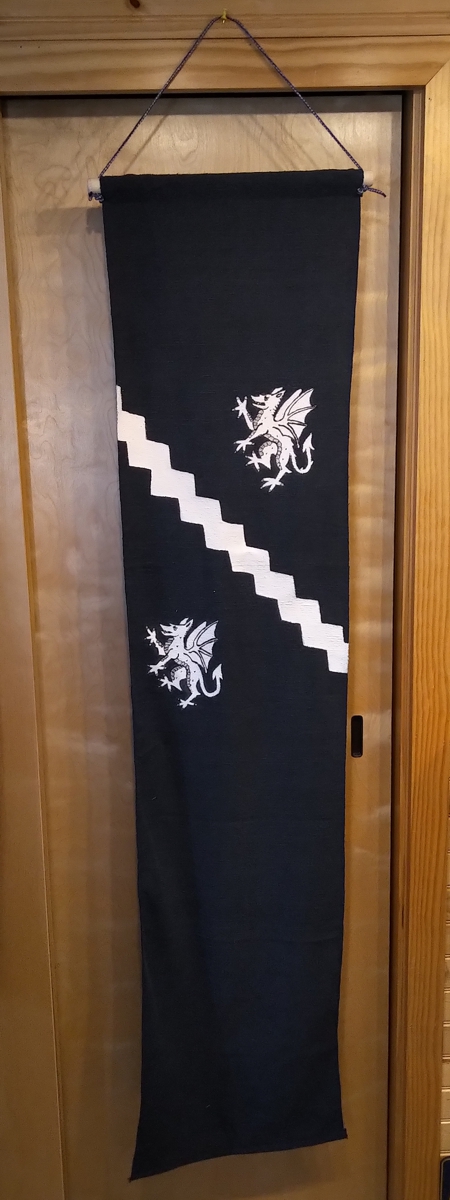
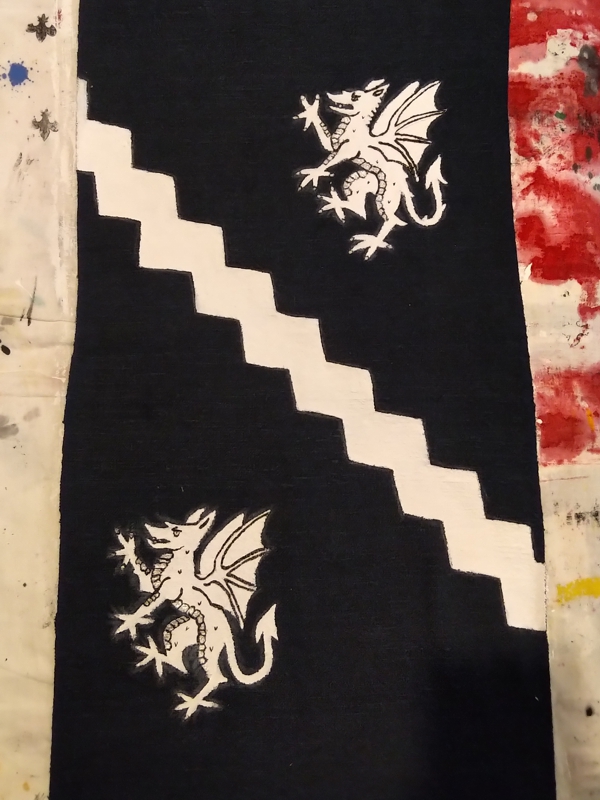
I actually completed this banner back in June and gave it to her at Pennsic in August, but I never posted about it. Maybe I didn’t want to spoil the surprise before, and then forgot to post after? Anyway, my friend Shirin al-Susiyya was being elevated to the Order of the Laurel back in May, so I decided to make a banner for her as a gift.
Azure, a bend dancetty between two dragons segreant argent
The fabric is some nice navy blue raw silk. The paints are acrylic fabric paints. It took me a little longer than I was hoping, so it wasn’t finished in time for her elevation, but she has it now. Some words on process:
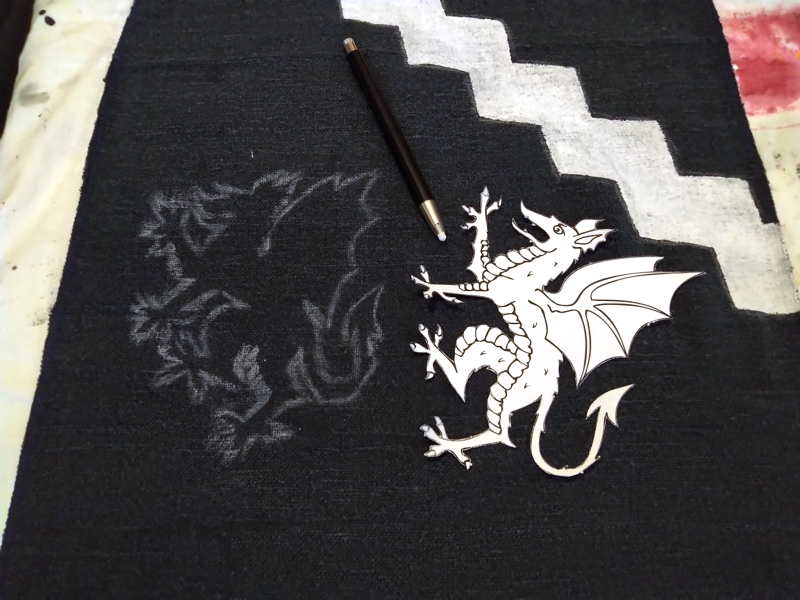
First, outline in chalk
A good way to get repeatable complex shapes (like heraldic animals) if you are bad at freehand art (like I am) is to print out a picture of the shape at the exact size you want it. Then, cut around the outside of the template, place it where you want the shape, and trace around the outside with chalk.
After painting the shape, pencil interior lines
Fill in the basic shape with a coat or two of paint, then cut the template apart so you can use the pieces to trace out the interior lines in pencil. You can probably freehand some of the smaller details, but sometimes I get pretty small with my template pieces.
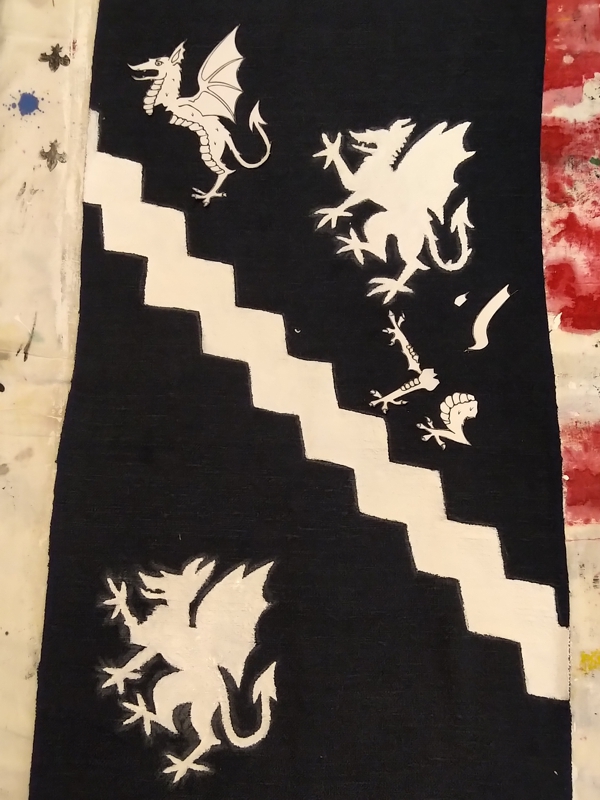
Finally, paint interior lines
Then, use a fine brush and some black paint to outline the shape and ink the interior lines.
I’ve used this method a bunch of times, and it really produces good results for me. Make sure to follow the manufacturer’s instructions for setting the paint!