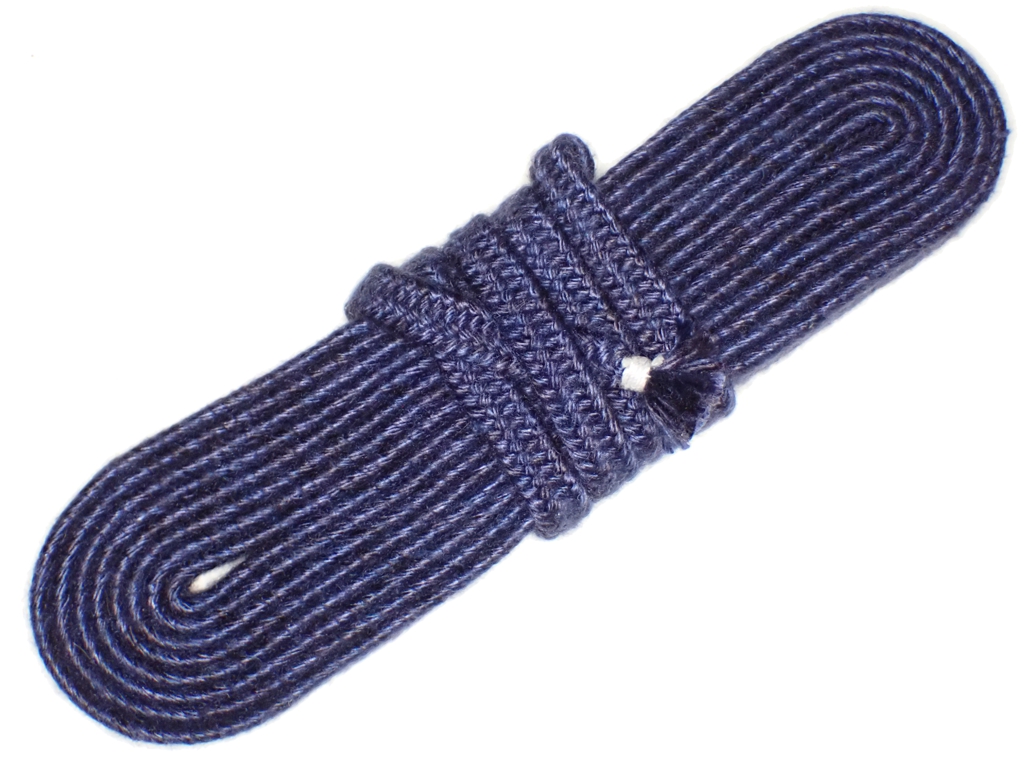
A dear friend of mine from way back who is a martial arts enthusiast had bought himself a Japanese sword, and he asked me if I would make a sageo cord for it. It was my pleasure to do this for him. I was able eventually to find some dark blue silk yarn in sufficient quantity to make this 9.5 foot long 7/16 inch wide 9-strand shigeuchi braid.
9-Shigeuchi Sageo in Silk
I started with about 13.5 feet of material, 10 ends of silk yarn per strand, and worked this braid on my sankakudai. Quite a bit of uptake, really. The amount of material gave me a nice heavy braid, and the silk makes it soft and flexible for its tightness. The use of yarn makes the braid a little fuzzier than I would prefer, but it’s mostly clean and only a little fuzzy. It took me about a year to get all my ducks in a row on this one, but like I said, eventually.
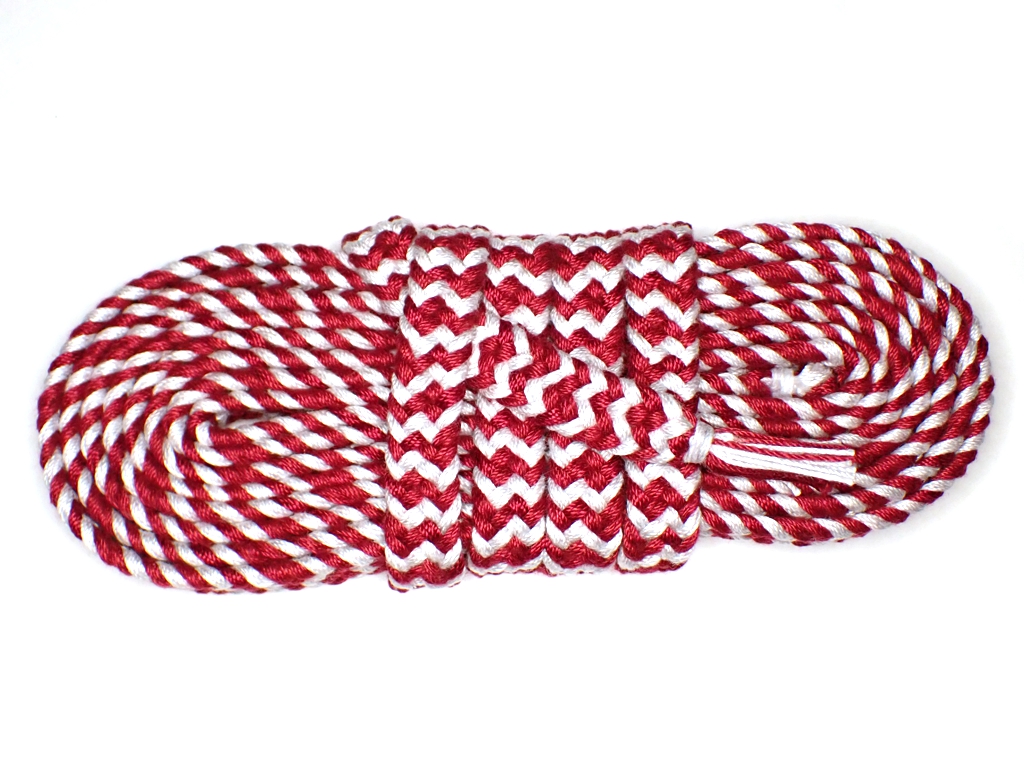
I still had a lot of burgundy and gray crochet cotton tripled up on my kowaku spools since last year. I was measuring out a lot of material for my class at the Braids 2025 conference in Cleveland, and it’s just been occupying the spools since then. I decided to use up as much of it as I could and make a nice, long shigeuchi braid on my sankakudai.
The final braid is about 9.5 feet long between the bindings and not quite a half inch wide. Each strand of this 9-strand braid has 6 ends of cotton crochet thread, and I started with 13 feet of material. So, about 27% uptake. The next sankakudai braid will be a sageo cord in dark blue silk, so these calculations are fairly important. I’m aiming for about 9 feet long.
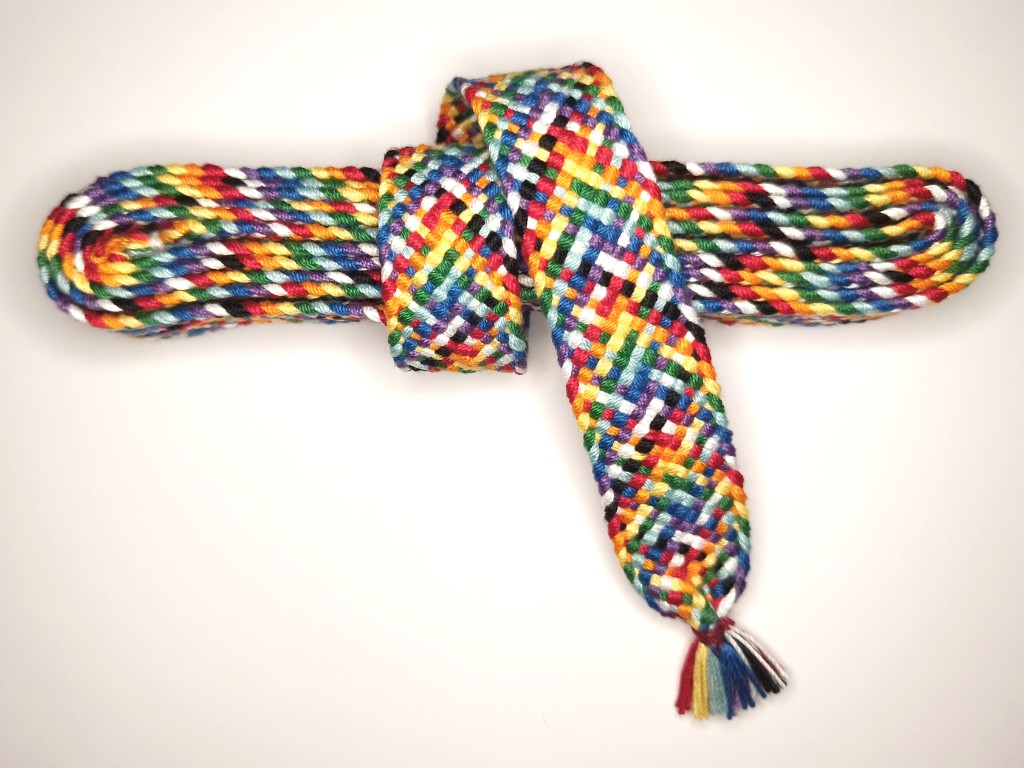
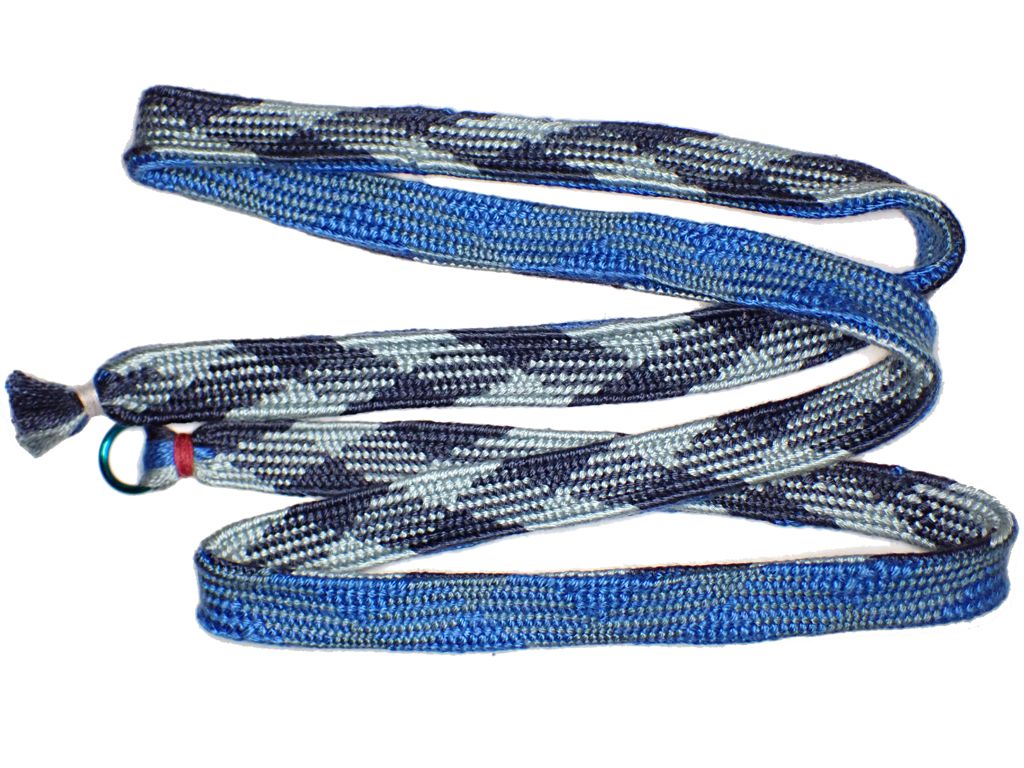
Started with 17 strands of cotton crochet cord in 9 different colors, 4 ends per strand about 116″. Had it on the takadai for about a month, working on it here and there, plain 1-1 interlacing. Finished it up this week while I have more free time. 76″ between the bindings, roughly 7/8″ wide.
17-strand Takadai Braid
I should do more braiding on the takadai. I did a bunch of braiding one morning, then the next day when I was getting dressed, I had a mysterious blister on my right index finger. I could not figure it out until I started braiding that day, and the beater sword bonked right up against the blister. Ow. Maybe I’ll get a kumishi callus.
I’ve already warped up the takadai for another braid.
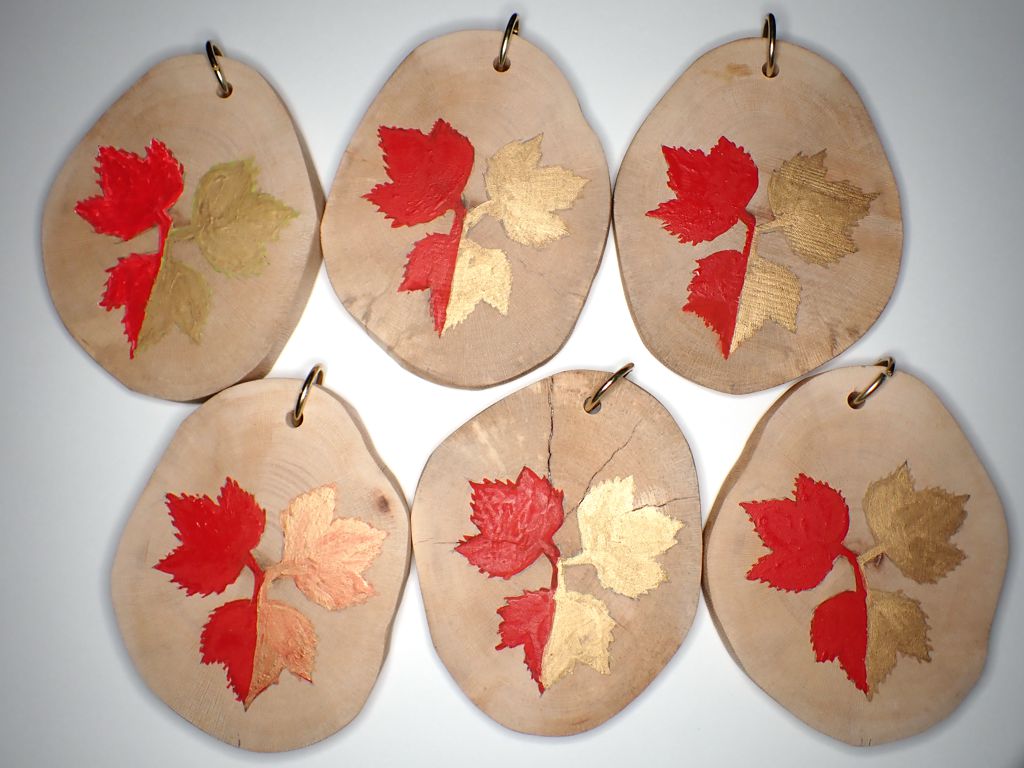
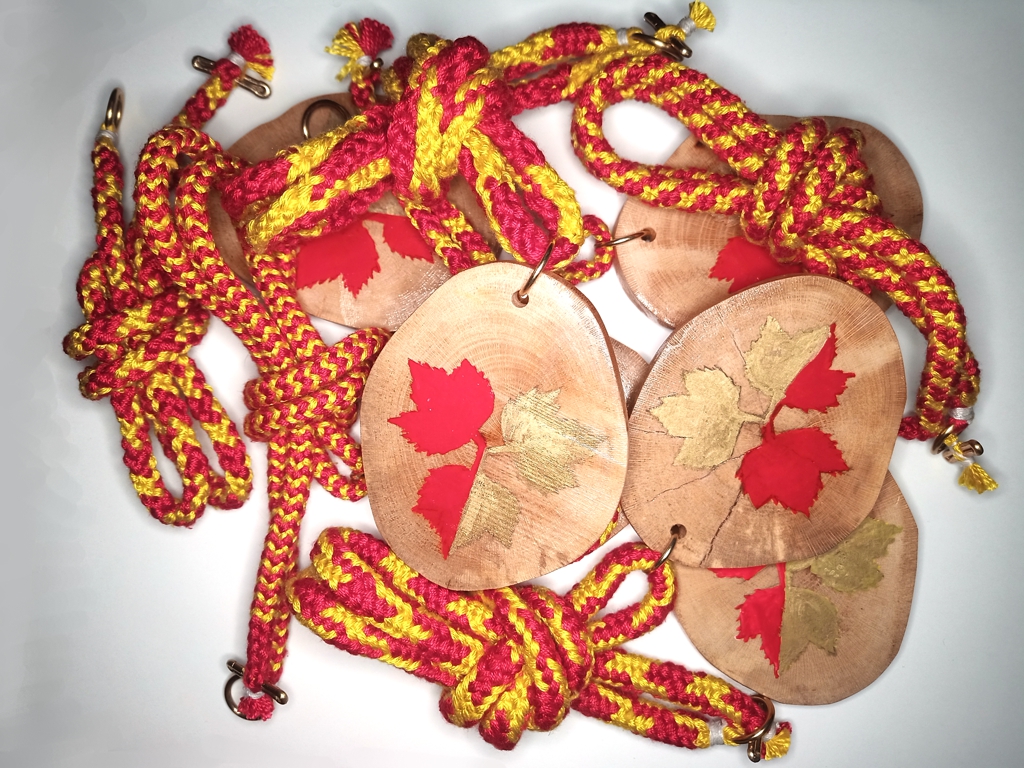
In our SCAKingdom, the basic level award for arts and research is called the Order of the Sycamore. Almost all of the trees that line our street (Shady Avenue) here in Pittsburgh are sycamores, and they shed branches all the time. When life gives you sycamore, make sycamade! Er, madellions. I mean, medallions!
I had a sycamore branch that had come down in the street in front of the house, and that I had cut up into 2-foot lengths. They’ve been drying in the garage for a couple of years, and it was time to do something with them. I cut a stack of “cookies” from one of the branches, and sanded both side of them smooth. Then, I dipped them in sanding sealer, let that dry, and sanded them even smoother. (somewhere in there I drilled them to accept a jump ring for hanging. Next, I painted the badge of the order on each cookie, and sealed the paint with a couple of coats of shellac. (Did you know that “gum arabic”, the binding agent in water paints, is not soluble in alcohol, the solvent in shellac?). Finally, I braided six cords on the marudai and hung each medallion from a cord.
The medallions themselves. Actually, this was from before the shellac
A kesa is a monk’s garment in the Japanese Buddhist tradition. It is the pieced-quilt kinda thing that hangs from the shoulder on a strap. Certain disciplines make this the only thing a monk wears, but most often it is seen as a kind of devotional garment or vestment. I don’t want to get too far into it, because you could spend many pages discussing the tradition and its changes over time. In modern times, there is a kind partial kesa called a hangesa which is essentially just the strap, worn as a collar. This is normally worn by lay members of an order to show their affiliation without implying that they are officially a monk.
In the SCA, we tend to wear medallions or belt favors to show our affiliations, but neither of these is really appropriate for Japanese persona. They may not be completely appropriate for SCA use, but I don’t think they are offensive at the level that, say, a full kesa would be.
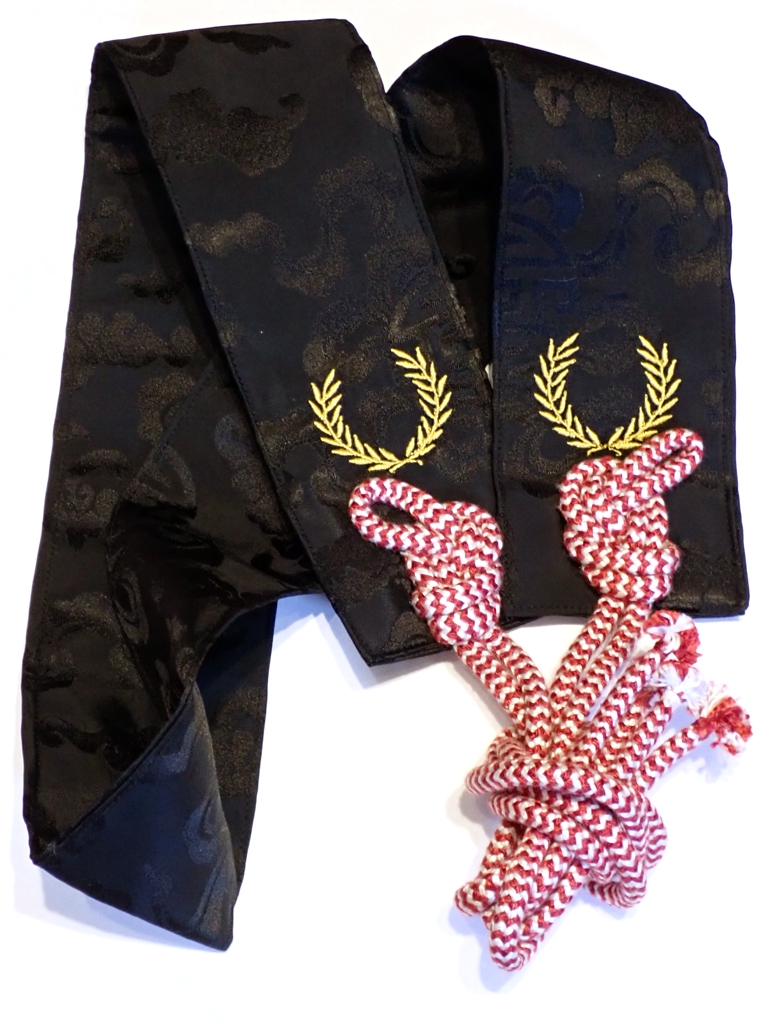
Anyway, here’s a hangesa I made for myself to show affiliation with the Order of the Laurel.
I used some left-over black silk brocade from my elevation garb, machine embroidered some Laurel wreaths near the ends, and attached some red and white (Kingdom colors) silk braids to act as himo. I actually made this at least a year ago, but I have gotten quite a bit behind on posting projects here.
Kichō are curtains that ancient and medieval Japanese nobles used inside rooms as movable partitions. The curtains hang from a stand, so they can be moved around as needed. You can think of them as the ancient version of “pipe and drape” dividers that you often see as trade show booths, but slightly more decorative, and for the home. They differ from other kinds of Japanese curtains in that the stand makes them freestanding and more portable. You will frequently see them in illustrated scrolls as backdrops, or screens to block a figure from view. They largely fell out of favor by the end of the Momoyama period (1573) and were replaced by the more solid shoji and more decorative byobu. Wikipedia actually has a whole List of partitions of traditional Japanese architecture, and you can learn more about differences there.
Anyway, I’ve had kichō on my to-do list for a while. I assembled a working stand a few years ago, and used it todisplaysomeprojects in the interim, but only got around to constructing the curtains themselves until recently. There is a little more to it than you might imagine. Here’s what I wound up with:
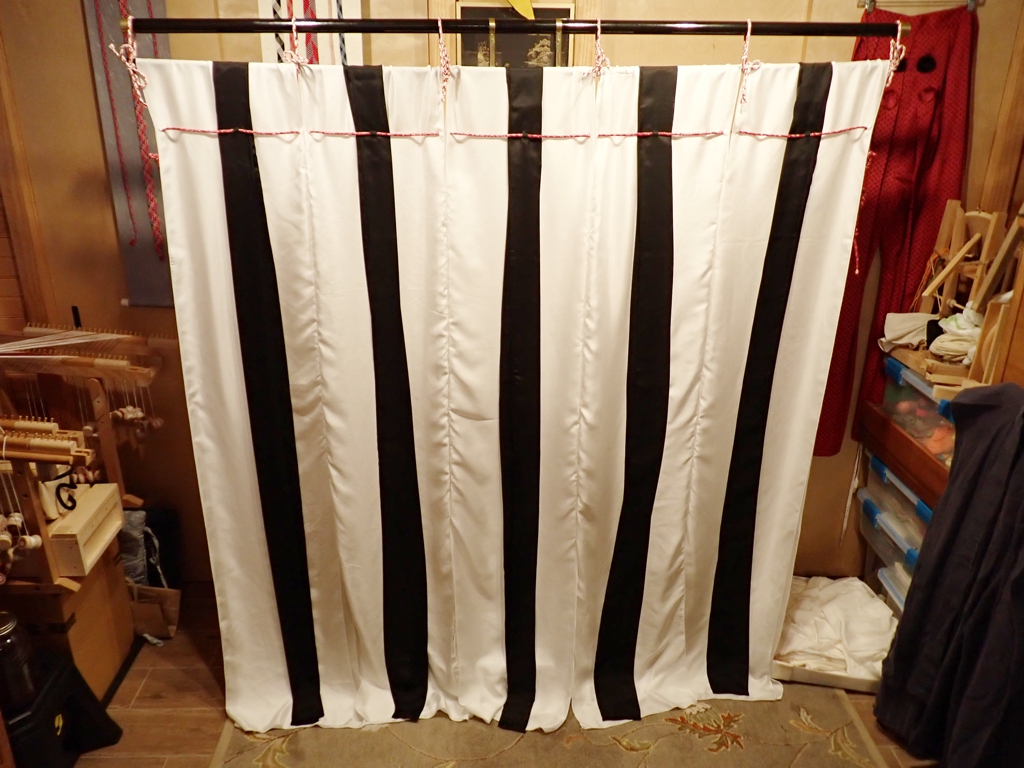
Kicho from the front
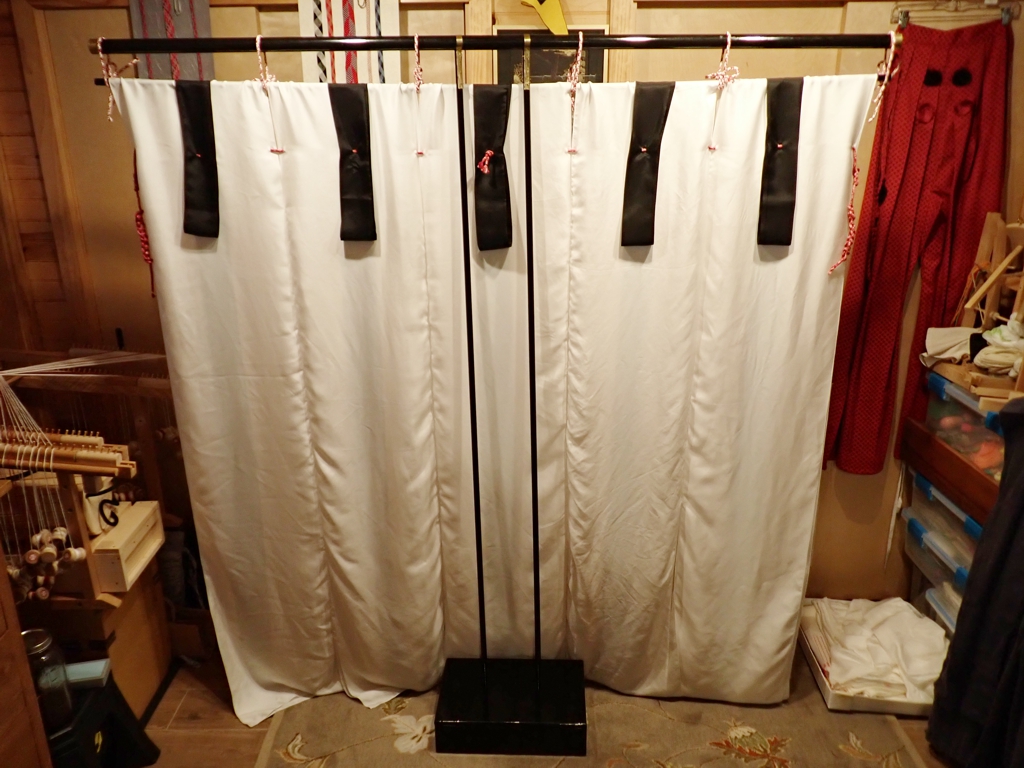
Kicho from the back
The white curtain bodies are twill weave silk from Dharma Trading, and the black “streamers” are black lightweight habotai also from Dharma. The curtains (or “katabira“) are double layer. Very often, the katabira would be decorated on the front panel, and plain on the back. I decided to skip the weeks that it would have taken me to decorate the fronts and skip directly to construction. Maybe I will get back to the decoration later. I made each panel by cutting 12-foot long 15-inch wide panels from the 45-inch wide fabric. I gave all of the panels a rolled-edge on the serger to simulate the selvedge that would be present on narrow-loom fabric.
The streamers (or “ribbons” according to Wikipedia) are half panels 15-feet long and 7.5-inches wide. I sewed the half-panels into tubes, turned the tubes inside out, and ironed them flat with the seams down one edge. I tucked in the loose ends and sewed them shut. The streamers needed to be longer because they are supposed to drape over the top and come a bit down the back. The slits for the lacing go all the way through both parts of the ribbons, and both layers of the katabira. I did not want to sew the dozens of buttonholes this would have required, so the slits are just cuts in the fabric that I made with my Clover Button Hole Cutter.
The lacing is basic edo yatsubraid that I made with some cotton yarn that I dyed as part of a group fiber activity back in the Autumn. I twisted up the hanks of yarn so that more dye got to some parts of the yarn than to others. The yarn itself is not super interesting, but I think it makes great pebbled-texture braids. Two lengths of braid lace the panels together, and shorter pieces of braid tie the rod that suspends the curtains (or “curtain rod”, if you will) to the crosspiece (or “te“) of the stand.
The stand itself is made of wood, as you might imagine. The base (or “tsuchii“) is a box with enough room inside to hold 20 to 30 pounds of iron weights. There are holes in the lid and a brace in the bottom to hold the two legs (or “ashi“) upright. The te rests on the tops of the ashi. The te and ashi are made of 6-foot long poplar dowels from the hardware store. The te is secured to the ashi using some custom made brass brackets that secure with brass cotter pins. The ends of the te are also embellished with a little brass. Everything wood is finished in black polyurethane to simulate lacquer.
I’m pretty happy with the way this all worked out. I may or may not make the curtains more interesting. I’d like to add more metalwork to the stand, and there are some problems with stability. A number of people have been talking about these lately, and I’m glad I went ahead and just made them. They should come in handy for defining smaller spaces in larger rooms, and they are much more portable than shoji.
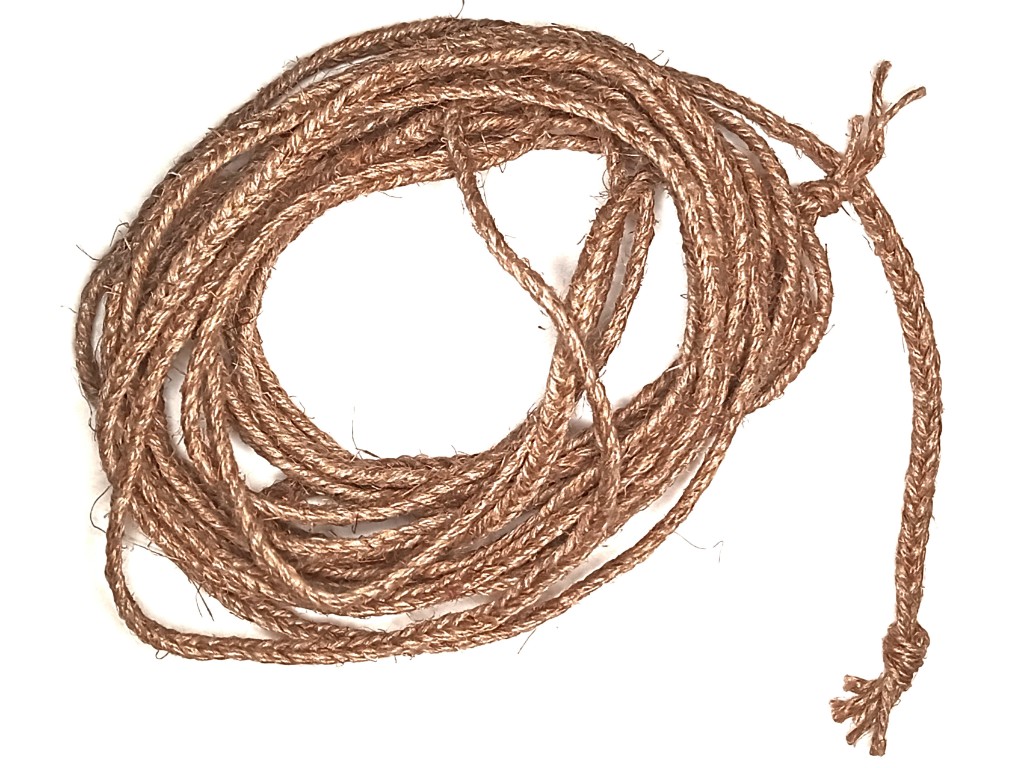
I was making a simple drawstring bag out of some surplus fabric, and found myself in need of a reliable drawstring. I had previously purchased some hemp beading cord with which to experiment, so this seemed like “the opportune moment”.
Sankakudai 5-set in Hemp
I measured out a “quadruple length” to start with. Typically, I clamp my warping posts to this chest of drawers I have in my studio. If I use the full width of the chest, a “single length” is about 52 inches. If I use all three pegs, a quadruple length (approx 17 feet) is pretty simple to measure out, but sometimes is not easy to transfer to the braiding stand. It went OK this time.
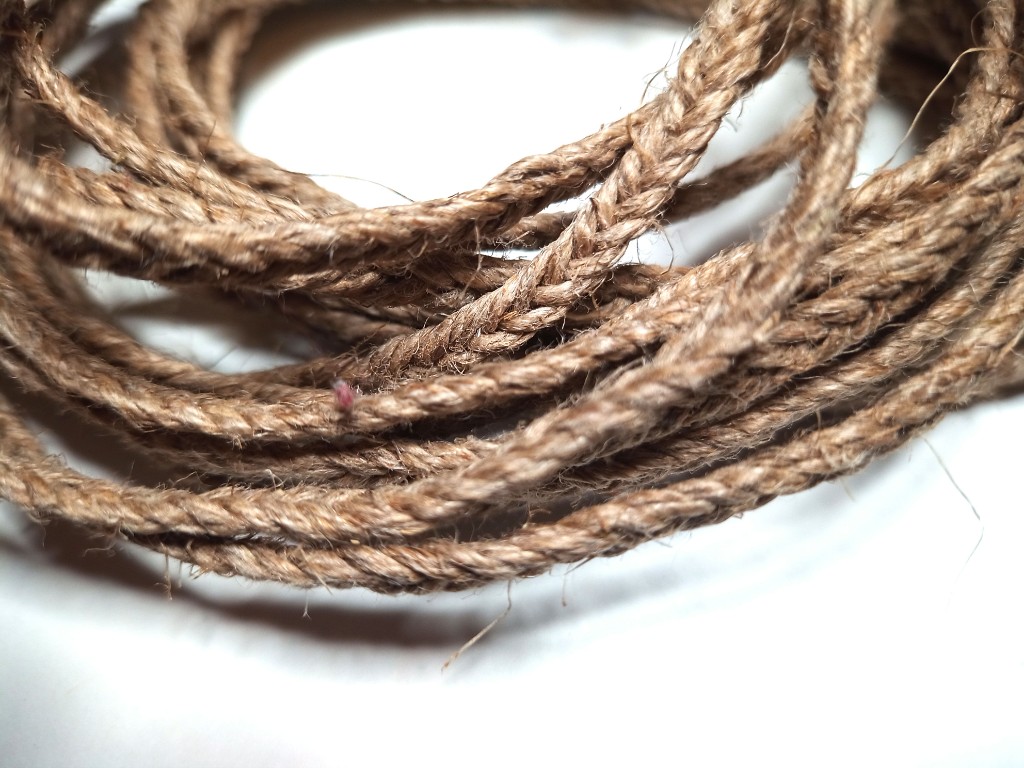
Close-up on the braid
Since the hemp cord is stiff, I used my heaviest tama to make a nice tight braid. With only one color in the braid, it looks just like a “3-set” braid, but it really does have 5 strands. With these simple sankakudai braids the structure all looks the same unless you have more colors worked in the braid.
It took me a while to work through all of this material, but I wound up with plenty of hemp cord for all my drawstring needs, about 12 feet.
This braid has been on the takadai for about six months. I have not been working on it constantly, of course, but still. It is a double-layer double-twill braid that used both the upper and lower arms, so it is essentially two braids stitched together at the edges. Even If I had been braiding at full speed, it still would have taken me twice as long as a single-layer braid, but I had so many other things to take care of and so many other braids to do.
The final braid is about a yard long and a little more than a half-inch wide. It’s all in silk lace-weight yarn and there are 52 (!) elements with 3 ends of yarn per element. There are plenty of errors in the braid. You can probably see a few in the photo. I’m still happy with it. It was a great learning experience.
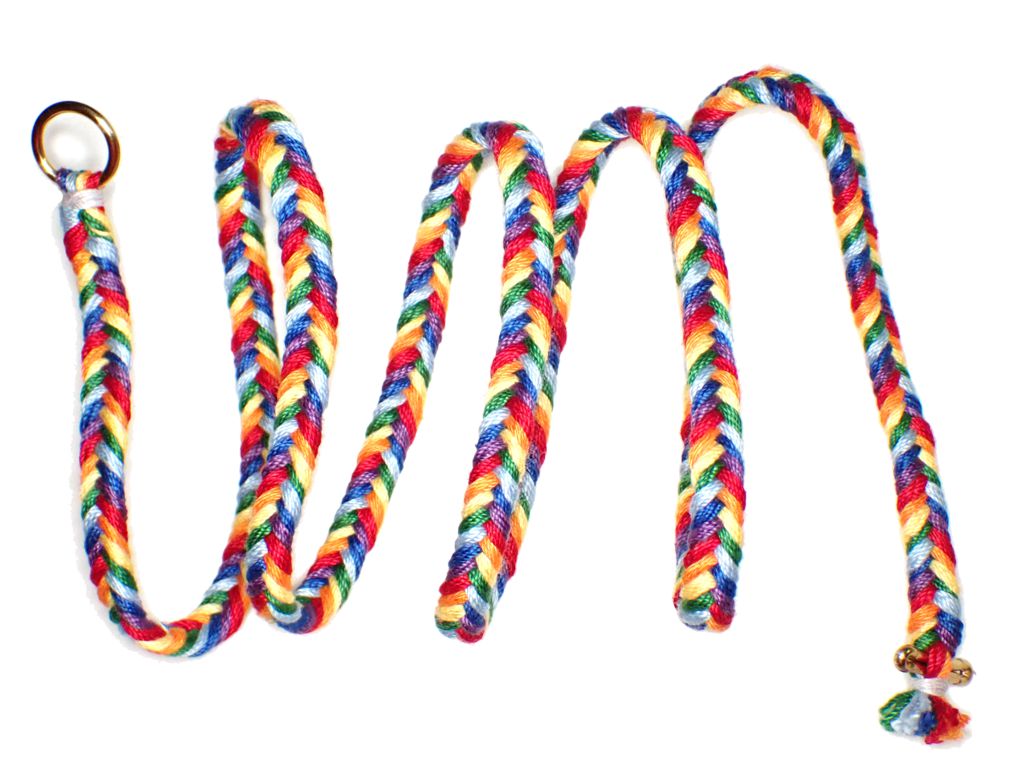
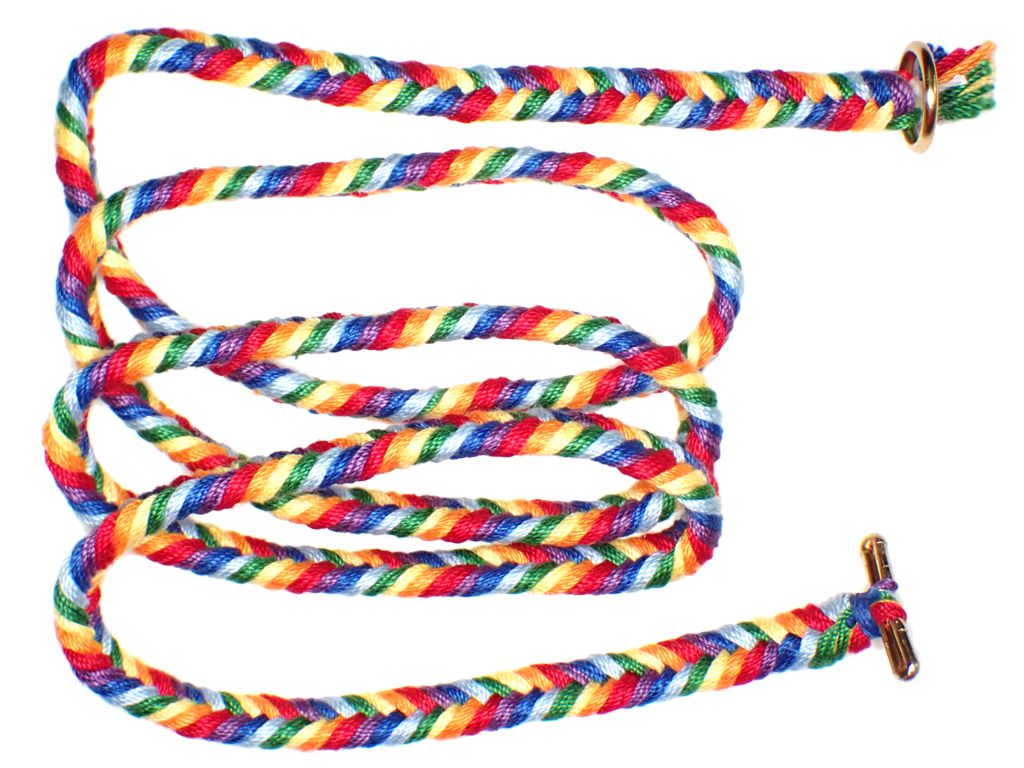
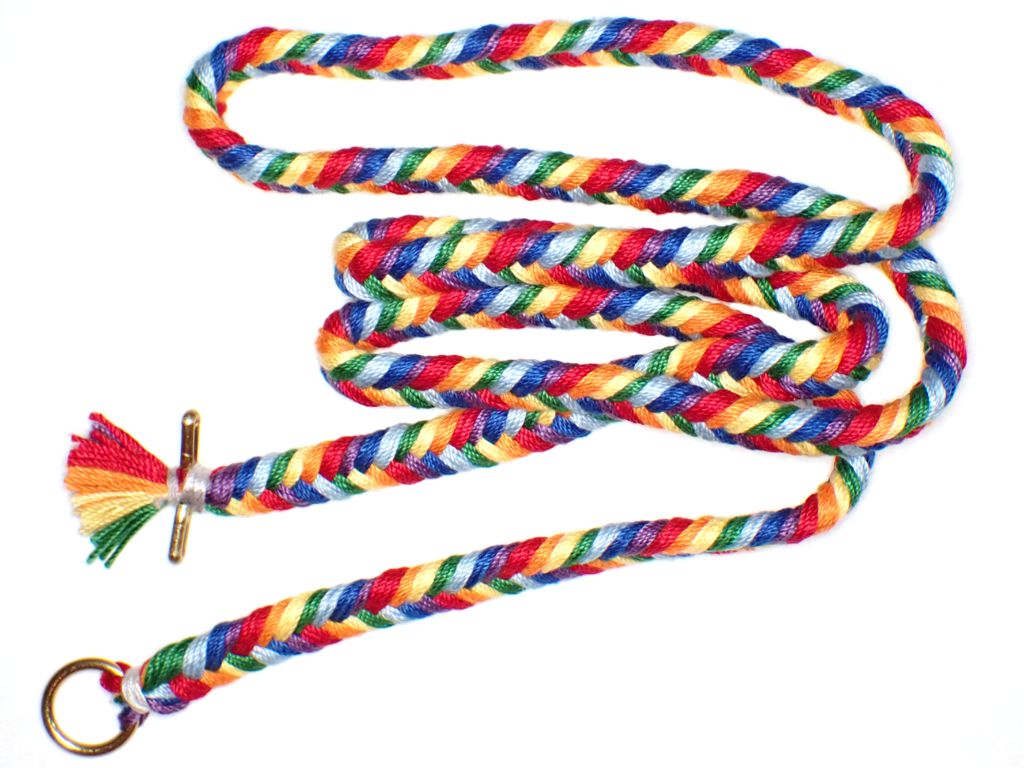
When the call went out before Pennsic for largesse items to be gifted to the East Kingdom, one of the suggestions was “rainbow” color schemes. I did all my braids in purple and gold to match East colors, but the rainbow idea stuck in the back of my mind. I later realized that as possibly the only person in North America to own a traditional Japanese sankaku-dai, I was maybe the only person in the SCA who could create braids in the classic 7-color “Roy G. Biv” (red, orange, yellow, green, blue, indigo, violet) rainbow pattern. Seven-strand braids are possible on other braiding stands, but they are fast and smooth on the sankakudai.
Sankaku-dai set up for 7-strand rainbow braid
To work a 7-set braid on the sankakudai, you lift the top strand on left, and move it over the other left-hand threads to become the bottom strand on the right. Then you do the same from right to left. When the point of braiding gets too close to the tip, use the roller to pull it back towards the torii. When the tama get too close to the mirror of the dai, extend them as you would on a marudai. You can add twist to the strands or not, as you please. I have found very little difference in the resulting braid, but that may be because of the material I am using.
Here are the 3 rainbow braids I made in one evening on my sankakudai:
Sankakudai 7-set rainbow braid, 8 ends of crochet cotton per strand (twist applied)
Sankakudai 7-set rainbow braid, 8 ends of crochet cotton per strand (no twist)
Sankakudai 7-set rainbow braid, 10 ends of crochet cotton per strand (no twist)
Adding more ends per strand make a braid that is only a little wider, but much softer. I am really glad I tried this braid, and happy to add it to my repertoire. These braids are cheerful and friendly, and I know that people will enjoy receiving them.
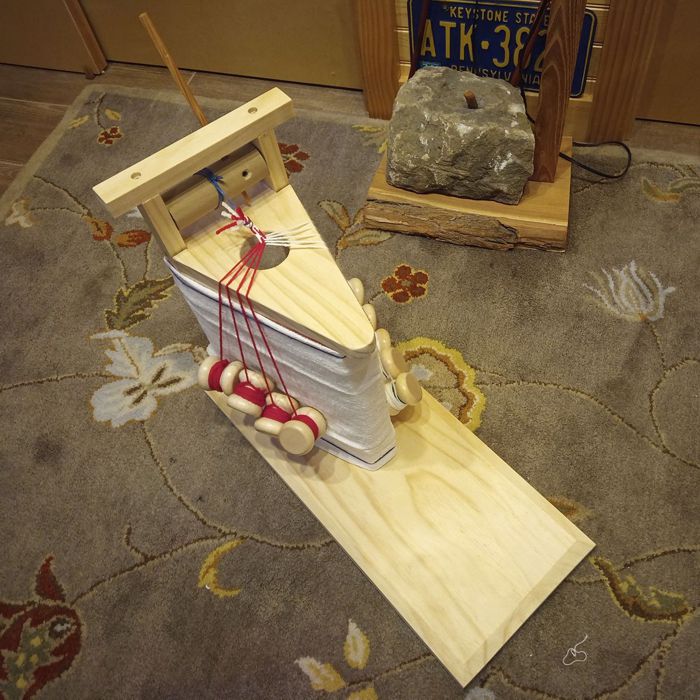
As you know, most braiding in Japan is performed on braiding stands, called “dai”. A braiding researcher in Japan clued me in to the fact that this braid was made traditionally on three different braiding stands, but only one of those pieces of equipment is used today. The two other dai are rarely seen even in Japan these days, and most braiders outside of Japan have never heard of them.
If I lived in Japan, I could probably make an appointment to travel to one of the few braiding studios that still possess them. In the USA, if I wanted to experiment with these stands I was going to have to DIY them based on some of the few photos that exist on the Internet.
The first is a stand that appears to be specialized just for the shigeuchi braid, since it is called the “shigeuchi-dai”. The unbraided strands hang down over the sides of the dai, and are wound around weighted bobbins called “tama”. The strands are passed between other strands and moved from side to side and to create the braid at the center. The completed braid passes over the “torii” at the top of the dai and is wound around the roller at the back. For scale, this stand is about 2 feet tall.
The second stand is used for several different braids, but usually with an odd number of strands. It is called a “sankaku-dai” because of its triangular (san=3, kaku=angle) top. The strands are (again) passed from side to side, but over the top instead of across a gap. This stand is smaller, at about 16 inches tall.
Both stands are made from pine to keep them affordable, and assembled with screws to keep assembly (and disassembly) simple. Learning to braid on these dai has been fun and informative. My researcher friend in Japan tells me they are most likely the only dai of their kind in North America!
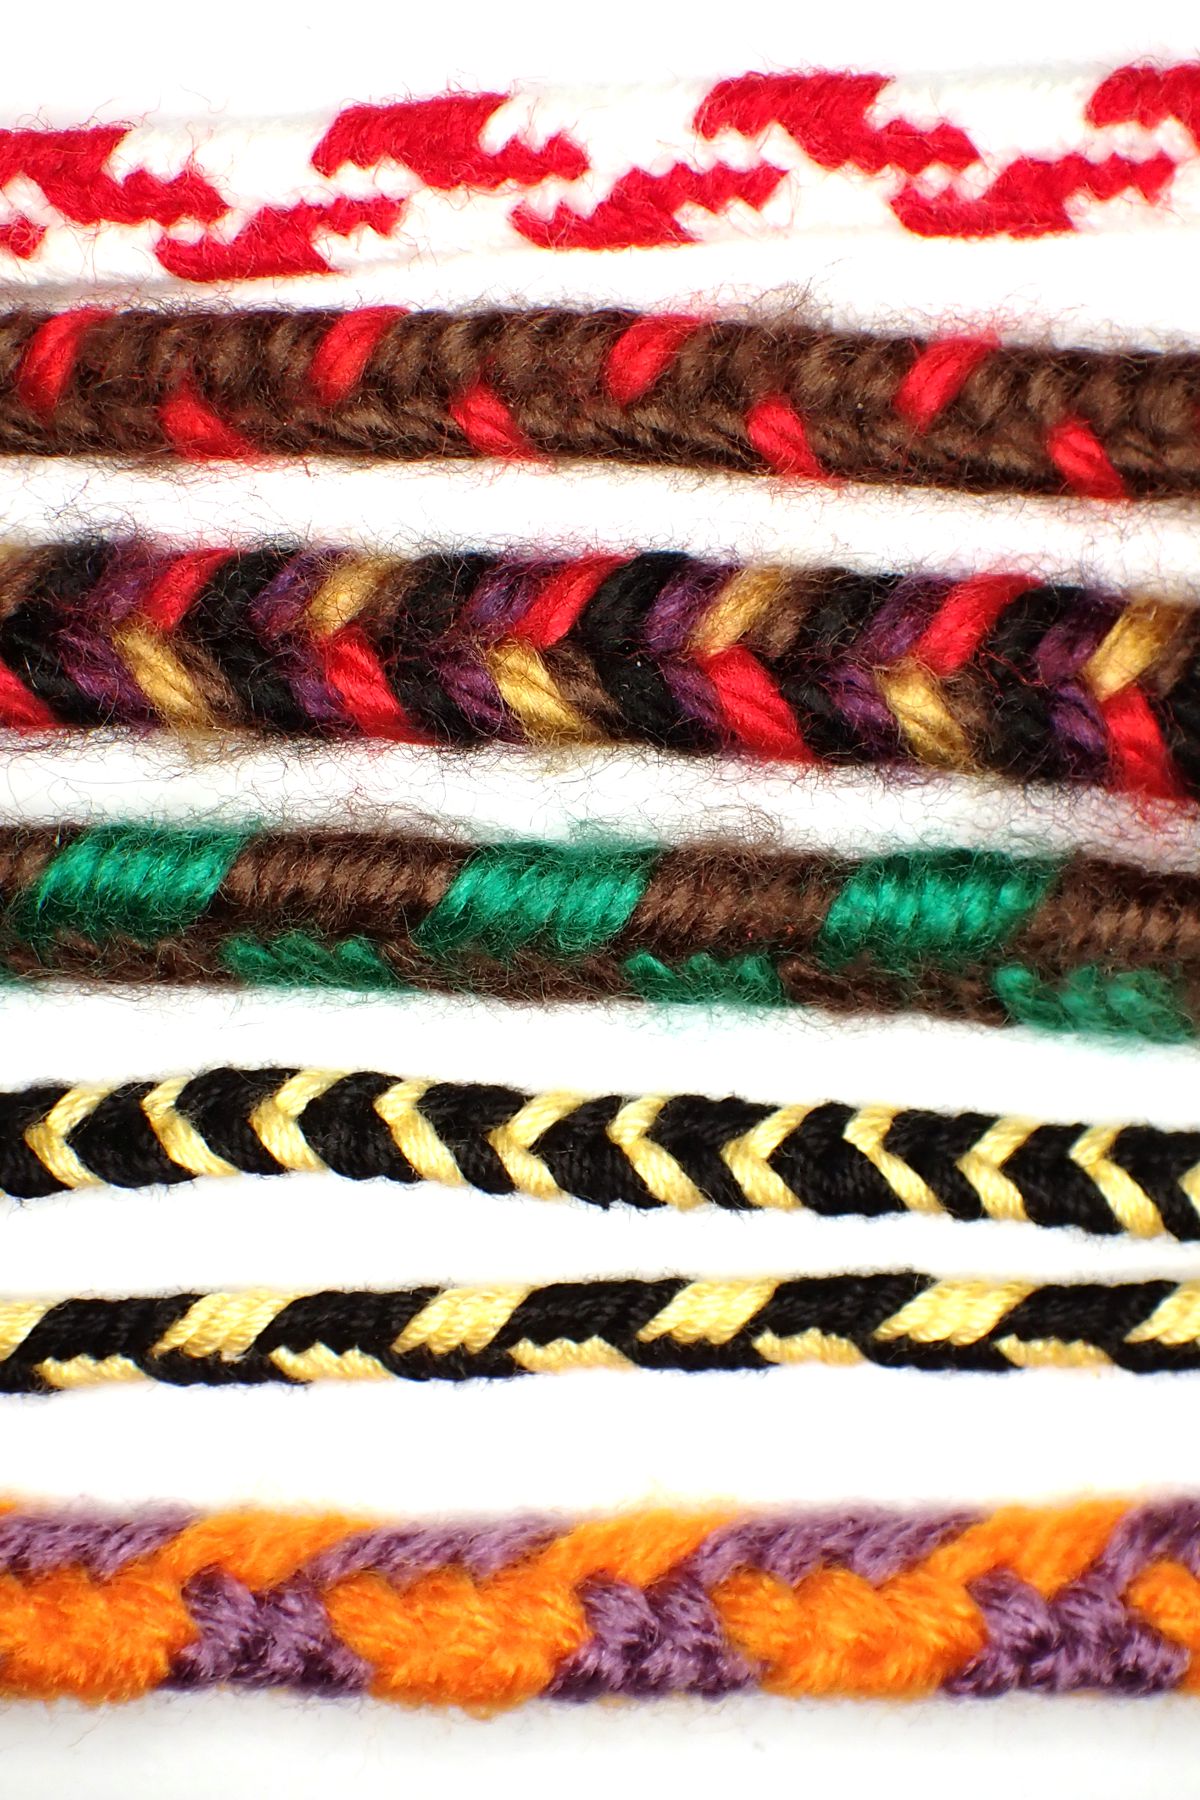
Here is a sampling of sankakudai braids in various materials and colors: