bookmark_borderCedar Bell Tower

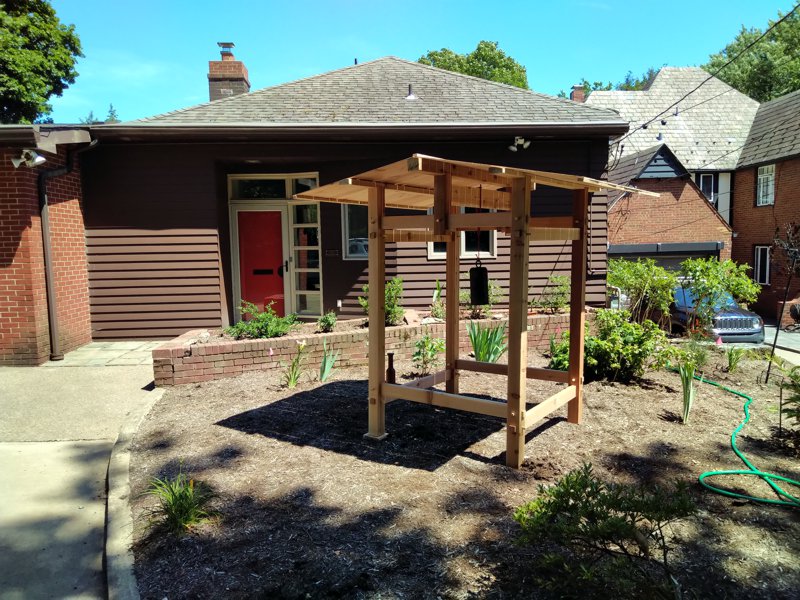
Sharon bought this bell maybe ten years ago up at Pennsic. It was in the basement at the old house, then it was in the garage here at the new house. I have planned, for all this time, to build an enclosure in which to hang this bell, to give Sharon’s garden a Japanese accent piece. Well here it is.

Bell Tower

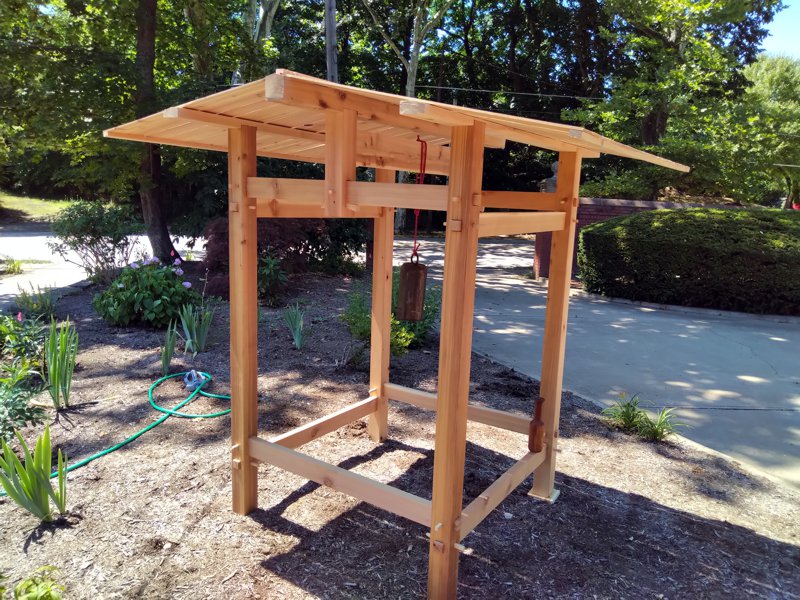
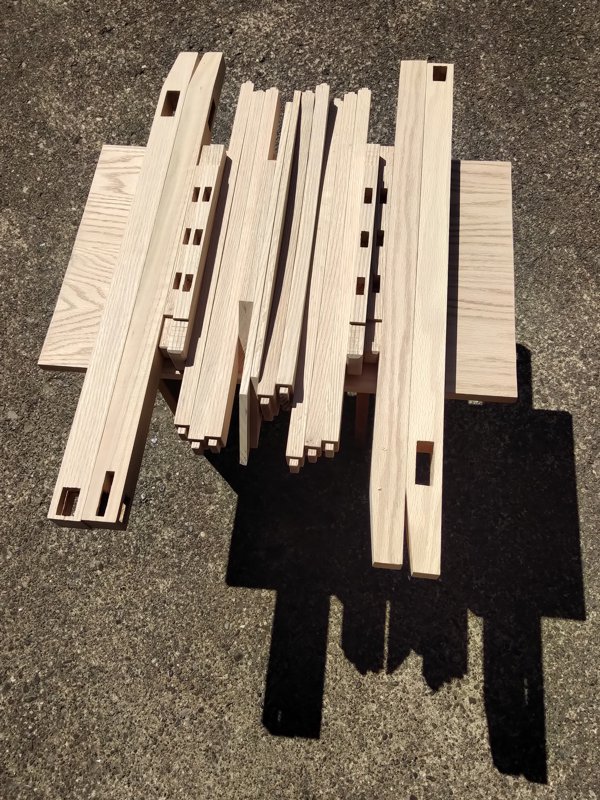
This belfry, or shourou, is made entirely of cedar, except for the pegs and wedges, which are cypress. The vertical posts are 4-by-4. Cutting all those through-mortises in 4×4 was no picnic, let me tell you. The cross-braces are all 2-by-4. Cutting the large tenons and small securing mortises on those was fun by comparison. The roof is all quarter-inch by 4, which I made by re-sawing 1×4 on the band saw, and then planing it down to remove the saw marks. In spite of the power tools, this was ten 1x4s, and quite a bit of work.

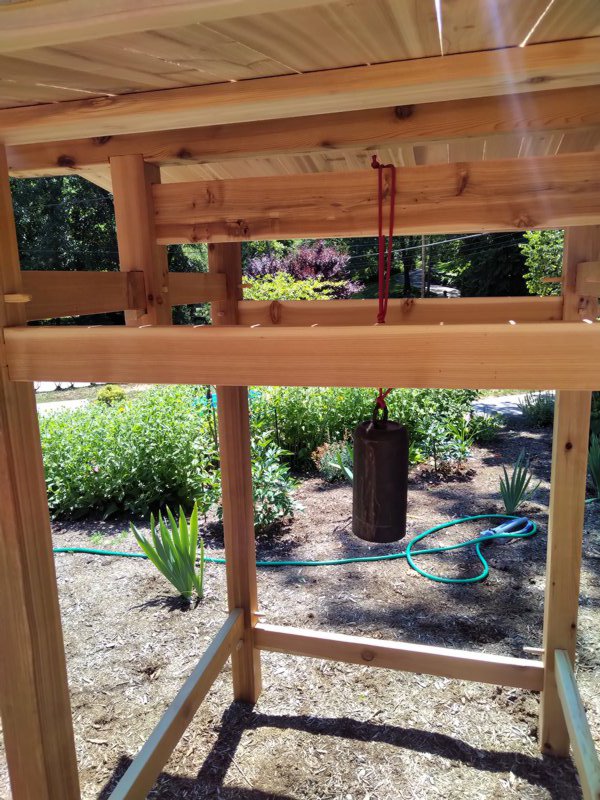
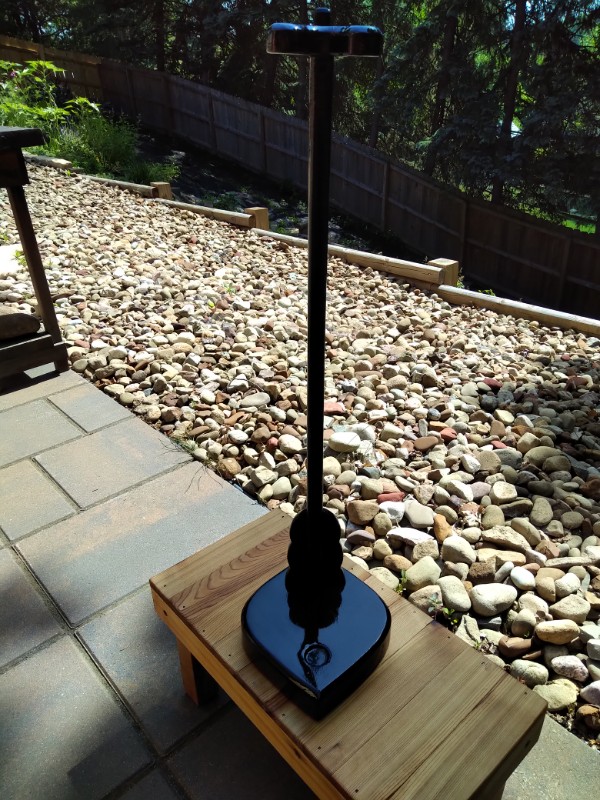
The corner posts are six feet tall, so this is a human-scale project. There’s a ranma panel between the center roof supports that’s made from a single panel of 1-by-6. The bell hangs from this.You can see a cherry-wood mallet sitting on one of the lower cross beams, for striking the bell. The bell is made from a an old SCUBA tank. It has a pleasing sound.

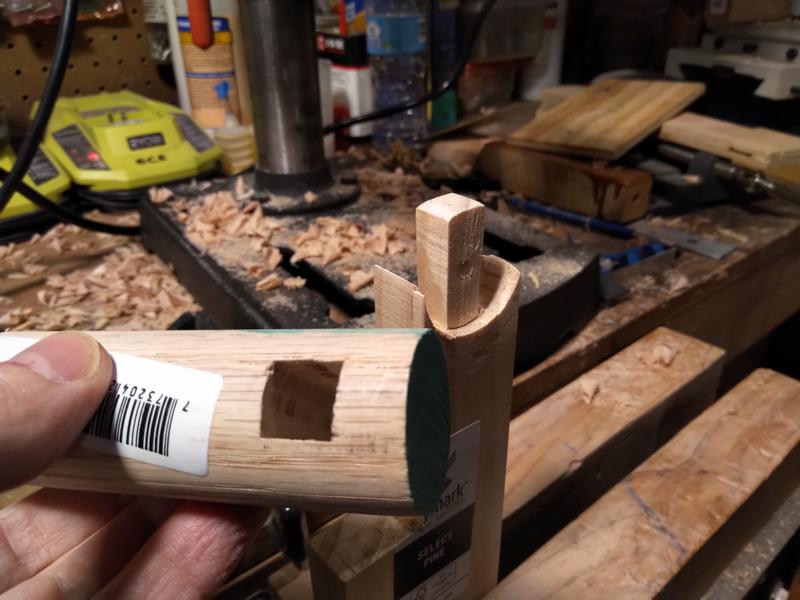
I put about six days of work into this, if you don’t count the trip up to Mars Lumber to buy the cedar. I could pretty much only cut one of the vertical posts per day. I drilled out the mortise holes, the chiselled the corners out of the holes to make square mortises. To keep them square with the faces, I marked both ends of the mortises and went in from both sides to the center. This means that cutting the four large mortises and four small mortises was like cutting 16 mortises on every post. So, one per day. I would only re-saw a few of the 1x4s and cut a few 2x4s each day, too. Spreading out the work made for more variety each day, which was necessary given that I was working out in the garage in 90 degree heat.

When enough pieces were ready, I started assembling the structure. The tenons on the end of the 2x4s were pretty tight in the mortises, and the pegs to secure them had to be hammered in to tighten the joints. once I had the frame assembled, I set it up in the garden and cut the three roof beams. These have notches cut in them to hold them on the posts, and there are hidden construction screws to secure them. I could have gotten fancier with the joinery here, but I did not.

Once all the roof pieces were sawn, planed, and cut to length, it was time to make a roof. The roof pieces are all nailed in place with brads from a nail gun. Strips under the edges of the roof keep the ends of the pieces together, and a cap rail on top secures the top ends of the roof pieces. It’s not waterproof, but it does not need to be.

I’m really happy with the way this project came out. It’s big, but not too big, and very solid. The thin roof provides shade, but doesn’t make the structure too top-heavy. The bell looks great hanging there, and sounds terrific when you strike it. Lamost all of the project went according to plan, so if I need a similar structure someplace else, I know that I can make all the pieces and then construct it on-site with minimal fuss. My ultimate goal is to build a small Japanese-style house on a trailer for camping at Pennsic. This is a good step in that direction.

Two of the 16 pegged corner joints
The center support is pegged to secure it, then wedged to keep it tight and square.
The ranma panel is just inserted into mortises in the center supports.
The view from the driveway

bookmark_borderTachi Kake

The tachi is a type of Japanese sword that is similar to a katana, but it is worn differently, has different fittings, and is usually used as a more of a formal/ceremonial sword compared to a warrior’s katana. I bought a small tachi as part of my mission to recreate a full bunkan sokutai.

When not in being worn or in storage, the tachi would have been displayed nearby the bearer in a vertical stand called a tachi kake. These are readily available to buy, both as new items and antiques, but of course I wanted to make one myself. I was able to settle on a design, and I still have an excess of surplus wood in the garage.

Tachi Kake Before Finishing

Here’s what it looks like after cutting and shaping, but before finishing. It’s a little easier to see the shapes of the pieces. This is all pine lumber. The upright and the bracket at the top are just 3/4″ thick cut from 1by. The brace at the bottom of the upright is 1/2″ thick pine I had around; most of the examples I see online are only 1/4″ thick. The base is cut from some surplus 2by, to keep it bottom-heavy when unoccupied. The brace is fitted in a slot that I cut all the way through the upright. Tenons at either end of the upright fit into through-mortises for ease of assembly and disassembly.

All told, this item is about 26 inches tall when fully assembled. The tapering curve on the upright piece is one of my favorite shapes ever. I did almost all of the cutting on the band saw, though, because it made things like this curve so much faster to make. I also used a router to bevel and round over all the edges on all the pieces to give it a softer look.

Tachi Kake After Finishing

Here it is after about a half-dozen coats of black-tinted polyurethane. This stuff makes a good affordable lacquer substitute, and it dries in hours instead of weeks. I sanded the finish between every couple coats, but it still needs some final polishing. I also want to add some embellishment like I did for the kyousoku arm rest, but that might not happen until autumn.

For a better sense of scale, here’s another picture of the tachi kake before finishing, with my ko-tachi in the stand like it is supposed to be:

Unfinished Tachi Kake with sheathed Tachi

bookmark_borderArts&Crafts End Table Project

Quite often, things sit on my project “to do” list for a season or a year until I’m absolutely sure I still want to make that thing. This project entered my list just two months ago, but it was such a motivating idea that I jumped right in on it after completing the smallest karabitsu. I bought all the lumber and other materials at Home Depot, and used almost all the power tools in my shop, so this is nothing that took great talent, uncommon materials, or specialty tools. Probably the only “talent” that made this project possible is the ability to plan, and the ability to follow plans.

Anyway, here it is. It’s an end table (or side table, whatever) in the “Arts & Crafts” (or maybe “Craftsman”) style. Made from red oak, stained a slightly darker brown, and finished with amber shellac.

Arts and Crafts End Table

The exact style is important because I wanted this table to go right at the end of my desk, and match the look of the desk as closely as possible. I have a file cabinet at the other end of the desk, and it came from the same furniture collection, and I though that having two match each other and a third not match would be visually jarring. They don’t even sell this desk any more, so buying an end table from this collection was not going to happen. What the heck, I’m a woodworker, right? Let’s just make one.

Table before finishing, next to desk

The only problem with that is that I have never made real furniture like this before. Years ago, I made the stereo cabinet, but I kind of winged it. I had to make a bunch of decisions about how such a thing even should be made, because the desk itself is mostly fakery. For instance, the ends of the “through tenons” that you can see on the desk are glued on. They are not even end grain! The “tenon ends” just under the surface of the desk are taller than the horizontal members of which they are supposed to be the ends. My tenon ends are really the ends of the horizontal members. My mortises are really full through-mortises. The ends of the vertical “ribs” really are tenons that fit into blind mortises in the horizontal members. The “inset molding” beneath the surface is not just routed onto the underside of a thick piece of wood, it’s a four-piece frame of 3/8″ wood that attaches the frame to the underside of the surface.

When you do this much planning on a project, though. You start to think about the project as a bunch of parts. It becomes very important that the pieces match the specification, and that each match the quality requirements of the project. However, it’s still just a bunch of pieces.

The pieces of an end table

Then, as the project progresses, things start getting more coherent. The first swipe of the staining pad and a stick of lumber starts to look more like a table leg. The pieces start getting assembled, and suddenly there is a piece of actual furniture. It’s almost magical. Suddenly it’s furniture!

The unfinished table after dry-fit assembly.

Then you add two coats of shellac (three on the top surface) and write a blog post, and suddenly the project is complete!

bookmark_borderTest Cutting

I spent a bunch of time today buying a new band saw blade and setting up machines so I could make some test cuts on scrap wood to prototype some interesting joinery for a new folding stool design.

mortise and tenon
New Shogi Joinery

How do you join a 1.25″ wide board perpendicular to a 1.25″ dowel? It takes a forstner bit, a band saw, and a mortising machine. I’m pretty excited to see how this works out on an actual project.

bookmark_borderFrom Plan to Progress

I got started on this new bench project yesterday, and managed to make some real progress. Here is one complete set of legs for the breakdown bench.

Breakdown bench leg assembly
One leg assembly consisting of two legs, one stretcher, and one support beam.

I have the other leg assembly mostly done, but one of my support beams broke apart, and I had to start over on it.

Even with the band saw for cutting tenons and the mortising machine, this kind of joinery is time-consuming work. Cutting the mortises in the benchtop pieces might be done some other way.