A friend of ours showed us some swatches of great fabric from a local fabric store, and one of them had this terrific green leaves and blue dragons pattern. Another friend of ours has a green oak leaf in their arms, so I knew they needed something made out of this fabric. It’s not nice to drop a pile of fabric on somebody who already does not have enough time to sew the things they want. Consequently, I made a kosode for them.
Detail of the Fabric
Completed Kosode
It’s maybe a little busy, but I’m pretty happy with it. It’s not very tall, so it will have to be worn with hakama, but I had enough fabric to do the wide fold-over collar, which is a little fancy. Adding to the fancy are 16-inch wide panels. I also added a little length to the sleeves with faced cuffs.
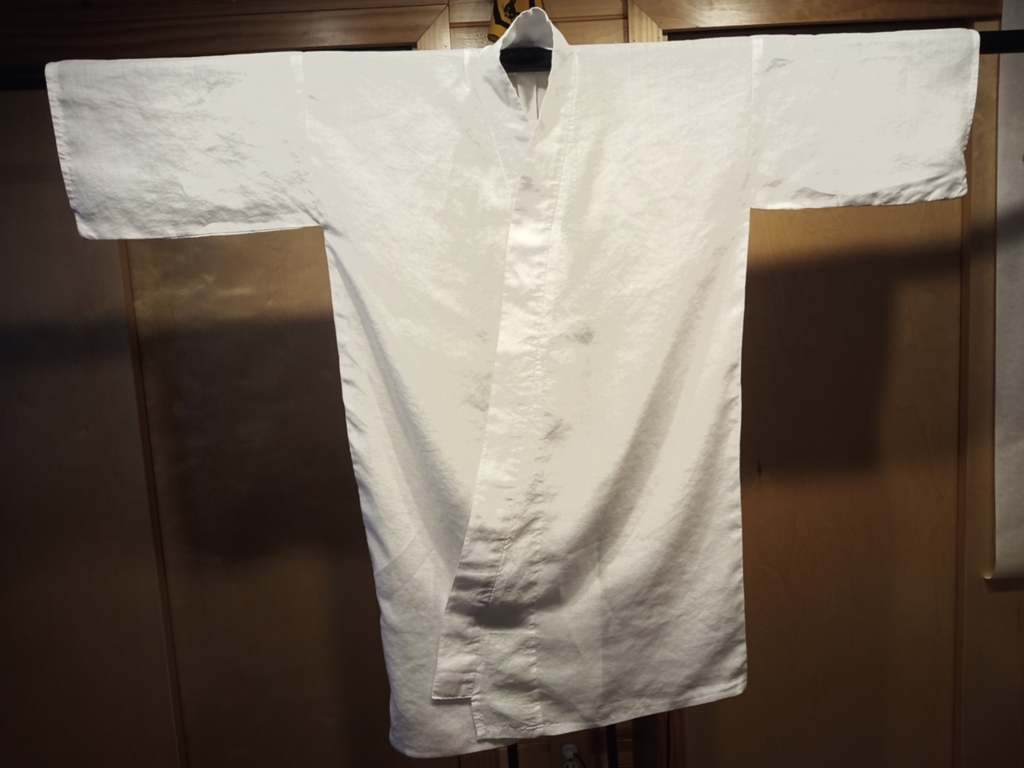
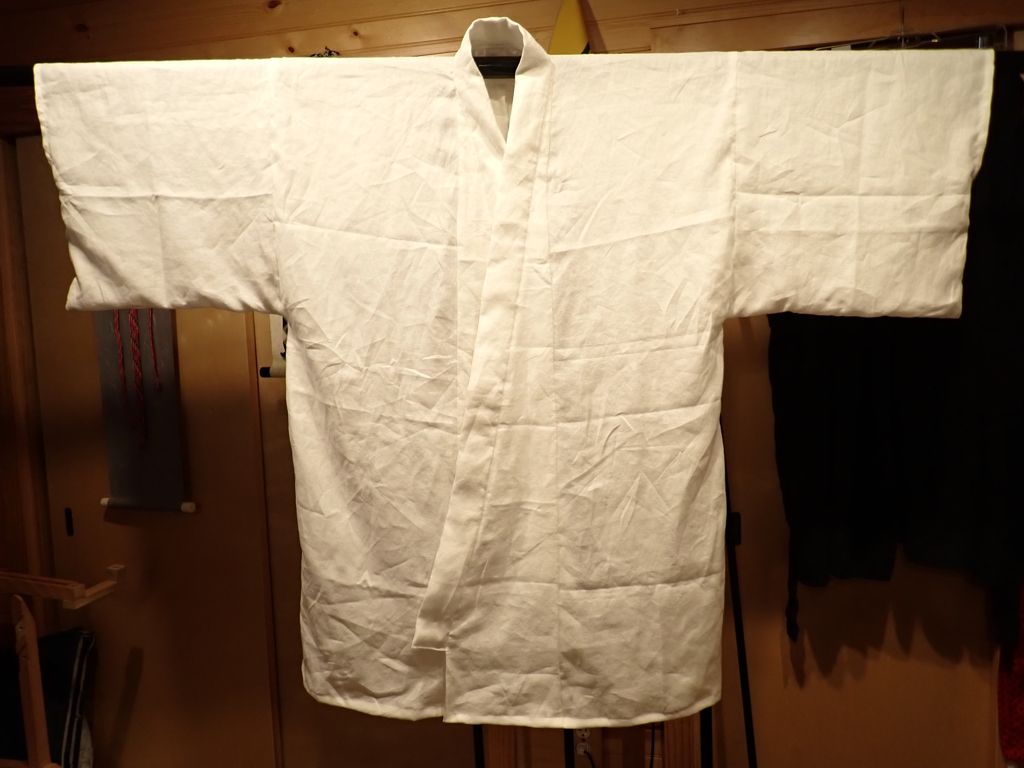
The first is another white kosode. I’m having to retire one of my old, old kosode because the cotton fabric is failing, so I need a kosode with narrow sleeves that can fit through narrow spaces in older garments. I have modified all of my older kosode to maximize the opening where the sleeve meets the body, but some of them just don’t have a lot of height to the sleeve itself.
White Kosode 2025, from Linen
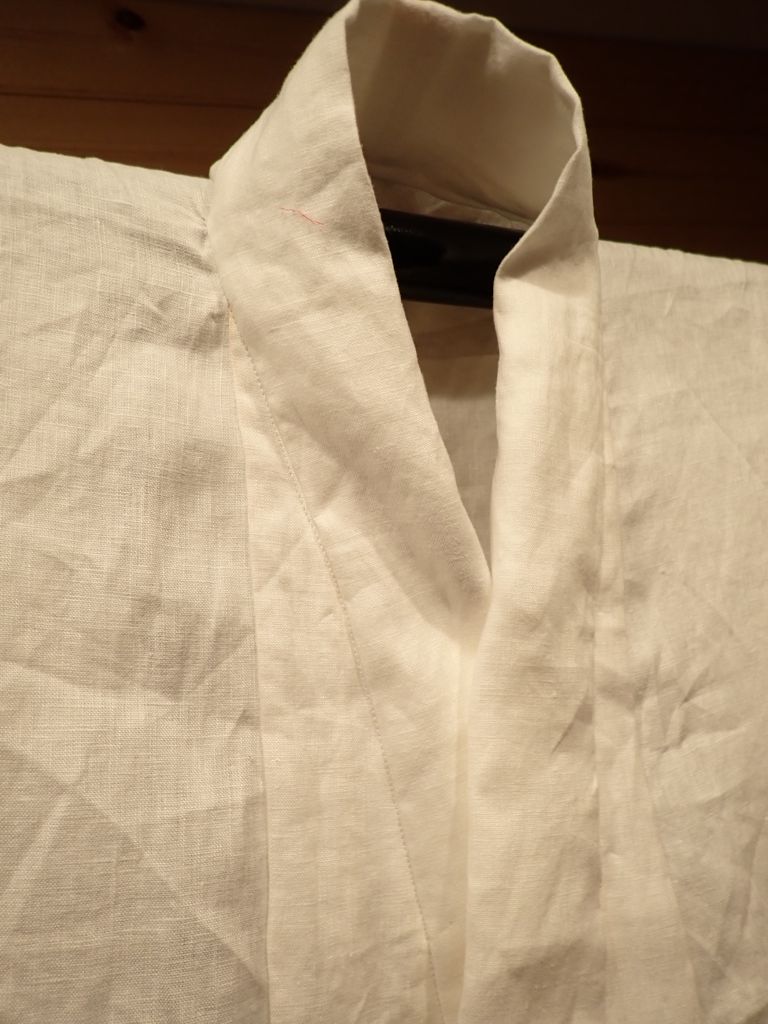
I only had a few months left to make my white kosode for 2025 anyway. This one is from the nice white linen I have been buying at Pennsic for the last few years. Due to some poor planning, I was not able to use the most au courant sewing pattern for kosode. I also decided to cut the piece for the neck band a little wider than normal, so it would stay more visible when worn under other kosode. This meant that the okumi overlaps are a little small. Oh well.
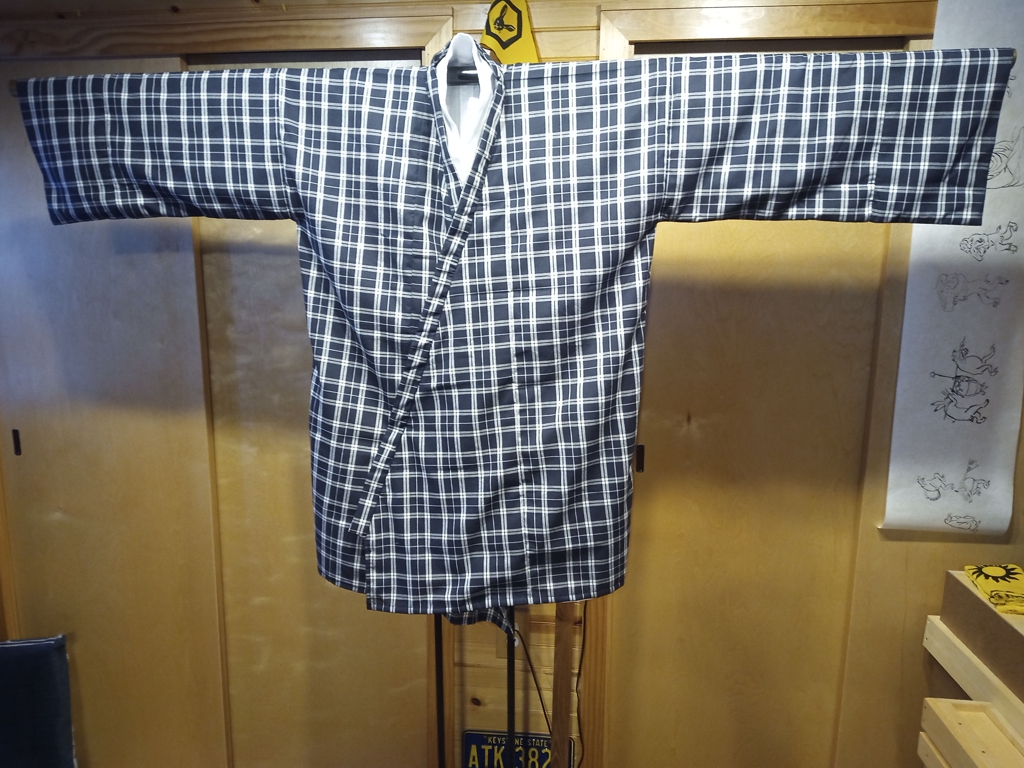
The next one is more exciting and more interesting. It’s made from a black and white linen tartan fabric I also bought at Pennsic, I think from the same merchant who sold me the linen for the recent green hakama. The pattern is woven in, not just printed on the surface. It’s very nice fabric.
The overlaps are a full panel width! They are joined at the edges of the neck opening! Neither the body panels nor the overlap panels are cut to make them narrower or angled, they are just folded! The sleeves are 1.5 panels wide, but those panels are not cut either! The sleeve ends double back on themselves to make self-facings! If you look closely, you can see I’ve done some clever things at the seams where sometimes the grid matches up and sometimes it doesn’t. I know all that sounds very technical and maybe doesn’t make sense to you, but trust me, I’m very happy with the work that went into this one.
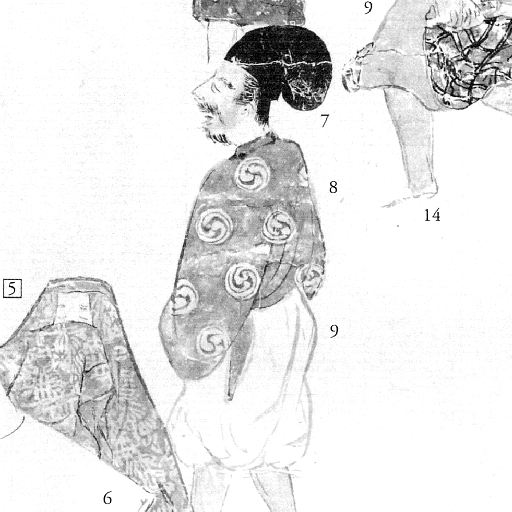
I have made dozens of eboshi over the years, both for myself and other people. One thing has always kind of bothered me about my eboshi, though. I tend to put a white headband on my eboshi because it is mostly what people are expecting, but many of the eboshi you see in historical illustrations do not have these white bands. Here, for instance, is an illustration from the Kitano Tenjin Engiemaki:
#7 indicates nae-eboshi
I picked this illustration because it is a fairly accurate portrait of me. You can see that the nae-eboshi in that image does not have a white band, but is all black. Quite simple to make a couple of eboshi using black fabric for the band instead of white.
Black Band Nae-eboshi
You will probably notice that the eboshi in the illustration is less pointy at the top than mine, and also does not have the long fabric ties that hang down in the back. I have some theories about that, but one change at a time, folks.
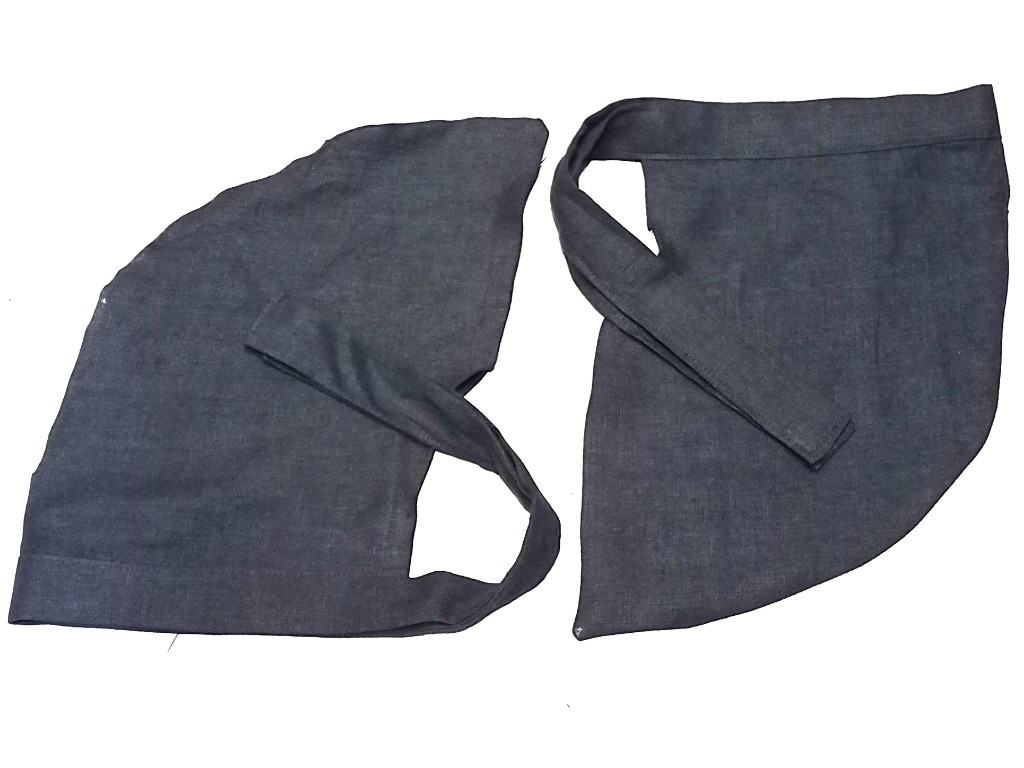
The next step in the long running Bunkan Sokutai Sugata project, I’m working my way down to the feet. When wearing the sokutai, asagutsu shoes (really more like clogs) protect the feet from the ground, and shitozu socks protect the feet from the asagutsu (or is it the other way around?). Apparently, they pre-date the split-toe and the idea that walking on a seam all day will cause blisters.
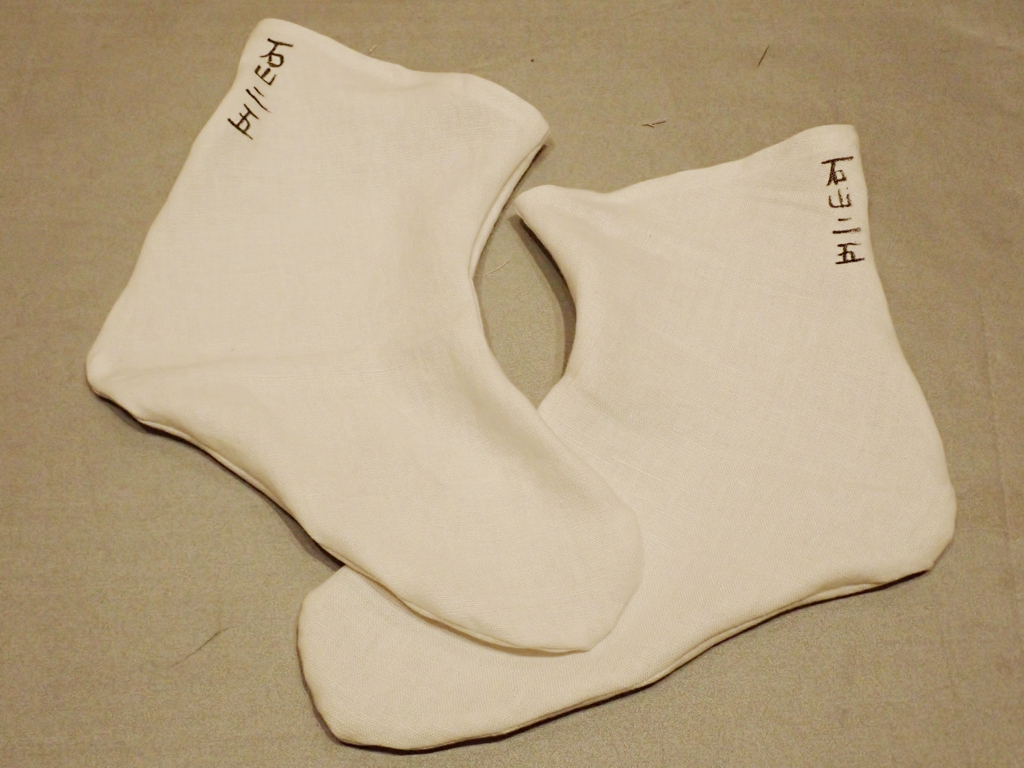
Shitozu in Linen
Mine are based on this one in the Shoso-in Imperial Treasure Repository:
Sock of bast-fiber cloth, No. 53.
I traced the photo in a drawing package, scaled it up to the size of my foot, printed the pattern, cut two pieces from surplus cotton canvas, sewed them together, everted the sock, and tried it on. Too tight. Modify the pattern a bit and iterate. Still too tight. Iterate. Success! That was actually pretty rapid for this kind of thing.
Now that I had a working pattern, it was time to cut four pieces and make the final copy out of white linen. A couple of cuff hems, and some decoration with a fabric marker, and they are ready to wear once I finally make the asagutsu. According to the Shoso-in site, the original bears the seal of “Tōji-kōin”, and if you visit the page to view the back there appears to be writing up near the cuff. It’s probably something like “worn on the occasion of his birthday” or something. I wrote “Ishiyama 2 5” on mine. If I ever make a real seal I’ll stamp them.
Managed to squeak this one in near the end of the year, but well within 2024. This year’s white kosode is made of some very nice linen that I bought at Pennsic from a vendor who specializes in fabric for historical reproduction. This linen is heavy, smooth, and luxurious. There are some changes in the pattern based on some more recent research that people in the SCA have done over the past few years. Most of the differences are in the overlaps and collar area.
White Kosode from Linen, 2024 edition
The learned can see the difference
Don’t worry, it’s looks better now that it has been laundered and ironed. I’m quite happy with the way this turned out. It does mean that I now have 14 white kosode. This is not only two full weeks worth of kosode, but the shelf where I keep my folded kosode is basically full. Most probably next year I will put one of my old cotton kosode into the garb swap to make room.
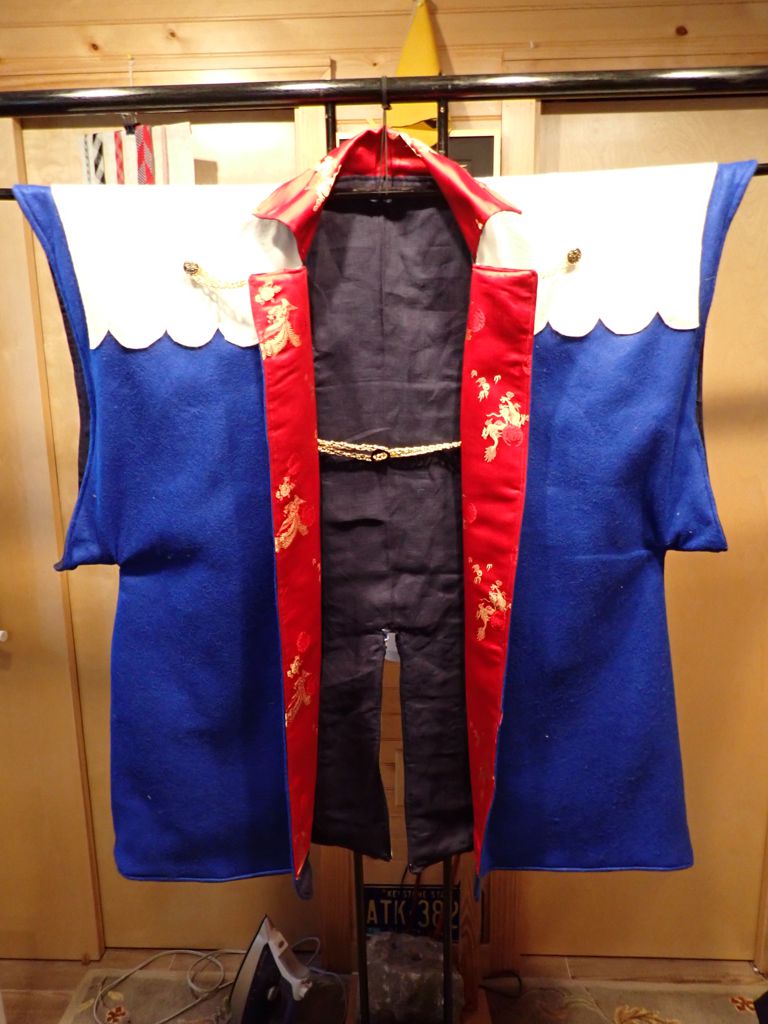
Our good friend, and the head of our household, Sir Maghnus an Chnoic na n’Iora is this year celebrating the 35th anniversary of his knighting at Pennsic. A military leader in medieval Japan with this level of seniority would have a jinbaori “camp coat” to wear over his armor so that he would be more visible and identifiable. I have been “planning” for some time to make one for him eventually, and this anniversary year really kicked my planning into execution.
Jinbaori from the front
The main body of the jinbaori is royal blue felt lined in navy blue linen. The collar lining is some “dragon and phoenix” silk brocade from the stash of Mistress Achren, who passed away some time ago. The “clouds” in chief are white felt. The whole thing is rather large, about 40 inches wide, because it is meant to be worn on top of armor.
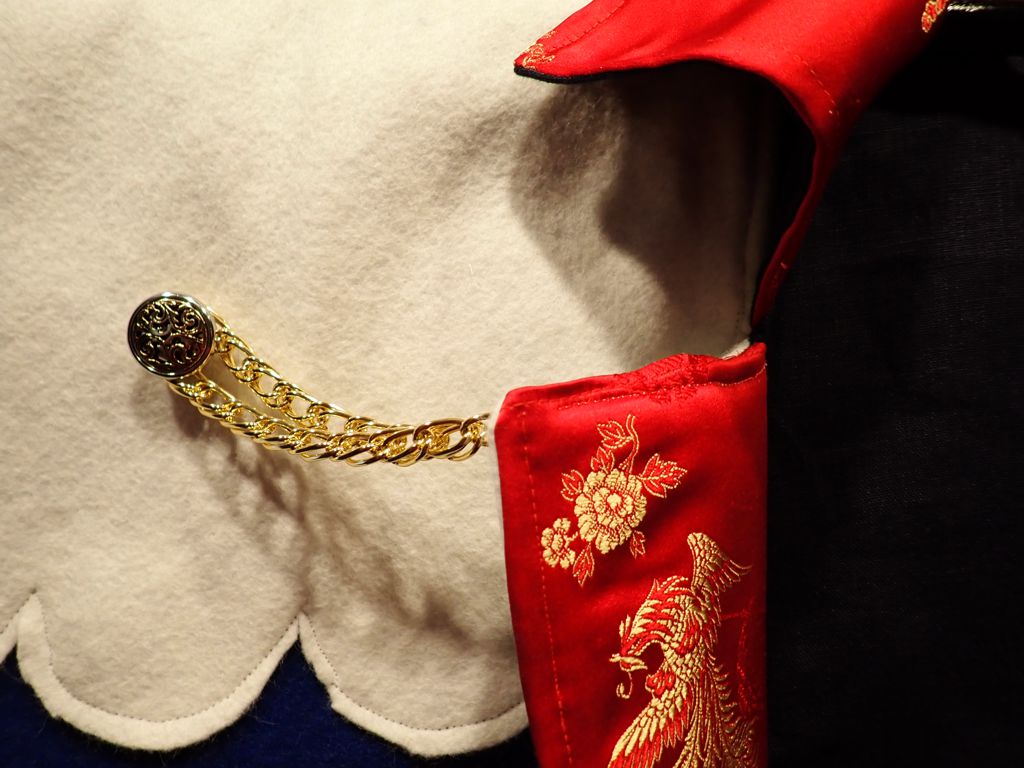
Jinbaori front detail
The chest closure and “hold open” loops are some decorative chain, gold chain being one of the symbols of a Knight in the SCA. The buttons are actually extra buttons I purchased as spares for a very early piece of garb of mine. Since I never needed the replacements, they were available for this project.
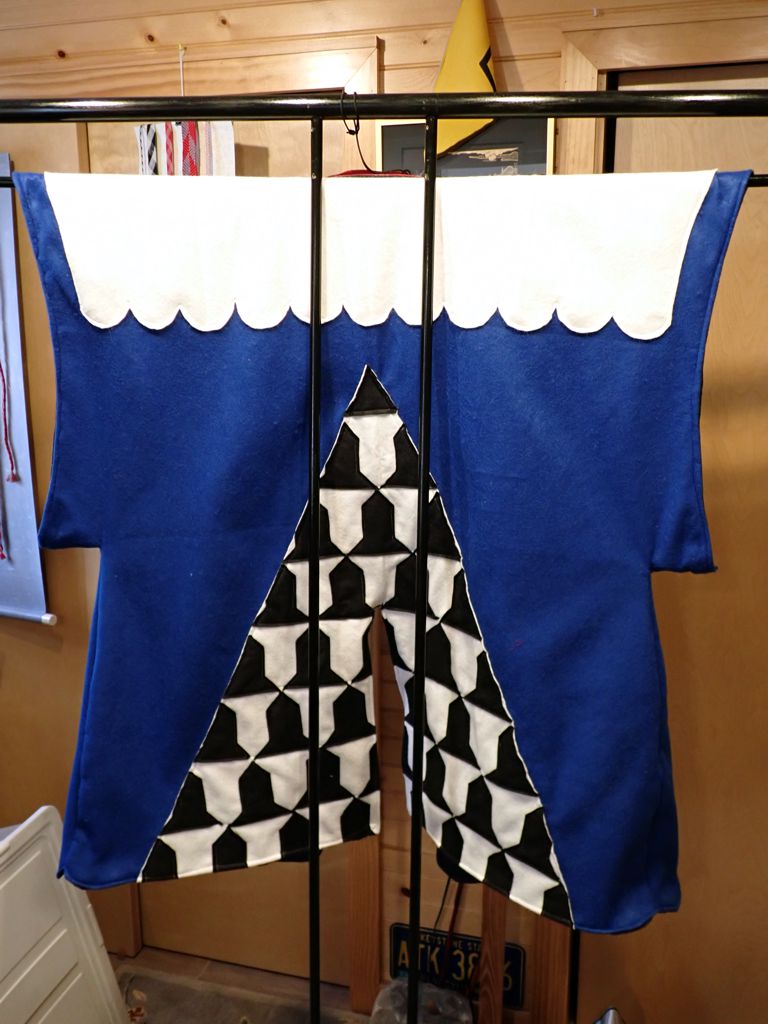
Jinbaori from the back
Here’s the view from the back, showing more felt embellishment. The “clouds” at the top are of a piece with the front. The “hill of squirrels” motif at the bottom is more felt, this time using black felt pieces on the white to create the vair pattern. This is his heraldic arms, and such display of heraldry is common on jinbaori.
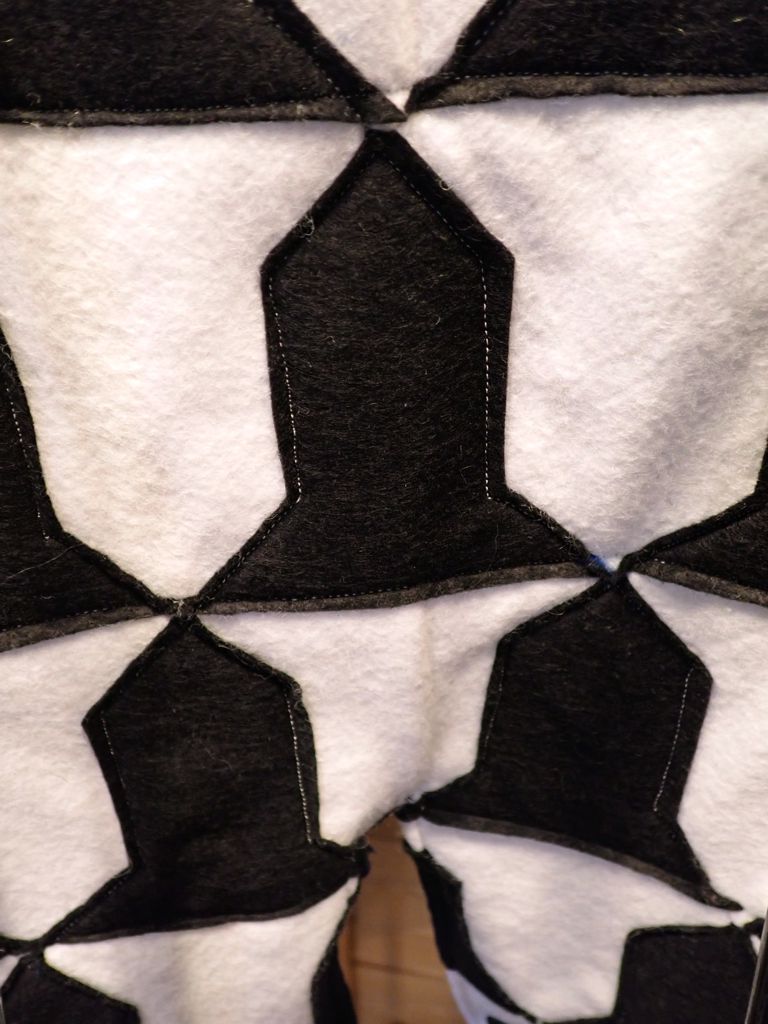
Jinbaori back detail
Attaching all those pieces of black felt was something of a pain, but I was able to sew continuously along the zig-zag edges of the pieces to reduce the labor significantly. While materials like felt don’t seem very Japanese, the “rules” of Japanese clothing seem to go largely out the window with jinbaori. These were intended to be showy and look as expensive and impressive as possible.
The completed project is quite large, heavy, overly warm, and probably somewhat fragile. I doubt it can ever be cleaned, so it probably won’t see very much wear. It should make a great display piece, and will really make him look quite impressive if he ever gets a chance to wear it in court.
I’m actually very happy with the way this came out. I was mostly just winging it when it came to construction, so I’m glad it came together at all.
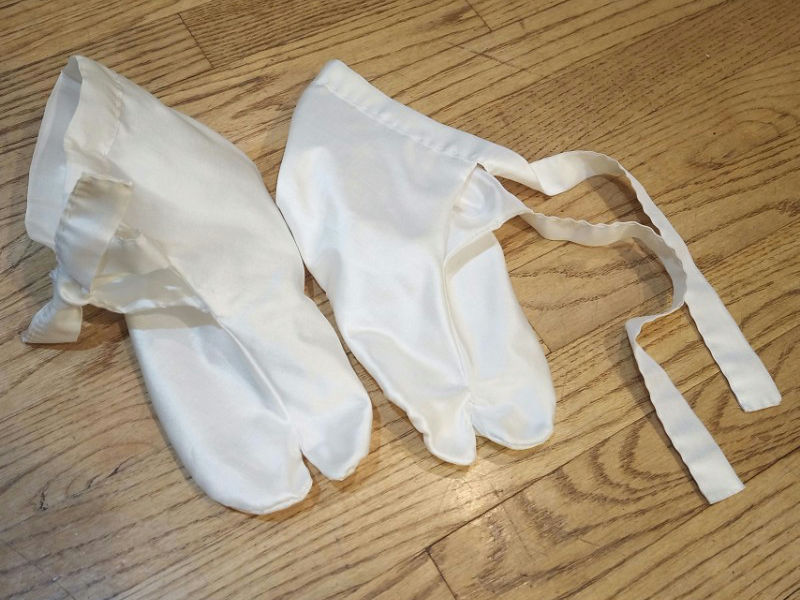
One of our friends in the SCA, Oribe Tsukime, received a writ for elevation to the Order of the Laurel. The writ was issued back in the Spring, but she was not able to have her actual elevation until this past weekend. This gave me plenty of time to make these white silk tabi for her to wear as part of her elevation garb.
Tabi in fine white silk
This was the first time I had ever made tabifor another person, the first time I had made tabi in a few years, and the process was complicated by Tsukime living somewhat far from my home. Footwear is always difficult to fit, and trying to do it by sending prototypes back and forth in the mail took a few months.
I was able to complete this project with days to spare, however, and she wore them during her vigil and elevation ceremony. They are all fine silk left over from the uenohakama project, sewn by hand with white silk thread. I don’t know how long they will last, and they probably never can be washed, but I was asked to make them and they were ready in time, so I am happy.
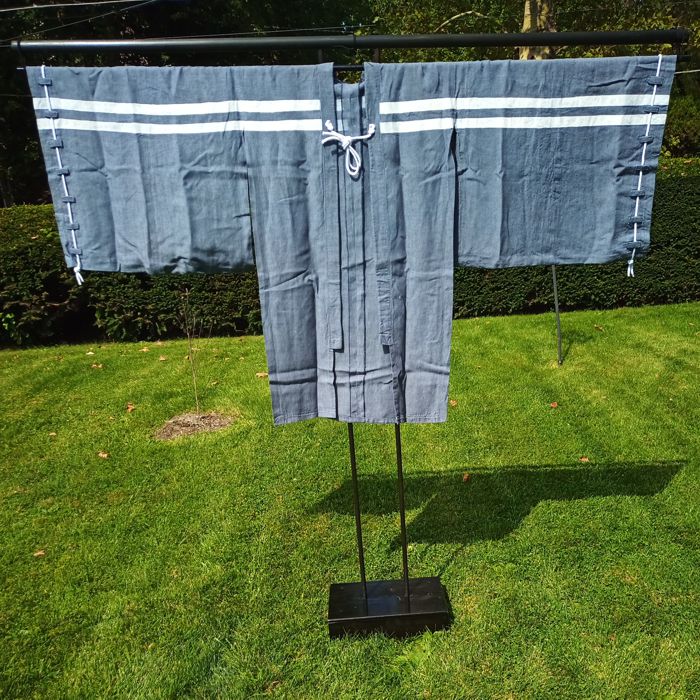
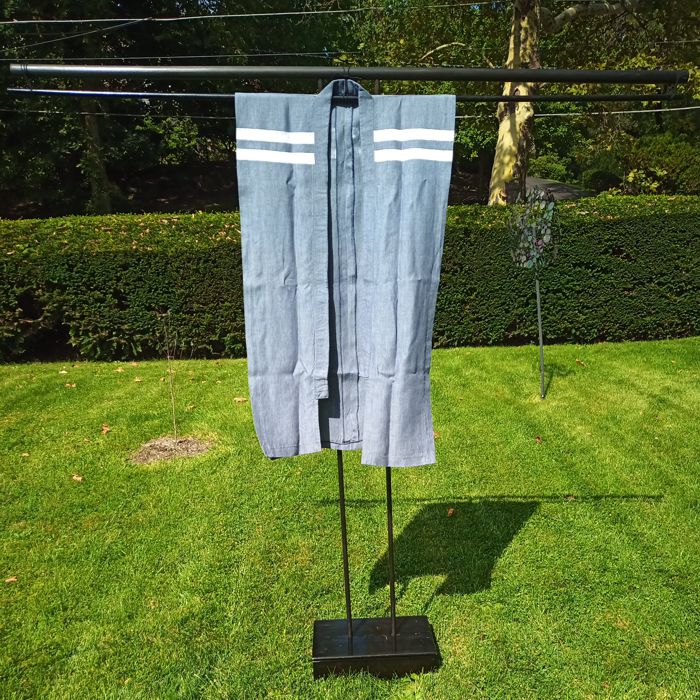
I completed this project back in early May of this year. I wore it to War Practice and to court at Pennsic, but I am only just now getting around to documenting it. Sorry I didn’t get any pictures of me actually wearing this outfit. Anyway, I wanted a less-formal and lighter-weight hitatare than my others. This one is made from a mid-weight linen, instead of the heavy-weight linen and hemp from which the others are constructed. I painted some white stripes on the fabric so that it wouldn’t look like a bedsheet. Here is the view from the front:
The assembled hitatare sugata
From the back, you can see that there are also stripes in the back, and that the hakama do not have a koshi-ita panel on the back. Some hitatare of late period had these panels, but since I do not tend to add them, this garment does not.
The hitatare sugata from the back
The sugata part of this post’s title of course means basically “outfit”. The hitatare itself is the upper-body over-garment. You have to make the body panels quite long if you don’t want the tails pulling up out of the hakama waistband.
The hitatare alone
Here is a close-up of the painted stripes. I have stopped using the “Jacquard Neopaque” acrylic fabric paint for most things, and I have switched over to “Jacquard Textile Color” fabric paint. This does not have the same vinyl-esque feel as the Neopaque, but it works well and still resists bleeding into the fibers. I applied the paint after the garments were constructed, so the stripes would match across the seams.
The stripes
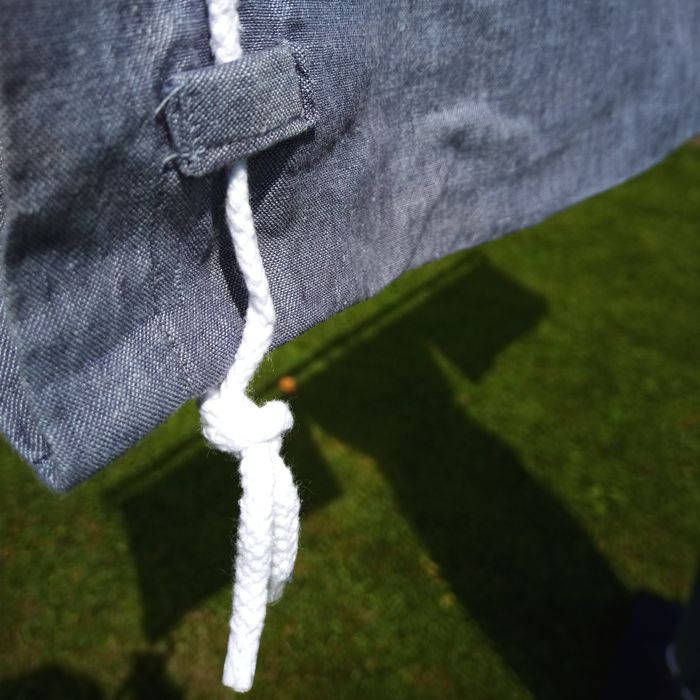
At the sleeve ends, the sleeve cords run through “belt loop” style attachments. There’s a hitatare in the Kure red book that uses these attachments, and I have found them to be durable.
A hitatare sleeve end
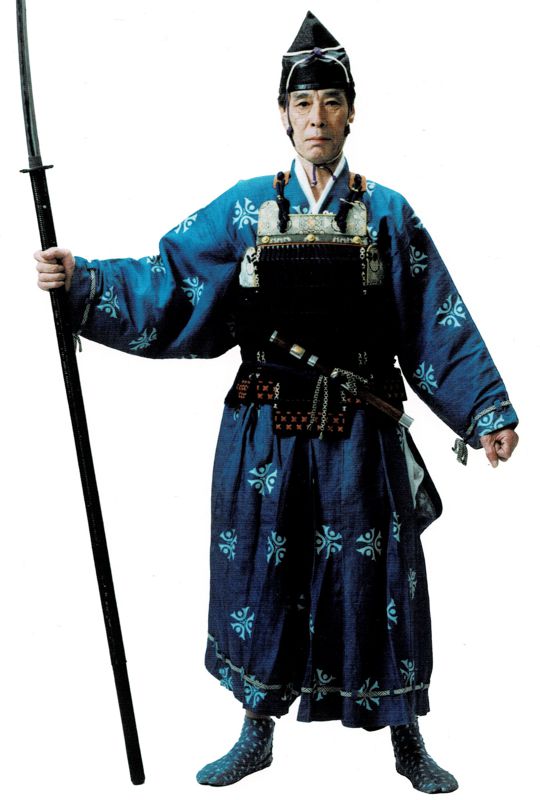
“Lower-Class Samurai” on page 29 of the Kure red book
Here’s a close-up of one at the bottom of a sleeve. You can clearly see that I have not bothered to braid my own cords yet for this outfit. It uses store-bought cotton braid. The belt loops are made by starting with a rectangle of fabric that is twice as long and four times as wide as the eventual loop. The ends of the rectangle get folded in to the center, followed by the sides getting folded in to the center. The loop is then folded in half along the length to make a short 4-layer strap, and stitched along the long edge to hold it closed. Stitching it on to the garment seals the ends of the loop.
Detail of the hitatare sleeve
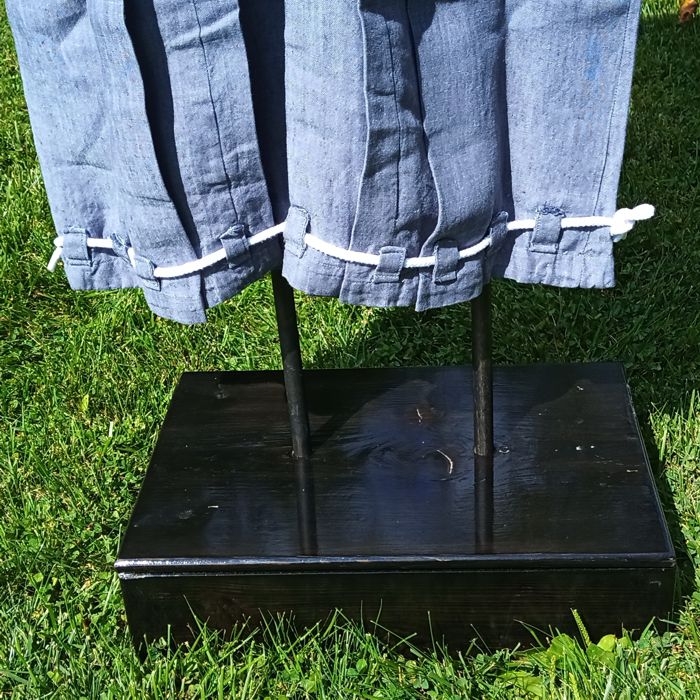
Similar loops are at the cuff end of each leg. I only put loops on the outsides of the pleats, so they hold the pleats in place. I’m not sure if this is historical or if the exemplar just has narrower legs.
The hakama cuffs
I also made a kataginu that matches the hakama so that I don’t have to roast if it is very hot. A kataginu is basically a sleeveless hitatare.
The matching kataginu
So there, now I have four hitatare sugata. This one went through the post-Pennsic laundry without falling apart, so I consider it to be a success.
I neglected to post about this at the time, but back in March when we were getting ready for my sweetie’s elevation, I made three more eboshi for our friend Gwen.
Of course, Gwen has been camping with Kaminari for years and has several eboshi, but nothing deemed nice enough to wear while heralding an elevation. So, I made three more for them. One floppy nae eboshi, one linen tate eboshi lined with heavy interfacing, and one mesh tate eboshi for summer wear. The mesh eboshi has a silk band for the extra-fancy.
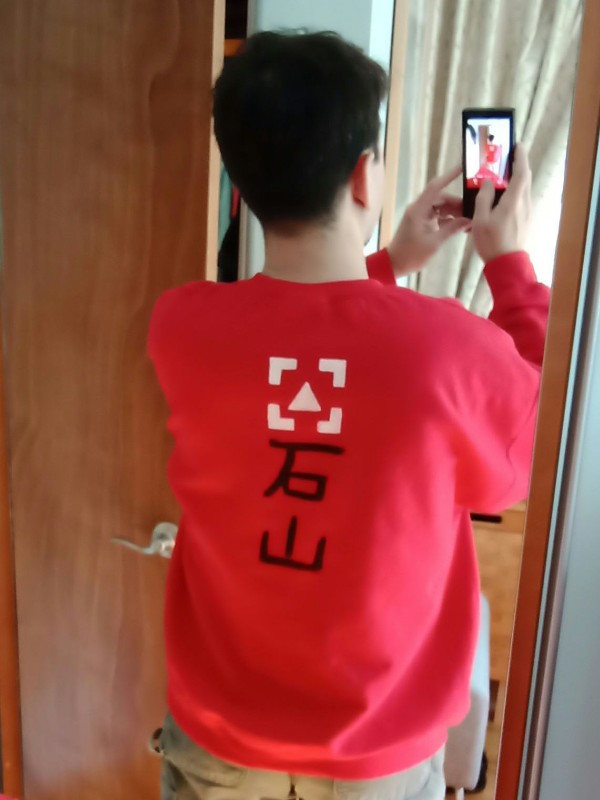
The motivations for this shirt are complex, but the execution was straightforward. I bought a blank red sweatshirt from the craft store, block-printed the Yama Kaminari clan mon in the center of the back and at the front left shoulder in white, then painted the kanji for my SCA name on the back beneath the mon. I had to re-paint the white by hand, which is almost always necessary when trying to paint white on dark color, but it’s pretty easy once the graphic is established. I used Jacquard Textile Color on this instead of heavier acrylic paint, since it soaks into the fabric more and changes the texture of the garment less. I’m really starting to like the Textile Color quite a lot.
Please forgive the mirror photo.
Re-mirrored so the kanji-enabled can read the name.
Anyway, this came in very handy on the chilly first night of War Practice this year, and on the chilly morning of pack-out at that same event.


