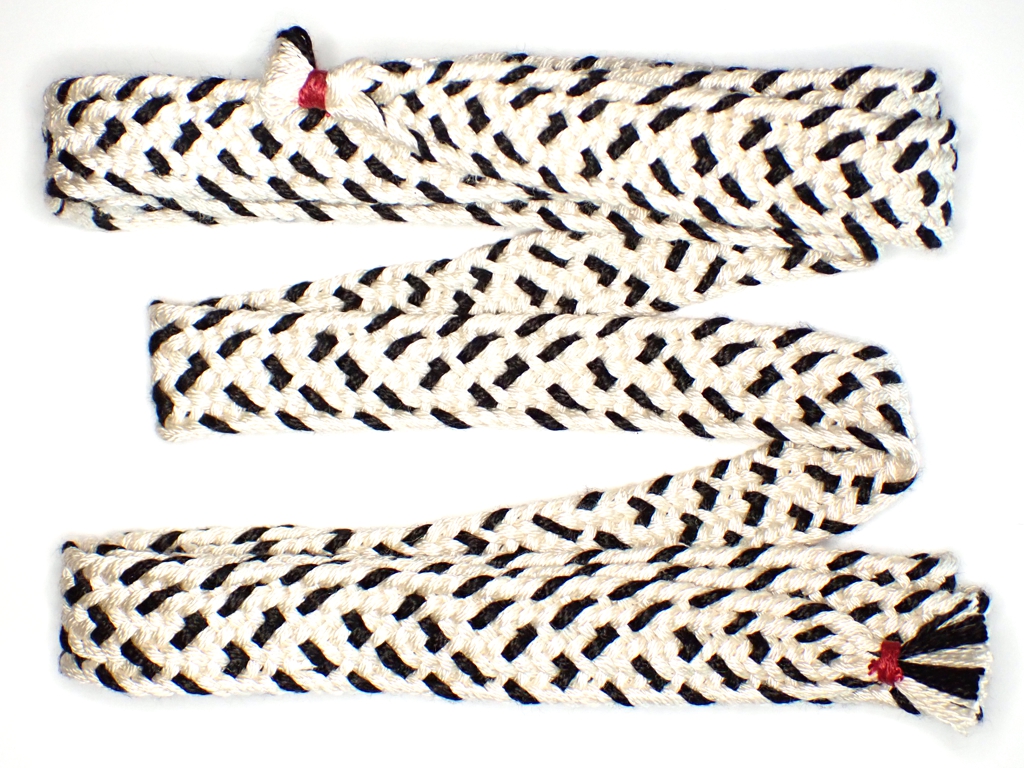
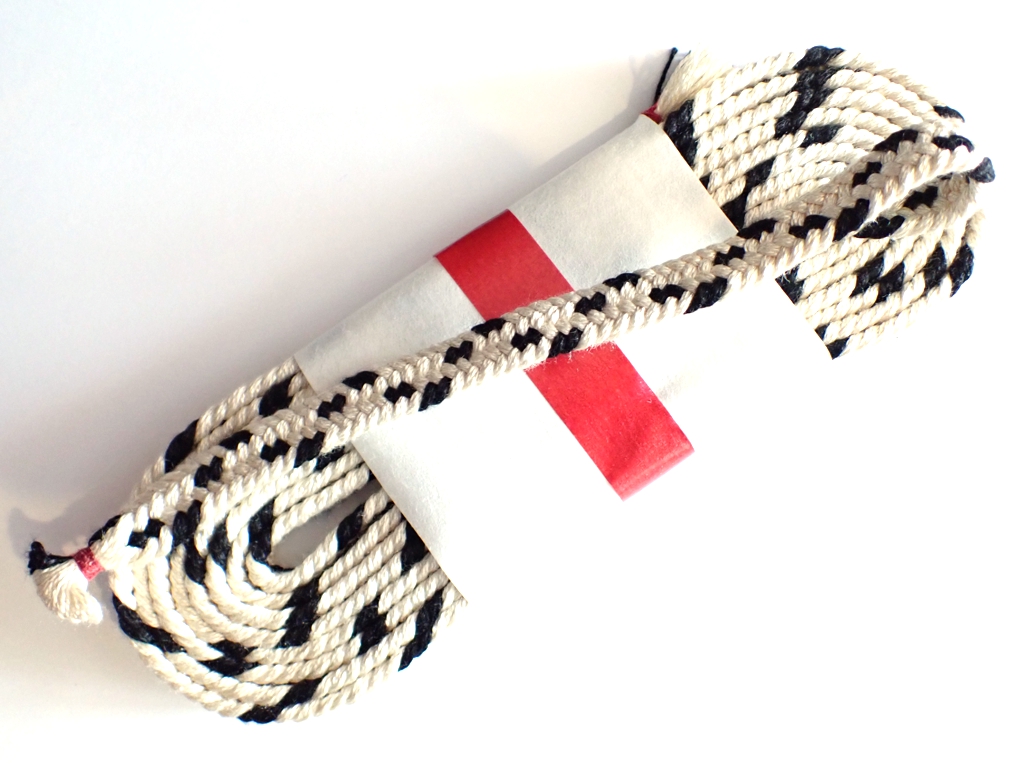
A very good long-time friend of ours was inducted into the order of the Pelican at Pennsic, so I made these two braids for him.
The first is a 17-strand “Taka-on-Maru” braid I made to secure his samurai eboshi (which I also made) to his head. This silk braid is about 80 inches long and about three quarters of an inch wide. I worked this twill marudai braid with 4 black strands and 13 white strands to approximate an ermine spot pattern. An erminois band is traditional for the “cap of maintenance” traditionally given to a Pelican.
The second is a 9-strand “Shigeuchi” braid that I made as a sageo cord. This silk braid is almost 10 feet long, and almost a half inch wide. I worked this twill braid on a sankakudai. A sageo is normally used to bind the sheath of a sword into the waist-ties of the hakama. While any braid of sufficient length can be used as a sageo, this 9-strand braid in this 7+2 zig-zag pattern is the most common style of sageo seen.
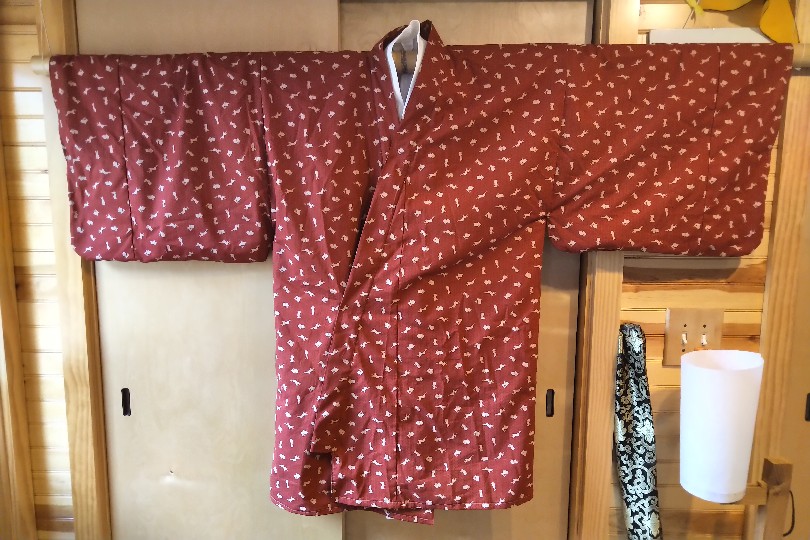
A friend of ours showed us some swatches of great fabric from a local fabric store, and one of them had this terrific green leaves and blue dragons pattern. Another friend of ours has a green oak leaf in their arms, so I knew they needed something made out of this fabric. It’s not nice to drop a pile of fabric on somebody who already does not have enough time to sew the things they want. Consequently, I made a kosode for them.
Detail of the Fabric
Completed Kosode
It’s maybe a little busy, but I’m pretty happy with it. It’s not very tall, so it will have to be worn with hakama, but I had enough fabric to do the wide fold-over collar, which is a little fancy. Adding to the fancy are 16-inch wide panels. I also added a little length to the sleeves with faced cuffs.
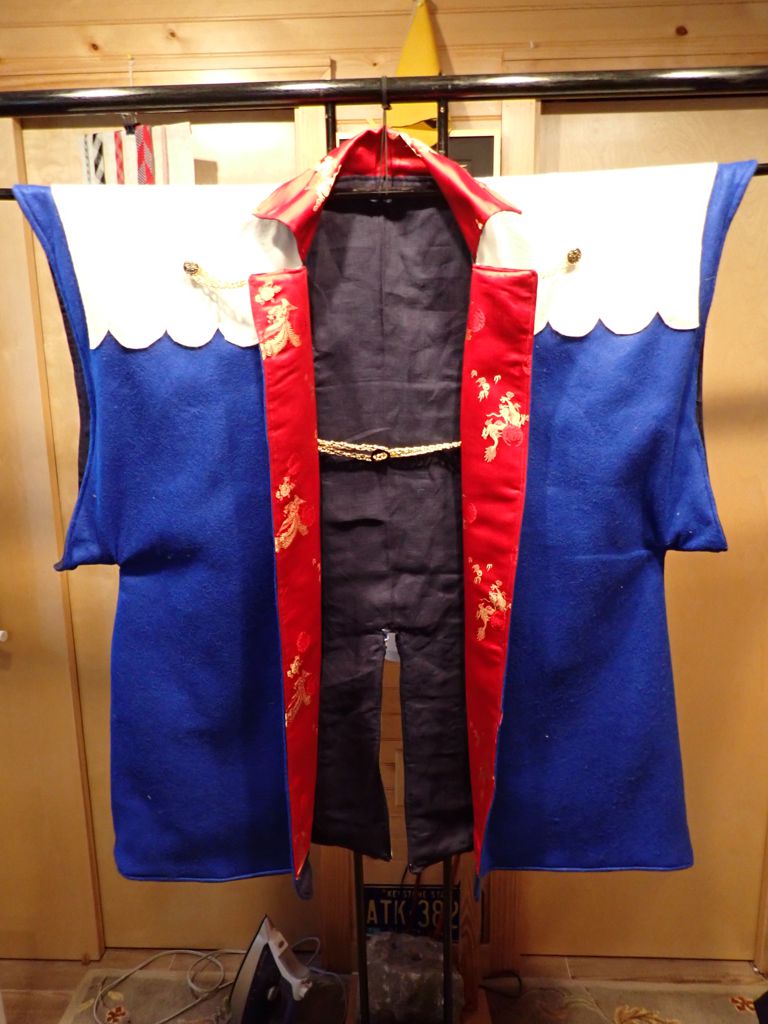
Our good friend, and the head of our household, Sir Maghnus an Chnoic na n’Iora is this year celebrating the 35th anniversary of his knighting at Pennsic. A military leader in medieval Japan with this level of seniority would have a jinbaori “camp coat” to wear over his armor so that he would be more visible and identifiable. I have been “planning” for some time to make one for him eventually, and this anniversary year really kicked my planning into execution.
Jinbaori from the front
The main body of the jinbaori is royal blue felt lined in navy blue linen. The collar lining is some “dragon and phoenix” silk brocade from the stash of Mistress Achren, who passed away some time ago. The “clouds” in chief are white felt. The whole thing is rather large, about 40 inches wide, because it is meant to be worn on top of armor.
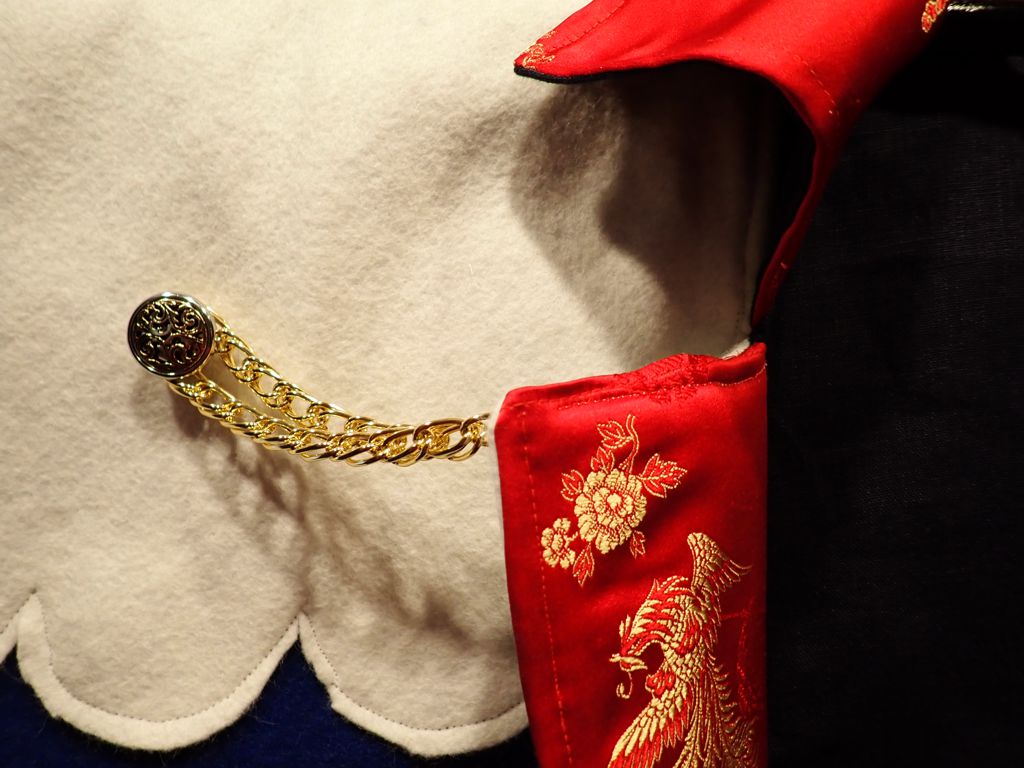
Jinbaori front detail
The chest closure and “hold open” loops are some decorative chain, gold chain being one of the symbols of a Knight in the SCA. The buttons are actually extra buttons I purchased as spares for a very early piece of garb of mine. Since I never needed the replacements, they were available for this project.
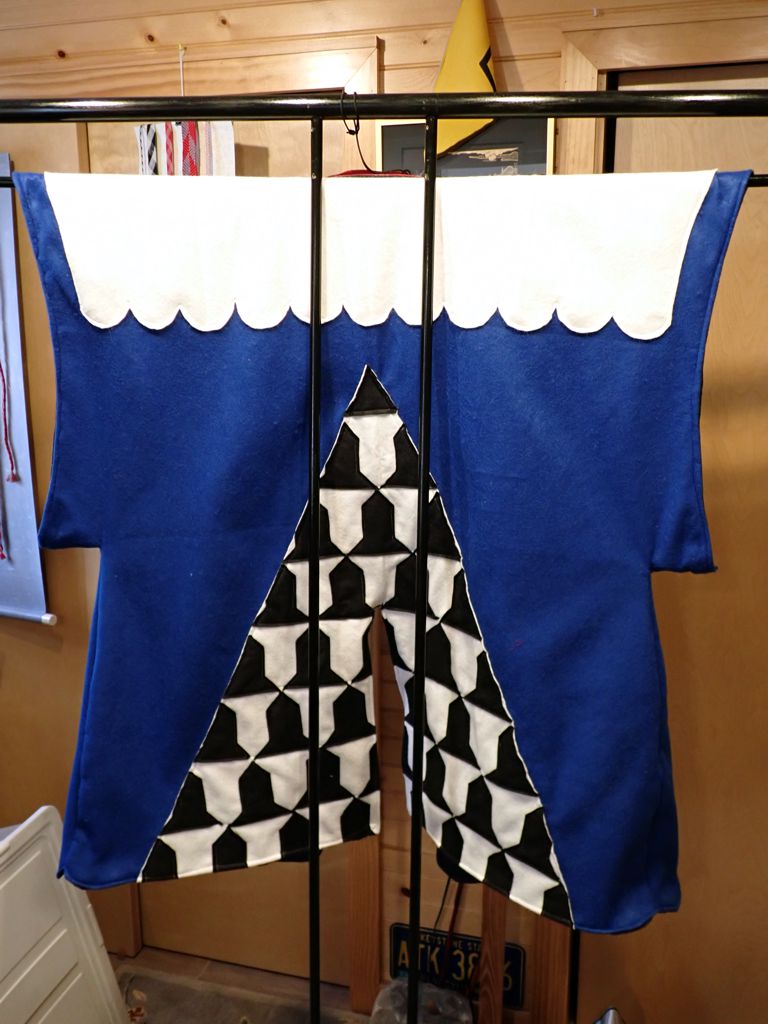
Jinbaori from the back
Here’s the view from the back, showing more felt embellishment. The “clouds” at the top are of a piece with the front. The “hill of squirrels” motif at the bottom is more felt, this time using black felt pieces on the white to create the vair pattern. This is his heraldic arms, and such display of heraldry is common on jinbaori.
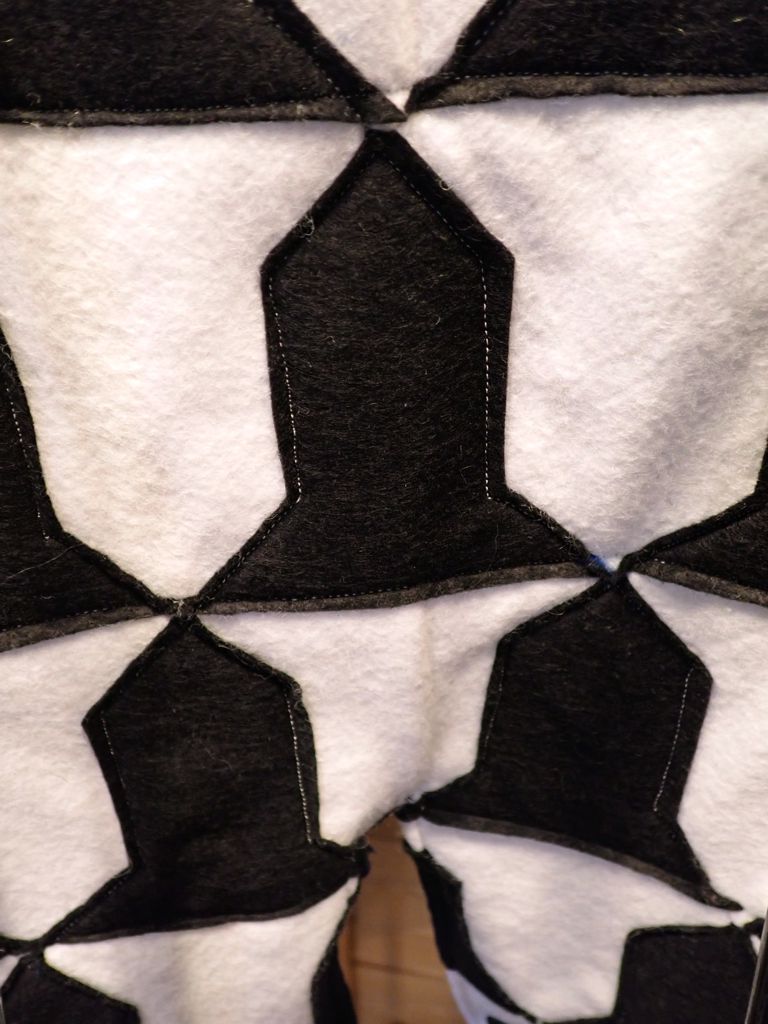
Jinbaori back detail
Attaching all those pieces of black felt was something of a pain, but I was able to sew continuously along the zig-zag edges of the pieces to reduce the labor significantly. While materials like felt don’t seem very Japanese, the “rules” of Japanese clothing seem to go largely out the window with jinbaori. These were intended to be showy and look as expensive and impressive as possible.
The completed project is quite large, heavy, overly warm, and probably somewhat fragile. I doubt it can ever be cleaned, so it probably won’t see very much wear. It should make a great display piece, and will really make him look quite impressive if he ever gets a chance to wear it in court.
I’m actually very happy with the way this came out. I was mostly just winging it when it came to construction, so I’m glad it came together at all.
A fiend of ours contacted me about making some book risers. This firend has just moved to a new house that has some built-in bookshelves that are deep and tall, which is nice for hardbacks but inefficient for paperback. My solution is to stack books vertically and sideways.
My solution, with edge tags
Not everybody like this solution, though. They like to be able to see at least a portion of all the spines, even though it is less efficient.
What most people want
To achieve this, though, you need some kind of riser. I know people who use foam blocks, or cardboard inserts, but plywood is way stronger and more durable, so this friend contacted me.
Risers being painted
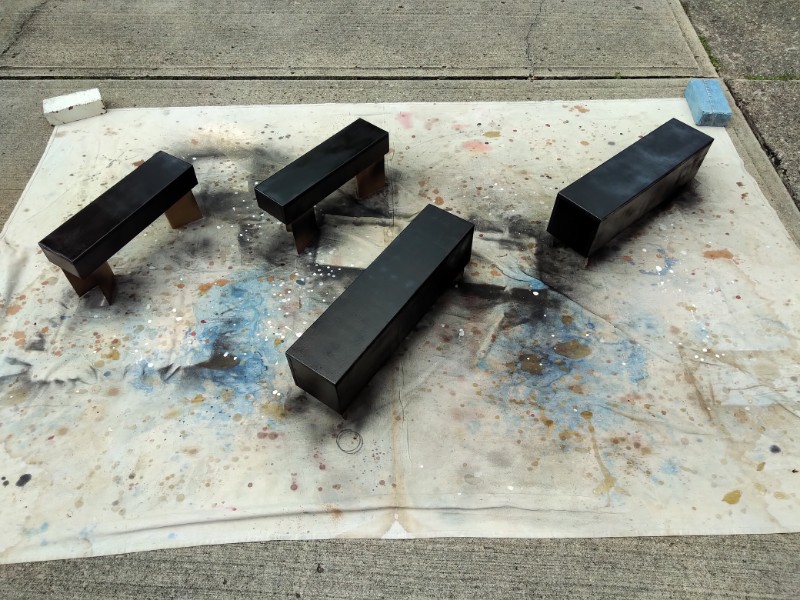
Here they are being painted matte black in the driveway. They are basically just open-bottom boxes. There is an extra support piece in the middle, just to keep them stable. They are made from half-inch plywood, with simple butt joinery, glue, and 23 gauge pins. Two different sizes, one for paperbacks and one for trrade paperbacks. They are clear-coated to keep the black from rubbing off, and felted on the bottom to keep from scratching the shelves. They are not perfect, but since once they are in place it is possible that nobody will ever see them again, that’s probably OK.
In Japanese, what Americans call “chopsticks” are called “hashi“. “Maki” is the word for “roll”. Many years ago, I bought a pair of hashi that came rolled in a piece of fabric, secured with a cord and a bead, and this was such a handy thing to have that I realized these would make great gifts, and would be a good way to use up small squares of surplus fabric. I bought a couple packages of bamboo chopsticks at the Asian grocery, and away I went.
8 Hashi-maki, 2021 edition
Here are the products of that idea. The fabric came from my stash of surplus fabric. You may recognize some fabric from previous sewing projects. The beads came out of my stash of beads and baubles that have been given to me as tokens of appreciation over the years. The basic process is to sew two squares of fabric right-sides together, leaving one corner un-sewn, Turn the squares right-side out, and insert the ends of the cords in the unfinished corner. Top stitch all the way around, sealing the corner and securing the cord.
To use, place flat on a surface with the corded corner pointing to the right. Place a pair of hashi just to the left of the center line, oriented vertically. Fold the top and bottom corners over the ends of the hashi, so they can’t slide out of the roll. Fold the left corner over the hashi to the right. Roll the hashi up in the fabric, wrap the roll with the cord, and tuck the bead under the wrapped cords to secure the roll.
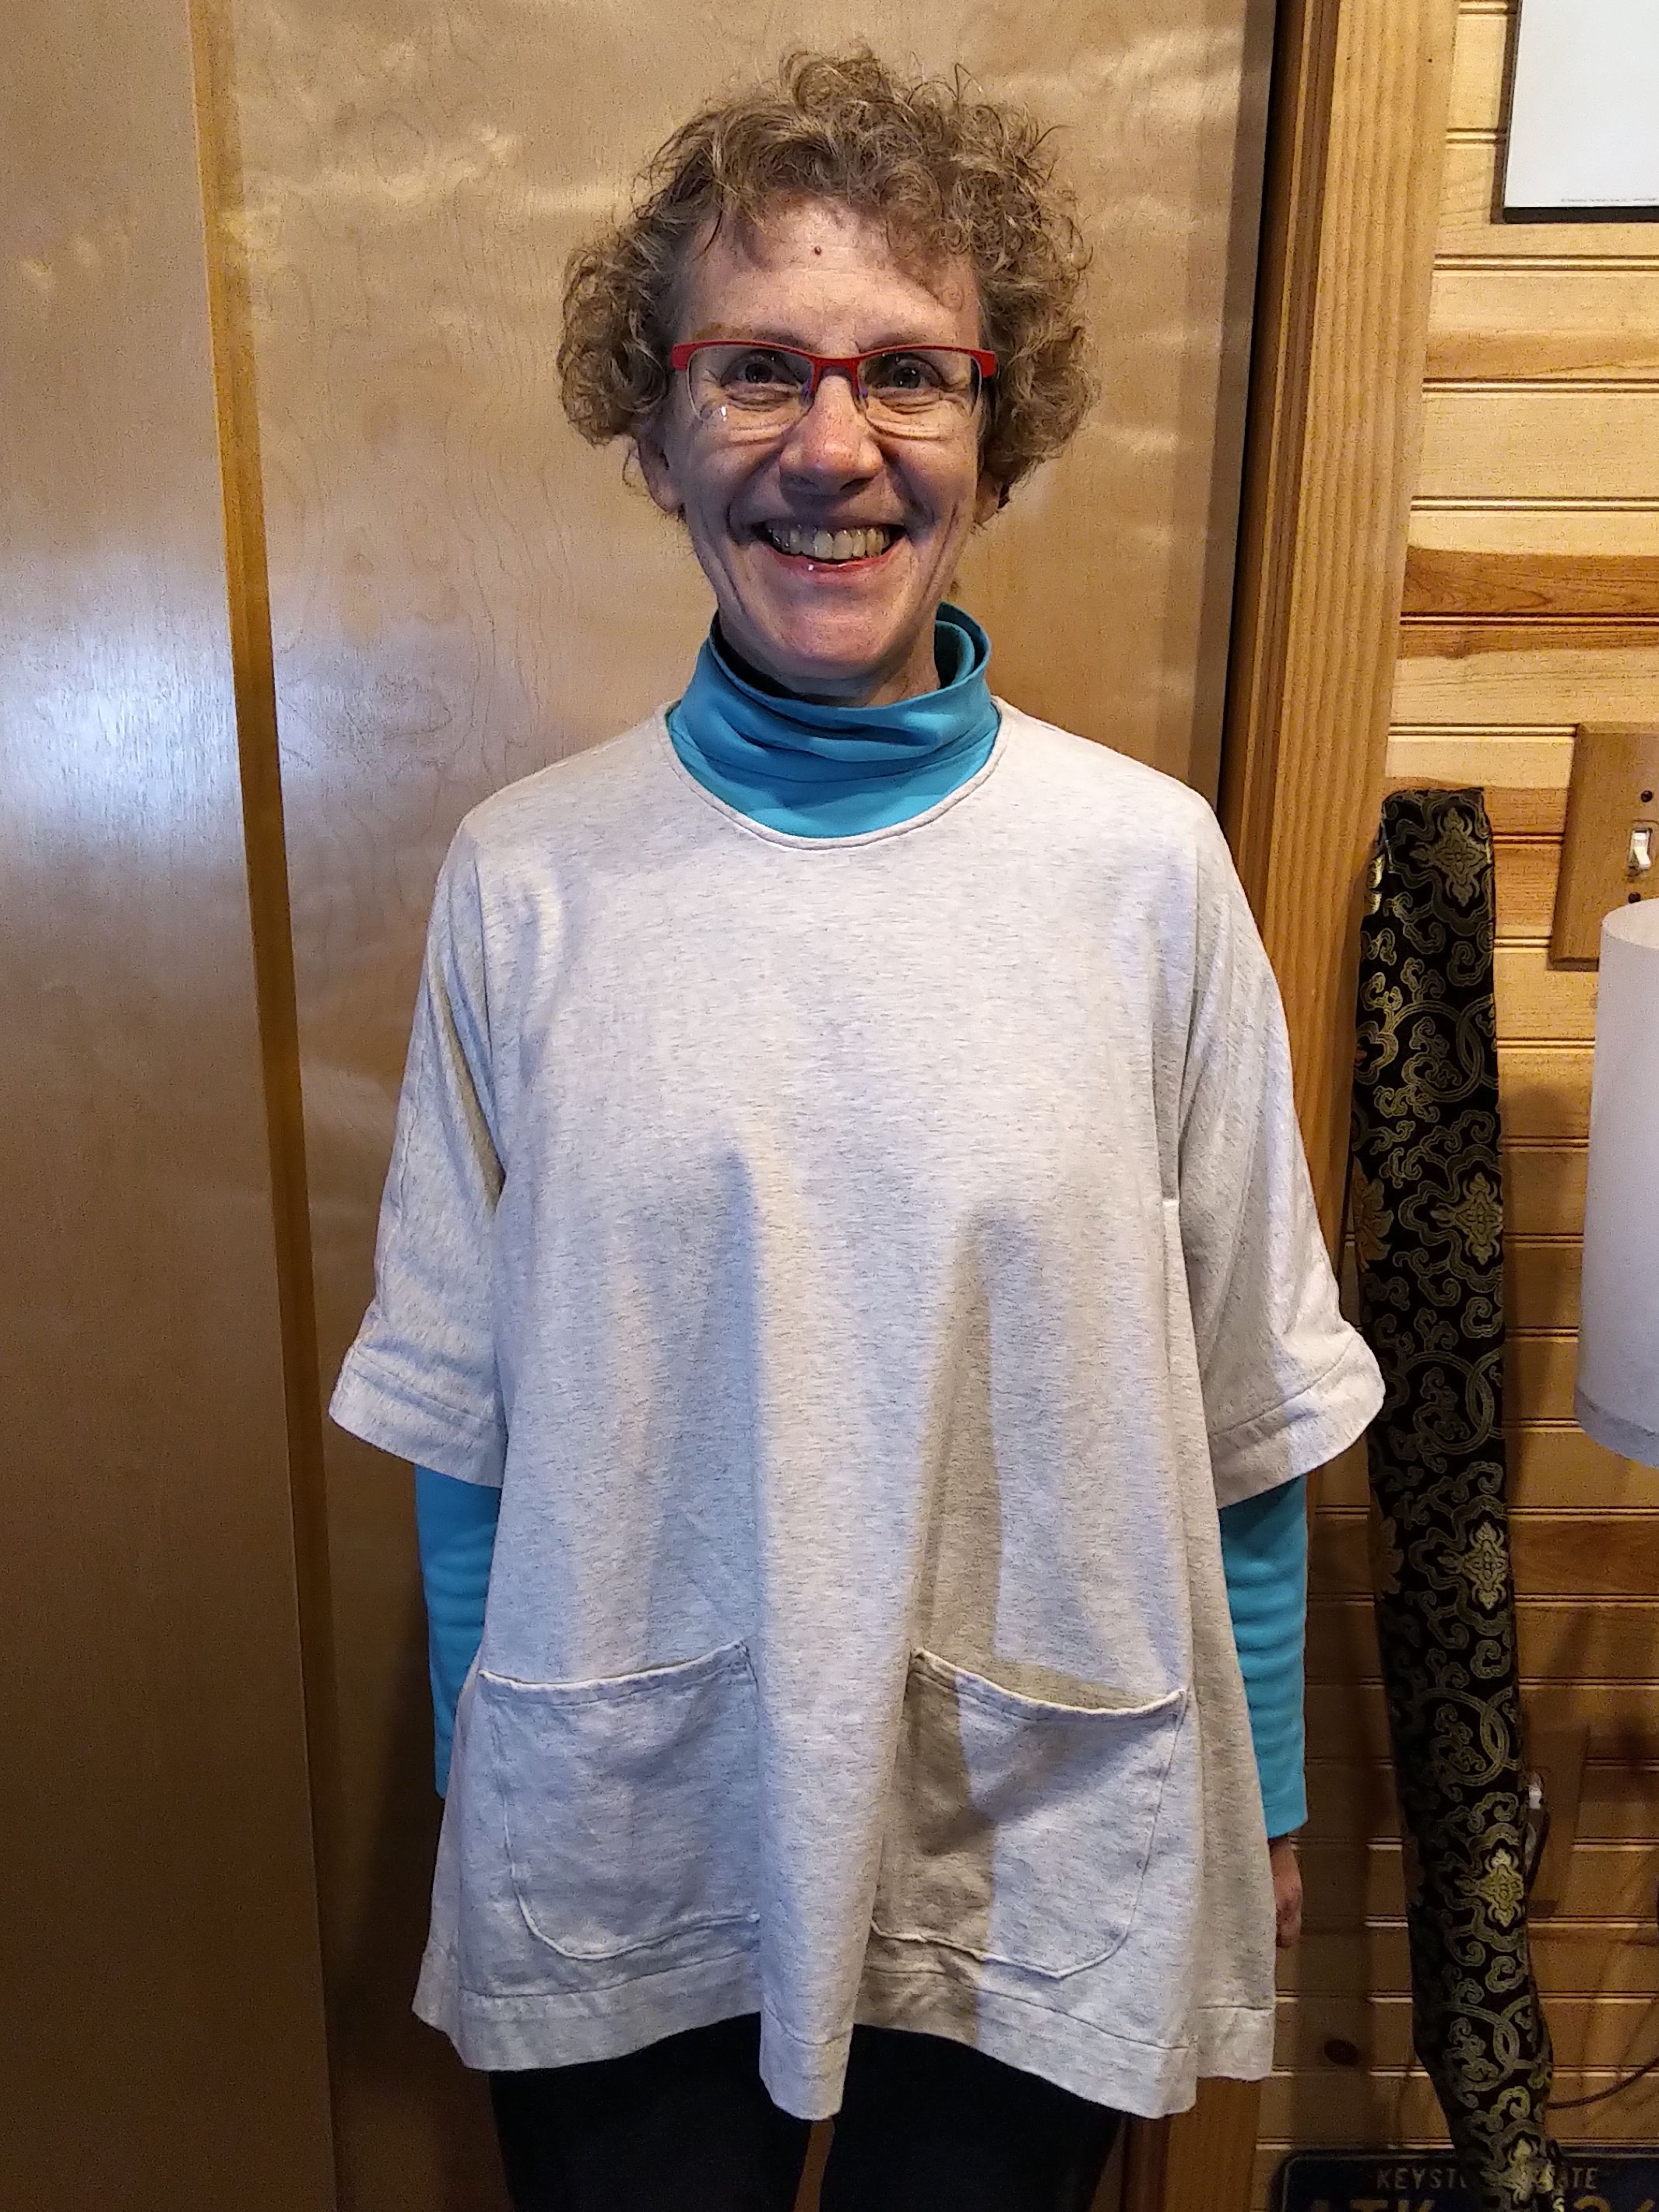
Most years, I try to make one of my holiday gifts for Sharon be something that I made myself. This year, I decided sort of at the last minute that it would be a knock-off of a garment she bought for herself earlier this year. She bought a kind of smock / poncho garment, and it has become one of her favorite things. It’s a good thing to throw on as an extra layer for warmth, and it adds a couple of handy pockets. The catalog she got it from only offers a couple of colors, and she bought the one she liked. If she was going to have another one, it would have to be hand made.
Sharon in her new gray smock
The fabric is a light gray mostly cotton stretch knit. Don’t underestimate the comlexity of this garment. The shoulders actually slope down from the neckhole, and the sides taper in towards the bottom hem. The hems have narrow turn-unders, and mitered corners. The pockets have rounded bottom corners. The neck hole has a narrow facing band. I have done almost no work with this kind of stretch knit fabric before.
Anyway, it took me a few days to get everything laid out, cut out, lanned out, and sewn. It was finished in time for the holiday, but still had chalk marks all over it so it had to be washed before it could be worn. Sharon sent all day yesterday wearing it, and found it to be as comfortable as the original, so success.
My days are nothing but free time lately, but holidays doubly so. I’ve spent most of the last few days sewing on different projects, but nothing I can post about quite yet. I sewed a present for Sharon, but I didn’t get a chance to launder it so it’s covered in tailor’s chalk markings and needs a few touch-up stitches here and there. I sewed a flannel shirt for myself, but it needs a trip to the fabric store for buttons before it can be completed, and I’m not sure I want to go to retail-ville on Boxing Day. It’s all about stymied ambition, isn’t it? Anyway, hope you all got a chance to spend the day doing something you enjoy.