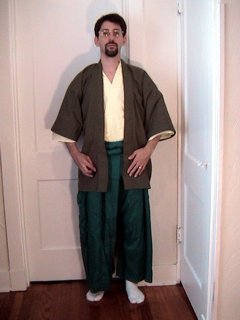
A friend of ours showed us some swatches of great fabric from a local fabric store, and one of them had this terrific green leaves and blue dragons pattern. Another friend of ours has a green oak leaf in their arms, so I knew they needed something made out of this fabric. It’s not nice to drop a pile of fabric on somebody who already does not have enough time to sew the things they want. Consequently, I made a kosode for them.
Detail of the Fabric
Completed Kosode
It’s maybe a little busy, but I’m pretty happy with it. It’s not very tall, so it will have to be worn with hakama, but I had enough fabric to do the wide fold-over collar, which is a little fancy. Adding to the fancy are 16-inch wide panels. I also added a little length to the sleeves with faced cuffs.
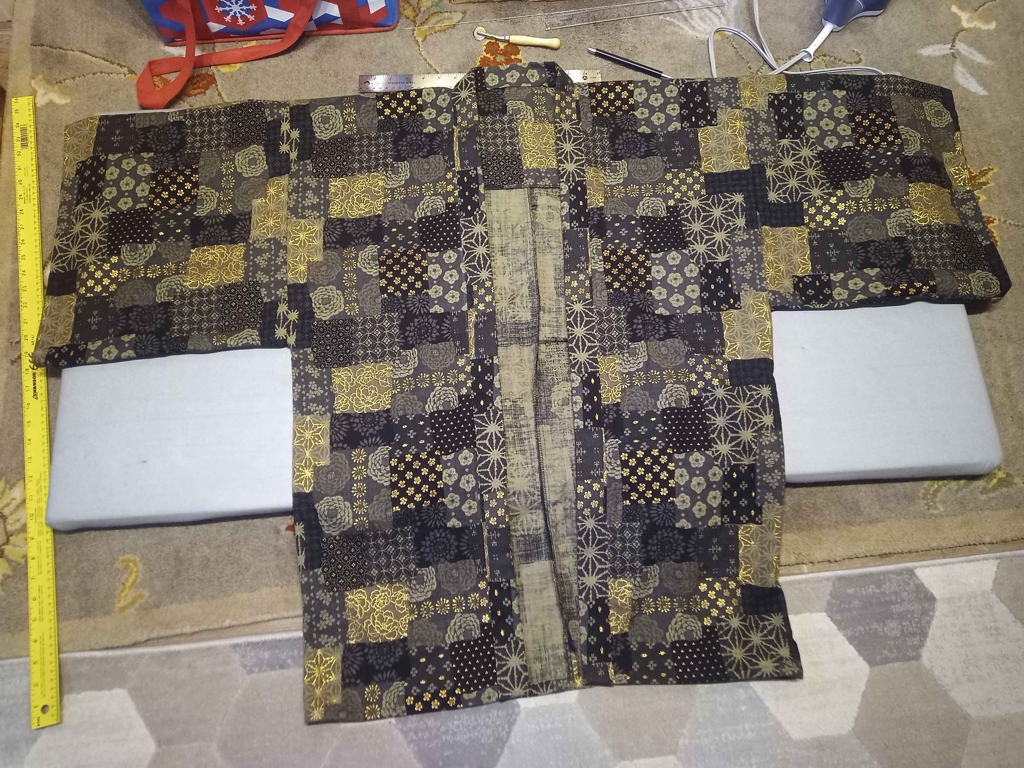
Sweetie and I were in a fabric store a few weeks ago, and they had a selection of faux boro fabric in several colorways. I really don’t need another happi coat, but they always come in handy and are a way to add another layer to a basic outfit as the evening cools off at Pennsic. Plus, one of the colorways was “black and gold”, which fits into the aesthetic we have here in the Debatable Lands.
Happi from Black & Gold Faux-Boro Cotton
Happi were some of the first Japanese garments I ever made for SCA wear, and they are still fun to make. They have a partial lining that helps to make them very durable. They are a good use for a a few yards of fabric that would be uncomfortable or distracting to wear as just about any other garment. The pattern I use is based on Folkwear 129, “Japanese Hapi & Haori“, but I no longer really need to refer to the pattern, I can just make one mostly from memory.
I’m going to save this one probably until January, then wear it at our Baronial 12th Night event, which is the SCA’s version of a Winter Holiday party.
A while back, I made an early-medieval kyousoku from poplar. That one is more what comes to peoples’ minds when Japanese floor-seated armrests are considered. However, in Traditional Japanese Furniture Kazuko Koizumi mentions another kind of armrest. “A sturdier, box-shaped armrest featuring feather-stuffed pads on top and usually storage space underneath emerged,” during the Muromachi/Momoyama period.
Koizumi, page 166
During Pennsic this year, I went over to the Alben sawmill and bought some excellent maple. Ray had already run it through the planer so it was pretty smooth, but it was still almost an inch thick. I knew that because of that thickness and because of the hardness of the maple, that my ability to make things out of this maple using the small selection of hand tools I had brought to Pennsic was going to be somewhat limited. I decided I would make a siple box, and this idea quickly developed into making a box-shaped armrest. I was able to get all the pieces cut, and and most of the joinery.
Once I got home, and had access to more tools and a sewing machine, I was able to finish shaping the pieces and assemble the armrest. I made a custom cushion out of cotton canvas and polyfill, and used to to upholster the lid of the box. I used copper nails to secure the joinery so it should be quite sturdy. given the density of the wood and its thickness, this completed box weighs more than ten pounds.
The inside of the box is roughly twelve inches by six inches, and four inches deep below the inner lid. I think it’s a bit smaller than the one in the image, but it’s a comfortable armrest when seated on the floor next to it, and I can fit a bowl and cup inside it.
It is not a comfortable seat, although you could probably park a midsize car on it.
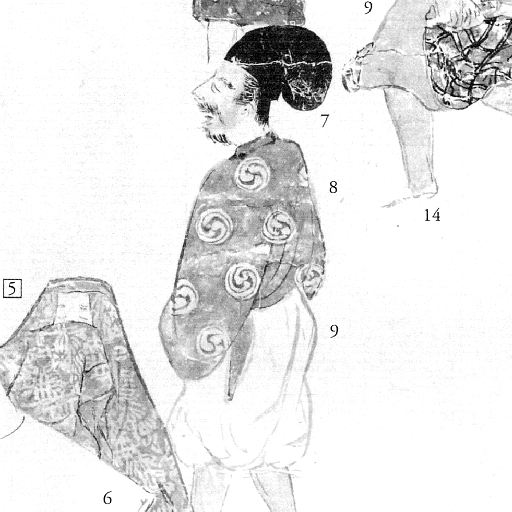
I have made dozens of eboshi over the years, both for myself and other people. One thing has always kind of bothered me about my eboshi, though. I tend to put a white headband on my eboshi because it is mostly what people are expecting, but many of the eboshi you see in historical illustrations do not have these white bands. Here, for instance, is an illustration from the Kitano Tenjin Engiemaki:
#7 indicates nae-eboshi
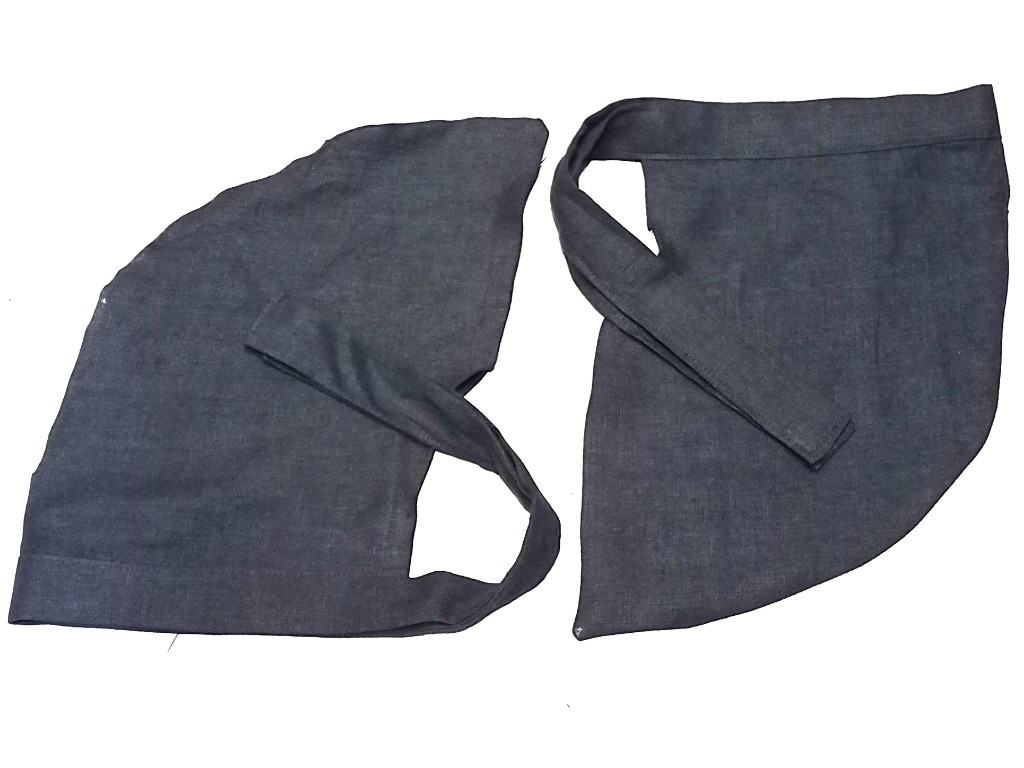
I picked this illustration because it is a fairly accurate portrait of me. You can see that the nae-eboshi in that image does not have a white band, but is all black. Quite simple to make a couple of eboshi using black fabric for the band instead of white.
Black Band Nae-eboshi
You will probably notice that the eboshi in the illustration is less pointy at the top than mine, and also does not have the long fabric ties that hang down in the back. I have some theories about that, but one change at a time, folks.
I’ve made a few nobori in the past, but usually for the Clan of which my household is a member group. This one is for the household of which I’ve been a member since 1996, the year it was founded: One Knight Inne.
Nobori no One Knight Inne
The full thing is 12 feet tall and 16 inches wide (19 inches wide with the tabs). It’s made entirely of rip-stop nylon (including the tabs). The tabs are made by stitching the nylon into a tube, then stitching 7″ lengths of the tube down to the banner. I made the badge by tracing the design onto white nylon, then stitching around the whole design using a 3mm satin stitch. Then, I trimmed the white nylon to the outside of the stitching, and the blue nylon to the inside of the stitching. It should be pretty durable. It should make quite a sight up next to all the Clan Yama Kaminari banners in camp.
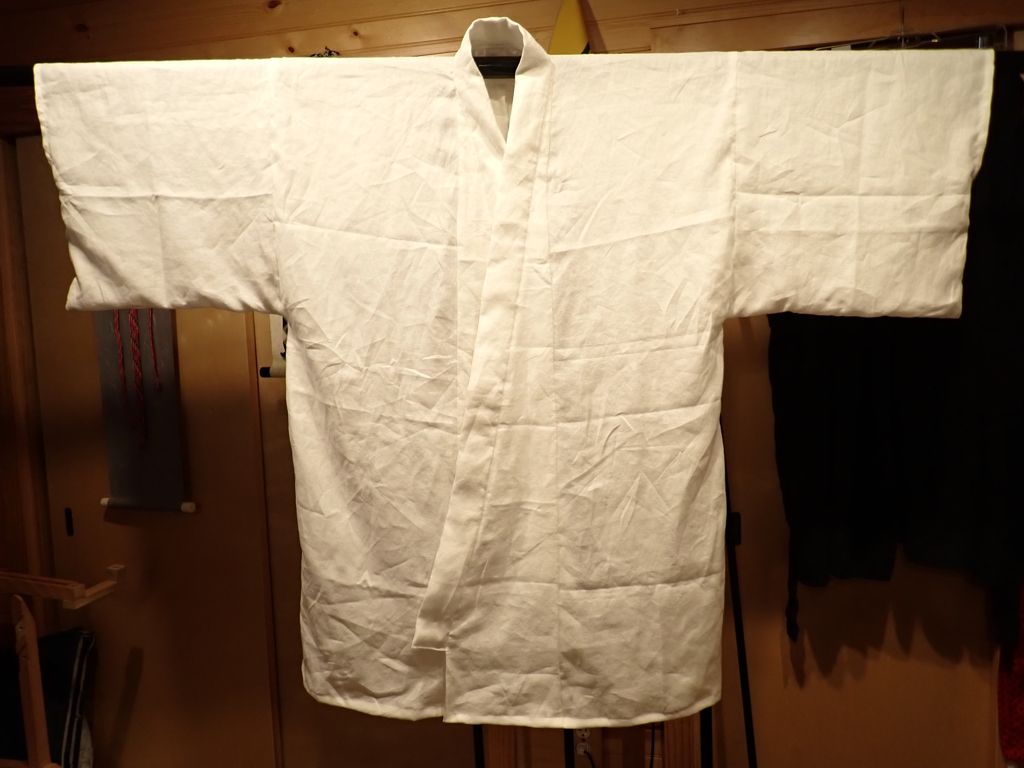
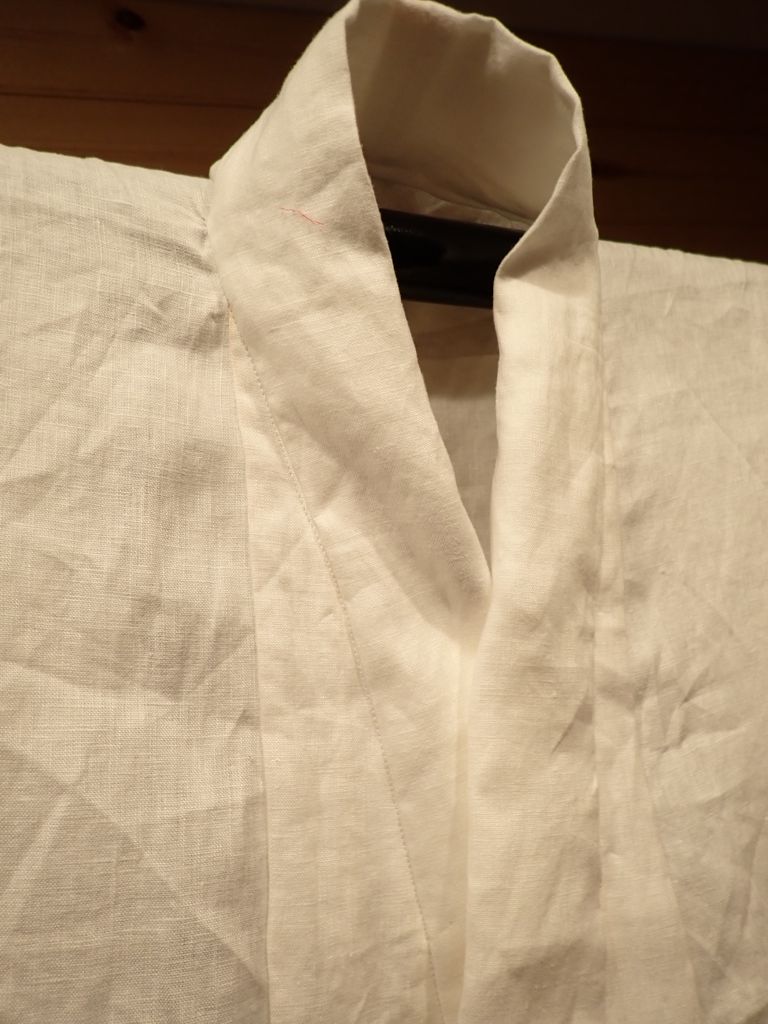
Managed to squeak this one in near the end of the year, but well within 2024. This year’s white kosode is made of some very nice linen that I bought at Pennsic from a vendor who specializes in fabric for historical reproduction. This linen is heavy, smooth, and luxurious. There are some changes in the pattern based on some more recent research that people in the SCA have done over the past few years. Most of the differences are in the overlaps and collar area.
White Kosode from Linen, 2024 edition
The learned can see the difference
Don’t worry, it’s looks better now that it has been laundered and ironed. I’m quite happy with the way this turned out. It does mean that I now have 14 white kosode. This is not only two full weeks worth of kosode, but the shelf where I keep my folded kosode is basically full. Most probably next year I will put one of my old cotton kosode into the garb swap to make room.
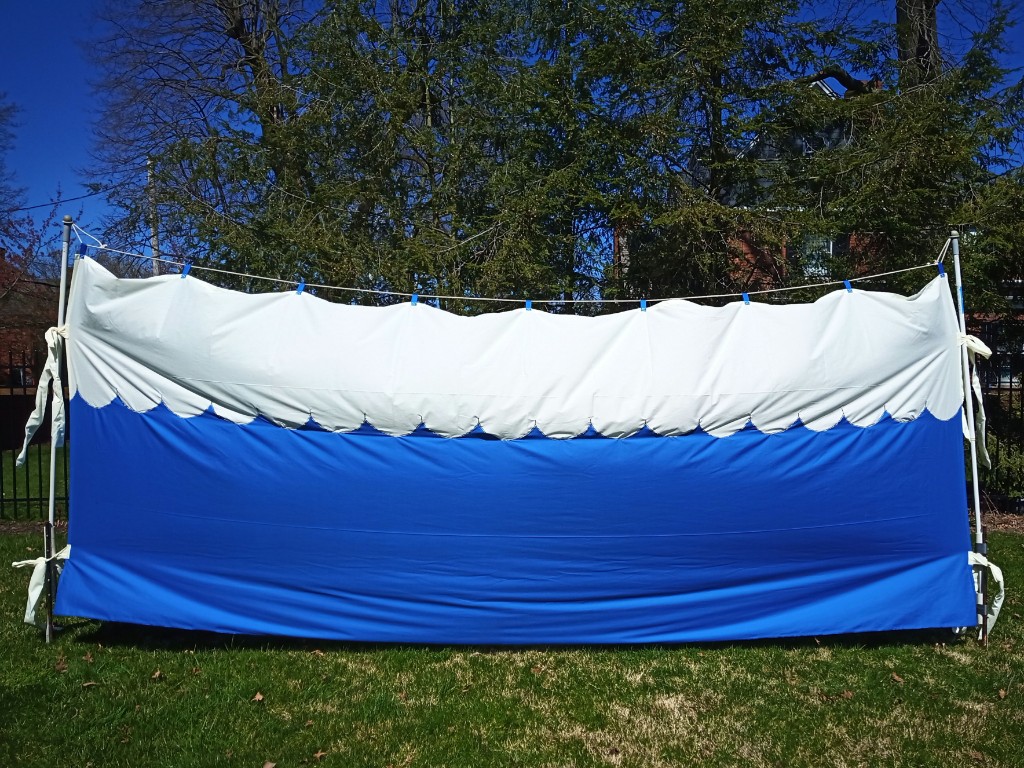
To commemorate the 35th anniversary of his knighting, I also made a jinmaku camp curtain (“windscreen”) for our friend Sir Maghnus.
It is the standard length (5 yards) and height (72 inches), but instead of the Kaminari colors of black over red, it’s white over blue and the white “chief” is invected like his arms. It took a while to do the scalloping, so I don’t recommend doing it “just because”. It’s a nice touch for a special anniversary, though.
For Pennsic, the Japanese-themed group we camp with, “Clan Yama Kaminari”, surrounds the camp with camp curtains called “jinmaku“. We typically refer to these as “windscreens”. Our camp is large, and these things don’t last forever, so we typically need to make one or two dozen new jinmaku every year to swap in for faded or otherwise damaged ones. Some time ago, I made some others to serve as personal curtains, or advertising banners for the Barony and Kingdom. For her birthday, I made my sweetie a couple of personal jinmaku.
Jinmaku in white over green
Jinmaku in white over purple
When we make them for camp, we make them in a “black over red” configuration. When I asked Hara Shonagon what colors she would want for personal jinmaku (without my committing to making them), she responded probably white/green or white/purple. Since she seemed undecided, I made one of each.
These are just cotton/poly fabric with webbing tabs at the top for hanging. I did put a lot of sewing into each one. Each has proper flat-felled seams for the top/bottom join, and a real hem at the top. The ones we make for clan spend most of the year locked up in a storage trailer, and only get used at Pennsic. We can use these whenever we want.
A “baldric” is a type of sash, typically used in the SCA to show heraldry, denote an award of some kind, or designate the wearer as a holder of an office. These are similar to belt favors (link, link, link, link, link, link) but they are a little more formal and are visible from the front. Anyway, I was told that until I made the Arts and Sciences Belt Favors, the office of Kingdom Arts and Sciences Minister had possessed absolutely no regalia. Since this is a serious office that sometimes requires participation in court, I decided to at least partially remedy this lack.
Aethelmearc Kingdom A&S Baldrics
These are linen baldrics about seven feet long total, though of course they are doubled over. I guess they are about seven inches wide. The Kingdom populace badge is one of the professionally embroidered patches I had made, and the A&S badge is machine embroidered. this kind of baldric is meant to be worn from the left shoulder, draped diagonally across the body to the right hip, with the badging over one’s heart.
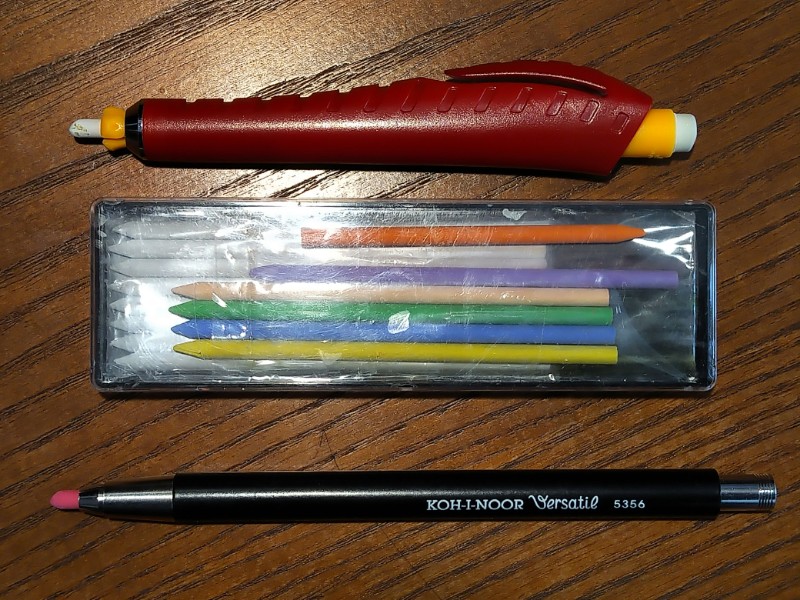
For those of you who, either at my recommendation or independently, purchased the “Dritz Chalk Cartridge Set” chalk holder, or (perhaps more so for you who) did not purchase the Dritz model because it is made of plastic, it should be noted that the chalks that come with the Dritz holder are 3.8mm in diameter, and can be inserted into the “Koh-I-Noor 3.8mm Clutch Pencil 5356″ which is made of metal.
Dritz (top) and Koh-I-Noor (bottom) 3.8mm Holders
I have never seen the Koh-I-Noor 5356 in any store, but it is available from several online retailers. I won’t attempt to bias you for or against any particular retailer. The down side are that the 5356 does not come with a supply of chalk or a sharpener.
I have yet to compare the Koh-I-Noor colored artist’s leads to the Dritz chalk sticks in terms of marking and washability. So far, the Dritz chalks have lasted several years and one pack may be a lifetime supply.


