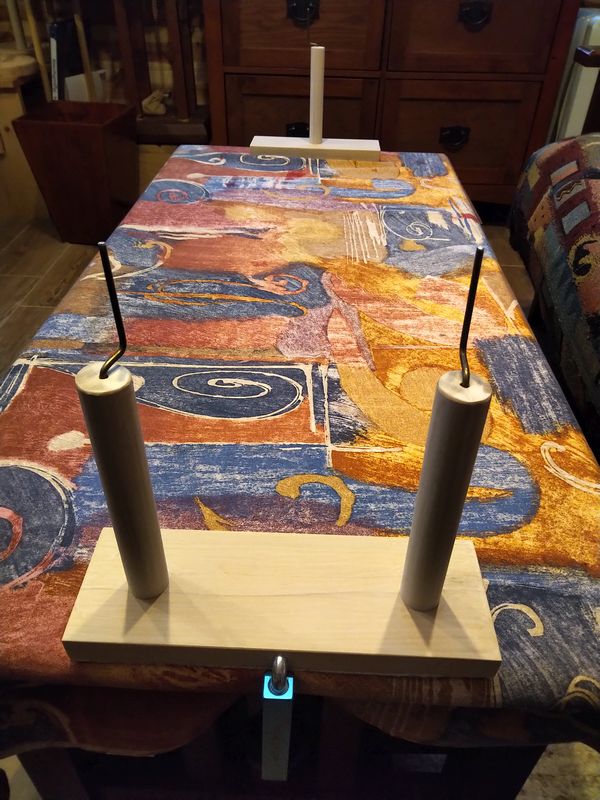
More than a decade ago, when I first started braiding, I made a couple of warping pegs so that I could measure out material for setting up a braid on my marudai without having to pay for pre-measured silk. Not too much later, I made a nicer set of pegs for Sharon, so that she wouldn’t have to borrow mine. Over the next ten years, I kept telling myself that I should make myself a nicer set of warping pegs because my first set was kind of “quick and dirty” in their construction. Finally, I was in the mood to actually do that.
Same as Sharon’s pegs, I did a pair of pegs on one board, and a since peg on the other. This is really common, and you will see it a lot if you do a web search for “warpings pegs”. It enables you to do a few different things like keeping two parts of a warp separated, effectively doubling the length of your table by using the single peg in the center of a long warp, and making part of a warp slightly longer than the other.
That last one is handy for some of the braids where the uptake on some strands is higher than the other. If you make all the strands the same length, you wind up running out of material on some tama faster than on others, and you usually throw away a bunch of material. Anyway, I’m glad to have them now.
The boards are both cross-drilled, so I can clamp them to a table edge using these ginchy clamps from Rockler. These clamps are a really good buy since they accommodate a large number of table thicknesses in a compact, sturdy clamp.
The wooden pegs have metal hooks extending from the top, same as all the other ones I have made. These are imitative of Japanese bodai warping stands. While they are not necessary, and most warping pegs made for weaving do not have the hooks, I like them.
I also put some sticky felt on the bottoms of the boards, so maybe they won’t scratch up the dresser in my crafting room like the cheap ones did.


