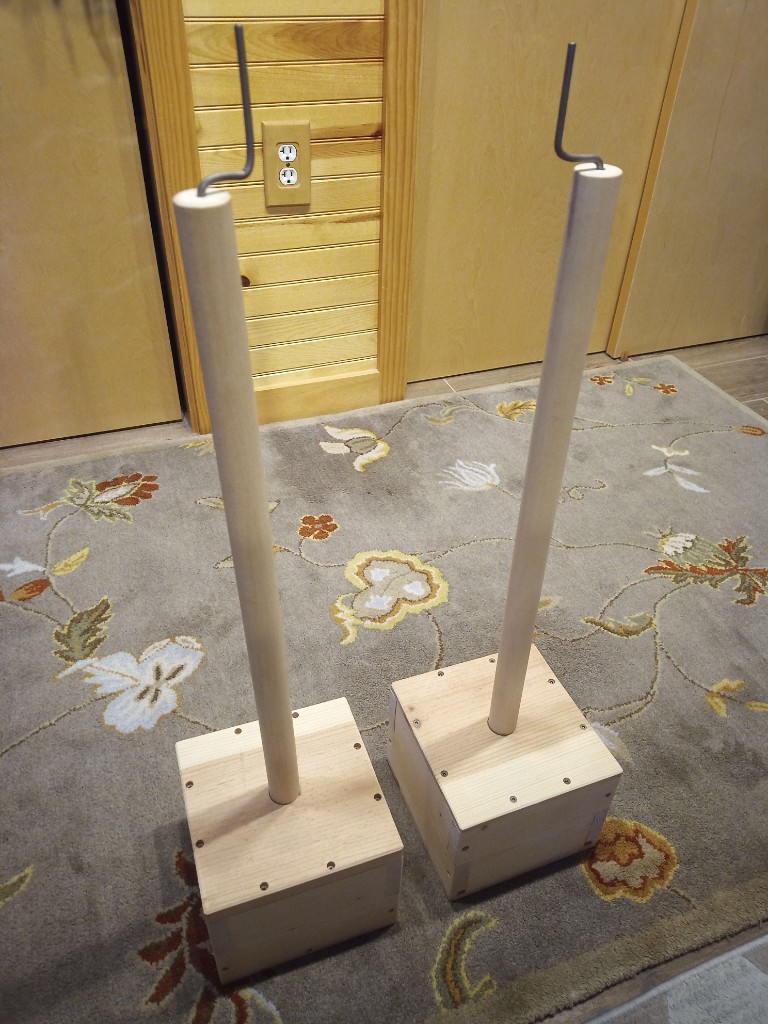
I’ve made several sets of small warping pegs, called bodai in Japanese, in the past, and even made this full-size pair some time ago. The only problem with those round bases is that they are too light. Subsequently, I made this new pair of bases for those bodai. Each base is weighted with 6 5-pound blocks of steel.
The benefit of these is that they can be placed an arbitrary distance apart, even if no tables or other clamping surfaces are available. If you need a 12-foot warp, just place these 12 feet apart and warp away. they can also be used as fixed points for kute-uchi loop-braiding if that’s more to your liking.
The new bases are made of pine. The bases are 7.75″ square and 6″ tall. Given the 0.75″ thickness of the lumber, that leaves a nice size void inside for the steel blocks, which are 3″x6″x1″ each. The boxes are held together with screws, which is not very attractive, but I wanted to be able to retrieve the blocks later if I need them for something else.
Many braiders who choose to work in silk buy premeasured bundles of silk threads. These bundles are usually designed to produce braids that are a good length for the obijime braids worn with formal kimono.
When sweetie and I braid, we are often aiming for other lengths, or specific colors that it is more economical to buy in bulk on spools. Then, we measure out our own bundles. Traditionally, this would be done on tall warping stands called bodai. We use a kind of mini-bodai that clamp to the edges of a table. I have made a few sets of these in the past, but I just made a nice set for Sharon.
Cherry Mini-Bodai
They are made entirely from cherry wood, except for the screws that attach the pegs to the bases, and the hookie thingies of course.
I bent the metal rod in a 4″ metal brake that I had to buy a 4″ bench vise to use. It was super easy doing it this way. The bends are exactly where I wanted them and used the mechanical advantage of the vise instead of brute force.
With the “2 and 1” pegs that i normally make, if you have a 4 foot table you can measure out 4′, 8′, and 16′ warps fairly easily. By making this “2 and 2” set, she can now add 12′ and 24′ to her repetoire for those longer or more complex braids.
More than a decade ago, when I first started braiding, I made a couple of warping pegs so that I could measure out material for setting up a braid on my marudai without having to pay for pre-measured silk. Not too much later, I made a nicer set of pegs for Sharon, so that she wouldn’t have to borrow mine. Over the next ten years, I kept telling myself that I should make myself a nicer set of warping pegs because my first set was kind of “quick and dirty” in their construction. Finally, I was in the mood to actually do that.
The pegs, clamped to my coffee table
Same as Sharon’s pegs, I did a pair of pegs on one board, and a since peg on the other. This is really common, and you will see it a lot if you do a web search for “warpings pegs”. It enables you to do a few different things like keeping two parts of a warp separated, effectively doubling the length of your table by using the single peg in the center of a long warp, and making part of a warp slightly longer than the other.
That last one is handy for some of the braids where the uptake on some strands is higher than the other. If you make all the strands the same length, you wind up running out of material on some tama faster than on others, and you usually throw away a bunch of material. Anyway, I’m glad to have them now.
The boards are both cross-drilled, so I can clamp them to a table edge using these ginchy clamps from Rockler. These clamps are a really good buy since they accommodate a large number of table thicknesses in a compact, sturdy clamp.
The wooden pegs have metal hooks extending from the top, same as all the other ones I have made. These are imitative of Japanese bodaiwarping stands. While they are not necessary, and most warping pegs made for weaving do not have the hooks, I like them.
I also put some sticky felt on the bottoms of the boards, so maybe they won’t scratch up the dresser in my crafting room like the cheap ones did.


