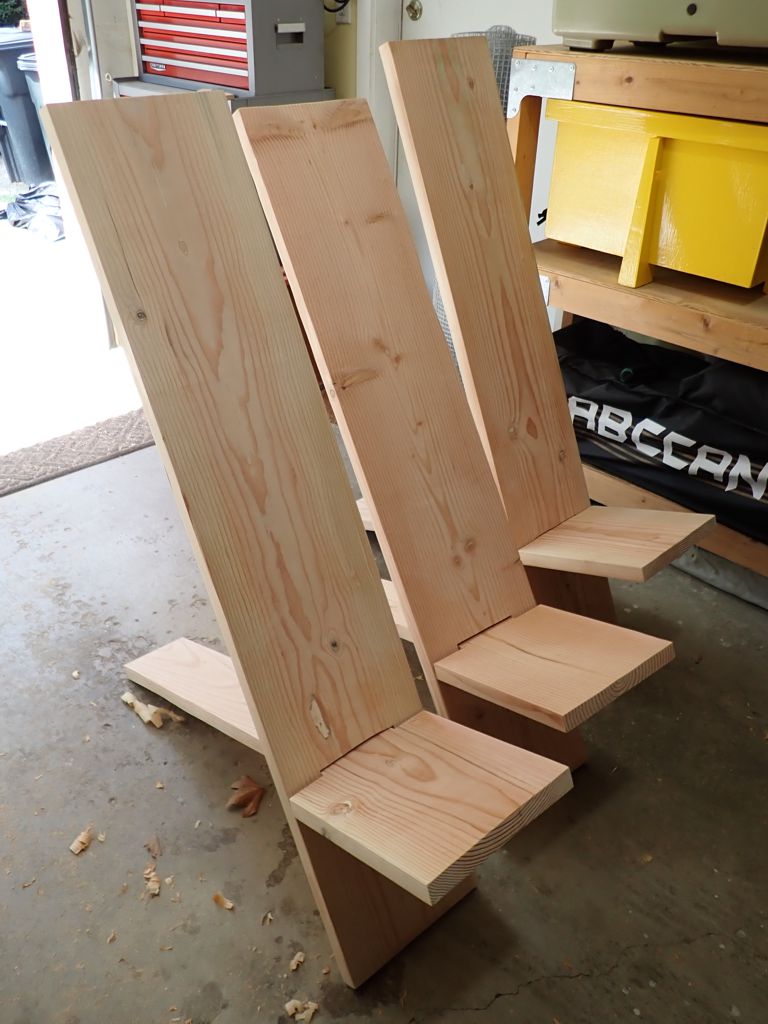
Some friends of ours who were living right around the corner from us were about to move to Portugal. They had a bunch of lumber that they had been using for storage shelves in garage, and they asked me if I wanted it. Three of the pieces were 8-foot 1-by-12s, so I decided to use them to make three brand-new “Pennsic Chairs“. After this photo was taken, I put a few coats of finish on the chairs, and later wound up giving them away to other friends.
I realize now that for as many years as I have been making these chairs, I never posted detailed visual instructions. Let’s do that now.
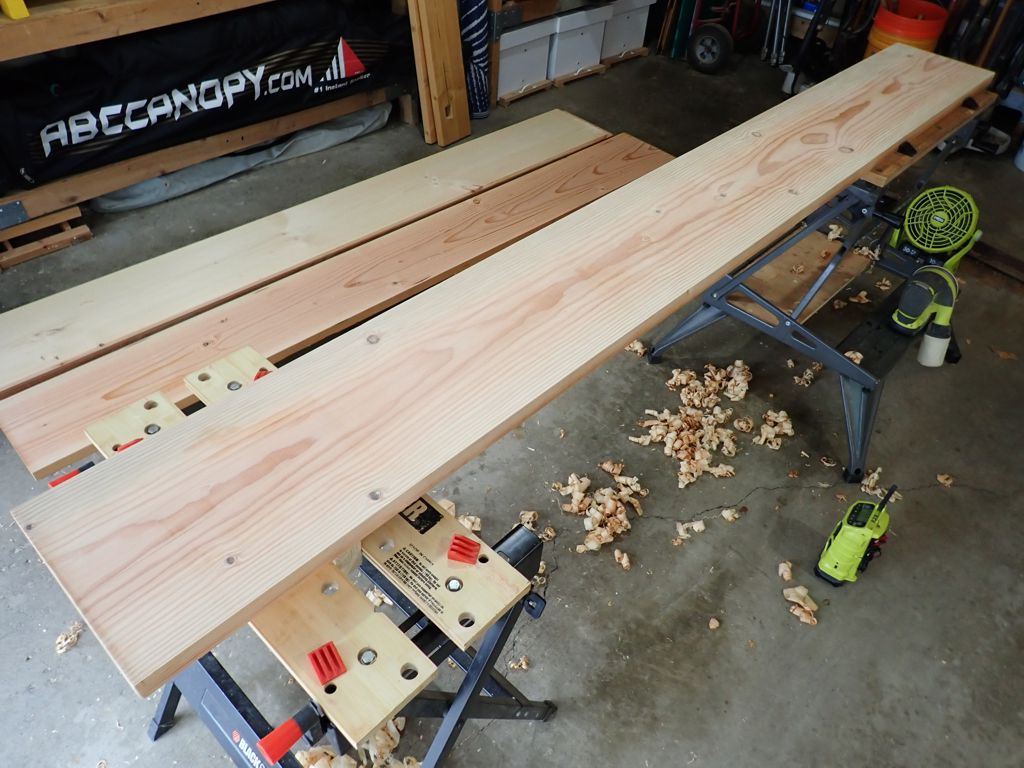
First, I planed the lumber smooth, and cleaned up the edges. Mark a middle line 42 inches form one end (for the seat), and 54 inches from the other (for the back).
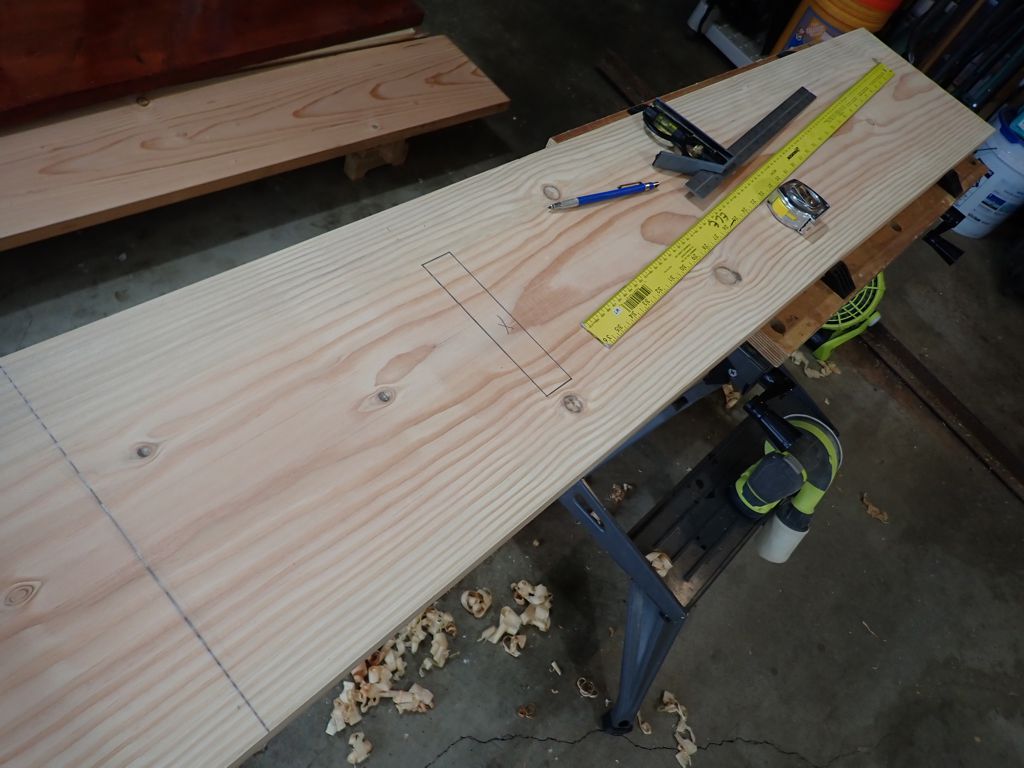
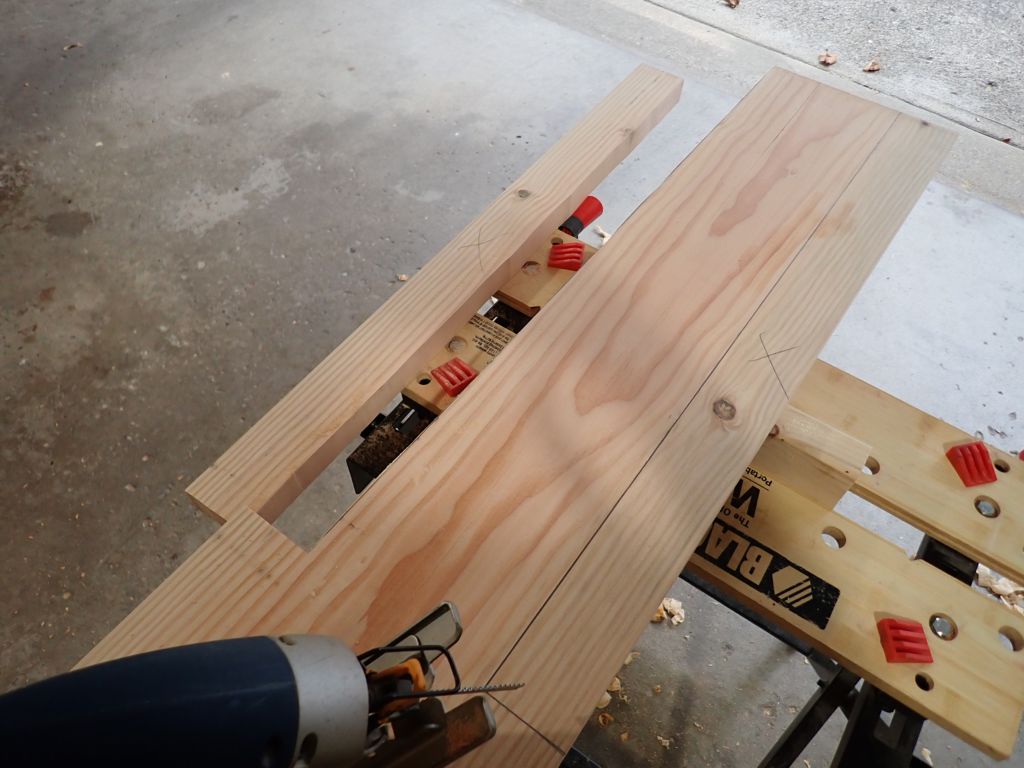
Next, on the back piece, 12 inches up from the middle line, mark a mortise about half the width of the lumber (so, 5 or so inches), centered, and a little more than the thickness of the lumber.
Then, on the seat piece, starting 12 inches down from the middle line, mark the tenon. It should be a little less than the width of the mortice, centered, and all the way from the start line down to the end.
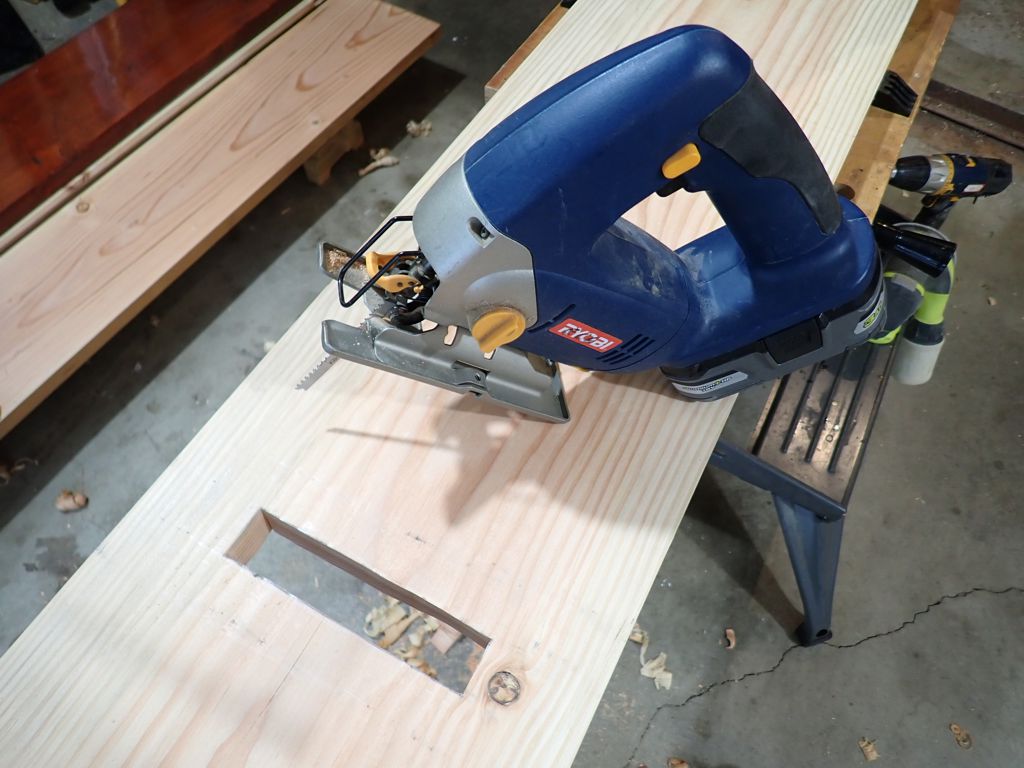
Using a jigsaw, I cut out the mortise. It’s best to start by drilling a hole, then cut towards the edges in curves until you can cut clean on the line.
You can use the same saw, and cut the edges of the tenon on the seat piece. These are long cuts, so take your time.
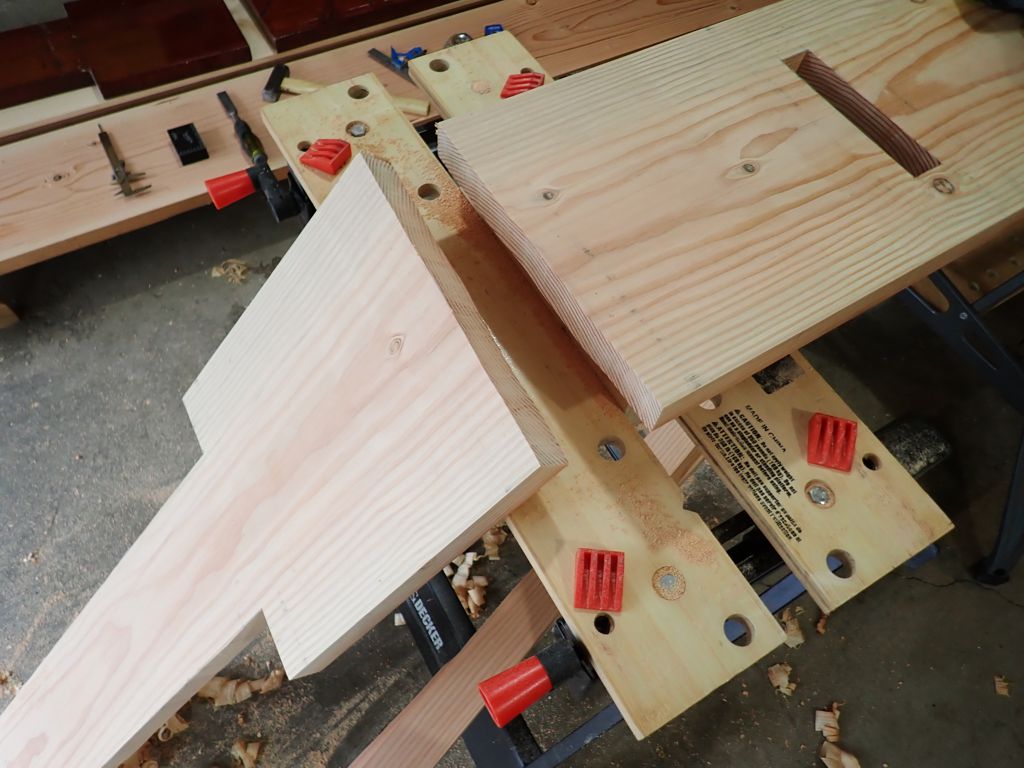
It’s easier to cut the joinery with the lumber in one big piece, but now you can cut along the middle line and separate the two pieces. Use files and sandpaper to clean up all the cut edges, and maybe round over the corners a little bit.
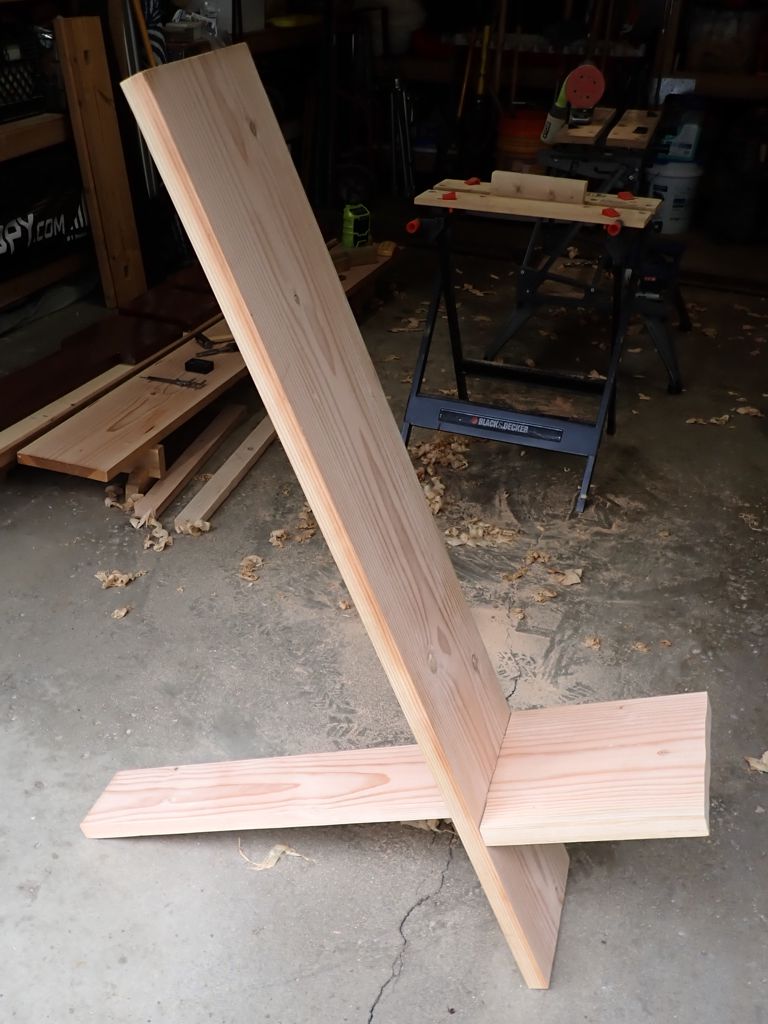
Test the fit by sliding the tenon through the mortise and standing up your new chair against the floor. Now all it takes is some finish and waiting.