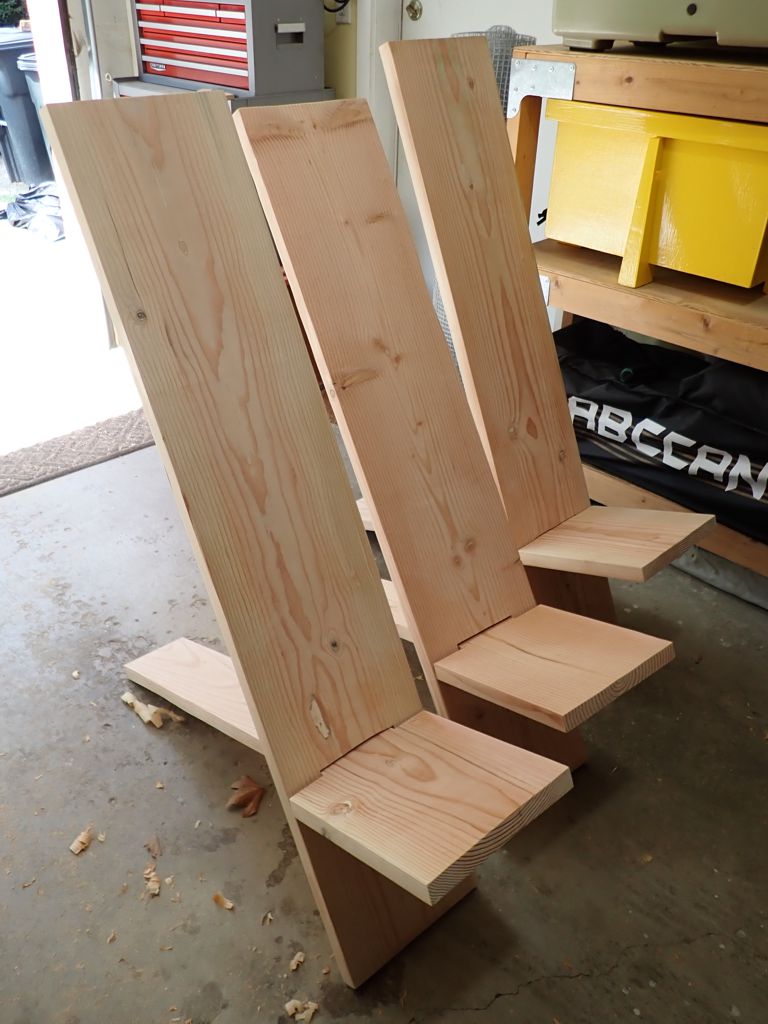
Some friends of ours who were living right around the corner from us were about to move to Portugal. They had a bunch of lumber that they had been using for storage shelves in garage, and they asked me if I wanted it. Three of the pieces were 8-foot 1-by-12s, so I decided to use them to make three brand-new “Pennsic Chairs“. After this photo was taken, I put a few coats of finish on the chairs, and later wound up giving them away to other friends.
I realize now that for as many years as I have been making these chairs, I never posted detailed visual instructions. Let’s do that now.
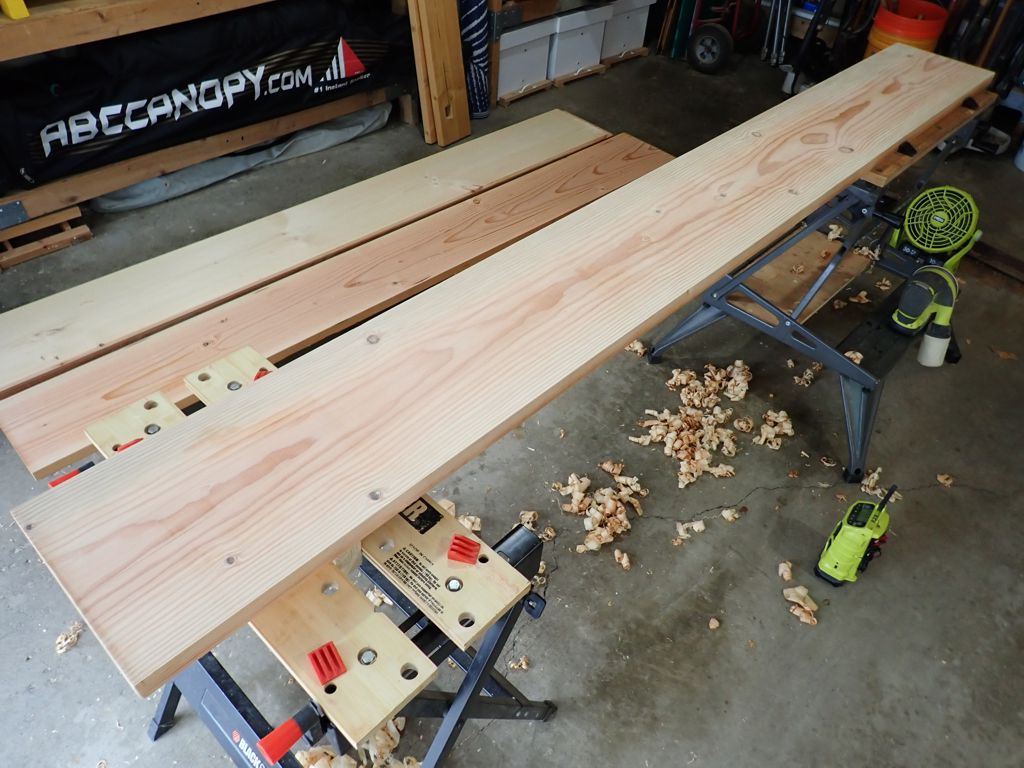
First, I planed the lumber smooth, and cleaned up the edges. Mark a middle line 42 inches form one end (for the seat), and 54 inches from the other (for the back).
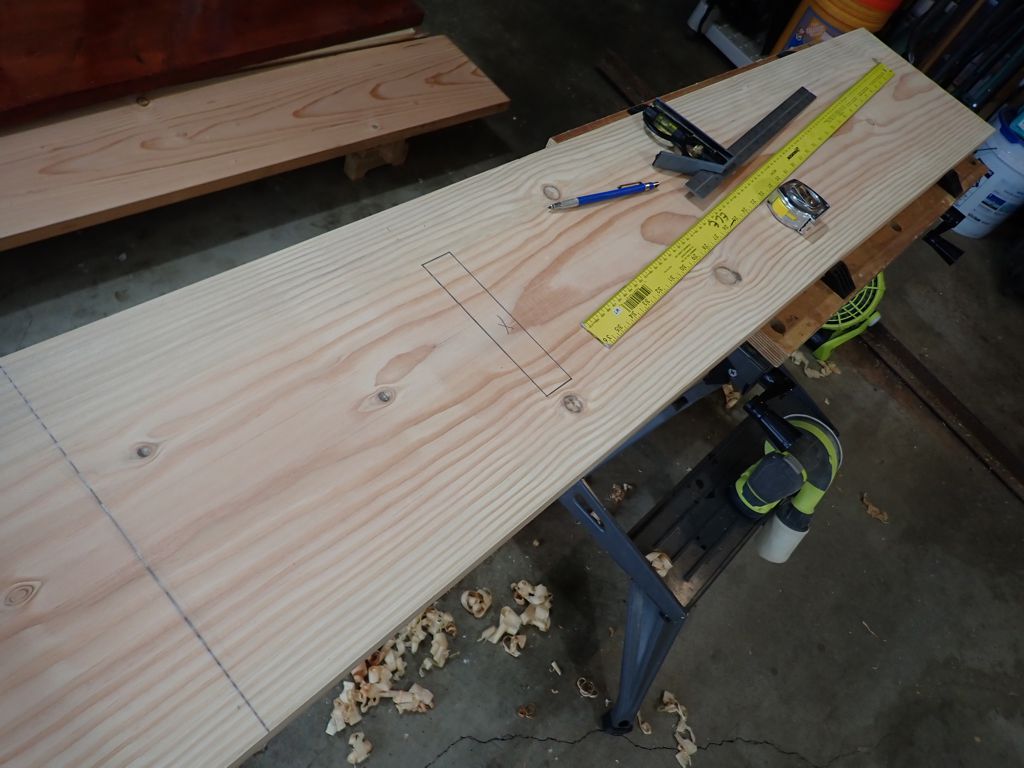
Next, on the back piece, 12 inches up from the middle line, mark a mortise about half the width of the lumber (so, 5 or so inches), centered, and a little more than the thickness of the lumber.
Then, on the seat piece, starting 12 inches down from the middle line, mark the tenon. It should be a little less than the width of the mortice, centered, and all the way from the start line down to the end.
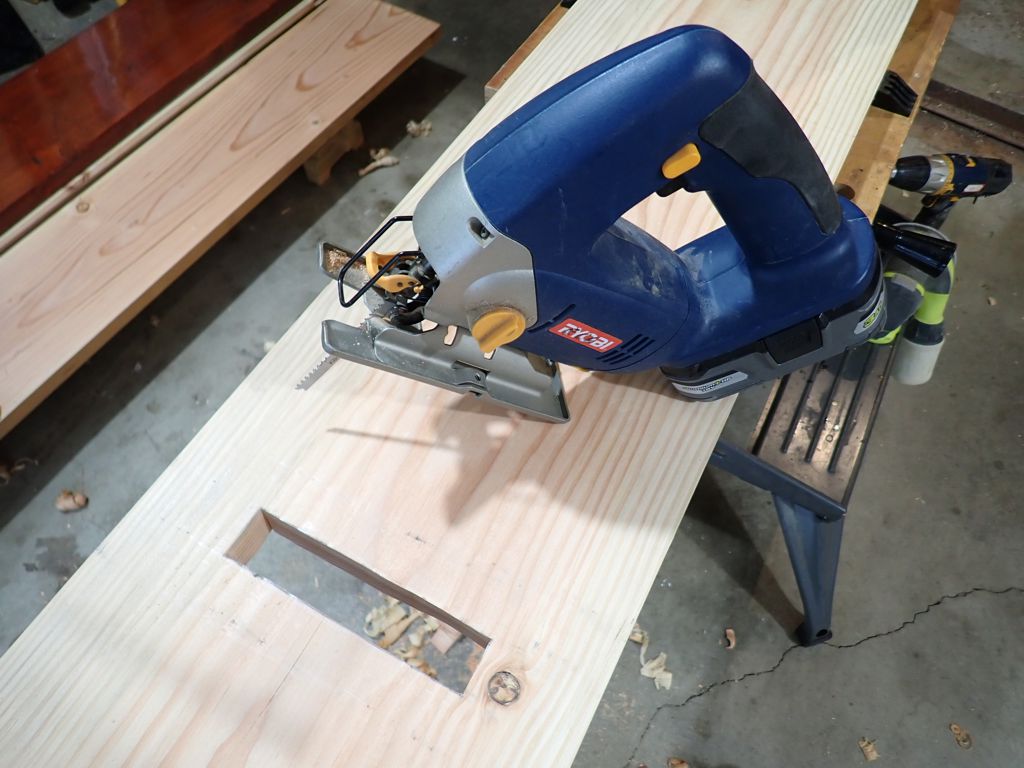
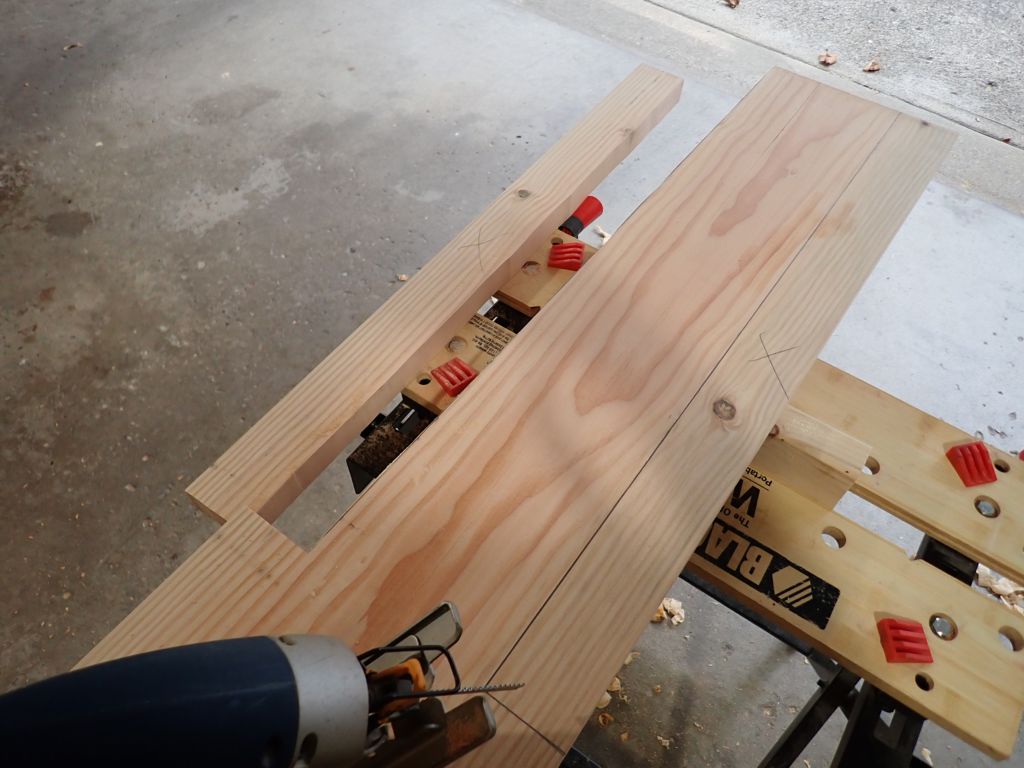
Using a jigsaw, I cut out the mortise. It’s best to start by drilling a hole, then cut towards the edges in curves until you can cut clean on the line.
You can use the same saw, and cut the edges of the tenon on the seat piece. These are long cuts, so take your time.
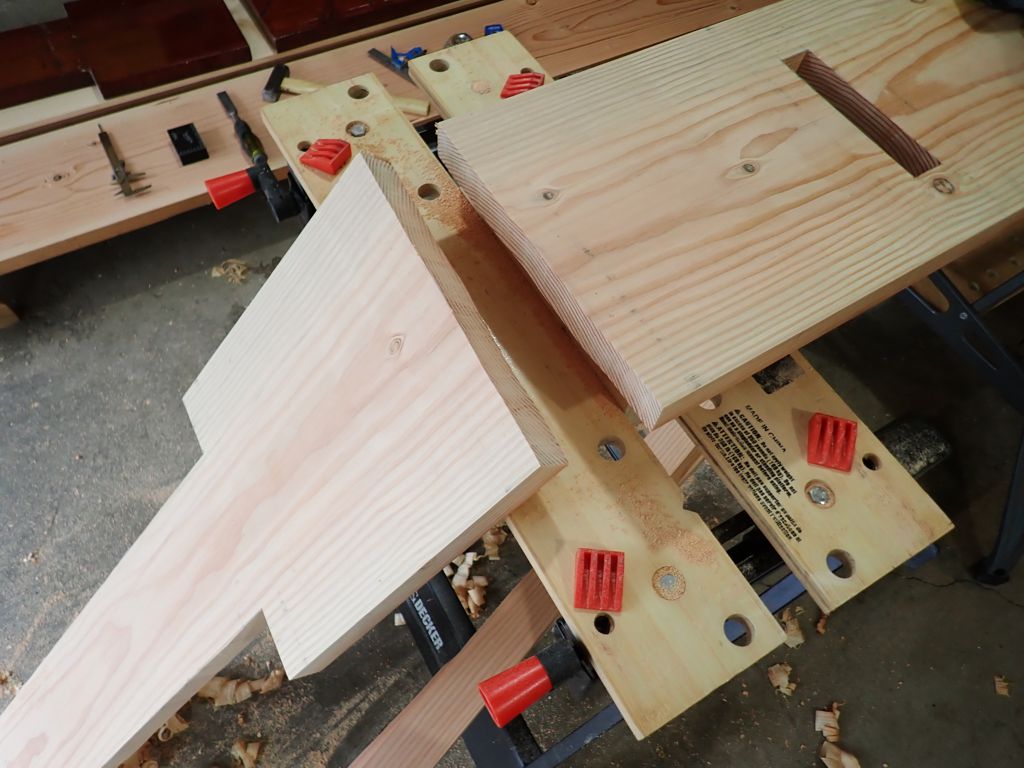
It’s easier to cut the joinery with the lumber in one big piece, but now you can cut along the middle line and separate the two pieces. Use files and sandpaper to clean up all the cut edges, and maybe round over the corners a little bit.
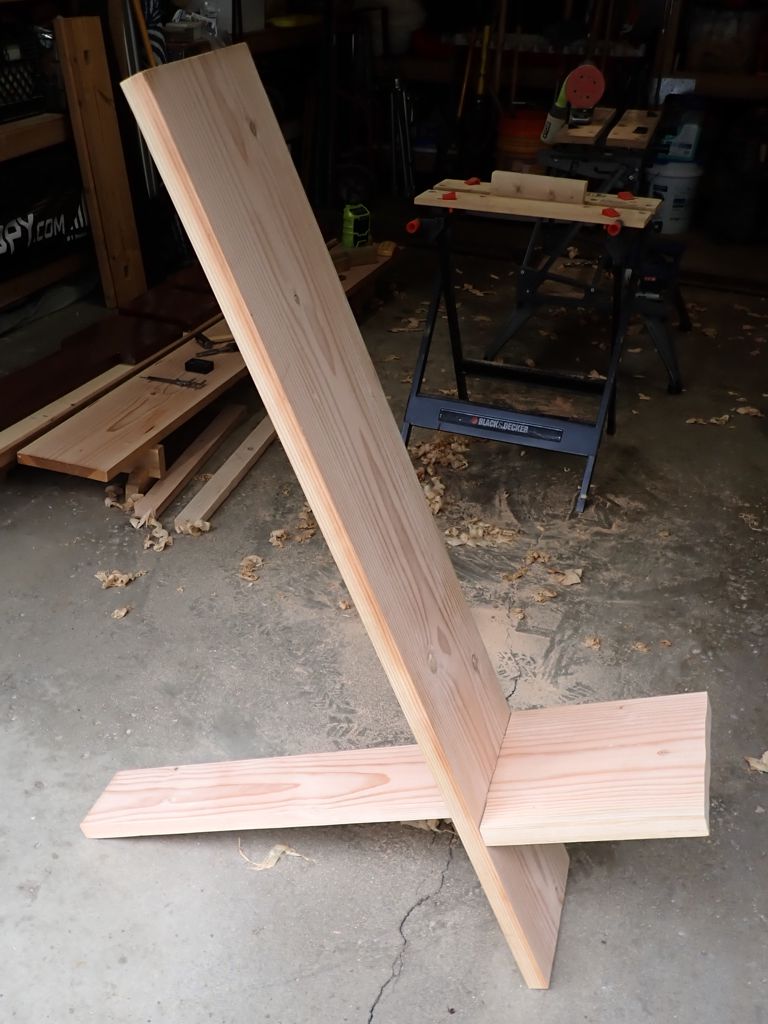
Test the fit by sliding the tenon through the mortise and standing up your new chair against the floor. Now all it takes is some finish and waiting.
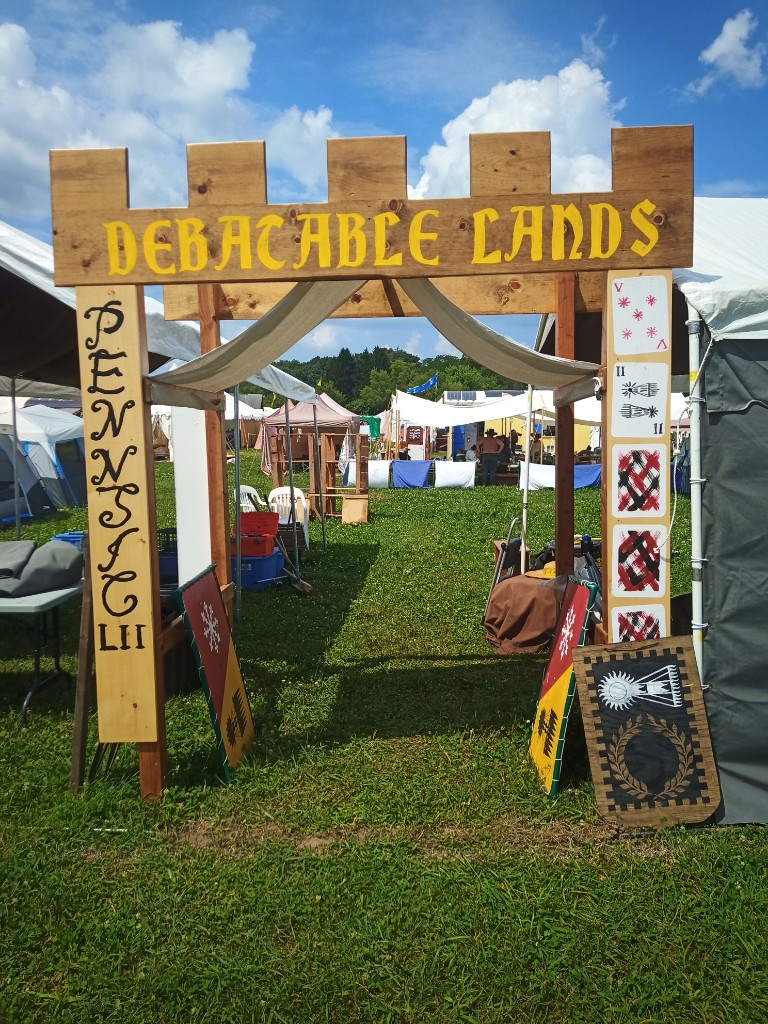
Last year, I made a new entry gate for the Debatable Lands Pennsic camp. Part of the design was for two panels, made from 6-foot 1-by-10 lumber, that are basically decorative and not structural. The idea was to use them as message boards that could be repainted every year or so depending on what people wanted to say. Last year, they honored 50 years of the Debatable Lands. (Because you can’t spell “Debatable Lands” without “L ans“.) This year I wanted them to honor Pennsic 52. (Now playing with a full deck!)
I bought two 1x10x72 boards at the orange DIY store and sanded them smooth. Last year I rounded-over the edges, but this year I did not bother. Then, I applied sanding sealer to harden the wood and sanded it (after drying) to create a nice smooth surface for painting. I did the “calligraphy” and playing-card “illustration” mostly by hand using enamel paint. The white rounded rectangles were taped off to make it easier to keep the edges crisp. rather than get too twitchy about making identical card backs, I just taped margins on the rectangles and kind of swiped the black and red brushes across. Most people seemed to understand what I was going for.
Anyway, these went over well and as a bonus, I can use the cards again next year since it’s 52 years as a Barony!
Here’s a project that barely has any wood in it at all! It’s another silk banner for a friend who was being elevated to the peerage in the SCA. Owen’s arms has one of those repeating patterns that make it an awful lot of work for a vertical banner like this, but the rams at the top are interesting.
I laid out the repeating pattern in chalk, then suspended the silk in my pvc-pipe painting frame and used black gutta resist to make the lines for the pattern. Then it was a simple if maddening chore to color in every other rhomboid with paint. Once that was dry I treated the upper portion with sizing, then traced and painted the rams.
I’m always a little paranoid about the paint, so even though I used the air-set additive in the paint I also did a bunch of ironing to heat-set the paint. I have to wash the silk to get all the chalk off, so I need to be sure the paint is well and truly set.
Anyway, this banner was done in plenty of time before Pennsic, and we used it at Owen’s vigil and his procession into court. Always happy to help out, and be able to contribute a gift that somebody can actually use.
In our camp each year, there is always a pile of random stuff in one corner of our common pavilion. Things like empty storage boxes, bulk packages of paper towels, and random office supplies. Camp leadership asked me to noodle on the idea of shelves for that corner, so at least things would look a little more organized and not just piled up. I had some ideas, and luckily for me they already worked out!
The lumber I had was three 48″ long stair treads. Stair treads are usually a full inch thick, so they should sag a lot less than the 3/4″ pine I usually use. I drilled holes near the corners of each shelf for the hardware to pass through. The base is cut from 2-by-4, and I added hand-cut half-lap joinery. The uprights are also cut from 2-by-4, and they have lag screws and dowel screws running into their ends to join them through the holes in the shelves and the base. Each upright is 18″, so the total height is about 5 feet tall.
Here is what they look like without picturesque stuff decorating them:
Here is the historical design I was imitating:
The original joinery in the book is shown as a double-shouldered mortise and tenon joint. I was pretty sure that would exceed my current capabilities and definitely deteriorate over time. I figured the hardware route was faster and more solid. It all joins rigidly together. Given that the shelves were a gift, that I only bought about $20 in lumber and $15 in hardware, and that I had all of the finishing materials I needed already, this was a very affordable project.
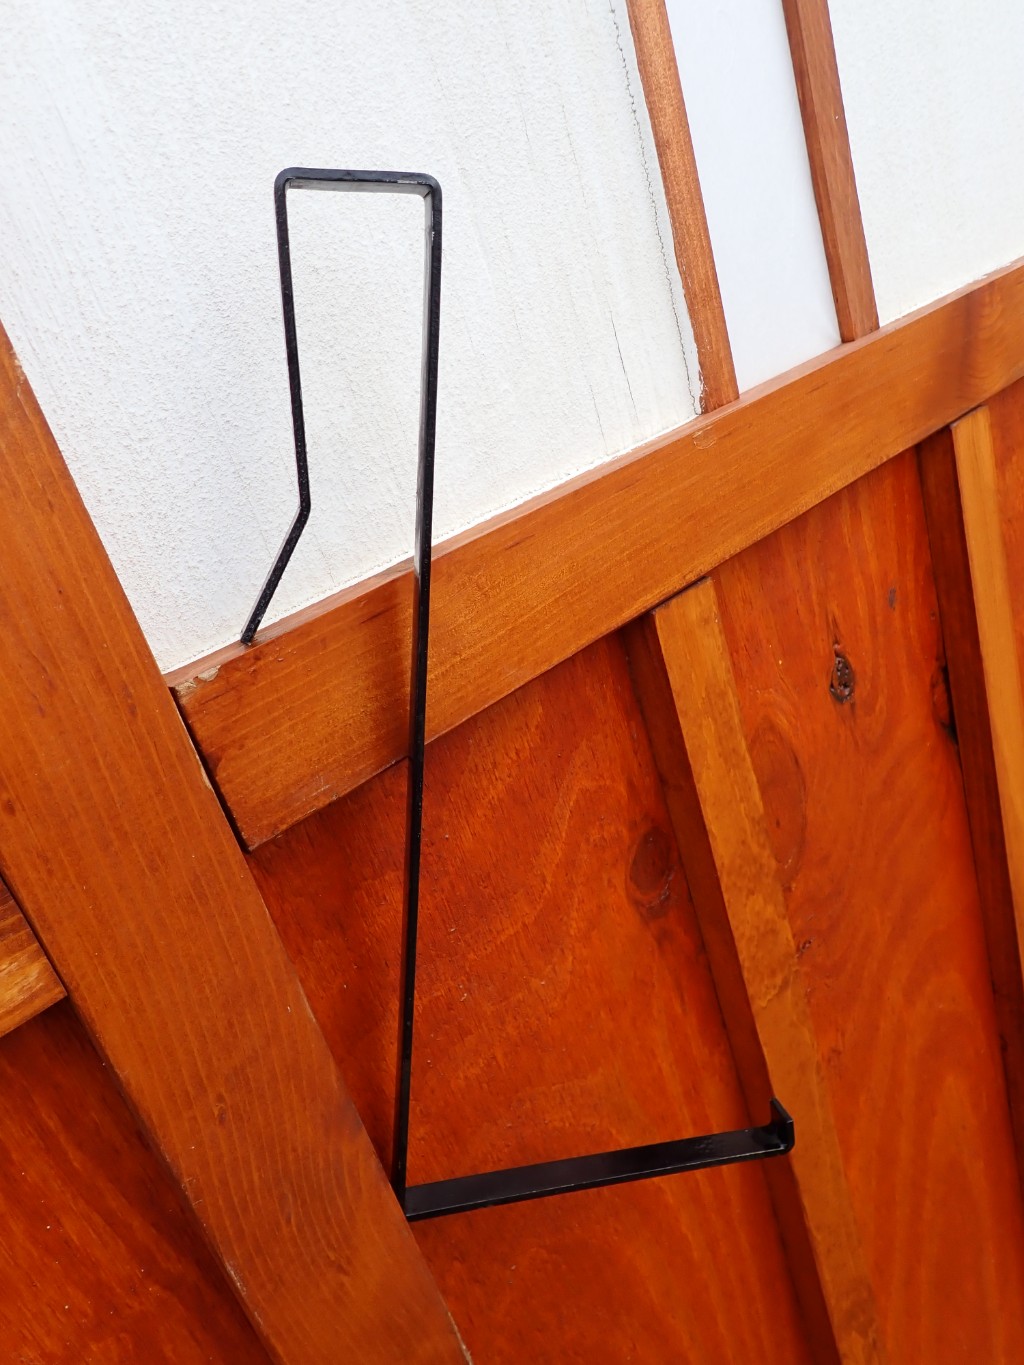
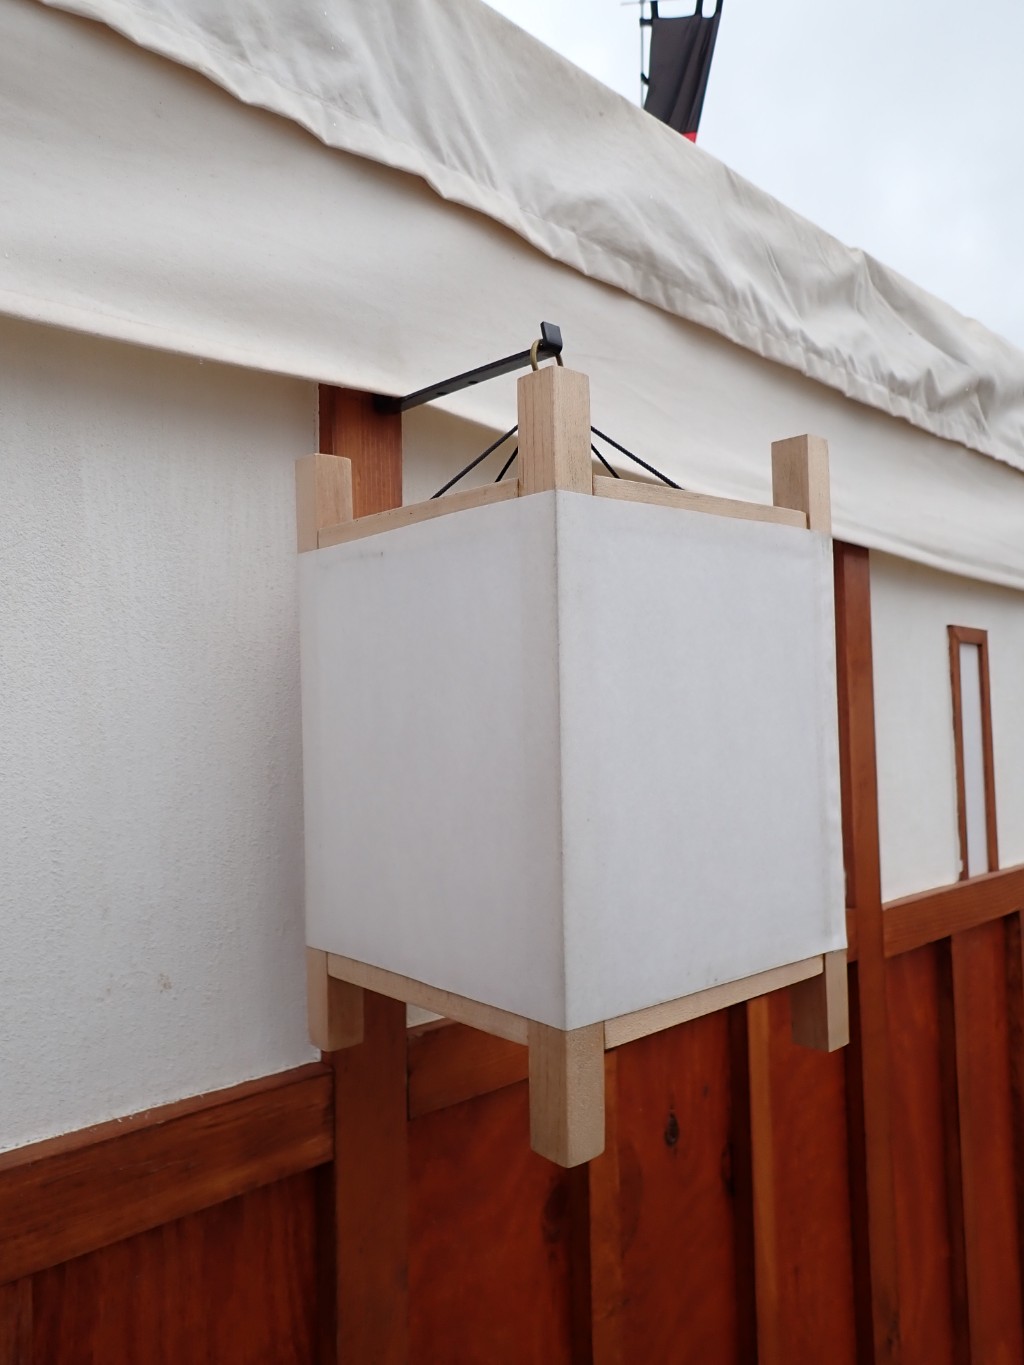
I made these back in the fall of 2023, but was not able to finish painting them until Spring, and wasn’t able to try them out until Pennsic (and get photos), so here we are. These are metal hooks meant to hang the lanterns I made a four years ago from the camp walls I made six or so years ago. The problem is that the canvas roofs of the pavilions hang down over the walls for a fair distance. The past couple of years, I have tied twine to the ring at the top of each lantern, then hung the twine from the metal frame of the pavilion. The meant that the lanterns were hanging against the walls, which I found to be less that optimal. The hooks clip onto the tops of the walls, hang down to below the bottom edge of the canvas, and then extend far enough so that the lanterns hang straight.
The basic shape of the lantern hook
Clipped to the wall and hung with a lantern
Pull down the canvas to complete installation
I made these by buying 1/2″x1/8″ welding steel bars from the hardware store, then bending each bar to shape using metal bending jaws in my bench vise. because of the length of the material, I had to bend the bars off center so that they would not hit the beam of the vise. This caused racking in the vise, so I tried to bend two bars at once to balance things out. This bent the beam on my light duty vise so that it is now useless, It’s OK, that was a good excuse to buy a heavy duty vise to replace it.
I also tried using aluminum bar to make it easier to bend, but the aluminum does not stand up to sharp bends as well and sometimes just breaks. I painted the steel bars black to protect them from rusting (I hope).
These stayed up for 2 weeks at Pennsic without incident, and the lanterns didn’t fall off even in the severe rain storms that we had. Success! They joined the lanterns in the 6 lantern storage box that I built 4 years ago.
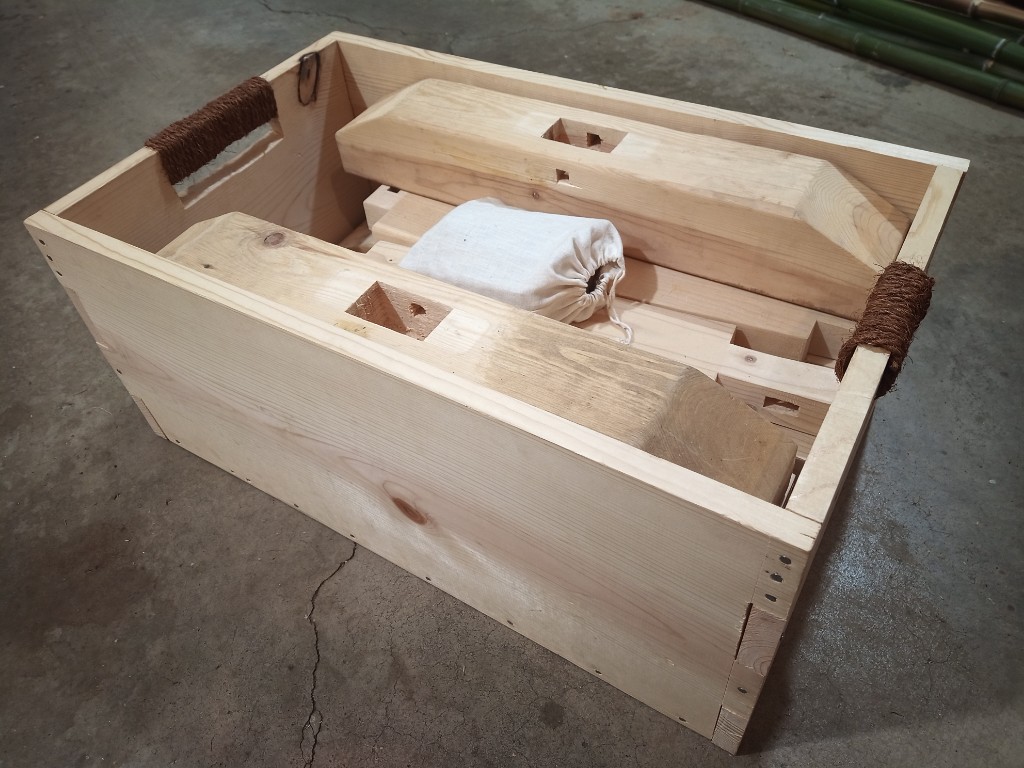
I made four Japanese-style sawhorses several years ago, but I realized recently that I had no way to transport them except to toss the pieces into the trunk of my car or pile them in a wagon. Then, some friends of mine moved away and gifted me with a pile of lumber they had been using as storage shelving. I spent a few days at the 51st Pennsic War medieval event constructing this 26″x16″x11.25″ crate using only hand tools, as a demo of Japanese style woodworking.
Sawhorse Crate from Pine 1-by-12
I used a ryoba nokogiri saw to do all the cutting of the pieces from the boards, and some of the joinery. I used oire nomi chisels and a mawashibiki saw to cut the remainder of the joinery and the handle cut-outs. A yotsume kiri gimlet came in handy for pilot holes so that the wood didn’t split when I drove in the nails with a genno tsuchi hammer.
Contrary to common belief, Japanese carpenters would not have used fancy joinery without nails to construct such a simple workman’s item. That kind of specialty carpentry was mostly used for devotional items or religious buildings. They probably would have used forged nails instead of wire nails, but I don’t have any of those handy. The big chunky box joints are seen a lot in shipping and storage boxes.
The linen bag holds the wedges and pegs that hold the horses together when assembled. I wrapped the handle cut-outs with some of this great palm rope from Hida Tools. I call it a crate instead of a box because there’s actually an opening in the floor because I just used two pieces of 1-by-12, leaving a 2-inch gap in the middle. This should let the sawdust and shavings out.
The completed box plus sawhorse parts is pretty heavy, so I have to store it on a lower shelf instead of storing the loose pieces on the highest shelf in the garage. I might try to figure out a packing pattern for only one horse’s worth of pieces, then make 2 of those for the other 2 horses.
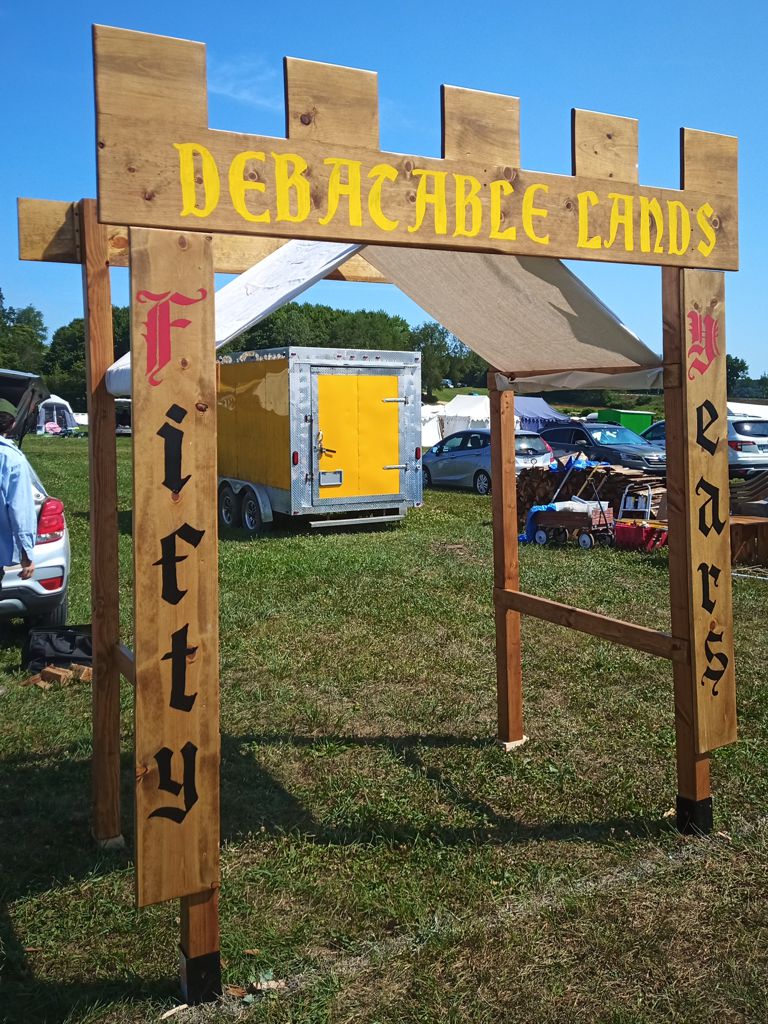
Due to a confluence of funds and enthusiasm, I came up with the idea of making a new entry gate for the Debatable Lands camp at Pennsic. The camp had a gate, and there wasn’t anything particularly wrong with it, , but given that the Debatable Lands just celebrated the fiftieth anniversary of it’s founding, I felt a shiny new gate was in order. It has actually been more than ten years since I made a camp gate, so I was able to apply what I have learned regarding complexity of design and total project weight, and minimize those vital factors.
Pennsic Camp Gate for the Debatable Lands
The vertical posts are four 8-foot pine 4by4s. They are untrimmed, but they have 3.5-inch slots cut in them to mate with the horizontal members. The horizontal members are 4-foot lengths of pine 2by4, and they have 3.5-inch notches cut at each end to mate with the slots in the vertical posts. The simple joinery increases rigidity and makes sure each horizontal member is in the right place. The lower members are at a good height for use as hand rails or butt rests.
The front top panel is an 8-foot 1by12 that has been crenelated using 5 pieces cut from a 6-foot 1by10. Battens on the reverse secure the crenelations and assure that the panel is aligned properly to the vertical posts. I painted the “Debatable Lands” part myself. The back top panel is an 8-foot 1by10. It is currently not decorated, but that’s plenty of room for an inspirational motto. “Salve Accolens” would be reasonable, but I decided to let others decide what goes there. The two top panels are really the only thing connecting the sides, but they are tall (wide) enough that I’m hoping that will be fine.
The two decorative side panels in the front are 6-foot 1by10s. Owen Tegg painted the lettering, and it is amazing. They say “Fifty Years” in honor of our anniversary, but they can be replaced or repainted easily in the future. It will be a shame to see all that ornate lettering go, though. I wanted to leave a lot of room for creativity from year to year. Since they are just flat panels, anybody can make new ones if they want, and attach them to the gate once it is up.
There is another 4-foot long piece of 2by4 that runs from front to back between the top panels. This provides a little more stability, but its real purpose is to serve as a peak for the awning. The awning is just a long canvas drop cloth from the hardware store. It should provide a little shade from the midday sun and a little shelter from light weather, but I don’t imagine it is waterproof.
All the wood pieces are stained and polyurethaned. A quart of polyurethane was just enough to coat all the pieces and seal the ends. The gate is assembled using regular 3-inch long construction screws.
Given the current price of construction lumber, this whole project (including hardware) cost around $400. I had a lot of help cutting, decorating, and assembling this gate. Thank you Brandubh, Turleough, Aaron, Catalina, Niall, Owen, Forveleth (who would have helped but did not get a chance), and to the officers of the Barony for approving this passion project in the first place. I hope the Barony likes our new gate!
The funding for this and other passion projects was available because a member of our local group passed away suddenly at the age of 33, and his family asked that memorial donations be made in his name to the Barony. Ronan took tremendous pride in the Barony and loved spending time in the Pennsic camp with his friends. He would have loved helping with this project, and I hope having it up at the front of camp would have made him happy.
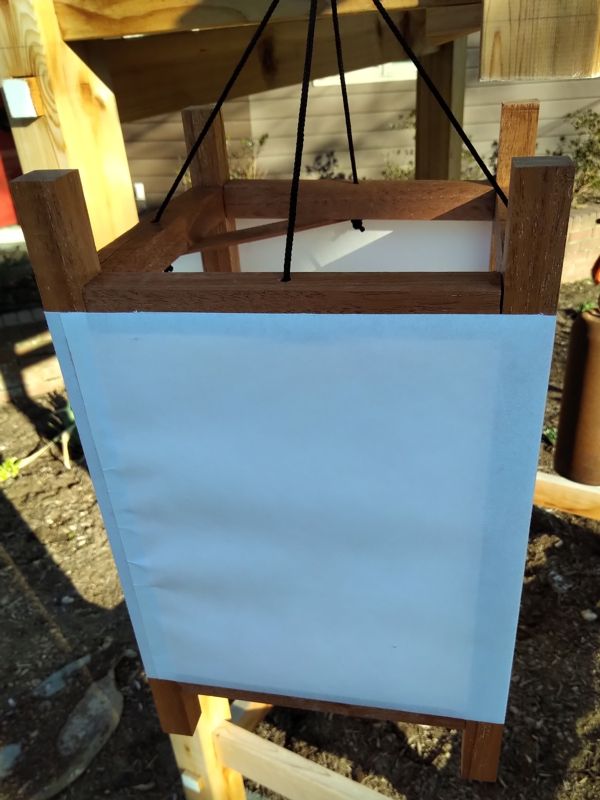
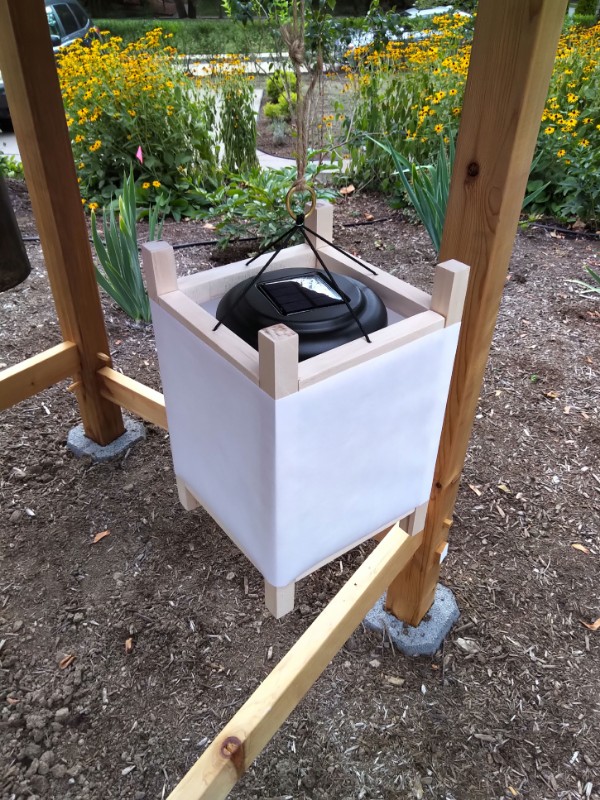
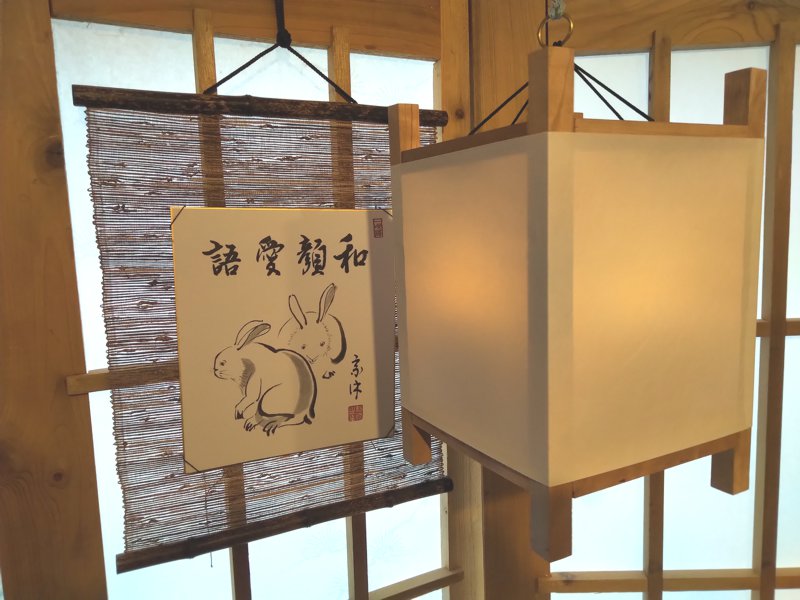
I finished up the last of the six solar flicker lanterns today! The pieces for this one have been sitting on the workbench since before it got too cold to work out in the garage, so it’s a relief to be able to check this project off my list. Here it is hanging from the shourou:
This one is not just special because it’s the last one in the project, but because it is made from some mahogany that Sir Ogami Akira, the O-daimyo of Clan Yama Kaminari gave to me years ago from the surplus of his boat building supply. I’m pleased as punch to finally be able to do something with it, and to have that thing be for the Clan. I had just enough wood to make the lantern, though some of the sticks are a little thinner than specification. The construction is all mortise and tenon, with little 1/4″ tenons.
I also managed to get a picture of this one before the paper went on, to show you how the lighting unit just rests inside the rails on a couple of angled braces:
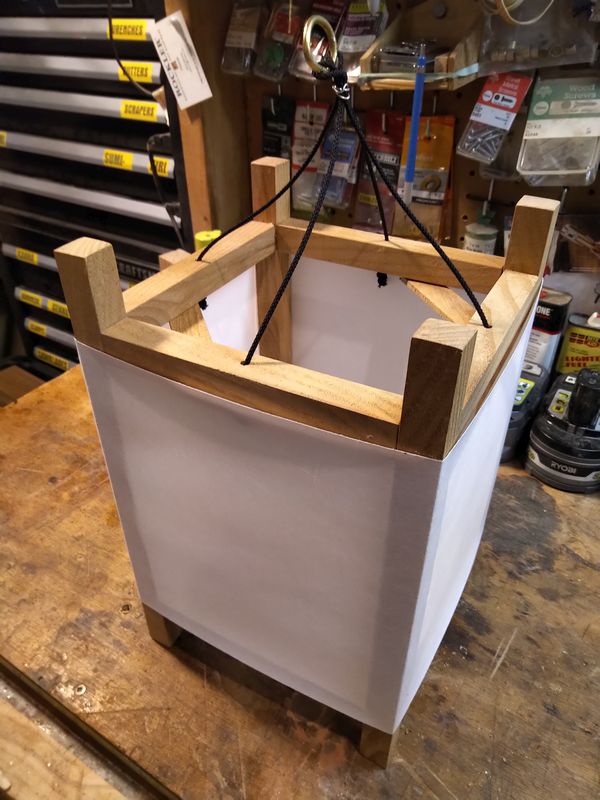
I just completed another lantern for the “six lanterns” project. The frame of this one is made out of mulberry wood. I had a small plank of this that Mr. Arimoto gave to me probably about seven years ago, and it seemed like a good project to use it on.
Andon in Mulberry
Of course, with the paper on it like that, you can barely see any of the wood. The fibers in this plank were very rough and wavy, but in the places where my plane got a good shaving, the surface is super-nice.
Frame of Mulberry Andon
I rough-milled the sticks from the plank using my band saw, then hand planed them down to 3/4″ square rods. There really wasn’t enough wood in the plank to make it entirely from mulberry. To compensate, I made some of the stretchers a little shorter than normal, and used dowel joinery instead of my usual mortise and tenon joinery. This was a little easier, since it meant cutting short lengths of dowel instead of cutting 16 tenons, but it meant drilling twice as many mortises, half of them into the ends of stretchers. I could not have done it without my drill press.
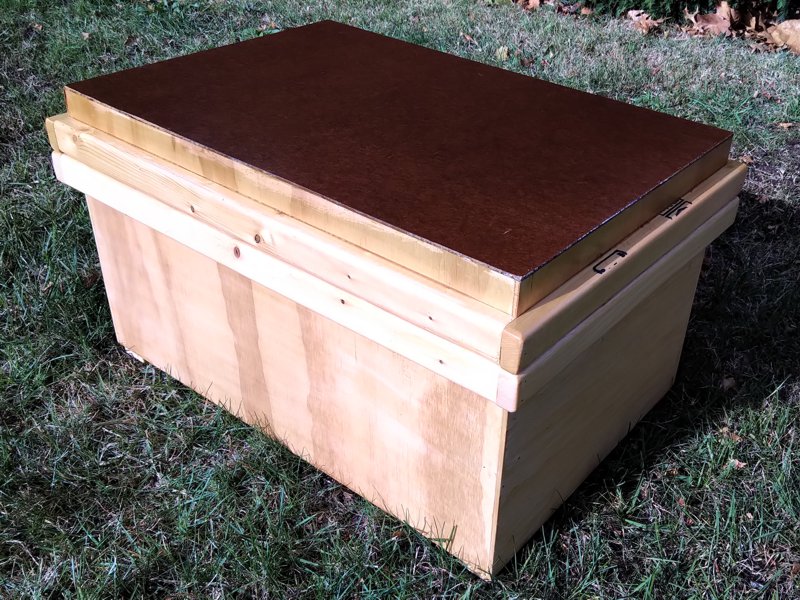
I’ve only made three of these lanterns so far, but I intend to make six, so eventually I will need something to transport and store them all in, or they are going to get pretty beat up. So, another box.
Lantern Box, Closed
This was also yet another exercise in using up surplus materials from other projects. I wound up having to use a piece of MDF for the lid, because that was the biggest piece of anything I had left. The edges are off-cut from 2-by-4 lumber from when I was making pole by cutting square pieces from 2-by-4. It awfully satisfying to use up some of that stuff.
Lantern Box, Open
You can see that the extra height of the lid makes it easy to get the lanterns in and out of the box. There’s an extra half inch in each direction, so the lanterns fit snugly but not tightly.
The whole thing is finished on the outside with spar polyurethane, especially the MDF on the lid, to give it a little more water resistance than a cardboard box. I glued some blocks of wood to the bottom to serve as feet, so it won’t be resting entirely in any puddles.
Basically, the whole thing is constructed with glue and nails form the nail gun. The bottom is thicker plywood to make it bottom-heavy, and the rim on the body both supports the lid and reinforces the corners of the box. This is a design and method I’ve used before with some success.
A lot of the sizing of pieces can be done while you’re building. For instance, I make the body of the box, then I measure the outside of the top before cutting the pieces for the lid. That way the lid is sized to fit the actual box, and not just my best hope.
The whole thing is kind of rough, because it’s not supposed to be anything special. You can see in the photos that I didn’t even sand off the mill markings.


