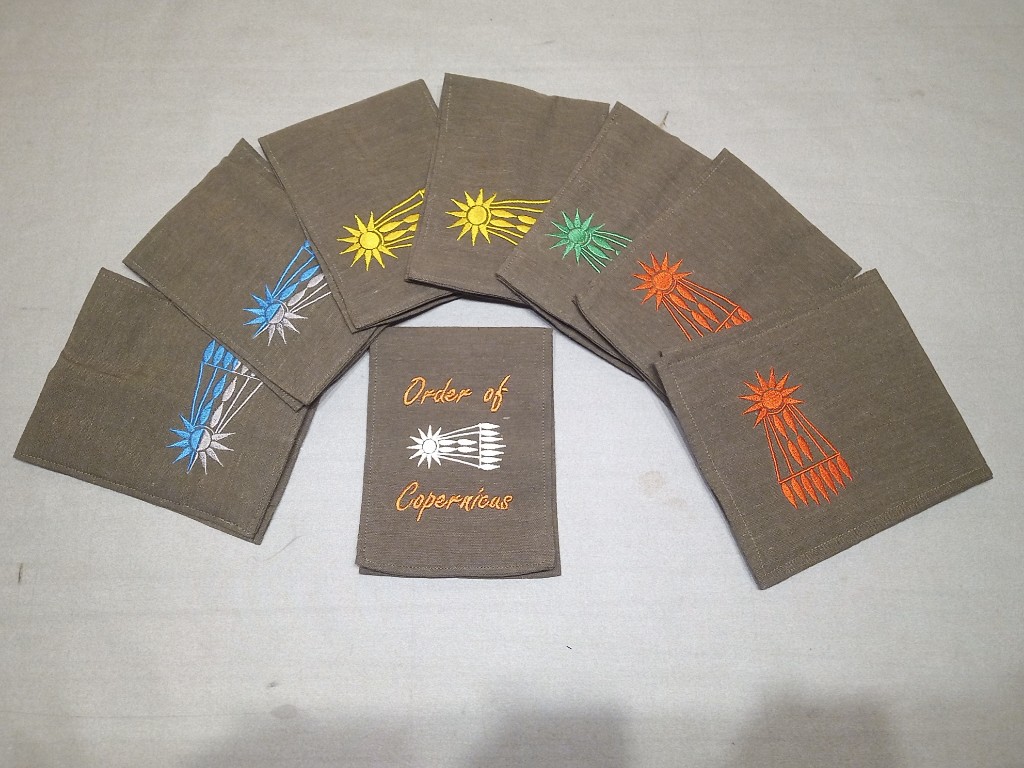
We have some big SCA events coming up in the Barony, and our Baronage loves recognizing people for their hard work by inducting them into our Baronial orders. Tradition has it that we give all inductees something they can use to display their membership in the order, and the one thing I can make most reliably is a “belt favor” machine-embroidered with the symbol of that order. Here is the most recent harvest from the fertile fields of my surplus fabric stash:
These are all made from surplus fabric green linen from my recent Basic Hakama project. The red comets are for martial activity, gold for service, blue/silver for arts & research, and green for “friend of the Barony”. The comet on the Order of Copernicus favor glows in the dark!
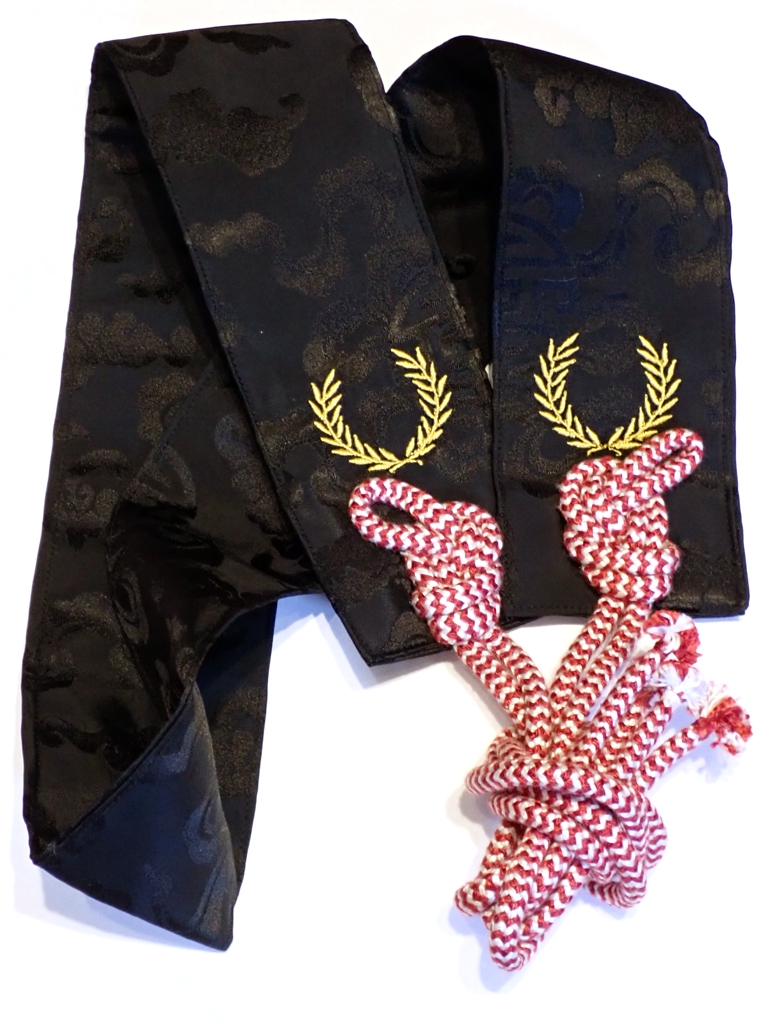
A kesa is a monk’s garment in the Japanese Buddhist tradition. It is the pieced-quilt kinda thing that hangs from the shoulder on a strap. Certain disciplines make this the only thing a monk wears, but most often it is seen as a kind of devotional garment or vestment. I don’t want to get too far into it, because you could spend many pages discussing the tradition and its changes over time. In modern times, there is a kind partial kesa called a hangesa which is essentially just the strap, worn as a collar. This is normally worn by lay members of an order to show their affiliation without implying that they are officially a monk.
In the SCA, we tend to wear medallions or belt favors to show our affiliations, but neither of these is really appropriate for Japanese persona. They may not be completely appropriate for SCA use, but I don’t think they are offensive at the level that, say, a full kesa would be.
Anyway, here’s a hangesa I made for myself to show affiliation with the Order of the Laurel.
I used some left-over black silk brocade from my elevation garb, machine embroidered some Laurel wreaths near the ends, and attached some red and white (Kingdom colors) silk braids to act as himo. I actually made this at least a year ago, but I have gotten quite a bit behind on posting projects here.
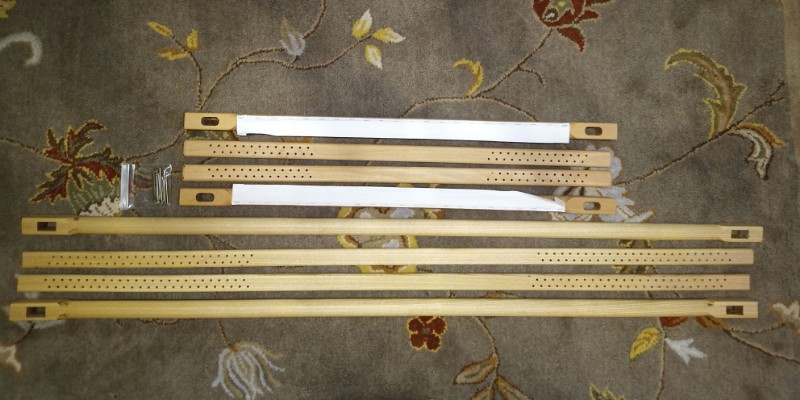
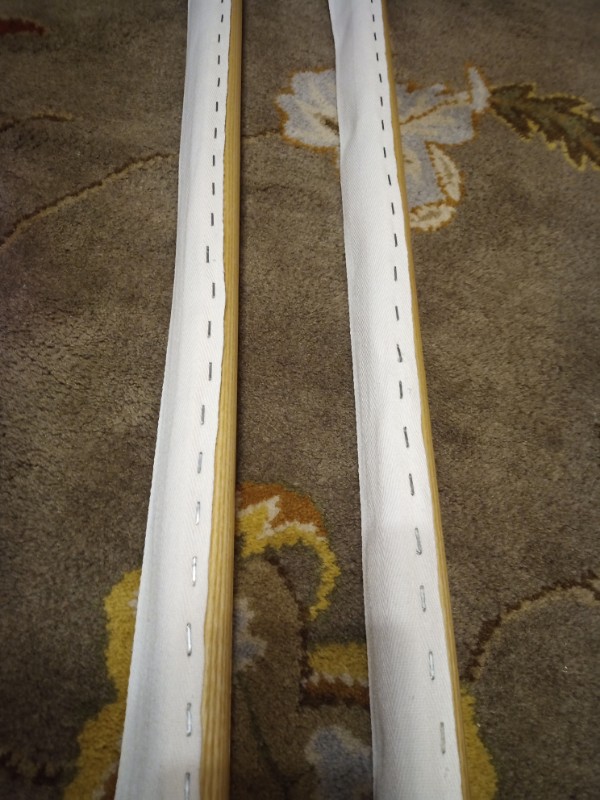
One of our friends is really into embroidery. She has taken classes all over the place, gotten certifications from international guilds, and all that fancy stuff. For larger-scale projects, she has acquired a couple of oak embroidery frames. These are great, but it turns out they are not big enough for some of the projects she would like to attempt. Woodworking friend to the rescue!
Pieces for two frames
Each frame has four pieces. The pieces for the original are the shorter ones above. The pieces for my larger version are the ones below.
The pieces with the big mortises and the round middle portion are the rollers. You stitch the ends of the fabric to the twill tape along the rollers, and you can roll very long pieces of fabric up and work on them in sections. In the picture, I have not yet attached the tape to the rollers.
The pieces with many small holes are the stretchers. They fit through the mortises, and you put pins into the holes to keep the rollers separated and under tension.
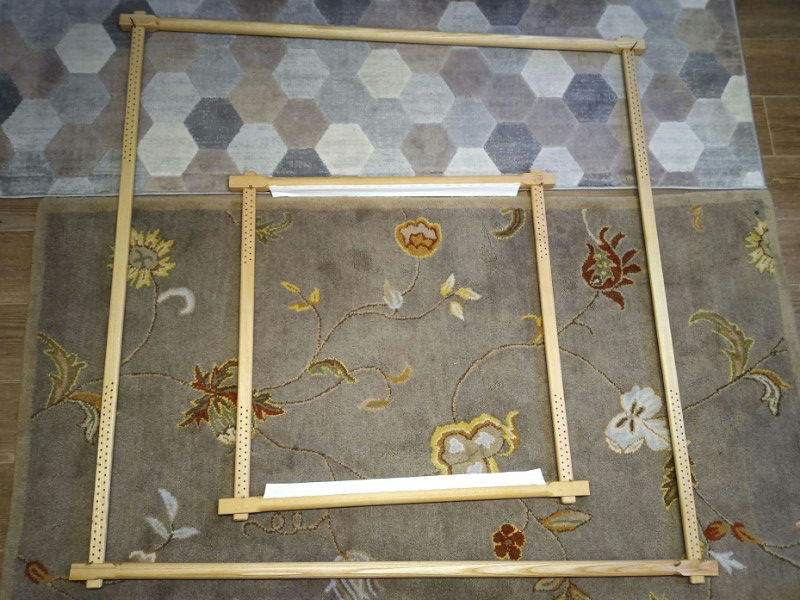
Here is what the frames look like when they are assembled:
Assembled embroidery frames
You can see how much more workable area my copy provides. The pieces for the original frame are about 30 inches long, so she can work on panels about 2 feet wide. The pieces for my copy are 54 inches long, so she can work on panels about 4 feet wide. That is 4 times as much working area! I tried to make all the pieces interchangeable, so she will have even more flexibility.
Her original is made from oak. My copy is ash, which is a little less dense than oak but still strong, and less expensive. I started from a 1.5″-thick slab about 5 feet long, planed it down to the 1.25″ thickness I needed, and then rip cut the pieces I needed off of that. All the corners are rounded off with various router bits to make them more pleasant to handle.
The through-mortises in the rollers are rectangular instead of rounded, because I used a chisel mortiser and not a router. I had never done “rounded beam with square ends” thing before, so I had a little trouble with that, but I don’t think the problems are structural just cosmetic. I did get the hang of it eventually, but the first batch are a little shaky. I used the original stretchers as drilling guides for the new stretchers, so the holes are evenly spaced. I put two coats of Osmo PolyX on all the pieces as a finish. It’s the first time I have ever used PolyX, and I’m pretty happy with the results.
I did eventually get the tape for the rollers. I was just using a manual staple gun, so it was quite a lot of work to put a staple every inch on both rollers. My lines of staples are little crooked, but not too bad.
Twill tape stapled to rollers
Before anybody suggests it, no I will not make and sell these. I was happy to make one as a favor for a friend, but this is somebody else’s design I’m outright copying. I could probably come up with my own design if I needed to, but it would be pretty different.
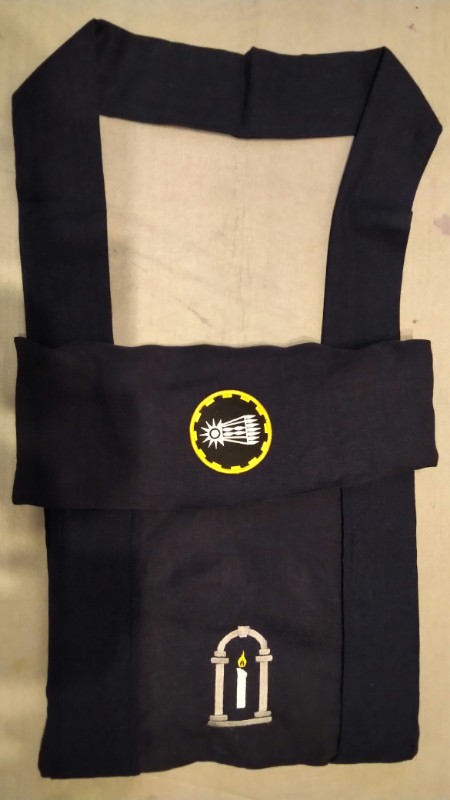
Speaking of regalia, I have made enough regalia for my current Baronial office that I was starting to worry about keeping it all together. When you have three storage boxes full of surplus fabric, no problem is unsolvable provided it can be solved with fabric! I decided to make a simple shoulder bag big enough to hold the banner, belt favor, and medallion of office. Then I decided to add a populace badge and A&S badge. Soon enough, I was finished.
Baronial A&S Satchel
Satchel Open, Showing Contents
It’s just a simple fabric satchel with a flap closure and a wide fabric strap for shoulder wear. The whole thing is linen, including the strap. It’s about 15 inches deep, so I can tuck the banner all the way in. It’s only about 14 inches wide inside, so the banner won’t fall all the way to the bottom. I thought about adding some pockets to the inside, so that small items like the medallion won’t fall to the bottom, but I realized that if I got into designing a pocket system inside, I would never get it done.
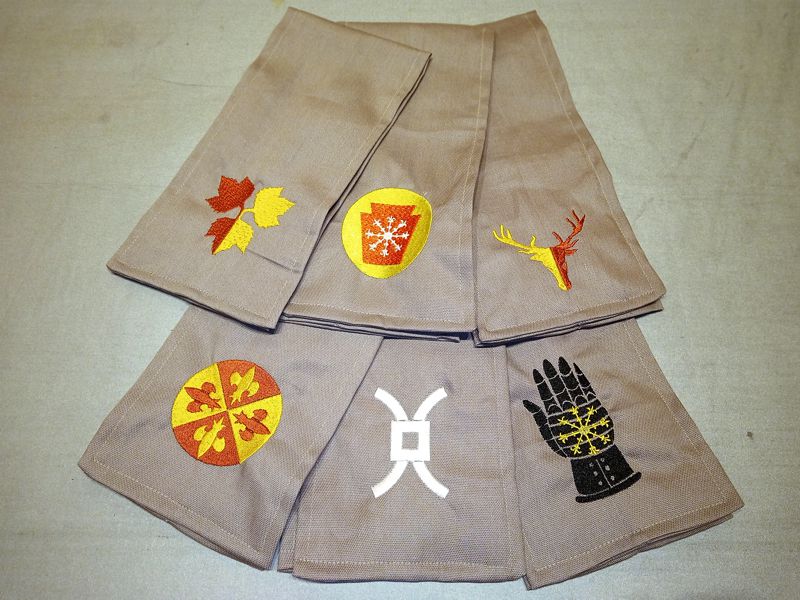
I’ve been kind of quiet here on the blog for a bit, because I’ve been busy with work stuff during the day, but I have definitely been busy in my free time as well, for instance, I made 6 embroidered belt favors for the “Comet” awards given out by our local SCA Barony.
Comets gold, silver, and iron
These just use some fabric I’ve had in my stash for years. I don’t think I will ever make the pants for which this fabric was purchased. It’s a nice heavy twill.
A few months ago, I was once again elected to the position of Arts and Sciences Minister of the Barony-Marche of the Debatable Lands. this position used to have a few pieces of regalia associated with it, but most of them have been lost since the last time I was minister. I decided a new belt favor was first on the list.
Belt Favor for the BMDL A&S Minister
The fabric is a navy cotton twill I bought online. The populace badge is one of the embroidered patches I had made a few years ago. The A&S badge is machine embroidery designed by me and applied with my embroidery machine.
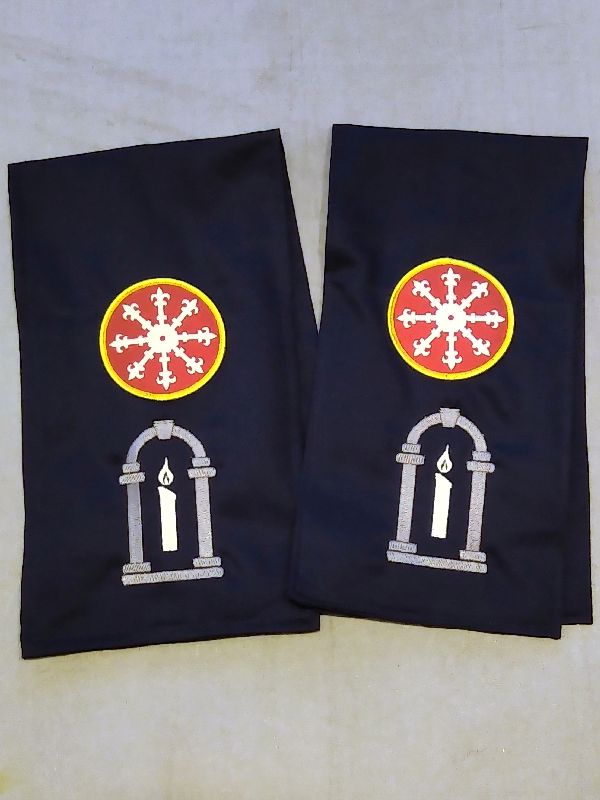
While I had the badge loaded into the machine, and good number of Aethelmearc patches in stock, I decided to make favors for the Kingdom A&S Ministers as well.
Belt Favors for the Aethelmearc A&S Ministers
Same rules apply, only (secretly) the candle flames are glow-in-the-dark thread. I’ll hand these off to the ministers when I see them.
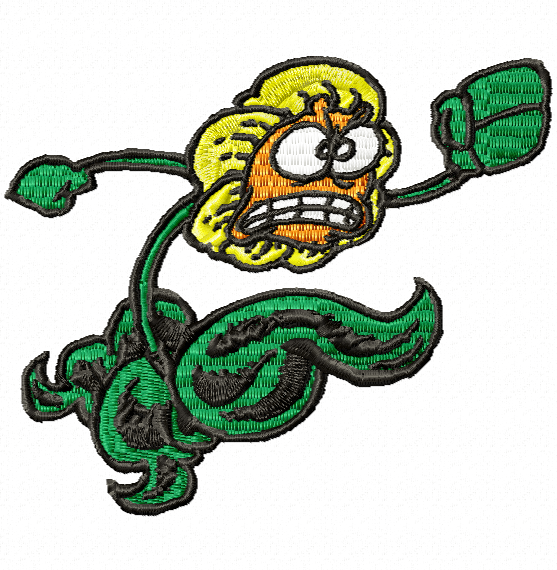
I have added the first new page to the non-blog portion of my web site in quite some time. I can’t even remember for sure what the last one was. In any case, this new page is a showcase for all of the “VP3”-format embroidery stitch pattern files I have created over the past several years. I received a request for some of them, and thought I would make the whole collection available to the Internet. Most of them are SCA-related, but there are a bunch of pop-culture and media-related designs at the bottom.
Follow the action Bob to visit
I use a piece of digitizing software called Embird to create these patterns, and the images are all exports of the 3D simulation of the eventual embroidery. Embird is a good value, and I have not had too much trouble figuring out its features. The files it produces work so reliably that I have not even tried embroidering some of these patterns. The fun is in designing and creating them.
Anyway, please read the text at the top of that page if you want to use any of those files.
One of the martial activities in the SCA is called “Thrown Weapons”. Participants throw handled metal weapons such as axes and knives at fixed targets for scores. If you can achieve certain scores during a timed exercise, you qualify for different ranks. These belt favors are meant to be given to those participants who have achieved the required skill levels. The background color of each favor denotes the rank: black for Thrower (0-29 points), blue for Verfur (30-59 points), purple for Caster (60-79 points), green for Huntsman (80-99 points), and red for Marksman (100-120 points).
Each is machine embroidered on cotton twill fabric. The favors are about 7.5 inches wide and 18 inches long, meant to be doubled over a belt. The badge is 3.5 inches in diameter. The fabric is doubled over into a kind of bag, inside which valuables or authorization cards can be stored. I made six of each rank, thirty in all. Even though the machine did all the hard work, there was still a bunch f work setting things up, switching threads, and completing the favors. It took me a while.