bookmark_borderGrocery List Holder

Way back in the mists of before-me time, Sharon‘s sister Megan (with Sharon’s mom’s help) made a grocery list holder as a gift for Sharon. It holds an old-fashioned roll of receipt paper (and a pencil) up on the wall so that you can quickly and easily jot down items for the next grocery trip. Sharon has used this holder for grocery lists ever since, and I dutifully started using it when I moved in with Sharon in the Spring of 1996. When you are ready to go grocery shopping, you pull down on the list until it is below the crossbar, then use the crossbar as a tearing guide to remove the list.

There is only one problem: we make two grocery trips a week because the two stores have different merchandise. Most weeks, Sharon goes to one store and I go to the other. Keeping two lists on one holder doesn’t work very well. If the “upper” list needs to be detached before the “lower” list, then the lower list winds up getting tucked into the crossbar and it is difficult to add things. Also, the detached list now has limited room. The solution was for someone (me) to make a second grocery list holder.

Two Grocery List Holders – Megan’s and Mine

I made mine from some of the pine board that I planed down to 5/8-inch for the Medium Japanese Tool Chest project. That’s why it looks a little smaller than the original. I did all of the cutting on the band saw, and smoothed all the saw marks by hand with a plane and some sandpaper. I used copper nails instead of iron nails, because I like the way that looks. Megan and Ivy used a rustic stain-only finish, which is fine and enables it to develop a patina. The pine on my list holder is finished with blonde shellac to seal it more completely for a brighter look.

Ivy says that she based the first one on a list holder that was on the wall of her parents’ house while she was growing up. When I sent a picture of these two to Megan, she said that she could really use one of these, so I will probably wind up making at least one more. Megan’s oldest offspring is now living in his own place, so he should probably have one as well. Maybe I should draw up some plans and write some instructions so that I don’t have to do all of these myself.

bookmark_borderAn Archery Stool for Urho

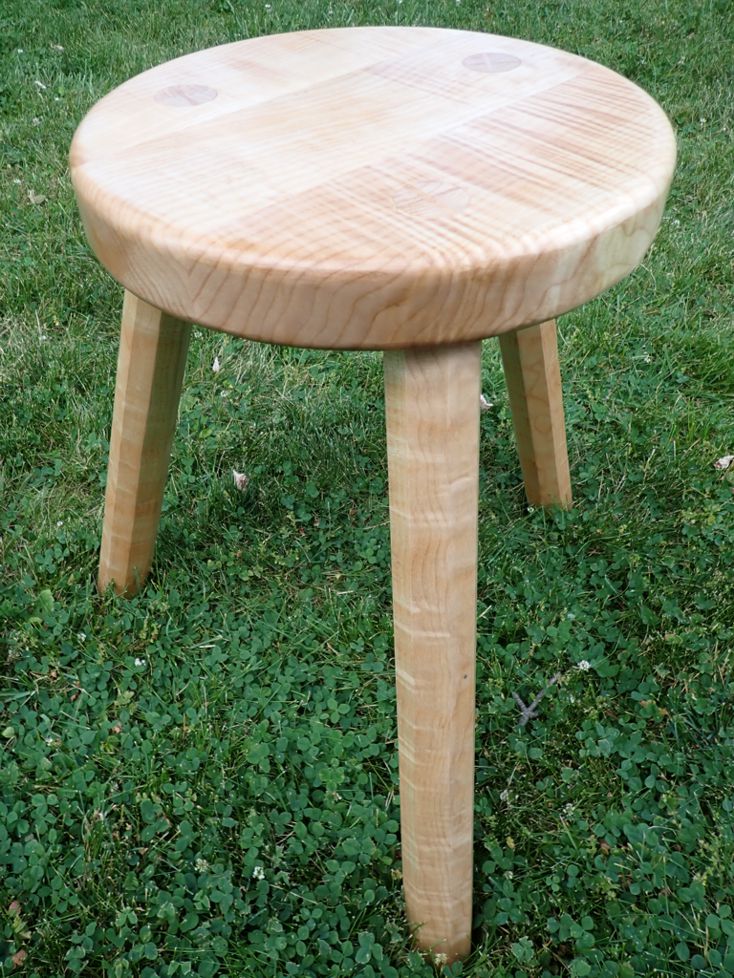
A friend of mine wanted a sturdy stool for shooting archery while seated. Another friend of mine gifted me with some surplus curly maple. I wanted to have fun making another stool, but I don’t really need more seating in the house. I love it when a plan comes together.

I glued up three pieces of the maple. then cut the round top on a band saw using my circle jig. Then, I cut the round through-mortises using a forstner bit.

From the remaining maple, I cut three legs using the band saw, then sawed off the corners to make octagonal legs. I roughed out the tenons on the band saw, then rounded them down by hand with a microplane rasp.

I rounded over the edges of the seat with a router, then all four pieces went through several stages of sanding. Once assembled, I wedged the legs in place. Then, I trimmed off the tops of the tenons using a ryoba hand saw. More sanding, then a few coats of General Finishes “Salad Bowl” finish which I wanted to try out.

21 inch tall 3-legged stool from maple
Look at that curly grain. Sweet.

bookmark_borderBand Saw Box

All my spare blades for the band saw have been sitting in an inadequate CocaCola crate for years. This state of affairs was becoming more and more untenable when I was switching blades back and forth during the shogi project. While I was waiting for some glue to dry on a more central project, I decided to rectify that.

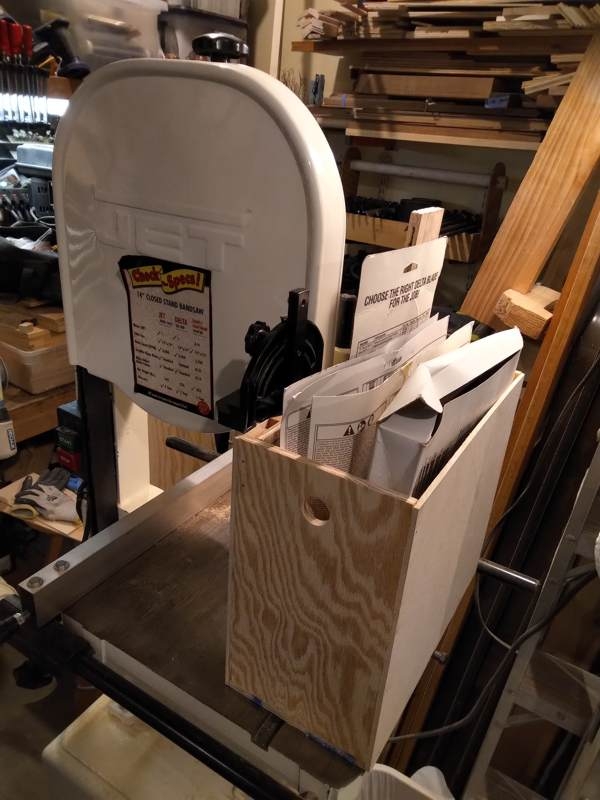
Band Saw box on Band Saw Table

The faces are some 3/16″ plywood from the scrap pile. The sides and floor of the box are some 3/8″ plywood from the scrap pile. Some of these utility projects are basically just ways for me to justify having kept around these massive quantities of scrap lumber for so long. The whole thing is just glued together with butt joints and pinned with 18gauge brads from the nail gun. One slightly fancy thing about this box are the two finger holes that make it easier to pick up the box.

Anyway, the interior is a little larger than 12″ wide, by 6″ deep. This gives me plenty of room to slide in the blister cards that Lowes sells 93.5″ band saw blades on. Another slightly fancy thing is a bracket for holding the miter gauge. It’s always a challenge finding someplace to put that thing when I’m no t using it. You can see how nicely this box fits on the band saw table, making it difficult for these two items to get separated.

Some months ago, I reorganized the shop a bit to make it easier to get to the band saw. At the old house, the band saw was set up in the middle of the basement and was always available for little things like making useful boxes. I’m so glad I have this saw back where I can use it easily without having to move other stuff out of the way.