bookmark_borderTravel Crate for a Takedai

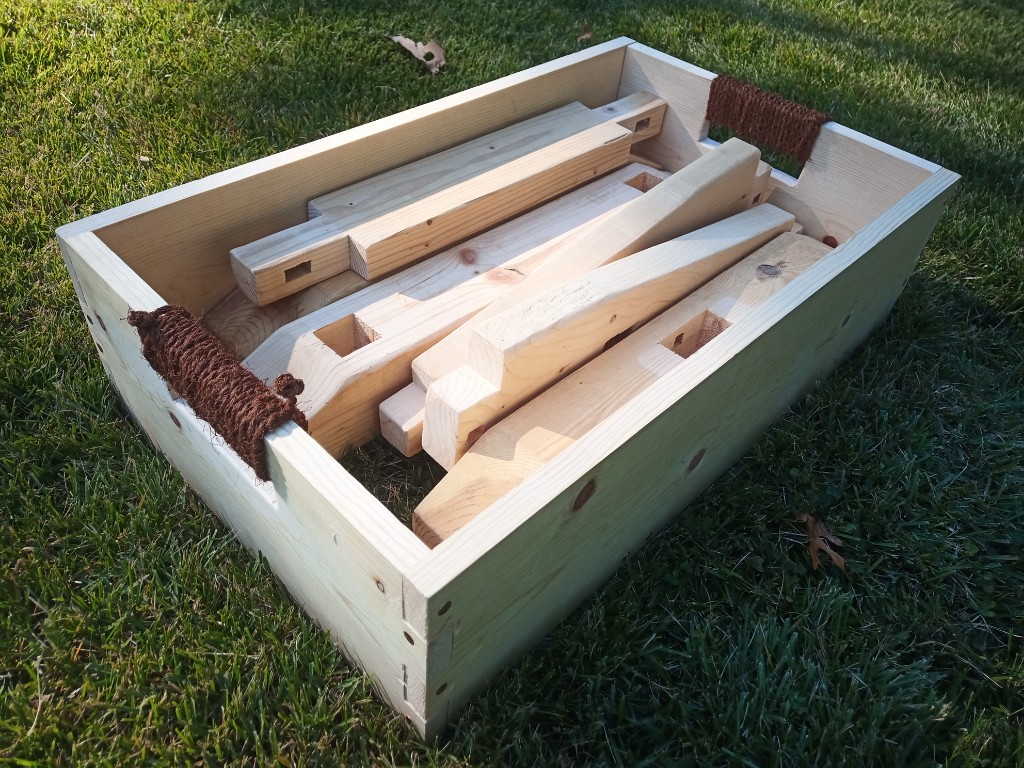
So, the takedai I have actually comes apart into pieces, so you can travel without having this large loom-thing in your vehicle. It didn’t come with a box or anything, though, so I would be traveling with a pile of loose parts like this:

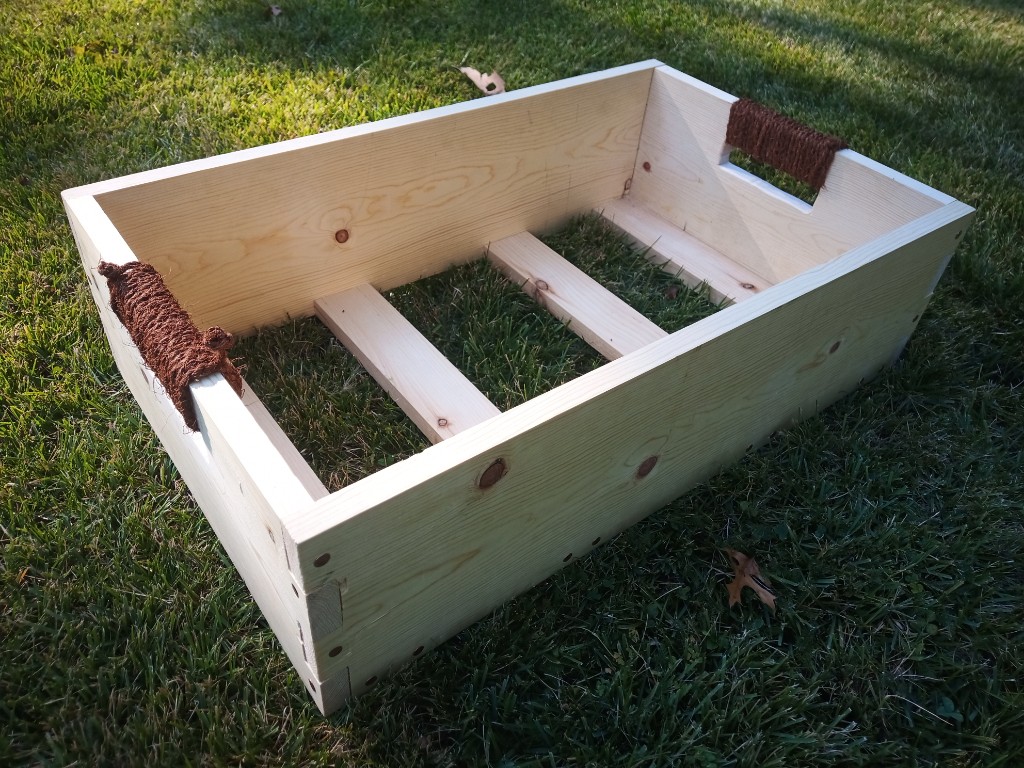
If only I knew how to make some kind of box… oh wait, I do! I calculated that I needed a box about 4.5″ deep, 30″ tall, and 22″ wide. I thought I would have to buy wider lumber and cut it down to 4.5″ wide, but the store I went into actually had 1-by-5 in stock for some reason. How weird is that? The large faces are “masonite” style hardboard. A couple of sheets of that are cheaper than a similar amount of plywood, and about as durable. The “rim” is some of the 1×5 that I actually did cut down to width in the band saw.

I cut the hardboard to size first, taking the thickness of the wood into account. I actually broke out the circular saw for that, since it was faster than getting the table saw set up. Then, I built the frame, gluing and nailing (with a nail gun) the frame pieces in place around one side. Screws at the corners secure the butt joints. Once that was done, I glued and nailed on the other side, completing the box. Next, I cut six inches off the top of the box, and built the two rims around the openings of the body and lid portions of the box. The rims are glued in place, and secured with screws.Finally, I added the latches to secure the lid during transport.

I went for a tall narrow box instead of a flat wide box because I felt it would be easier to slide the pieces in than to stack them up. I kind of feel I was right. Slide in the two big pieces, then put the long pieces long the side. It works pretty well, and it’s easier to carry vertically than horizontally especially after I messed up the tendons in my lower arms lifting tabletops five years ago.

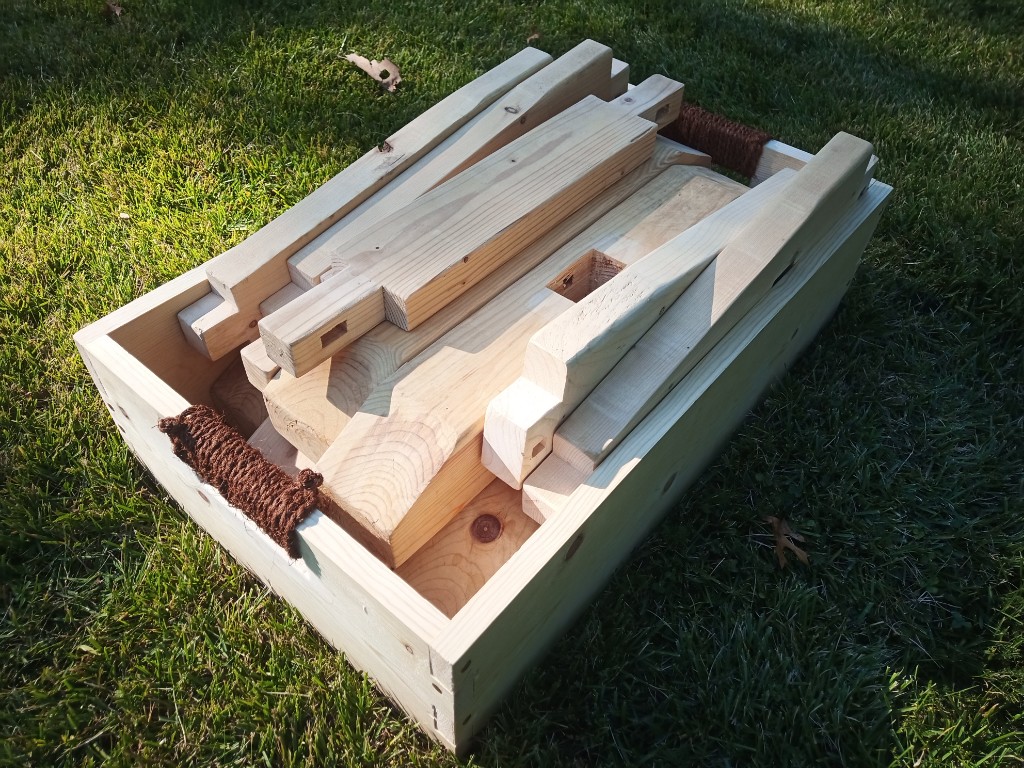
Here’s another angle so you can see how neatly it all fits in.

bookmark_borderCrate for a Single Sawhorse

So last year I made a crate to hold the pieces for two sawhorses. The only problem with that project is that a crate big enough to hold all the pieces for two sawhorses plus all the pieces for two sawhorses is quite heavy and two sawhorses is not enough sawhorses for most work. I usually like to have at least three sawhorses, that’s why I made four sawhorses. Anyway, I decided to make a crate that would be somewhat smaller, and would be sized to only hold the pieces for one sawhorse. I started this a while back, but only just put the final touches on it.

I started with a couple of pine 1-by-8s, cut all the corner joinery by hand, ripped the surplus lumber into slats for the bottom, then assembled the crate with some nice copper nails I found at Rollier’s. I wound up cutting the holes for the handles using a jigsaw, because cutting those by hand with a keyhole saw is very annoying. I used more of the palm rope from Hida Tools.

The crate is actually spacious enough that if you’re willing to overfill it, you can carry all the pieces for two sawhorses. If you use it along side the other crate, you can distribute the different shapes between the crates such that the two crates hold all the pieces for four sawhorses without overfilling.

Anyway, with these two crates I feel like I have fulfilled all my needs for sawhorse storage and transport. The crates also serve as valuable supports for tool chests, and holders for surplus lumber while the sawhorses are in use.

bookmark_borderSawhorse Crate

I made four Japanese-style sawhorses several years ago, but I realized recently that I had no way to transport them except to toss the pieces into the trunk of my car or pile them in a wagon. Then, some friends of mine moved away and gifted me with a pile of lumber they had been using as storage shelving. I spent a few days at the 51st Pennsic War medieval event constructing this 26″x16″x11.25″ crate using only hand tools, as a demo of Japanese style woodworking.

Sawhorse Crate from Pine 1-by-12

I used a ryoba nokogiri saw to do all the cutting of the pieces from the boards, and some of the joinery. I used oire nomi chisels and a mawashibiki saw to cut the remainder of the joinery and the handle cut-outs. A yotsume kiri gimlet came in handy for pilot holes so that the wood didn’t split when I drove in the nails with a genno tsuchi hammer.

Contrary to common belief, Japanese carpenters would not have used fancy joinery without nails to construct such a simple workman’s item. That kind of specialty carpentry was mostly used for devotional items or religious buildings. They probably would have used forged nails instead of wire nails, but I don’t have any of those handy. The big chunky box joints are seen a lot in shipping and storage boxes.

The linen bag holds the wedges and pegs that hold the horses together when assembled. I wrapped the handle cut-outs with some of this great palm rope from Hida Tools. I call it a crate instead of a box because there’s actually an opening in the floor because I just used two pieces of 1-by-12, leaving a 2-inch gap in the middle. This should let the sawdust and shavings out.

The completed box plus sawhorse parts is pretty heavy, so I have to store it on a lower shelf instead of storing the loose pieces on the highest shelf in the garage. I might try to figure out a packing pattern for only one horse’s worth of pieces, then make 2 of those for the other 2 horses.