
Sweetie ordered some frozen food from someplace, and it arrived packed in a small cooler. I had the bright idea to make a small karabitsu to hold/hide the cooler, and that was all she needed to hear. I grabbed some 1/2″ pine and some surplus 2×4 for legs, and got to work.
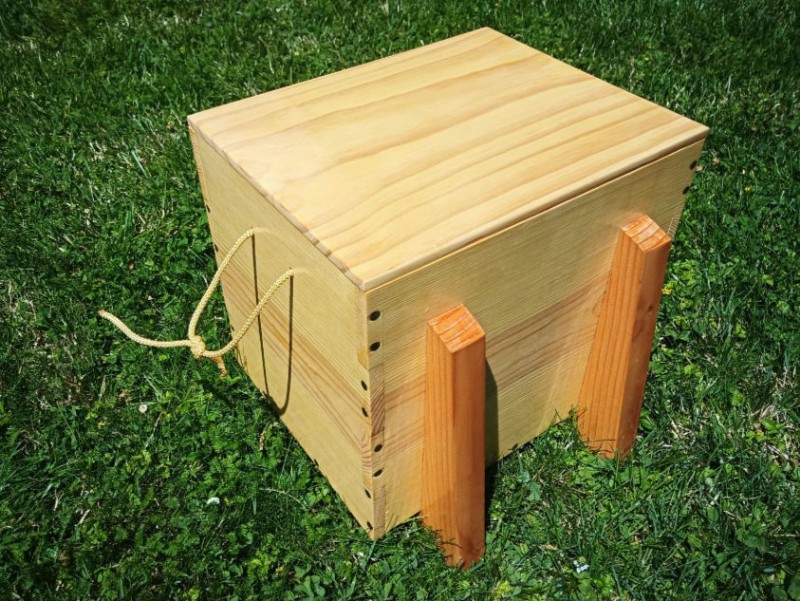
The body of the karabitsu is 13″x10.5″x11″. I used traditional box joints at the corners. The legs are simply glued on, though they do hook under the body to support the floor. The floor is fully captive inside the walls, and nailed in place. The lid is a 3/4″-thick piece of “premium pine”, and it is rebated to fit the body of the box like a box lid.
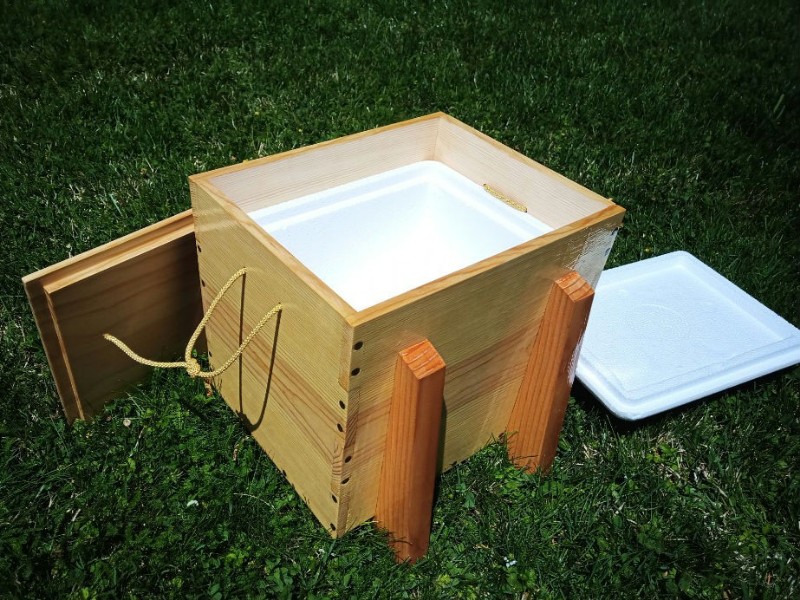
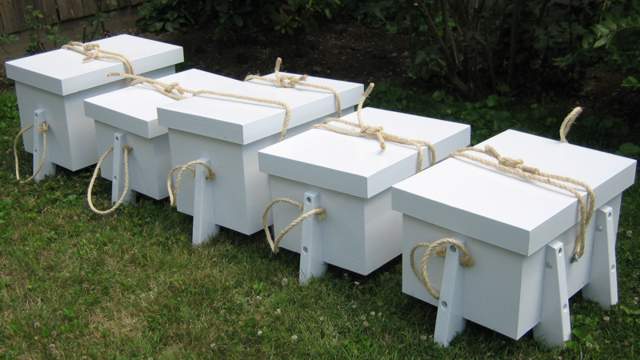
Here you can see the rebated lid, and how nicely the little cooler fits inside the body. The handle ropes pass through holes in the ends of the body, and the rope does a good job of keeping the cooler in place. The exterior of the karabitsu is finished with clear polyurethane, so if it gets rained on or otherwise splashed with water it should be OK.
This is a nice little cooler that should be good for chilling beverages for an afternoon, or for packing lunch to an event.


