
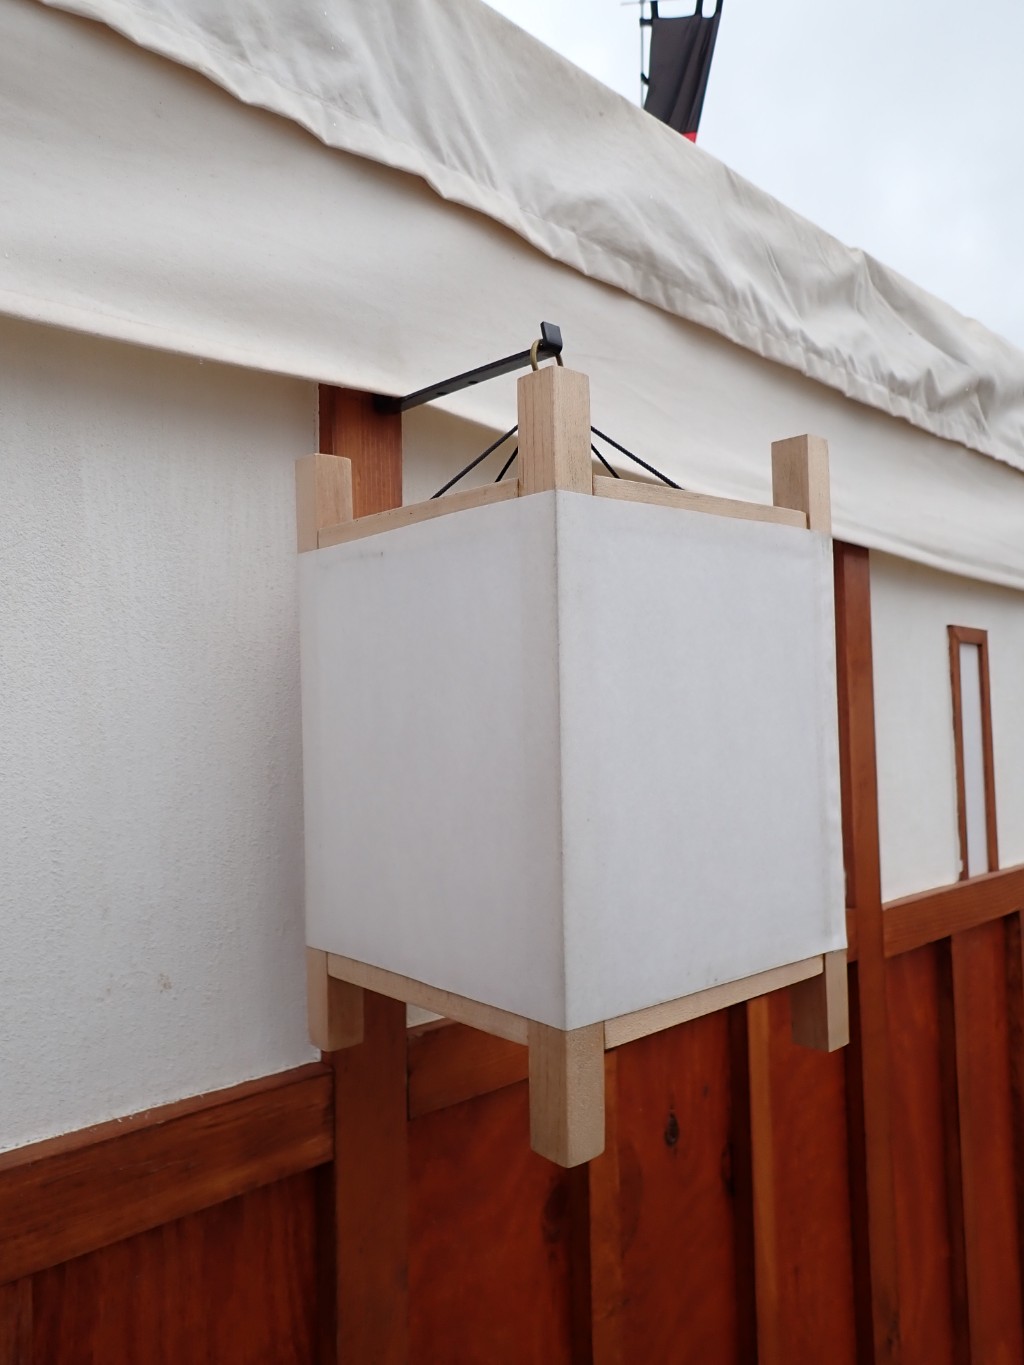
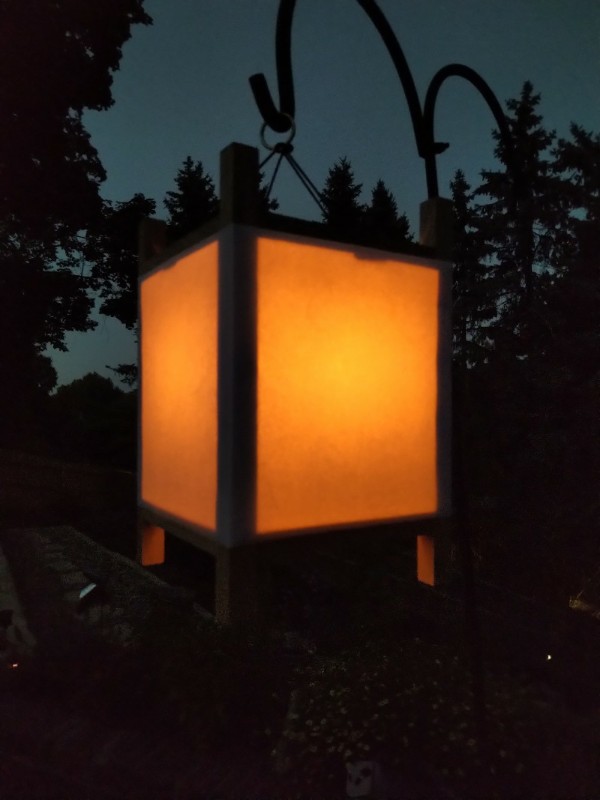
I made these back in the fall of 2023, but was not able to finish painting them until Spring, and wasn’t able to try them out until Pennsic (and get photos), so here we are. These are metal hooks meant to hang the lanterns I made a four years ago from the camp walls I made six or so years ago. The problem is that the canvas roofs of the pavilions hang down over the walls for a fair distance. The past couple of years, I have tied twine to the ring at the top of each lantern, then hung the twine from the metal frame of the pavilion. The meant that the lanterns were hanging against the walls, which I found to be less that optimal. The hooks clip onto the tops of the walls, hang down to below the bottom edge of the canvas, and then extend far enough so that the lanterns hang straight.
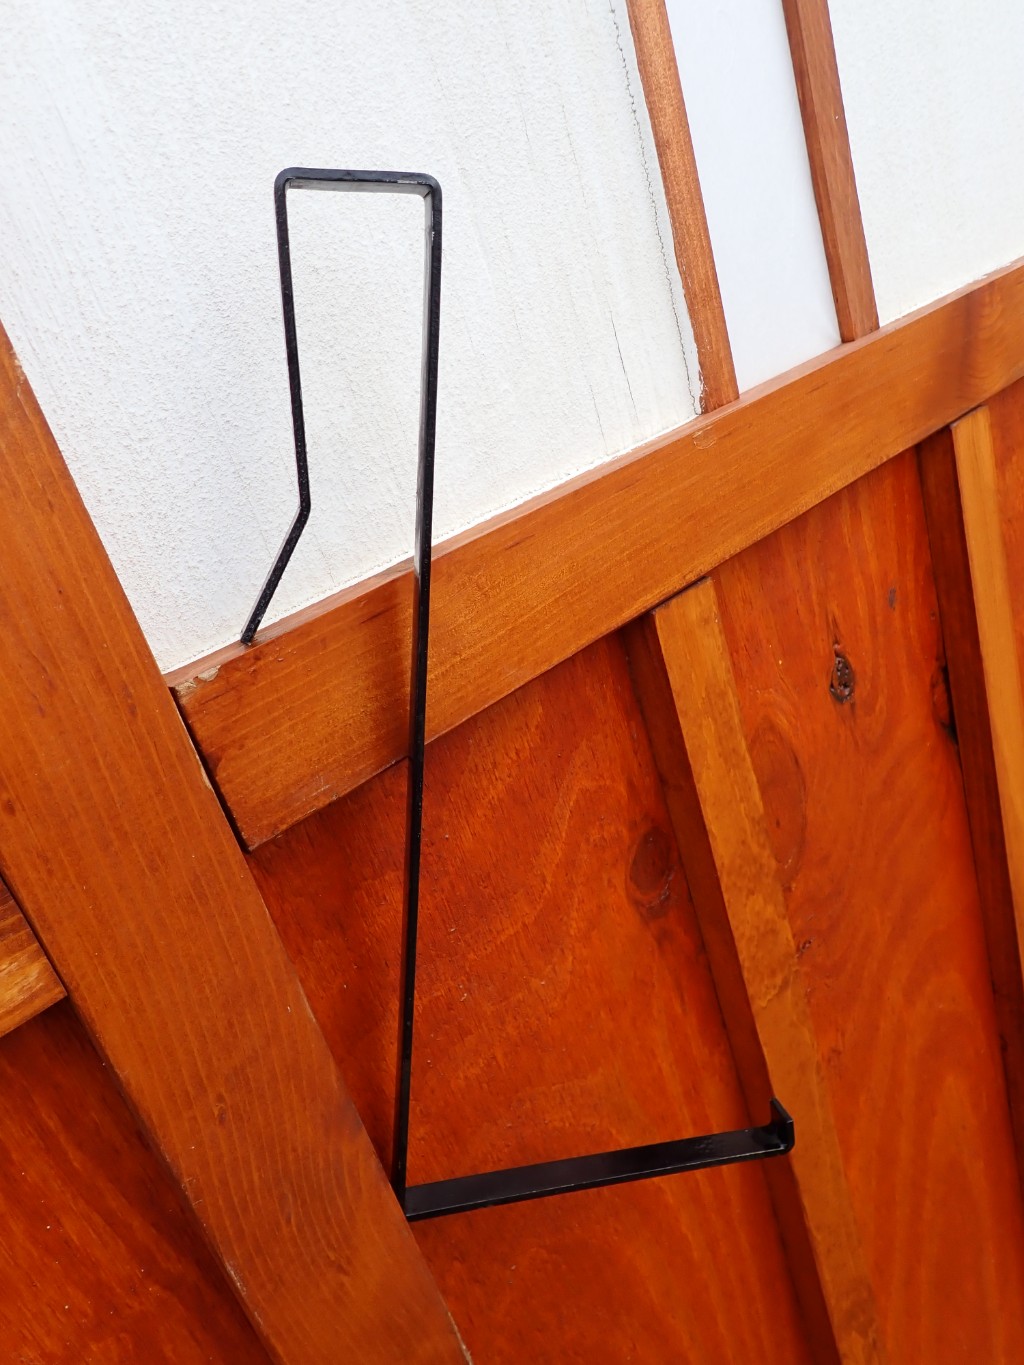

I made these by buying 1/2″x1/8″ welding steel bars from the hardware store, then bending each bar to shape using metal bending jaws in my bench vise. because of the length of the material, I had to bend the bars off center so that they would not hit the beam of the vise. This caused racking in the vise, so I tried to bend two bars at once to balance things out. This bent the beam on my light duty vise so that it is now useless, It’s OK, that was a good excuse to buy a heavy duty vise to replace it.
I also tried using aluminum bar to make it easier to bend, but the aluminum does not stand up to sharp bends as well and sometimes just breaks. I painted the steel bars black to protect them from rusting (I hope).
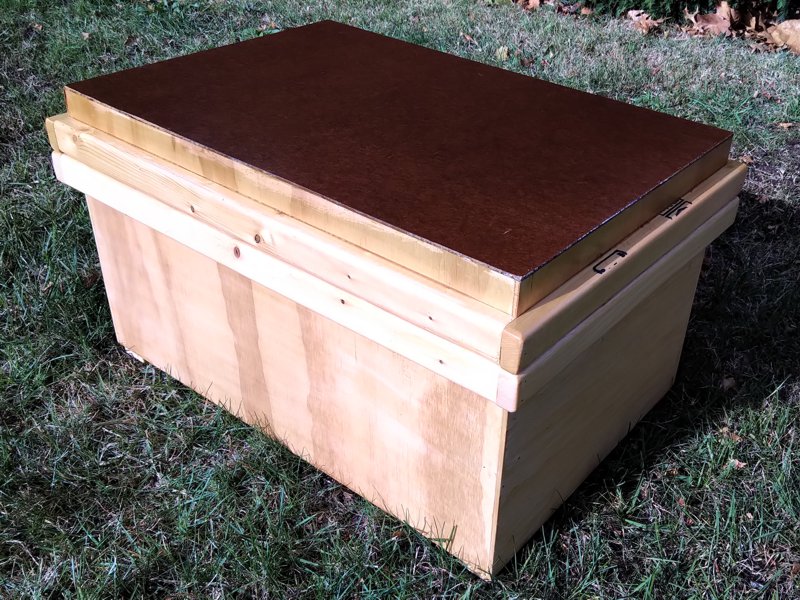
These stayed up for 2 weeks at Pennsic without incident, and the lanterns didn’t fall off even in the severe rain storms that we had. Success! They joined the lanterns in the 6 lantern storage box that I built 4 years ago.


