bookmark_borderWeekend Woodturning Work

I bought a woodturning lathe more than ten years ago, but I set it up so rarely that I have not made very much progress on learning how to do anything interesting with it. There are three things that most people want to do with lathes: spindles, handles, and bowls. I will have plenty of use for spindles when I get back into making marudai, but they are not really a part of my woodworking needs. Handles don’t interest me very much because they are mostly a way for companies to sell you hardware you don’t really want to make tools you don’t really need. I don’t really need bowls, but bowls are cool, right? How hard can they be, right? They don’t have any hardware, so they won’t make you buy more stuff, right?

OK, so totally wrong on most counts. I had to buy a real chuck for the lathe so that I could start the exterior of the bowl using what is called a woodworm screw to hold the bowl blank steady. Then, of course I had to buy a special gouge, and special scrapers to cut the interior of the bowl. Then, of course I had to buy better jaws for my chuck so I could hold the size bowl I wanted to make. Also, the lathe spent so much time sitting around that I had to order a new drive belt from the lathe manufacturer because the old one was falling apart.

Anyway, bowls are still cool. A pain, and a risk to life and digits, but cool. The value of these handmade bowls justifies the hundreds of dollars I have spent on stuff to make them, right?

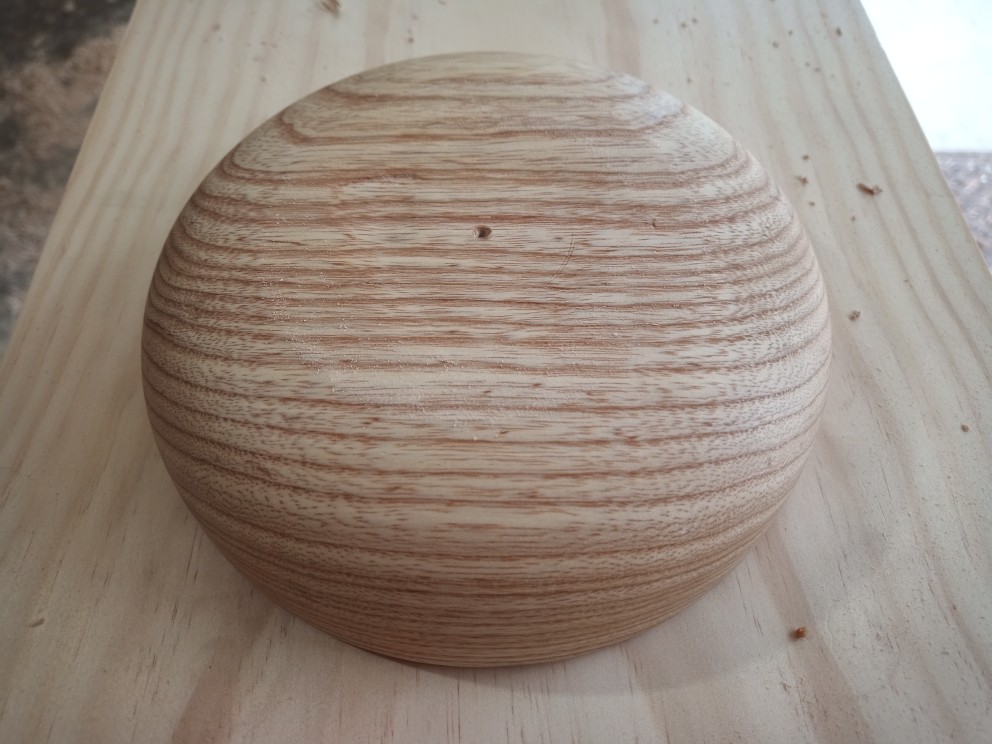
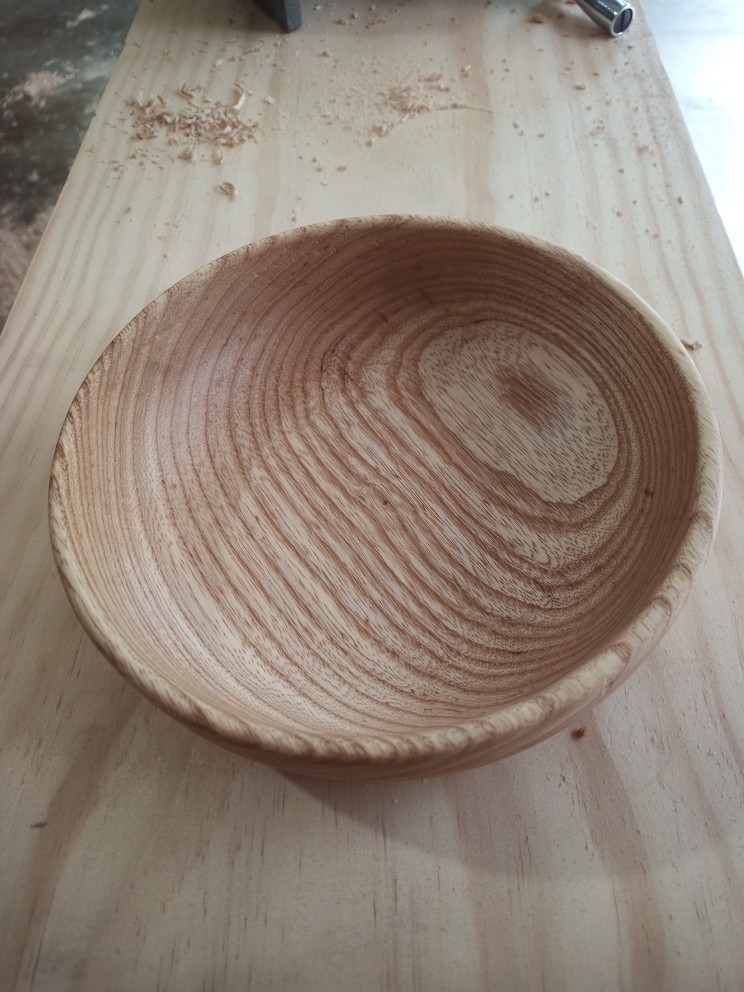
The first bowl is turned from some surplus ash. It is about seven inches in outer diameter and two inches tall. The foot was damaged during turning, but I just removed it with a chisel and sanded the bottom mostly smooth so it is hard to notice.

7″ bowl from Ash

I really like the way the angled grain in the blank produces those cool ripples in the finished bowl. There’s some food-safe beeswax finish on the which really makes that grain pop, I think.

Ash Bowl Exterior

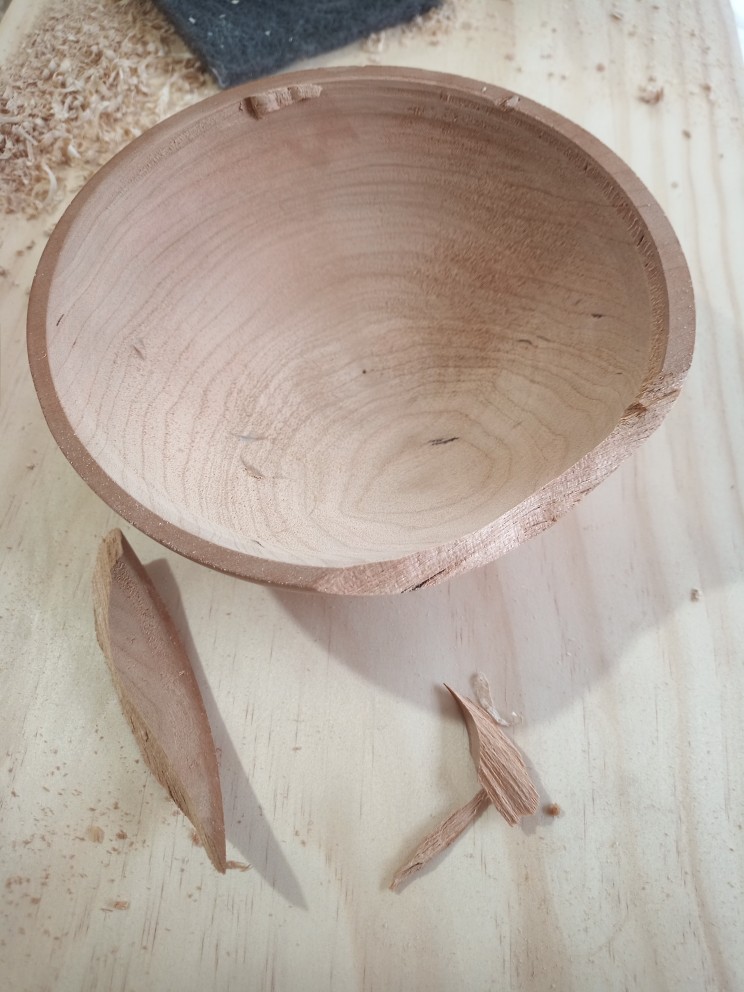
The next bowl was a spectacular failure and a waste of about an hour’s work. What happened was that after shaping the exterior and switching to the inside, the scraper caught (technical term) along the rim of the interior (visible in photo) and wrenched the bowl off of the chuck jaws, breaking the foot of the bowl. Then, when the spinning bowl hit the concrete of the shop floor, the rim broke.

Failed Bowl from Cherry

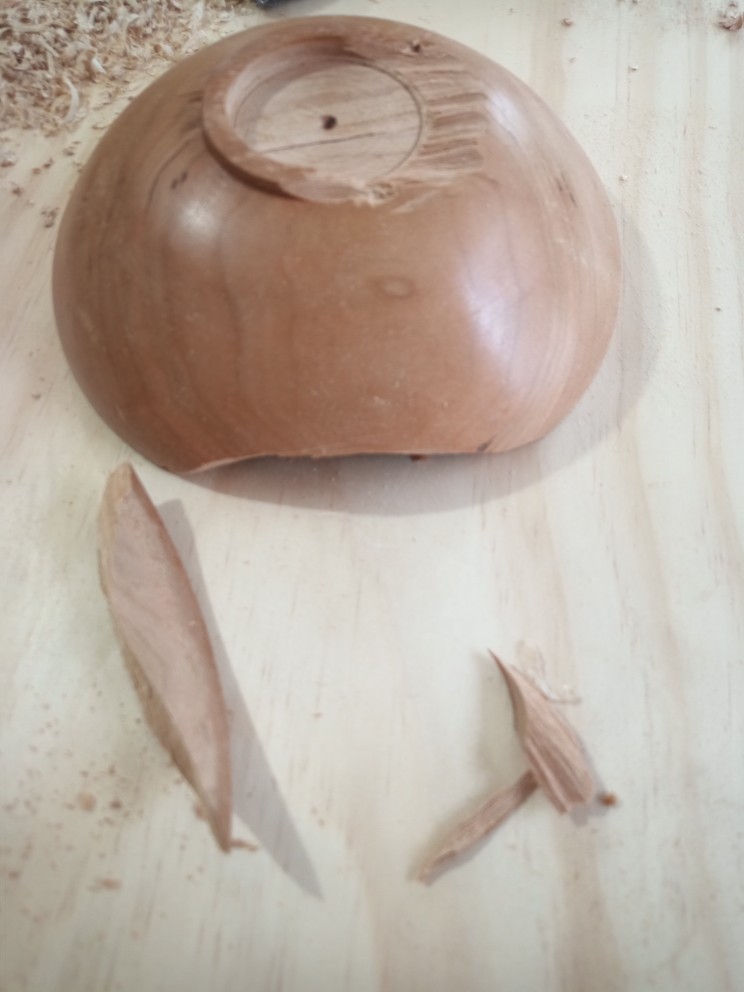
I declared this bowl a loss and put it in the burn bin. It’s frustrating to spend time on something, and just look at that grain, and then throw it away, but I really could not figure out how to salvage it after so much of the foot was lost.

Too Much Missing Foot

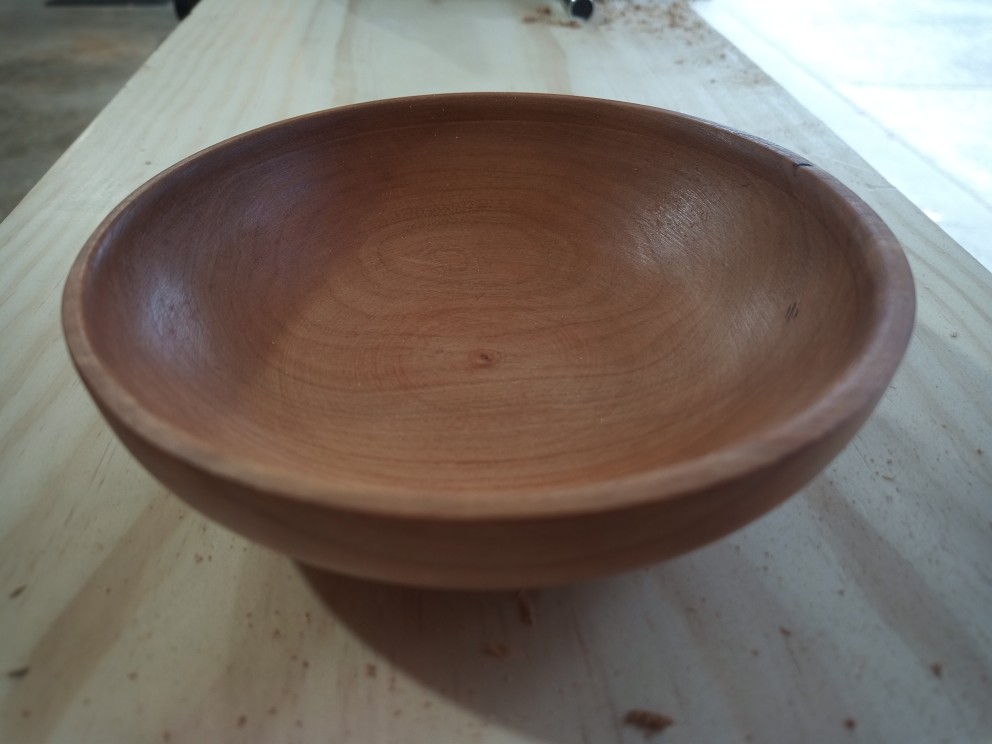
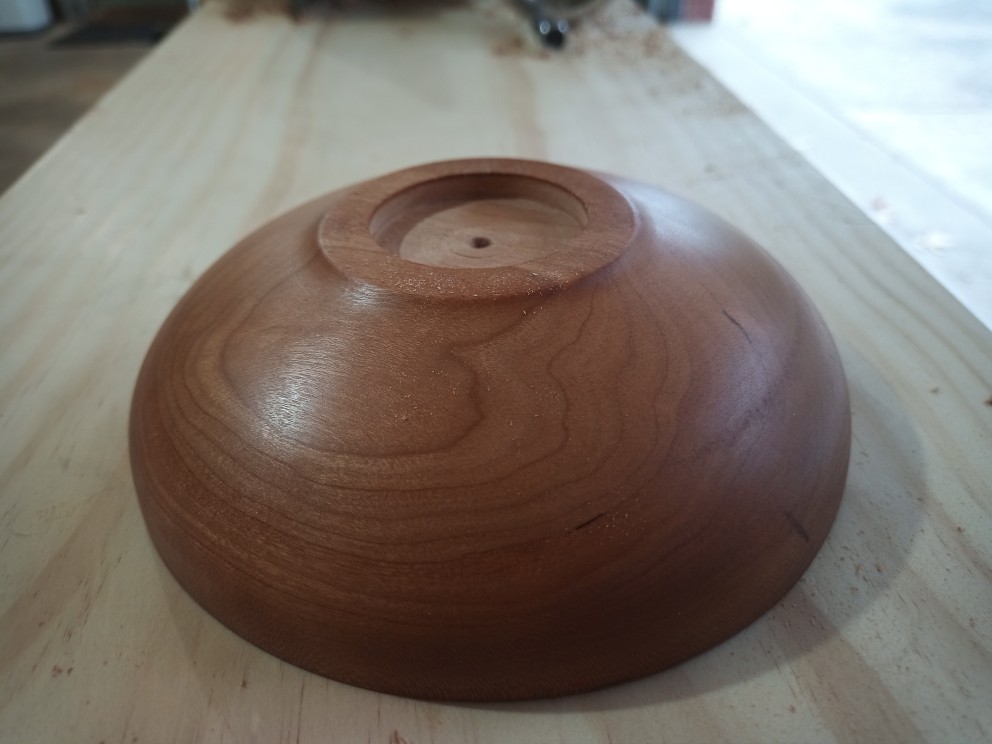
Luckily, I had one more blank to go. This one got started at some point, then I must have had problems with it, so it wound up on the shelf. I drilled out the center for the woodworm and got started. Learning from the two earlier bowls, I left a much beefier foot on the bottom so it did not fail even when I had problems with my tooling.

6″ Bowl from Cherry

Third time lucky, I guess. I’m pretty happy with this one. No major problems, no major errors or failures, just a simple little bowl.

Cherry Bowl Exterior

I mean, you can really see how much thicker and better supported the foot is on this one. It really gave me the stable grip the chuck needed for me to work the rest of the bowl.

I feel like I learned a lot during these three bowls, including how I have been possibly mis-using one of my tools. Now I have two usable bowls, too.

bookmark_borderCado Royal Shelf From Cherry

One of the wonderful mid-century modern things that came with the house we live in now is a “Cado Royal” wall unit in the upstairs den. This is a really great wall-hung modular shelving and storage system, but the pieces are now collectible and so it’s a pain to expand an existing installation to accommodate, say, an ever expanding media addiction. So, once I had the plant shelf all done with some cherry lumber left over, I decided to try my hand at making my own shelf.

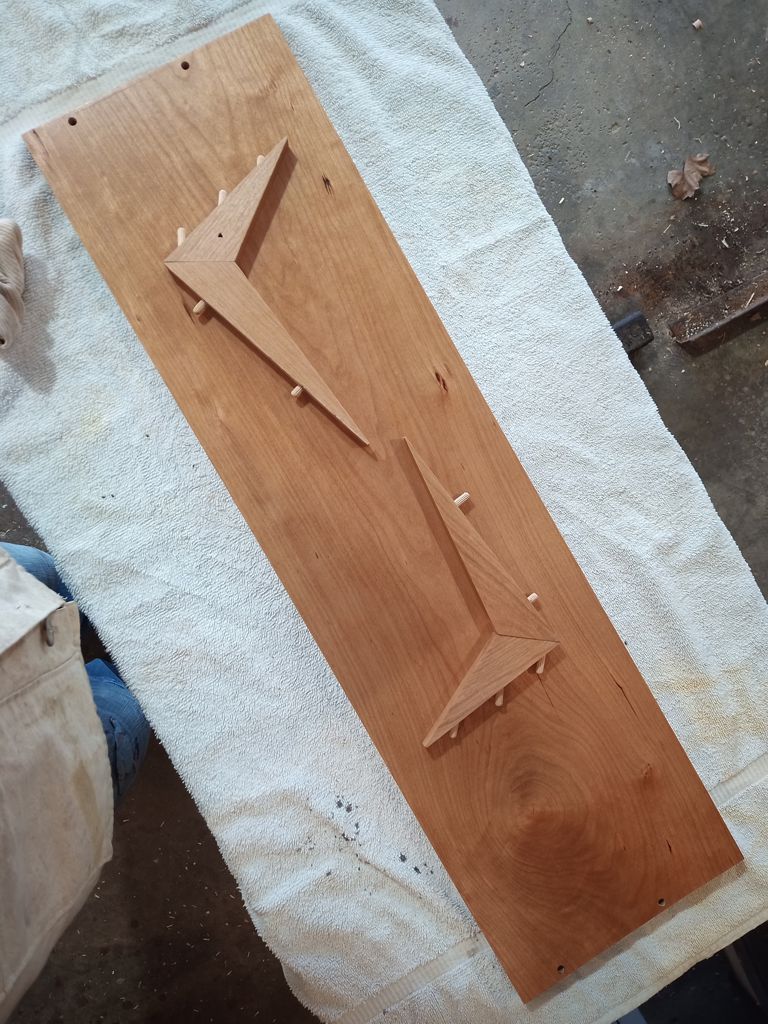
Pieces for One Shelf

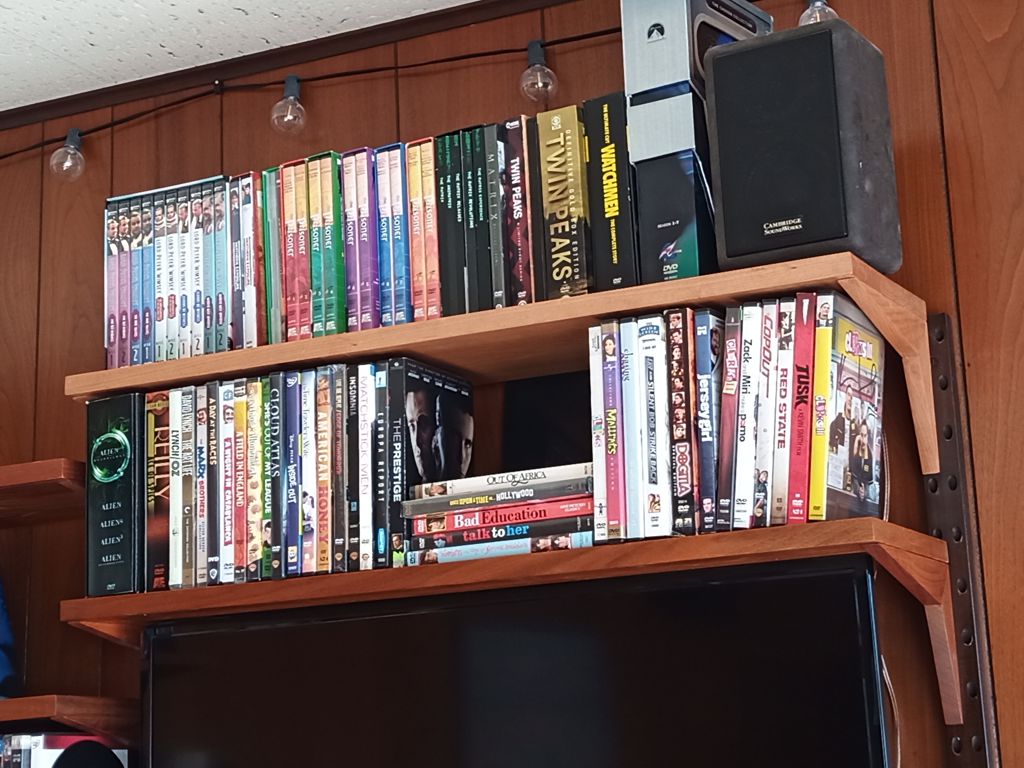
The angle-y, peggy things are the support brackets. The 45-degree dowels slide into angled holes in the wall standards. The 90-degree dowel stubs go into hole sin the underside of the shelf and hold the shelf in place. As you might imagine, accuracy of measurement and placement is vital to this system working as intended. Here is what it looks like with my new shelf added to the existing installation:

Shelf in Use

The cherry will darken over time to match the teak or whatever that stuff is that the existing shelves are made of. I think my shelf is actually nicer than the others. The existing shelves are all veneered, whereas mine is solid wood. The ends of the existing shelves don’t show any end-grain!

bookmark_borderNew Plant Shelf

I made a few of these “plant shelves” at the old house, but we left most of them behind when we moved. A plant shelf is a shelf that goes in front of the window so that the plants get sunlight, and that has a raised edge of some kind so that the potted plants can’t fall off or get pushed off the shelf by cats.

Sweetie asked me if I’d build a plant shelf for the house we live in, you know, now. Most of the dining room furniture we have is made from cherry wood, so I went up to the Alben Sawmill to buy enough cherry to make this plant shelf. Ray Alben gave me a fantastic deal on a couple of stunning cherry boards, and he threw in a couple bonus boards to sweeten the deal.

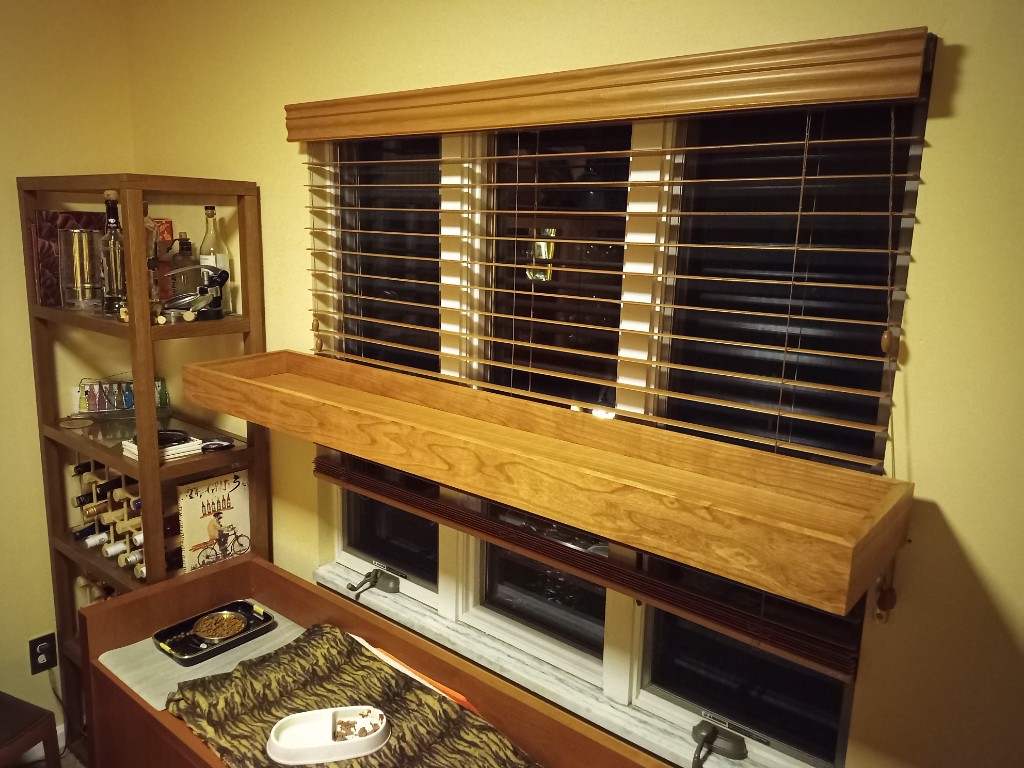
After taking way too much time to plane the boards down to 3/4″ (Ray suggested new planer knives. Spoiler: He was right!) I cut the shelf part of the shelf down to size. Then, I cut the other board down into the “railing” pieces, mitered the ends for joining, and cut dadoes into them to hold the shelf part of the shelf. Tape, glue, and boiled linseed oil later, and we had a new plant shelf.

Plant Shelf Empty

The trick is mounting it to the brackets so that the shelf itself stays away from the venetian blinds. Anyway, I’m really happy with how this came out, and with how easy this project seemed while I was doing it. The first three plant shelves that I made, I guess like 15 years ago at least, were a huge pain and had a couple of problems that I never resolved. The fact that this went smoothly means that I’m actually getting somewhere with all this practice.

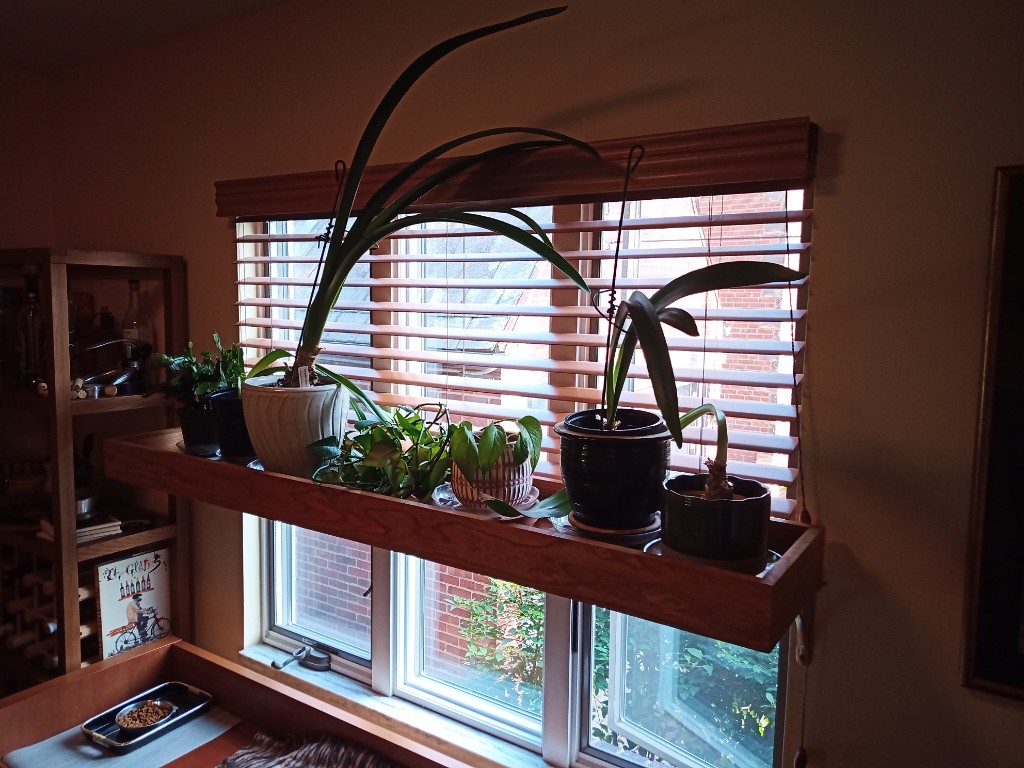
Anyway, here’s what it looks like full of plants:

Plant Shelf Full

bookmark_borderAlben Sawmill

I start a new job on Monday, so I decided to spend one of my dwindling supply of open weekdays going up to finally visit the Alben Sawmill. People have been telling me about the sawmill and Ray Alben for probably 20 years. The mill and lumber store are across the highway from Cooper’s Lake where Pennsic is, but I’ve just never made it over there. Part of the problem is that events at Cooper’s Lake are normally so busy that I never get a chance. Another part is that as a professional sawmill, they were never open on weekends so when I’m working its hard to get up there when I am not at an event.

Ray is retired now, and his son has teamed the mill up with another wood products business to sell hardwood flooring and moldings to the architectural trade. That leaves Ray free to take care of the family farm and run the lumber shop as needed. Ray says that he is even willing to open up the shop on Saturday if he’s not busy with the farm. I happened to catch him there, but he is mostly only open by appointment, so call first at 72‍4–7‍12–13‍71.

If you are familiar with how to get to Pennsic from Pittsburgh, the mill is easy to find. One way is to drive past the entry gates on Currie Road until you get to the North boundary of the campground. Turn right onto Zion Church Road and take that until it ends at West Park Road. Turn right on West Park, cross over the highway, and the shop will be on your left. It’s about a five minute drive. More directly from I79, take exit 99 and head East (away from Currie Road) on route 422. You’ll pass under West Park Road, take the ramp on the right, then turn right onto West Park. Take West Park up past the park entrances until you get to the mill on your right. If you miss it like I did, you can turn around at Zion Church.

When I was there, Ray had plenty of lumber in stock. Most of it is raw cut, but it’s all nicely dried and in the barn. He had several different kinds of wood. I saw pine, oak, cherry, and something else (maybe ash? hickory?). Most of it is in 10-foot lengths and 8 to 12 in widths. He sold me the lumber equivalent of two 10-foot 1x10s in cherry for $25 each. These were arrow-straight, surfaced four sides (S4S) boards almost an inch thick (4/4). They would cost easily eighty bucks apiece anywhere else. Beautiful grain, too. He trimmed them down so they’d fit in my car, then he added in a couple of smaller pieces as lagniappe. It was an excellent experience. If I have some time later this summer, I’m going back to get some thicker pieces for furniture.

The Alben family has been on that land for about 150 years. Ray’s great-grandfather started the farm, and Ray’s dad opened the mill. Ray’s grand-kids help out in the mill and on the farm, so the tradition continues.

bookmark_borderUtensil Box from Cherry Planks

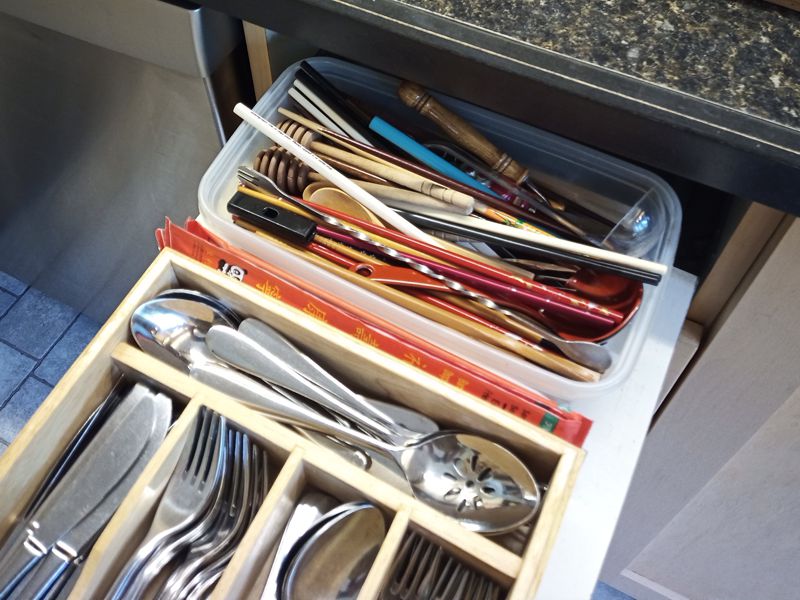
We had a plastic bin at the back of of kitchen utensil drawer that held chopsticks and other miscellaneous items. I got tired of having to dig for chopsticks, and my father had coincidentally gifted me with some cherry grilling planks. We love cherry wood here, and I wasn’t going to just set fire to it, so it’s projectin’ time.

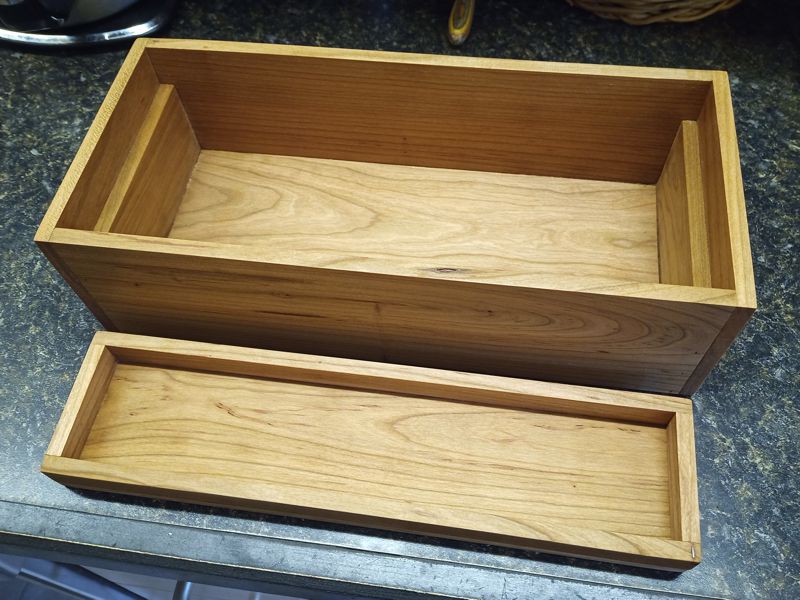
I made a box that’s as wide as the utensil drawer, and a smaller tray to hold chopsticks so that they do not just fall to the bottom and have to be dug out. This construction turned out to be a little too tall, so I shaved some off the top and eventually cut the bottom completely off. Here are the pieces.

The tray slide back and forth, or it lifts right out for easy access to the utensils underneath. Of course we have more stuff than actually fits in the bin, but that can be moved elsewhere.

I finished the whole thing with some salad bowl oil finish, which only takes 3 days to dry, but makes the wood look attractive.

Learn to make things, because people who buy things are suckers.

bookmark_borderWarping Pegs

Many braiders who choose to work in silk buy premeasured bundles of silk threads. These bundles are usually designed to produce braids that are a good length for the obijime braids worn with formal kimono.

When sweetie and I braid, we are often aiming for other lengths, or specific colors that it is more economical to buy in bulk on spools. Then, we measure out our own bundles. Traditionally, this would be done on tall warping stands called bodai. We use a kind of mini-bodai that clamp to the edges of a table. I have made a few sets of these in the past, but I just made a nice set for Sharon.

Cherry Mini-Bodai

They are made entirely from cherry wood, except for the screws that attach the pegs to the bases, and the hookie thingies of course.

I bent the metal rod in a 4″ metal brake that I had to buy a 4″ bench vise to use. It was super easy doing it this way. The bends are exactly where I wanted them and used the mechanical advantage of the vise instead of brute force.

With the “2 and 1” pegs that i normally make, if you have a 4 foot table you can measure out 4′, 8′, and 16′ warps fairly easily. By making this “2 and 2” set, she can now add 12′ and 24′ to her repetoire for those longer or more complex braids.

bookmark_borderCherry Andon Lamp

An andon is a type of Japanese lantern that is usually used indoors by people who are seated on the floor. I think that, technically, any “framed paper” lantern is an andon, but the word is most often used to refer to the floor-standing version. That may be because most hanging lanterns you see are the collapsible paper chochin type.

I’ve been wanting to make a tall, floor standing andon for about five years, and took the opportunity to cut pieces for this one when I was preparing materials for the Cherry Solar Flicker Lantern project.

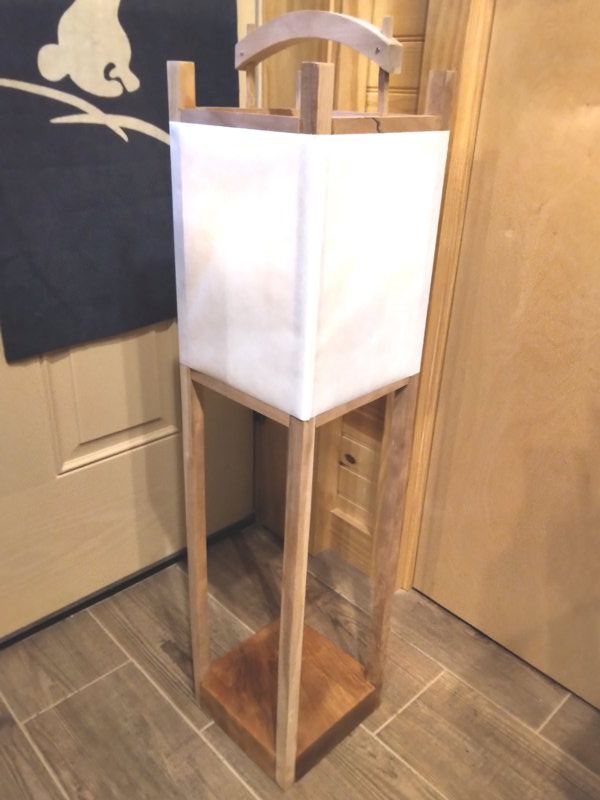
Andon, from cherry

This andon is about 34 inches tall and 7.5 inches deep/wide. It’s made from cherry. To keep it from being tippy, the base is a solid block of cherry two inches thick. It uses a different lighting system than the hanging lanterns. This one is designed to suspend a NEBO Tools “BIG Poppy” lantern inside.

The view inside

Here you can see how the Poppy is suspended from the diagonal crossbeam. This is also a better view of the handle. I cut the through-mortise into a rectangular block first, then cut the curved handle from that block. You can also see the seam where the paper is taped closed at the front corner. Even in the light it doesn’t look bad.

bookmark_borderCherry Solar Flicker Lantern

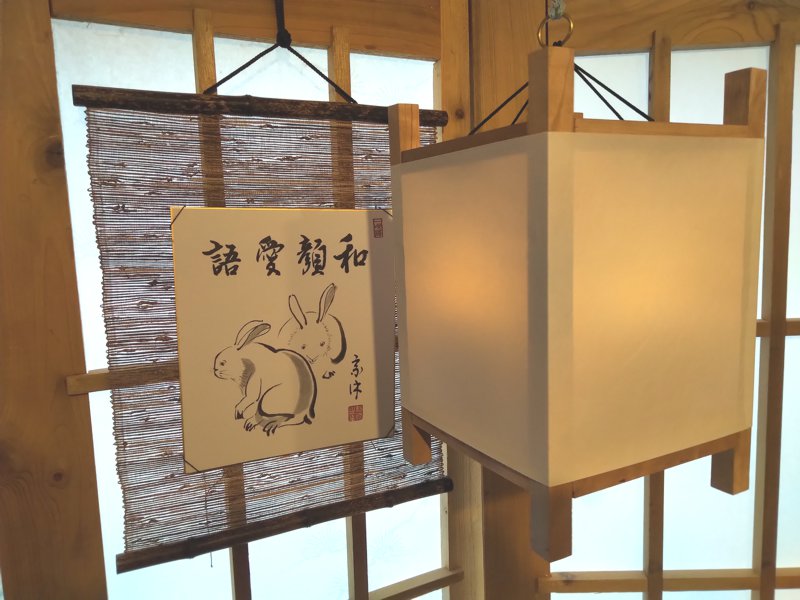
This is the third lantern in a series of at least six. This simple Japanese frame lantern is made from some Western Pennsylvania cherry lumber that I bought a bunch of years ago and am still working scraps out of. It follows the same design as the Oak Solar Flicker Lantern and Maple Solar Flicker Lantern before it.

Lantern in cherry

I have a new method for applying the paper that I think yields a much tighter and smoother result. I’m using Warlon Taf-Top shoji paper, so I can’t just dampen the paper to shrink it. Unless the lantern is perfectly square, wrapping a correctly-sized strip of paper around it leaves wrinkles or bulges. Instead, I cut the paper oversized, apply it to the lantern, then trim the paper down so that it is perfectly straight and flat. It watses a bit more paper, but I think it is more attractive.

The shoji in the background were made about a decade ago, and are made from cedar. I bought the bunny painting from an antique store.

bookmark_borderCherry Surplus Box Project

Just in case you are under the impression that everything I do is always perfect, here’s a little project I had to make because I messed up my first try on the Sake Cup Box project. Sometimes I kind of “wing it” on projects, making decisions based on dimensions that are are penciled on cardboard boxes or post-it notes instead of sitting down to draw up formal plans and doing calculations. As you might expect, sometimes this bites me in the butt.

I made this box bottom, then when I tried it out with the dividers to check for size, I realized it was too small. I set it aside while I started over on a new box bottom, kept it aside while I made a lid for the Sake Cup Box, then I made a lid to fit this “surplus” box bottom instead of smashing it to bits in frustration.

Surplus Box Bottom

This time, the top of the lid is made from more strips of cherry, edge-glued together. I am getting tired of seeing this big stack of cherry scants in the shop, so this was a good way to use up a handful of them. The walls are also cherry strips, but I was able to get better glue joints this time, so there is no metal hardware. Hopefully, the whole thing doesn’t wind up smashed to pieces at some point.

Cherry Surplus Box

The floor is maple, resawn and bookmatched, but as this was my first try it is much more uneven than the floor of the Sake Cup Box. In a way, it’s a good thing this one was unusably small because the bottom it’s definitely not as nice.

The whole thing got the same walnut oil finish as the Sake Cup Box, because why not, so it also spent the last month in the drying closet. I’m no entirely sure what I’ll use this box for, but I am sure that I will use it for something. It’s big enough to hold 16 tama and some braiding supplies, and since it obviously matches the Cherry Marudai, maybe that’s what I will use it for.

bookmark_borderSake Cup Box Project

It spent a month in the furo, and now it’s ready to show off. This was one of my big projects last month, and it has been on my to-do list for a while.

Back at the SCA 50-year anniversary event, we purchased a dozen sake cups for a very good price from a merchant. Since a dozen is one box of cups, the merchant threw in the box so we could safely transport the cups home. This was just a cardboard box, so we have been keeping the cups in a plastic bento box ever since. The cardboard dividers between the cups got destroyed at Pennsic last year, so I made some new dividers from cherry, but still sized to fit in the plastic bento. Now, I have made the final box.

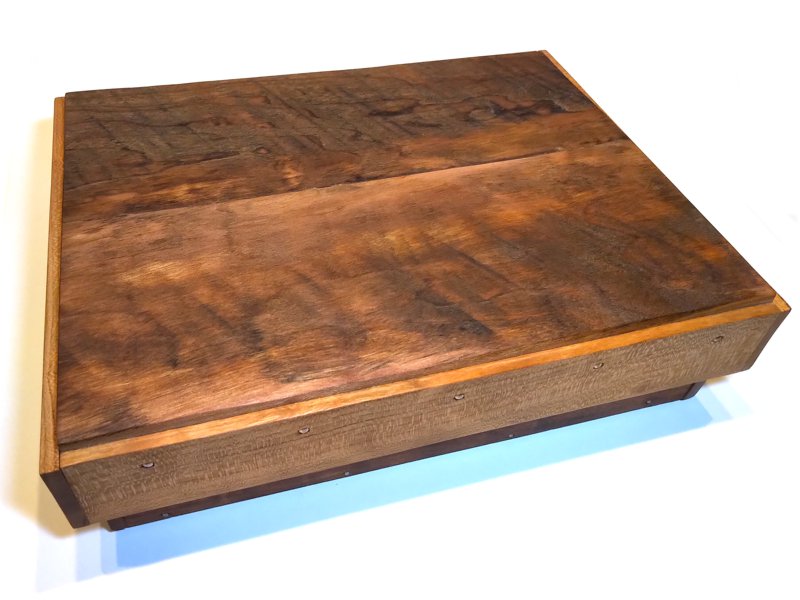
The Sake Cup Box

The top of the lid is made from some rough-sawn lumber I salvaged from Mr. Arimoto’s workshop during the restaurant furniture project. The walls of both the lid and the box body are made from off-cut cherry strips from making maurdai. I was having some trouble gluing the strips to the lid and floor pieces, so all the joinery is secured with brass escutcheon pins. This should also make it a little more durable. It’s finished with food-grade walnut oil, which is why it had to spend a month in the drying cabinet. That oil takes a really long time to cure.

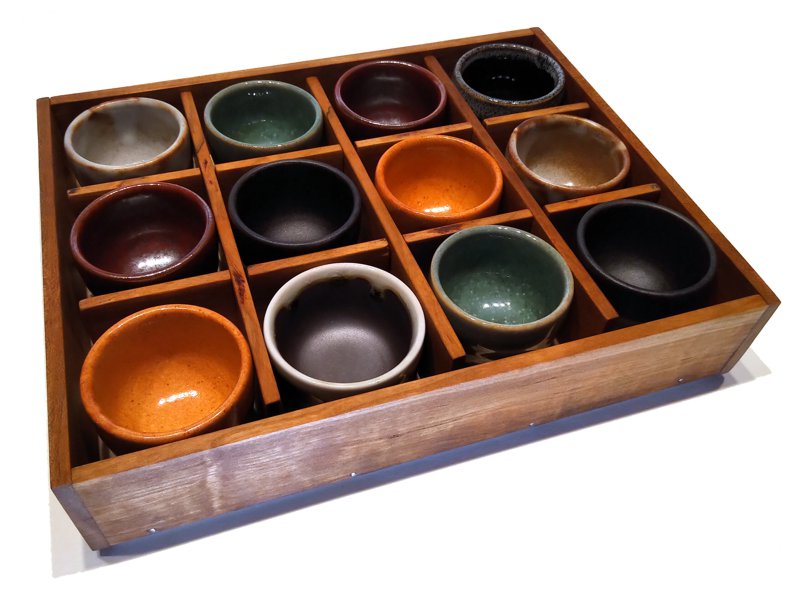
Here’s what it looks like with the lid off:

Sake Cups in Box, with Dividers

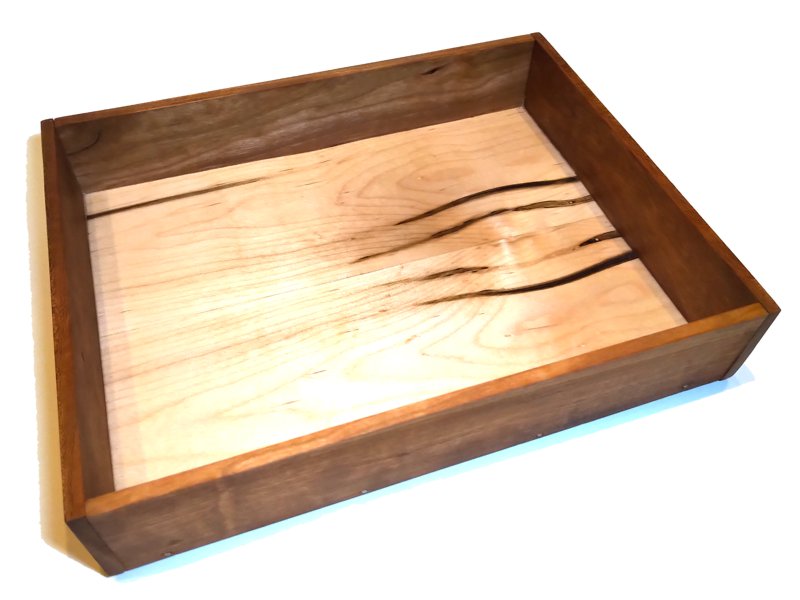
The dividers are neither glued together, nor are they glued in. If I need this box for something else later, they will lift right out. The floor of the box is some resawn and book-matched maple that I had in the shop. I didn’t have enough or thick enough cherry left over. It started as 4/4 (roughly 1-inch thick) maple, so I resawed it to roughly half-inch thickness, then sanded it smooth and even.

Empty Sake Cup Box

I am really super-happy with the way this came out. It is significantly larger and heavier than the old plastic box, but it is also significantly classier.