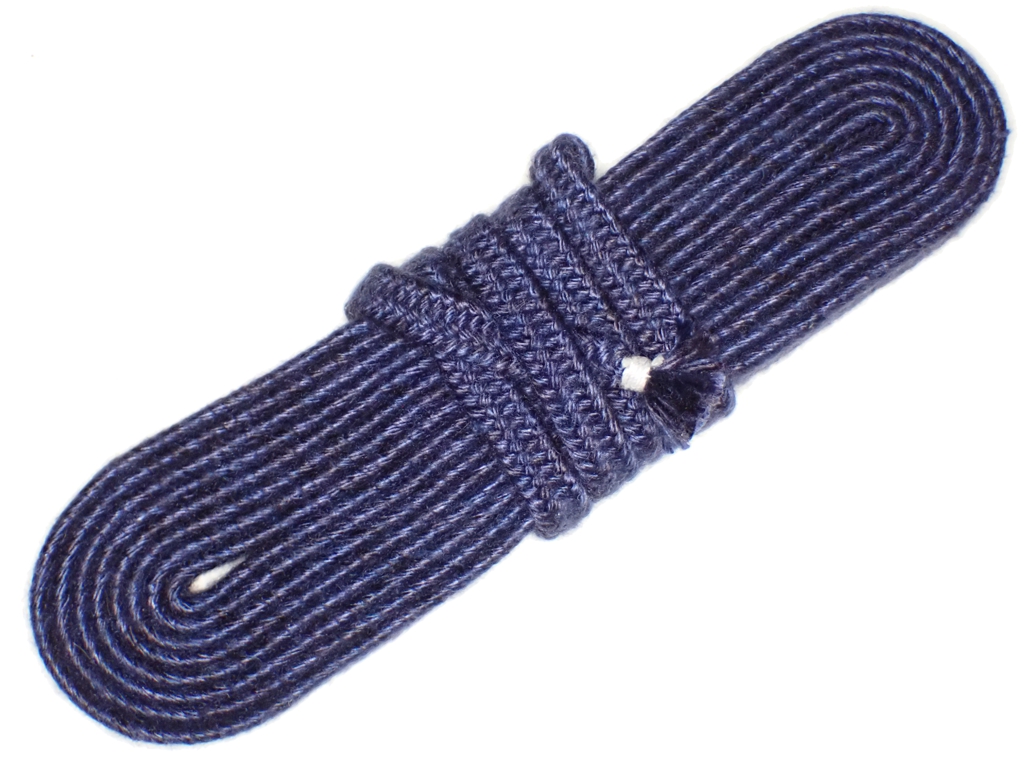
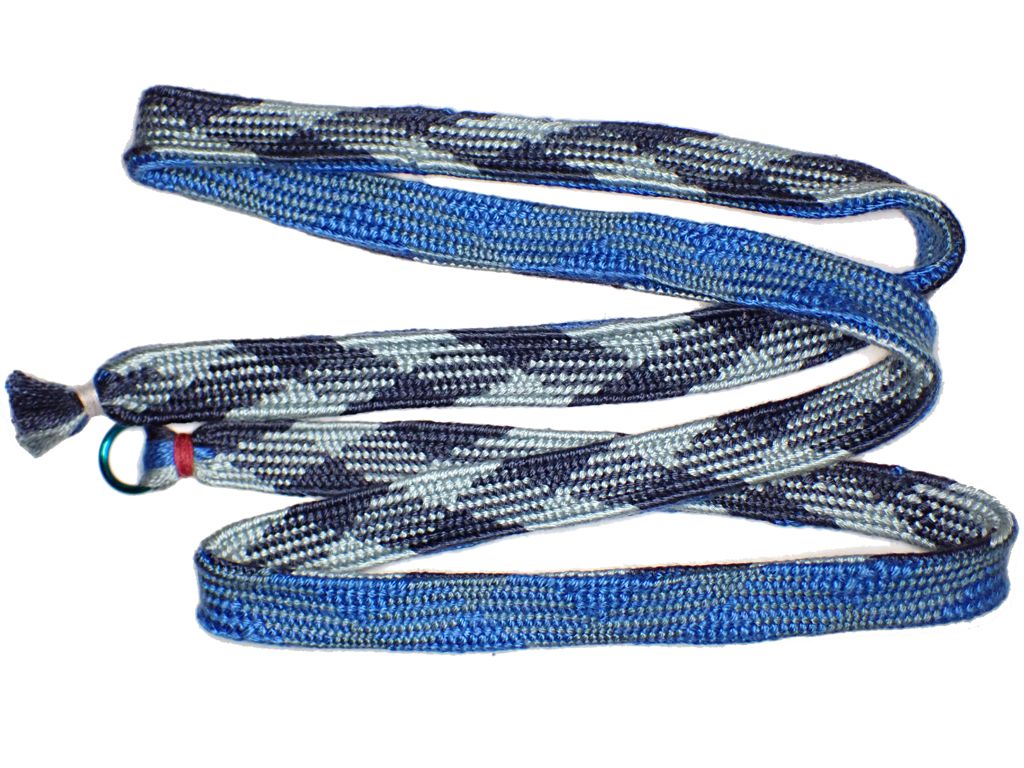
A dear friend of mine from way back who is a martial arts enthusiast had bought himself a Japanese sword, and he asked me if I would make a sageo cord for it. It was my pleasure to do this for him. I was able eventually to find some dark blue silk yarn in sufficient quantity to make this 9.5 foot long 7/16 inch wide 9-strand shigeuchi braid.
9-Shigeuchi Sageo in Silk
I started with about 13.5 feet of material, 10 ends of silk yarn per strand, and worked this braid on my sankakudai. Quite a bit of uptake, really. The amount of material gave me a nice heavy braid, and the silk makes it soft and flexible for its tightness. The use of yarn makes the braid a little fuzzier than I would prefer, but it’s mostly clean and only a little fuzzy. It took me about a year to get all my ducks in a row on this one, but like I said, eventually.
A very good friend of ours was elevated to the Order of the Mark yesterday for his years of excellence with thrown weapons and related service. Hara and I made this hitatare sugata for him to wear for his elevation. Hara found the wonderful silk brocade online, and she made the hakama. I made the hitatare and the braided embellishments.
Silk Brocade Hitatare
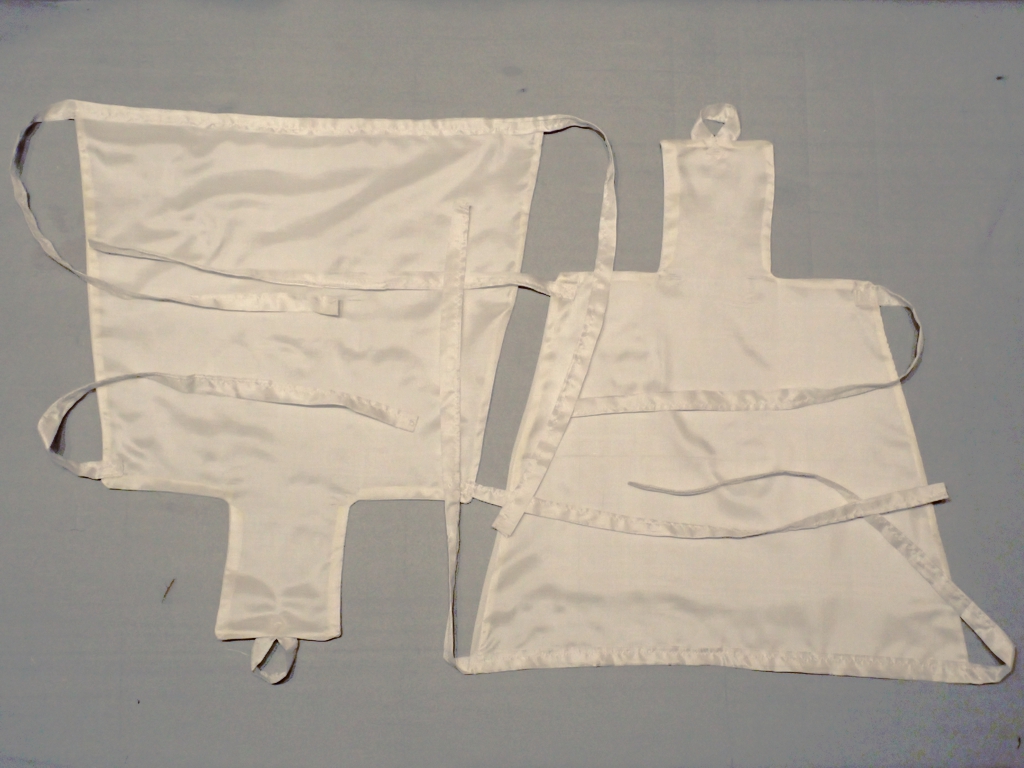
I also made the white tekkou bracers from some excellent white silk, and lined them with white linen.
White Tekkou (Bracers) from Silk
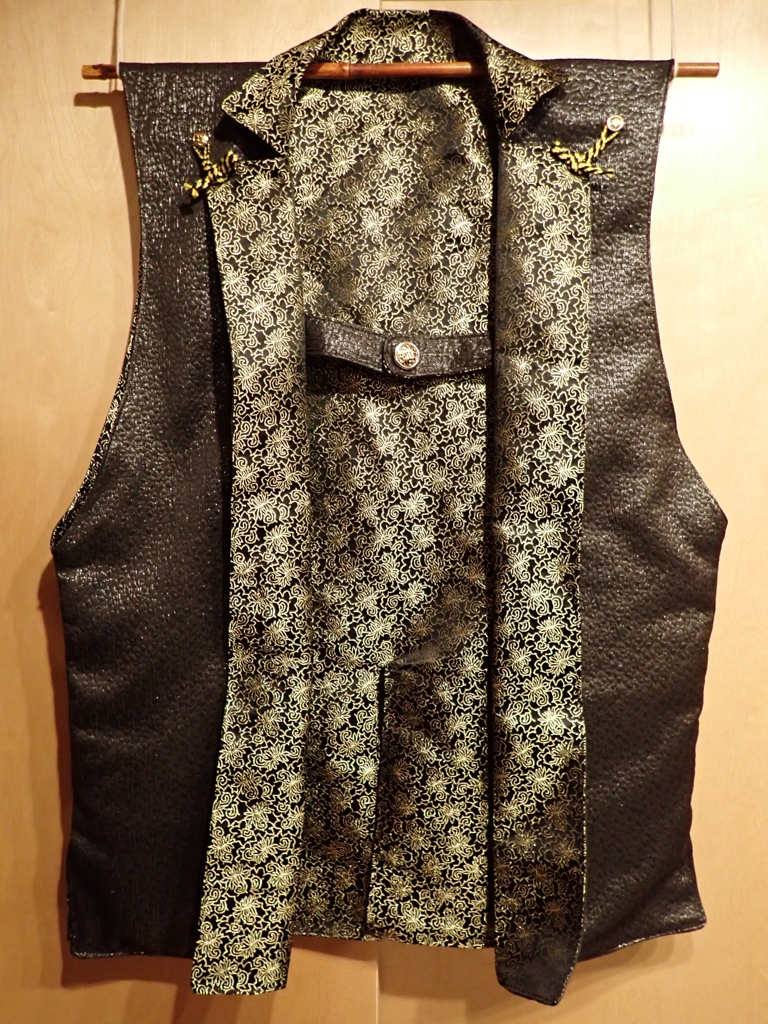
I also made the jinbaori arming jacket. Hara bought the lining, and Alime bint Yorgi found the shell fabric. We might later replace the buttons with new buttons shaped like the Mark badge.
Jinbaori Front
On the back, I embroidered a Mark badge onto some of the extra lining fabric, then turned the edges under and sewed the square down to the center of the back.
Jinbaori Back with Mark Badge
This is some of the shiniest, most extravagant garb I have ever made. It was my special pleasure to make these garments for Kuma because I was otherwise prevented from attending his elevation.
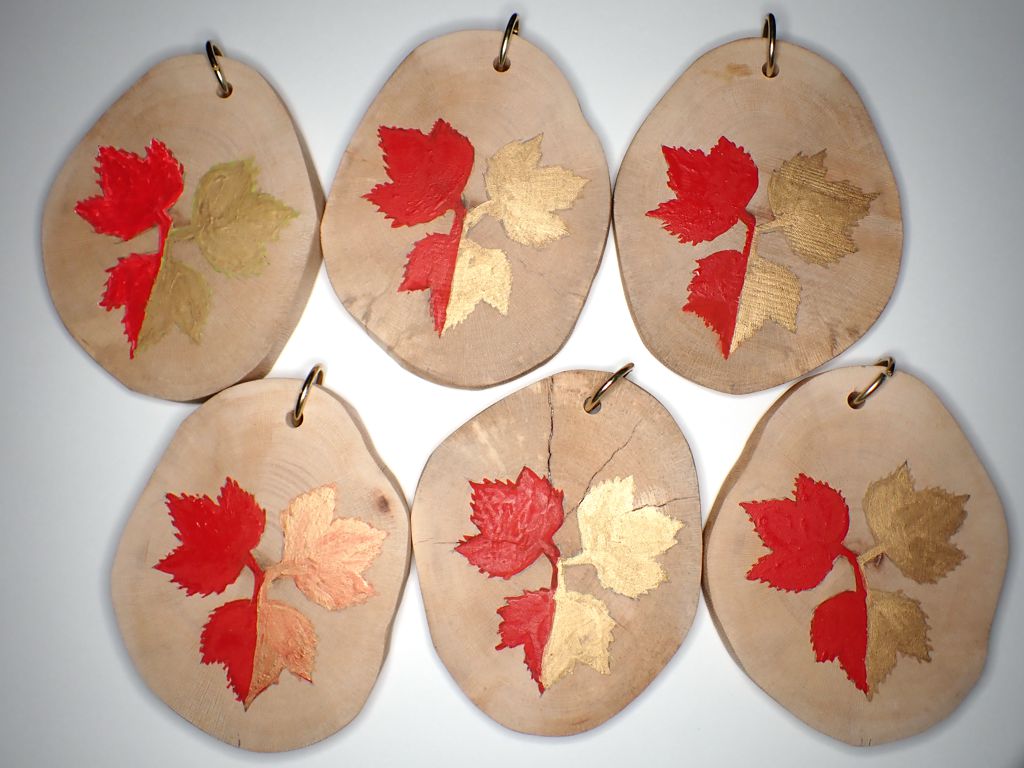
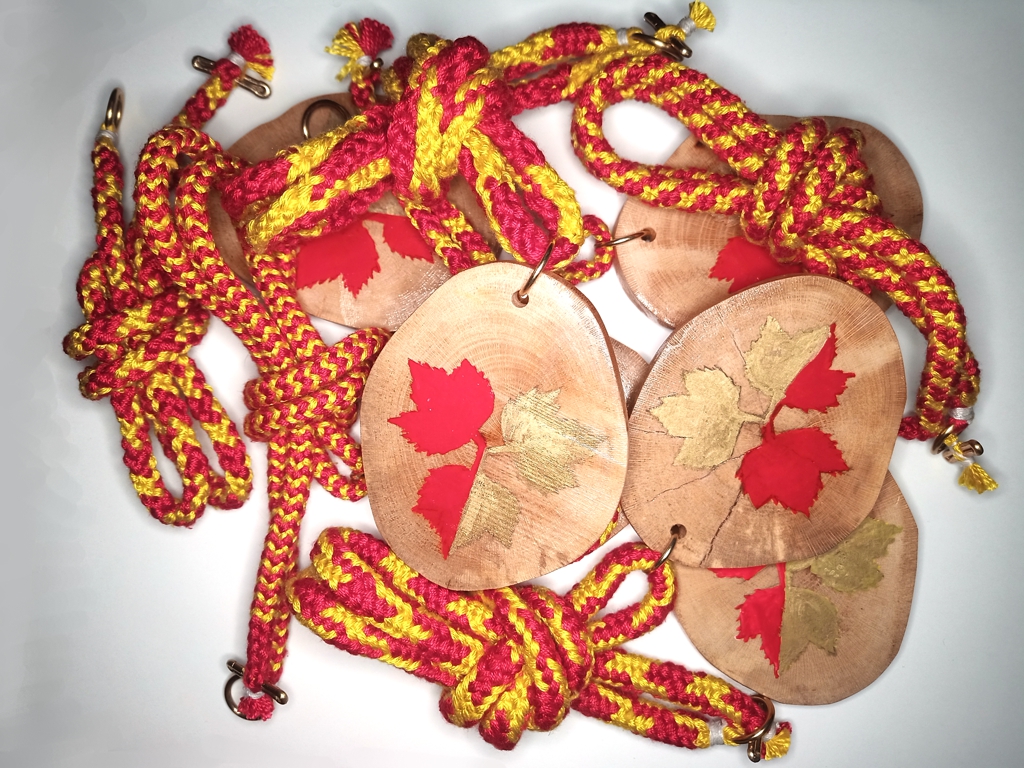
In our SCAKingdom, the basic level award for arts and research is called the Order of the Sycamore. Almost all of the trees that line our street (Shady Avenue) here in Pittsburgh are sycamores, and they shed branches all the time. When life gives you sycamore, make sycamade! Er, madellions. I mean, medallions!
I had a sycamore branch that had come down in the street in front of the house, and that I had cut up into 2-foot lengths. They’ve been drying in the garage for a couple of years, and it was time to do something with them. I cut a stack of “cookies” from one of the branches, and sanded both side of them smooth. Then, I dipped them in sanding sealer, let that dry, and sanded them even smoother. (somewhere in there I drilled them to accept a jump ring for hanging. Next, I painted the badge of the order on each cookie, and sealed the paint with a couple of coats of shellac. (Did you know that “gum arabic”, the binding agent in water paints, is not soluble in alcohol, the solvent in shellac?). Finally, I braided six cords on the marudai and hung each medallion from a cord.
The medallions themselves. Actually, this was from before the shellac
Here’s a project that barely has any wood in it at all! It’s another silk banner for a friend who was being elevated to the peerage in the SCA. Owen’s arms has one of those repeating patterns that make it an awful lot of work for a vertical banner like this, but the rams at the top are interesting.
I laid out the repeating pattern in chalk, then suspended the silk in my pvc-pipe painting frame and used black gutta resist to make the lines for the pattern. Then it was a simple if maddening chore to color in every other rhomboid with paint. Once that was dry I treated the upper portion with sizing, then traced and painted the rams.
I’m always a little paranoid about the paint, so even though I used the air-set additive in the paint I also did a bunch of ironing to heat-set the paint. I have to wash the silk to get all the chalk off, so I need to be sure the paint is well and truly set.
Anyway, this banner was done in plenty of time before Pennsic, and we used it at Owen’s vigil and his procession into court. Always happy to help out, and be able to contribute a gift that somebody can actually use.
Last summer we were out in Rockaway for a niece’s wedding, and realized two things: we were probably close enough to Brooklyn that we could probably find a few bottles of Brooklyn Gin, and we were probably close enough to the fashion district that we could probably find a good fabric store. It turns out we were right on both counts! The fabric store had a lot of great silks, and I got some shiny violet silk that I knew would make a very fancy kosode.
Kosode from Violet Silk
This was great to sew. I have not worked with this kind of silk in many years, since I made the Gray Silk Kosode in 2006. I had a really hard time with it back then, and it was nice to see that my fabric handling ability and sewing skills have improved considerably over time.
A kesa is a monk’s garment in the Japanese Buddhist tradition. It is the pieced-quilt kinda thing that hangs from the shoulder on a strap. Certain disciplines make this the only thing a monk wears, but most often it is seen as a kind of devotional garment or vestment. I don’t want to get too far into it, because you could spend many pages discussing the tradition and its changes over time. In modern times, there is a kind partial kesa called a hangesa which is essentially just the strap, worn as a collar. This is normally worn by lay members of an order to show their affiliation without implying that they are officially a monk.
In the SCA, we tend to wear medallions or belt favors to show our affiliations, but neither of these is really appropriate for Japanese persona. They may not be completely appropriate for SCA use, but I don’t think they are offensive at the level that, say, a full kesa would be.
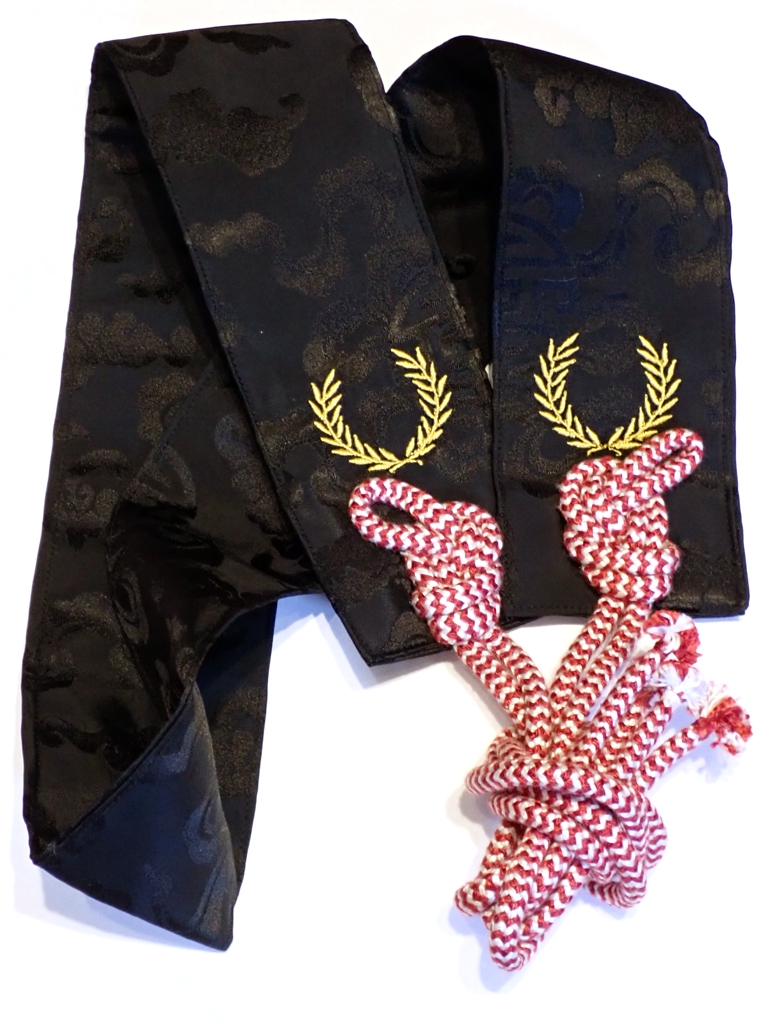
Anyway, here’s a hangesa I made for myself to show affiliation with the Order of the Laurel.
I used some left-over black silk brocade from my elevation garb, machine embroidered some Laurel wreaths near the ends, and attached some red and white (Kingdom colors) silk braids to act as himo. I actually made this at least a year ago, but I have gotten quite a bit behind on posting projects here.
Kichō are curtains that ancient and medieval Japanese nobles used inside rooms as movable partitions. The curtains hang from a stand, so they can be moved around as needed. You can think of them as the ancient version of “pipe and drape” dividers that you often see as trade show booths, but slightly more decorative, and for the home. They differ from other kinds of Japanese curtains in that the stand makes them freestanding and more portable. You will frequently see them in illustrated scrolls as backdrops, or screens to block a figure from view. They largely fell out of favor by the end of the Momoyama period (1573) and were replaced by the more solid shoji and more decorative byobu. Wikipedia actually has a whole List of partitions of traditional Japanese architecture, and you can learn more about differences there.
Anyway, I’ve had kichō on my to-do list for a while. I assembled a working stand a few years ago, and used it todisplaysomeprojects in the interim, but only got around to constructing the curtains themselves until recently. There is a little more to it than you might imagine. Here’s what I wound up with:
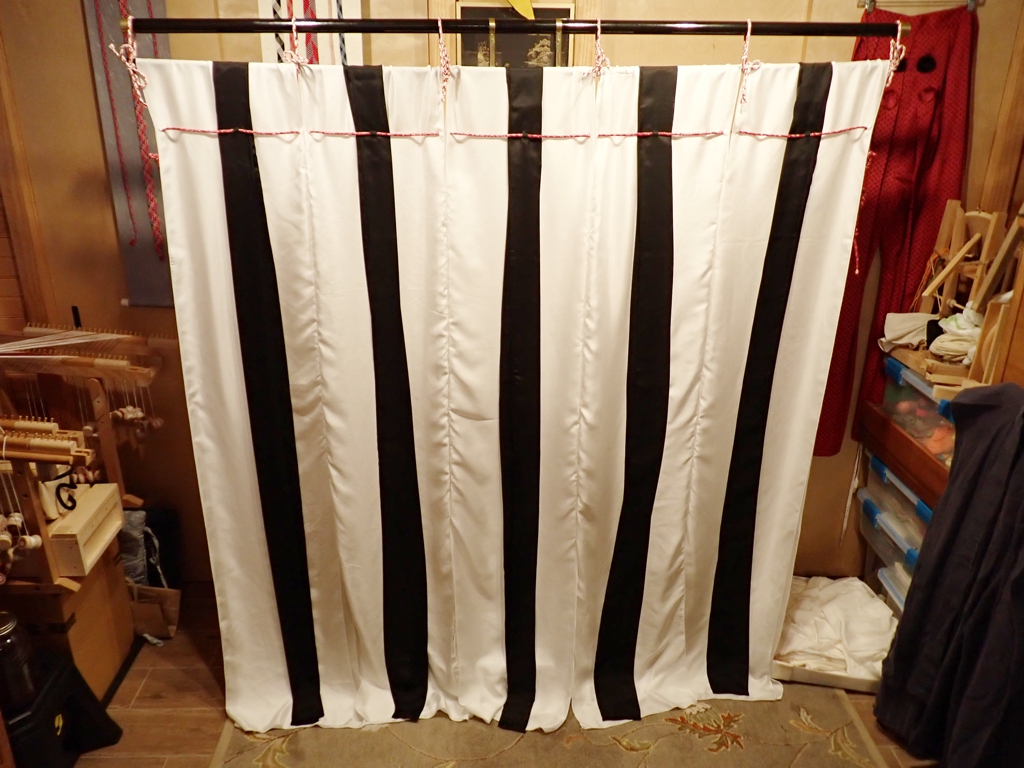
Kicho from the front
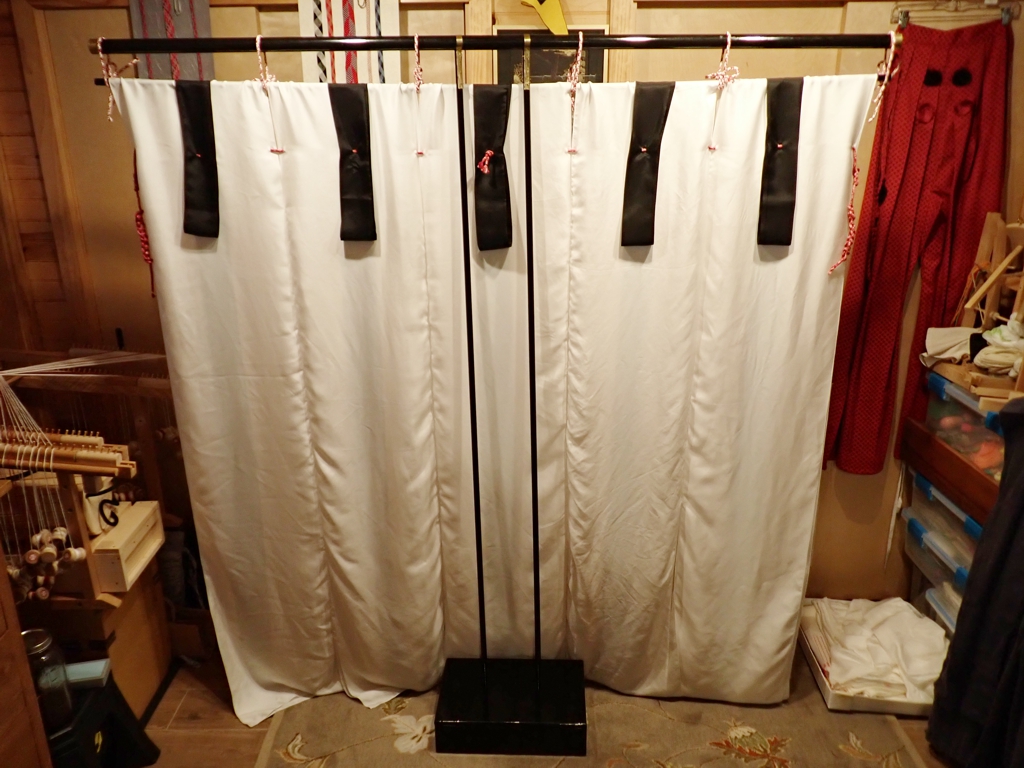
Kicho from the back
The white curtain bodies are twill weave silk from Dharma Trading, and the black “streamers” are black lightweight habotai also from Dharma. The curtains (or “katabira“) are double layer. Very often, the katabira would be decorated on the front panel, and plain on the back. I decided to skip the weeks that it would have taken me to decorate the fronts and skip directly to construction. Maybe I will get back to the decoration later. I made each panel by cutting 12-foot long 15-inch wide panels from the 45-inch wide fabric. I gave all of the panels a rolled-edge on the serger to simulate the selvedge that would be present on narrow-loom fabric.
The streamers (or “ribbons” according to Wikipedia) are half panels 15-feet long and 7.5-inches wide. I sewed the half-panels into tubes, turned the tubes inside out, and ironed them flat with the seams down one edge. I tucked in the loose ends and sewed them shut. The streamers needed to be longer because they are supposed to drape over the top and come a bit down the back. The slits for the lacing go all the way through both parts of the ribbons, and both layers of the katabira. I did not want to sew the dozens of buttonholes this would have required, so the slits are just cuts in the fabric that I made with my Clover Button Hole Cutter.
The lacing is basic edo yatsubraid that I made with some cotton yarn that I dyed as part of a group fiber activity back in the Autumn. I twisted up the hanks of yarn so that more dye got to some parts of the yarn than to others. The yarn itself is not super interesting, but I think it makes great pebbled-texture braids. Two lengths of braid lace the panels together, and shorter pieces of braid tie the rod that suspends the curtains (or “curtain rod”, if you will) to the crosspiece (or “te“) of the stand.
The stand itself is made of wood, as you might imagine. The base (or “tsuchii“) is a box with enough room inside to hold 20 to 30 pounds of iron weights. There are holes in the lid and a brace in the bottom to hold the two legs (or “ashi“) upright. The te rests on the tops of the ashi. The te and ashi are made of 6-foot long poplar dowels from the hardware store. The te is secured to the ashi using some custom made brass brackets that secure with brass cotter pins. The ends of the te are also embellished with a little brass. Everything wood is finished in black polyurethane to simulate lacquer.
I’m pretty happy with the way this all worked out. I may or may not make the curtains more interesting. I’d like to add more metalwork to the stand, and there are some problems with stability. A number of people have been talking about these lately, and I’m glad I went ahead and just made them. They should come in handy for defining smaller spaces in larger rooms, and they are much more portable than shoji.
This braid has been on the takadai for about six months. I have not been working on it constantly, of course, but still. It is a double-layer double-twill braid that used both the upper and lower arms, so it is essentially two braids stitched together at the edges. Even If I had been braiding at full speed, it still would have taken me twice as long as a single-layer braid, but I had so many other things to take care of and so many other braids to do.
The final braid is about a yard long and a little more than a half-inch wide. It’s all in silk lace-weight yarn and there are 52 (!) elements with 3 ends of yarn per element. There are plenty of errors in the braid. You can probably see a few in the photo. I’m still happy with it. It was a great learning experience.
Almost 8 years ago, Makiko Tada was kind enough to teach me kute-uchi hand-loop braiding in her studio. For the past 8 years I have been making “practice” braids, “sample” braids, “class” braids, and the like, but never making any actual braids from silk. So, I did it. Twice.
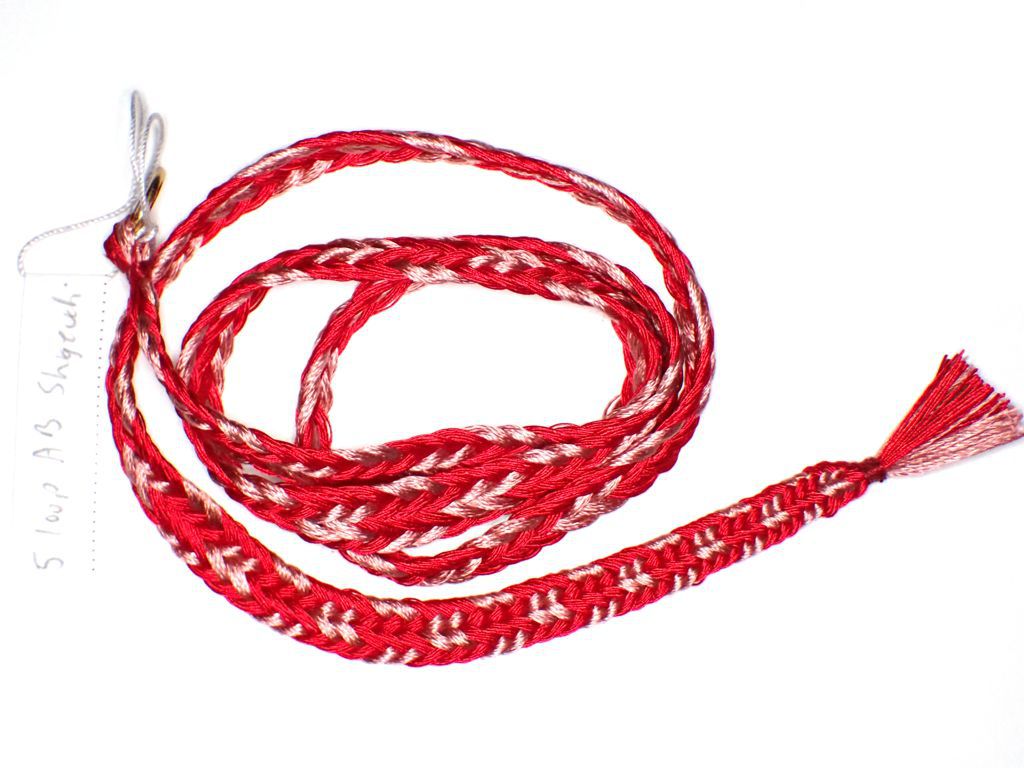
The first braid is a 5-loop (3+2) AB flat braid that is usually referred to as shigeuchi. I used 12 ends of silk reeled silk yarn per loop, 3 loops red and 2 loops pink. The “3+2” means that three loops start on the left hand, and 2 on the right. The “AB” refers to two of the four moves used to make the braid from loops:
A = Outside Straight
B = Outside Twist
C = Inside Straight
D = Inside Twist
I realize that this doesn’t actually tell you anything you need to know about loop braiding. Anyway, the braid:
5-loop AB Shigeuchi in Reeled Silk
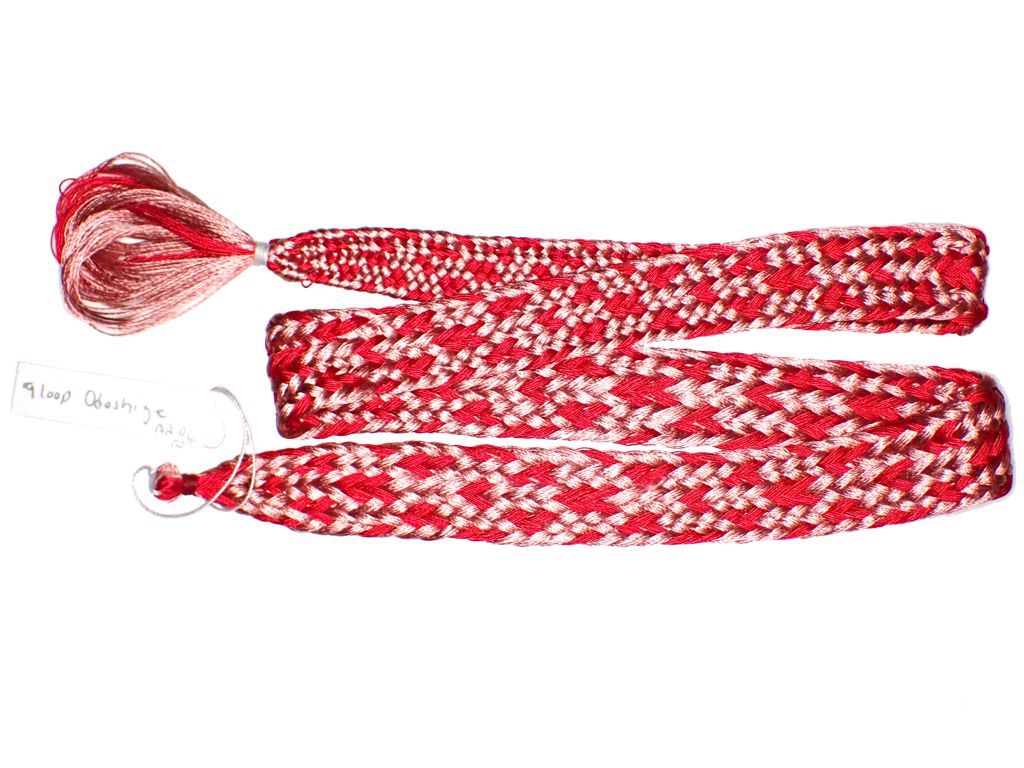
The second braid is a 9-loop (6 +3) AADC Odoshige braid, again with 12 ends of reeled silk yarn per loop. This time I had 6 loops of pink and 3 of red. This braid makes this great 8-ridge flat twill structure. The name odoshige indicates that it was mainly used as lacing on odoshi , which is a word for armor. This particular one is a little wide for armor lacing, though.
9-loop AADC Odoshige in Reeled Silk
I feel like the tension on both of these braids is still a little off. I bet you can even see the change in tension over the course of each braid. I have tried to showcase the best section of each braid. In the first braid, it’s the arc at the bottom. In the second braid it is the diagonal part near the top. In both cases, the nicer part of the braid is closer to the finish end of the braid. That should tell you something about how difficult it is to tension a longer braid.
Both braids are roughly 30 inches long. The second braid also has an error in it, but I have skillfully hidden that error from the camera.
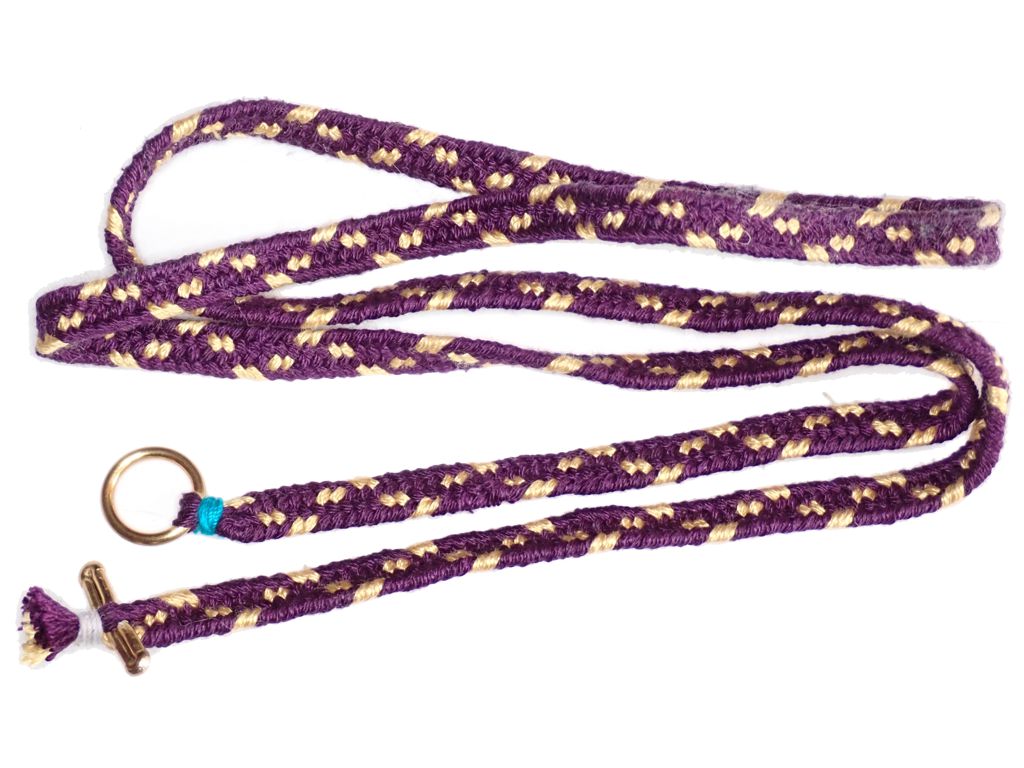
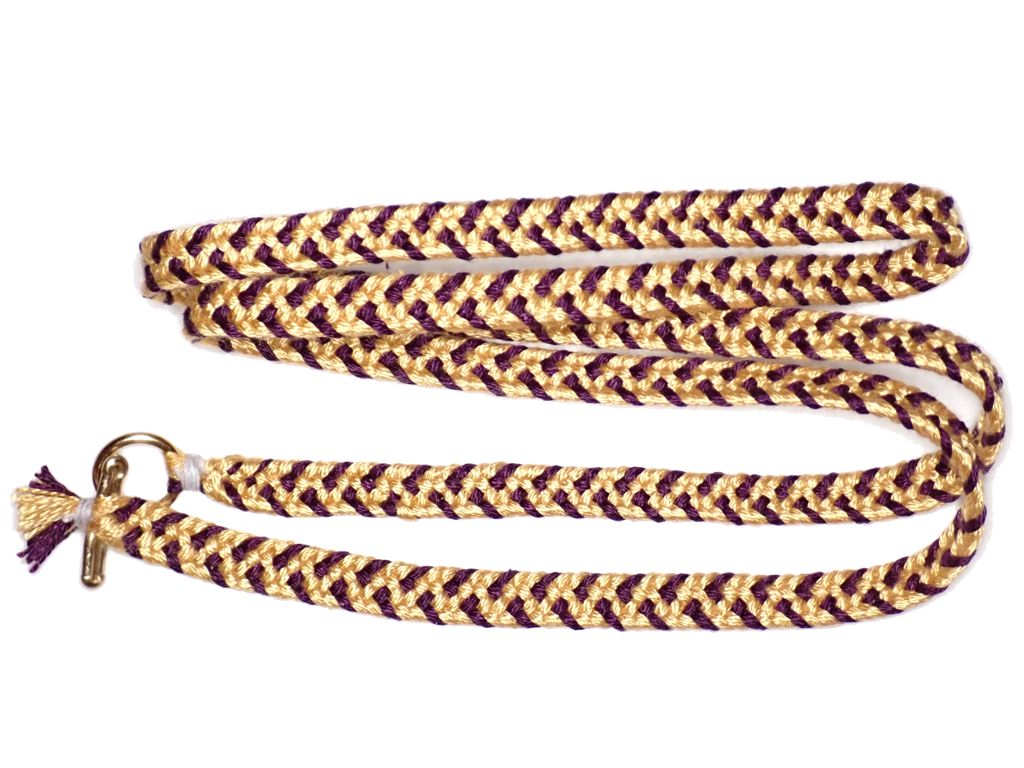
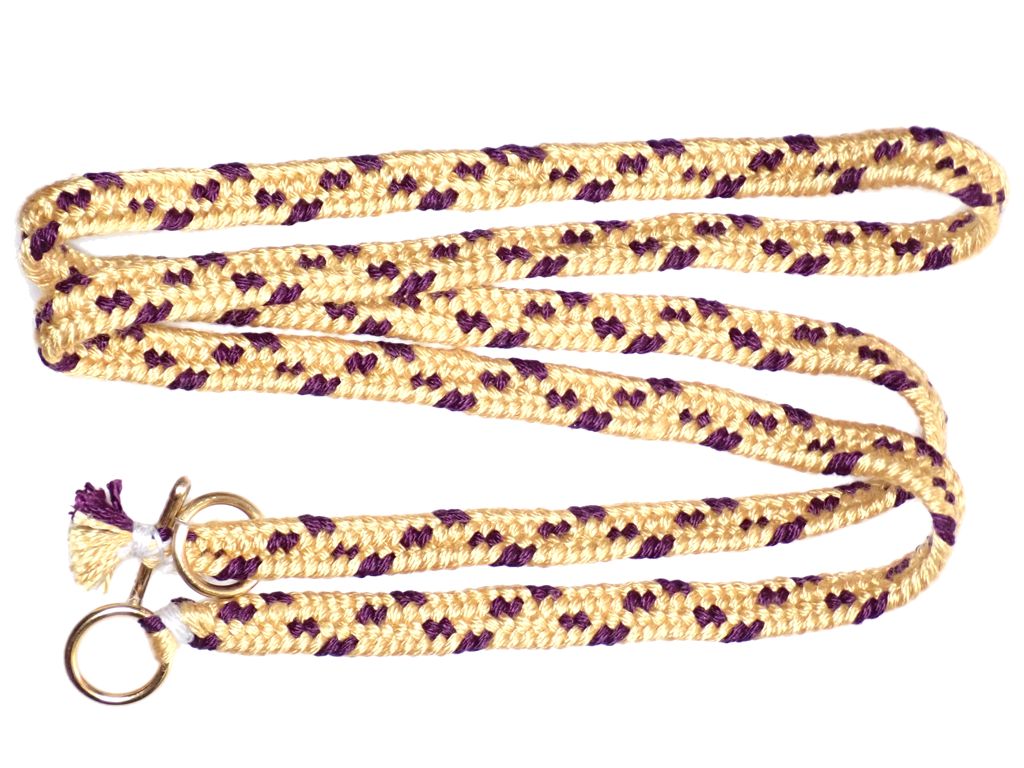
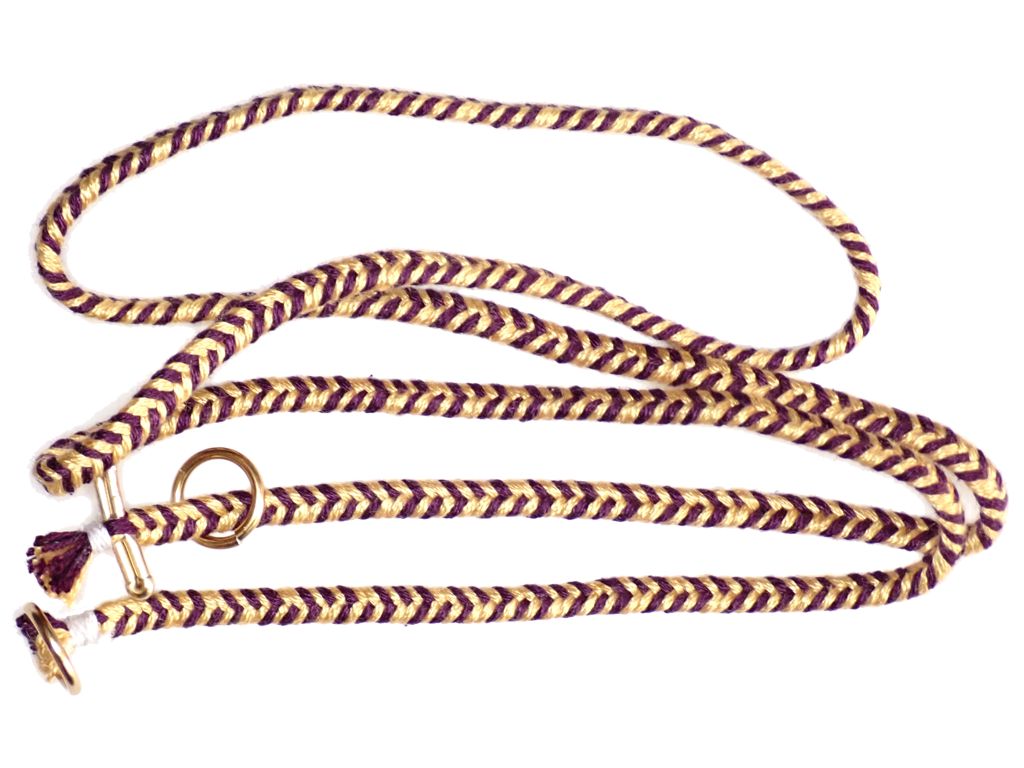
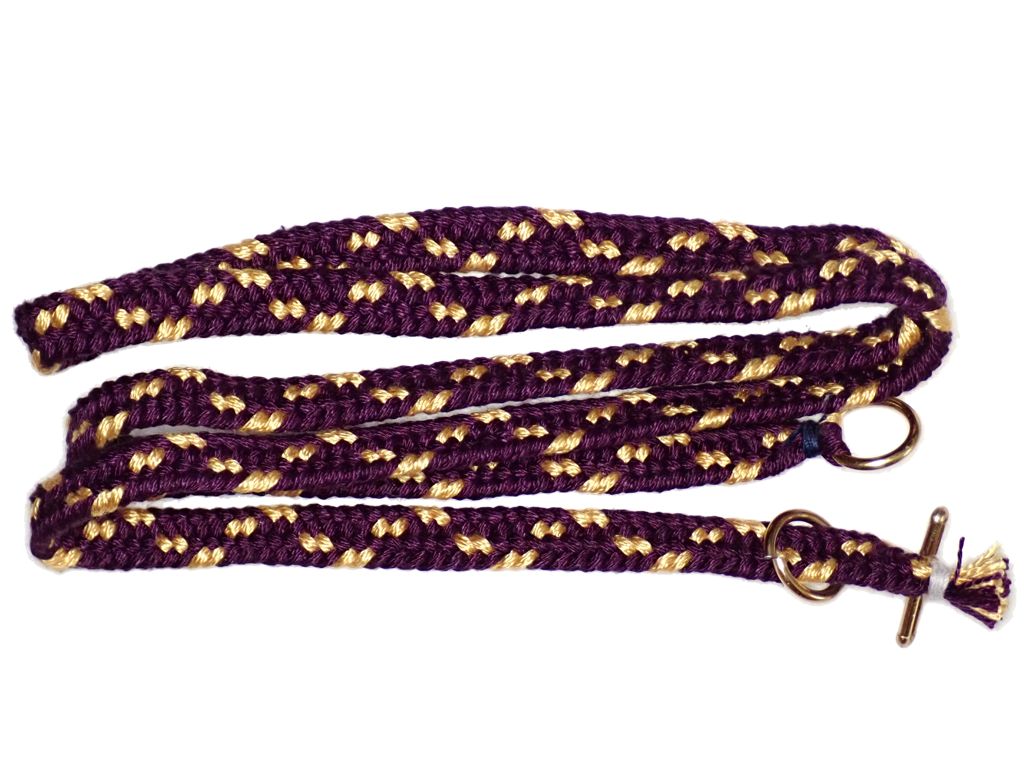
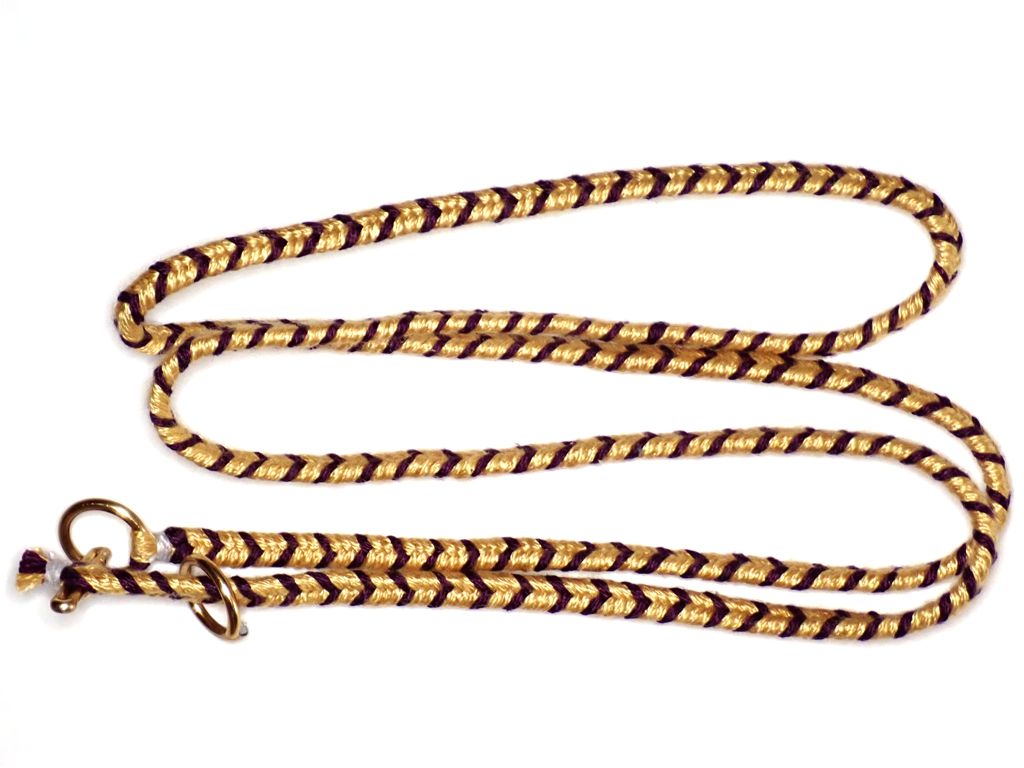
Every year at Pennsic, the Kingdoms in the SCA trade gift baskets. This year, my Kingdom is gifting the Crown of the East Kingdom with a basket of goodies that they can use during their reign or give out as largesse themselves. I decided to chip in with some of my stock of illustrated scroll blanks and some fresh medallion cord braids in East Kingdom colors.
9-strand Marudai Shigeuchi
9-strand Sankakudai Shigeuchi
9-strand Shigeuchidai Shigeuchi
7-Strand Sankakudai
9-strand Shigeuchidai Shigeuchi
7-Strand Sankakudai
These were all in violet and gold silk lace-weight yarn, with multiple ends of yarn per strand. These braids enabled me to practice some new techniques and on some new equipment, so it was totally worth it.


