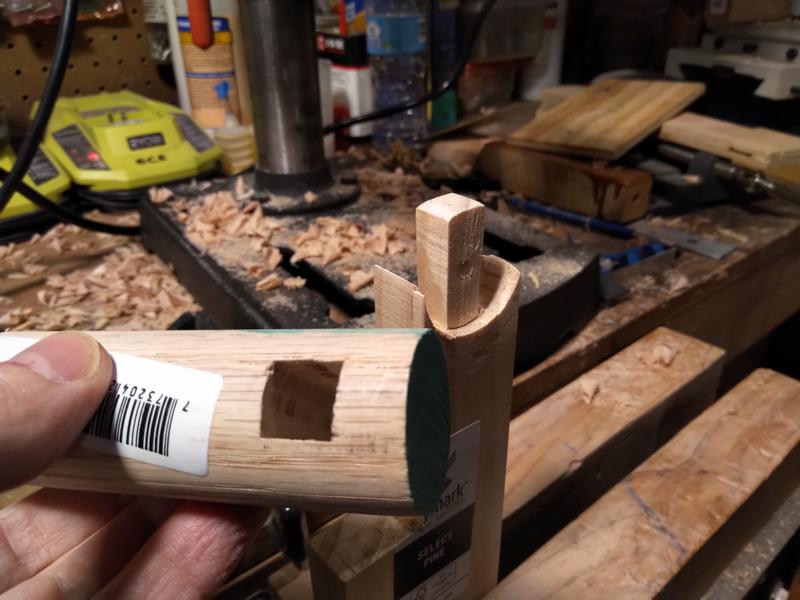
I spent a bunch of time today buying a new band saw blade and setting up machines so I could make some test cuts on scrap wood to prototype some interesting joinery for a new folding stool design.
New Shogi Joinery
How do you join a 1.25″ wide board perpendicular to a 1.25″ dowel? It takes a forstner bit, a band saw, and a mortising machine. I’m pretty excited to see how this works out on an actual project.
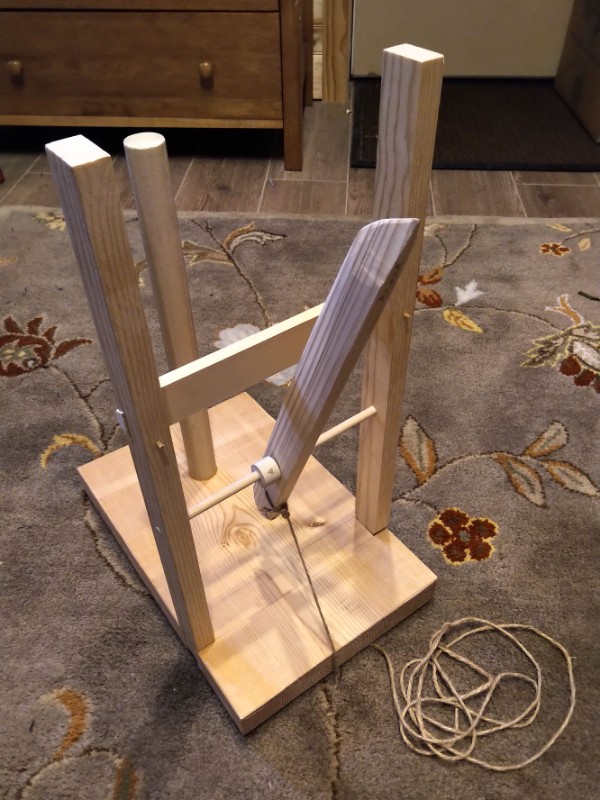
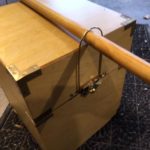
An ashiuchidai is a piece of braiding equipment used when braiding long loop braids. If the material is too long, it’s impossible to pull the “stitches” tight by spreading your hands apart. The ashiuchidai provides a fixed point to hold the braid up where you can work it easily, and a beater bar that can be activated by tugging on a string. The string can be tied to your toe so that moving your foot taps the stitches into place while your hands braid.
I made this ashiuchidai back in June of last year, but I recently added some features to it to improve its performance. There are two stabilizers that keep the beater bar centered and straight on the axle (only one is visible in the photo), and five brass pins added to the beater (visible as the dark dots on the back ot the blade just below the tip) as counterweight. Despite my best efforts, the beater could still get stuck in the “up and in the way” position, and this counter-weighting makes it much more likely that the beater will fall back out of the way.
Ashiuchidai v1.1
I still have to try it out! I haven’t made the “helping-hands” that allow you to put down the loops while you’re loop braiding, so trying out the ashiuchidai means devoting a block of time to completing a braid that is pretty long.
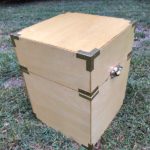
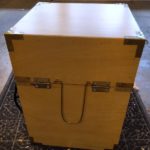
This is a project I started way before I got the blog going gain, but I finally added one of the final details to make this project complete. This is a “hitsu“, a Japanese storage box. They’re often used to store armor (which would make them a “gusoku hitsu” or “gusoku bitsu”), and often when you see a set of Japanese armor on display, the armor stand is sitting on top of the storage hitsu. They often have bail handles so a pair of people can carry one or multiple hitsu slung from a pole, and sometimes they have carry straps so a single person could carry the hitsu on their back.
Hitsu, closed
Hitsu, open
Hitsu’s rope carry straps
Hitsu’s hinge-side bail handle
Hitsu’s latch-side bail handle, with carry pole
The body of the box is thin plywood to keep the weight down. It’s framed in on the inside with 1×1 lumber, to give the nails something to bite into. The corners are also reinforced with brass hardware that I made myself by cutting it from sheet brass with snips. the latch is a sash lock, which isn’t the best, but it looks ok and is beefy enough to keep the hitsu closed during carrying.
All the wood is protected on the outside by spar urethane, so I think this will be good for carrying things around on drizzly days at Pennsic. that’s the main reason for this project, carrying things around at Pennsic.
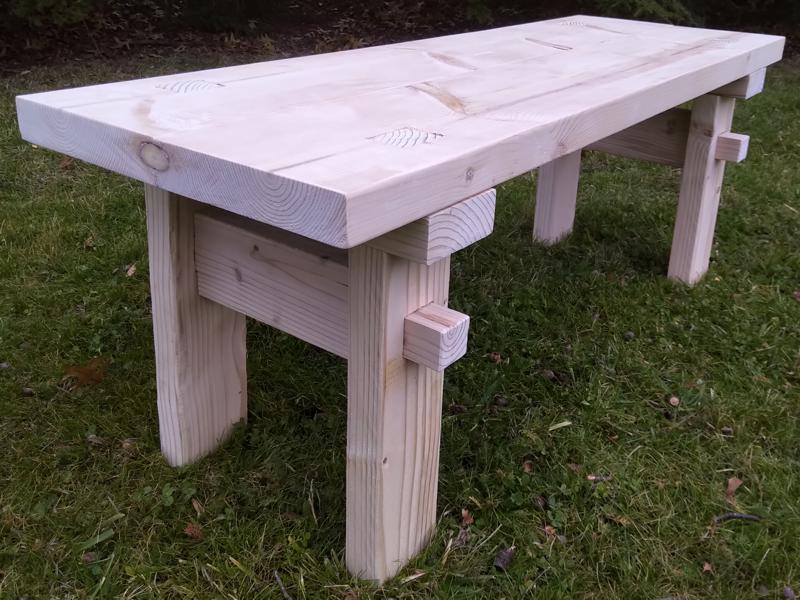
I managed to get all the joinery and tuning done on Friday, making this project complete. Here is the complete “Breakdown Bench”.
This is the completed and assembled bench.
It’s pretty solid, given how tight some of the joinery came out. It still comes apart, though. I need to sand some of these pieces a bit, and maybe add some sealer, but otherwise, it’s done.
The completed bench, disassembled.
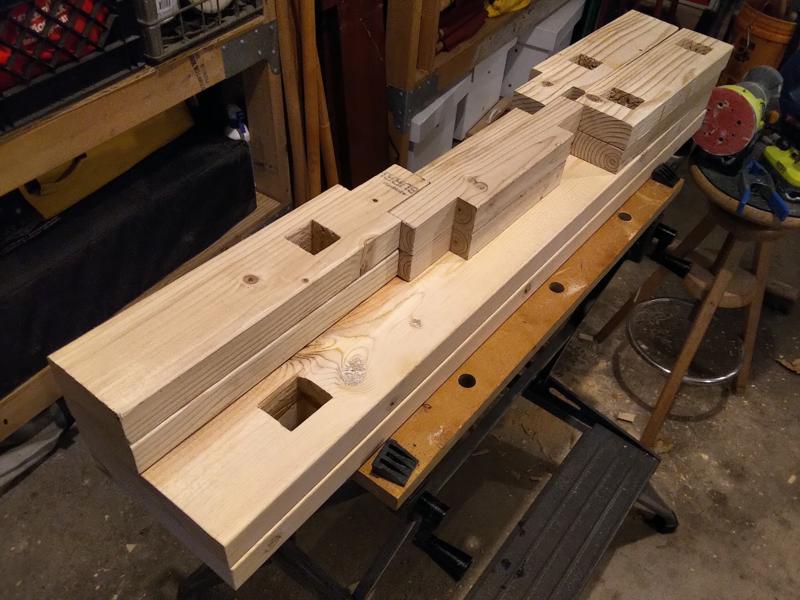
I wound up cutting the mortises on the benchtop pieces by drilling through and then cutting with a jig saw. This gave me the basic through- holes, then I tuned them with a rasp and a file.
I got started on this new bench project yesterday, and managed to make some real progress. Here is one complete set of legs for the breakdown bench.
One leg assembly consisting of two legs, one stretcher, and one support beam.
I have the other leg assembly mostly done, but one of my support beams broke apart, and I had to start over on it.
Even with the band saw for cutting tenons and the mortising machine, this kind of joinery is time-consuming work. Cutting the mortises in the benchtop pieces might be done some other way.
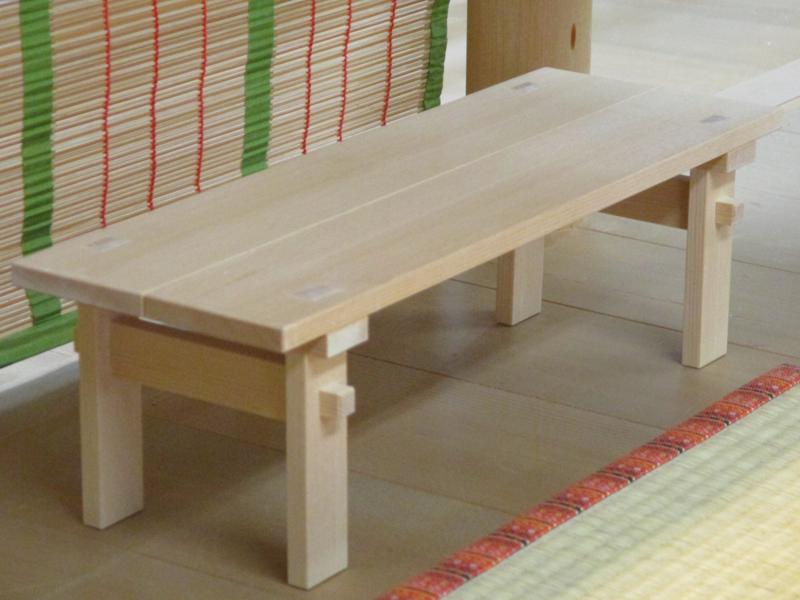
When we were recently in Japan, we visited the Costume Museum in Kyoto. There are only a few costumes on display in the costume museum these days. Now it is mostly a large dollhouse model of scenes from the Tale of Genji. Part of one of these scenes was this great little bench.
Model of a bench
So of course I decided that I need to make a bench just like this. The “no hardware” aspects of it really appeal to me, and even though it may turn out a bit unstable due to that, the ability to break it down into pieces for travel may come in handy. Also, since so many of these pieces have the approximate proportions of modern dimensional lumber, it shouldn’t be too hard to make.
Needless to say, it’s quite a bit of work to go from a photo of a scale model to a plan for cutting and joining actual lumber, but assumptions about scale, combined with measurements of actual lumber, can be used to make decisions, and create plans.
I need to make a new hanging lantern for Pennsic, and I actually managed to spend some time out in the garage this weekend to get some of the bigger work done on this frame of the lantern.
It’s all left over cypress, joined with mortise and tenon joints. I cut the sticks on my band saw, smoothed them with a hand plane, cut them to length by hand, cut all the tenons on the router table, and cut all the mortises with a mortiser.
So, not a great example of hand work, but I might need to make a bunch of similar lanterns in the future, so I wanted to try to automate as much as possible. It still needs sanding, gluing, papering, and the insertion of some kind of light source.
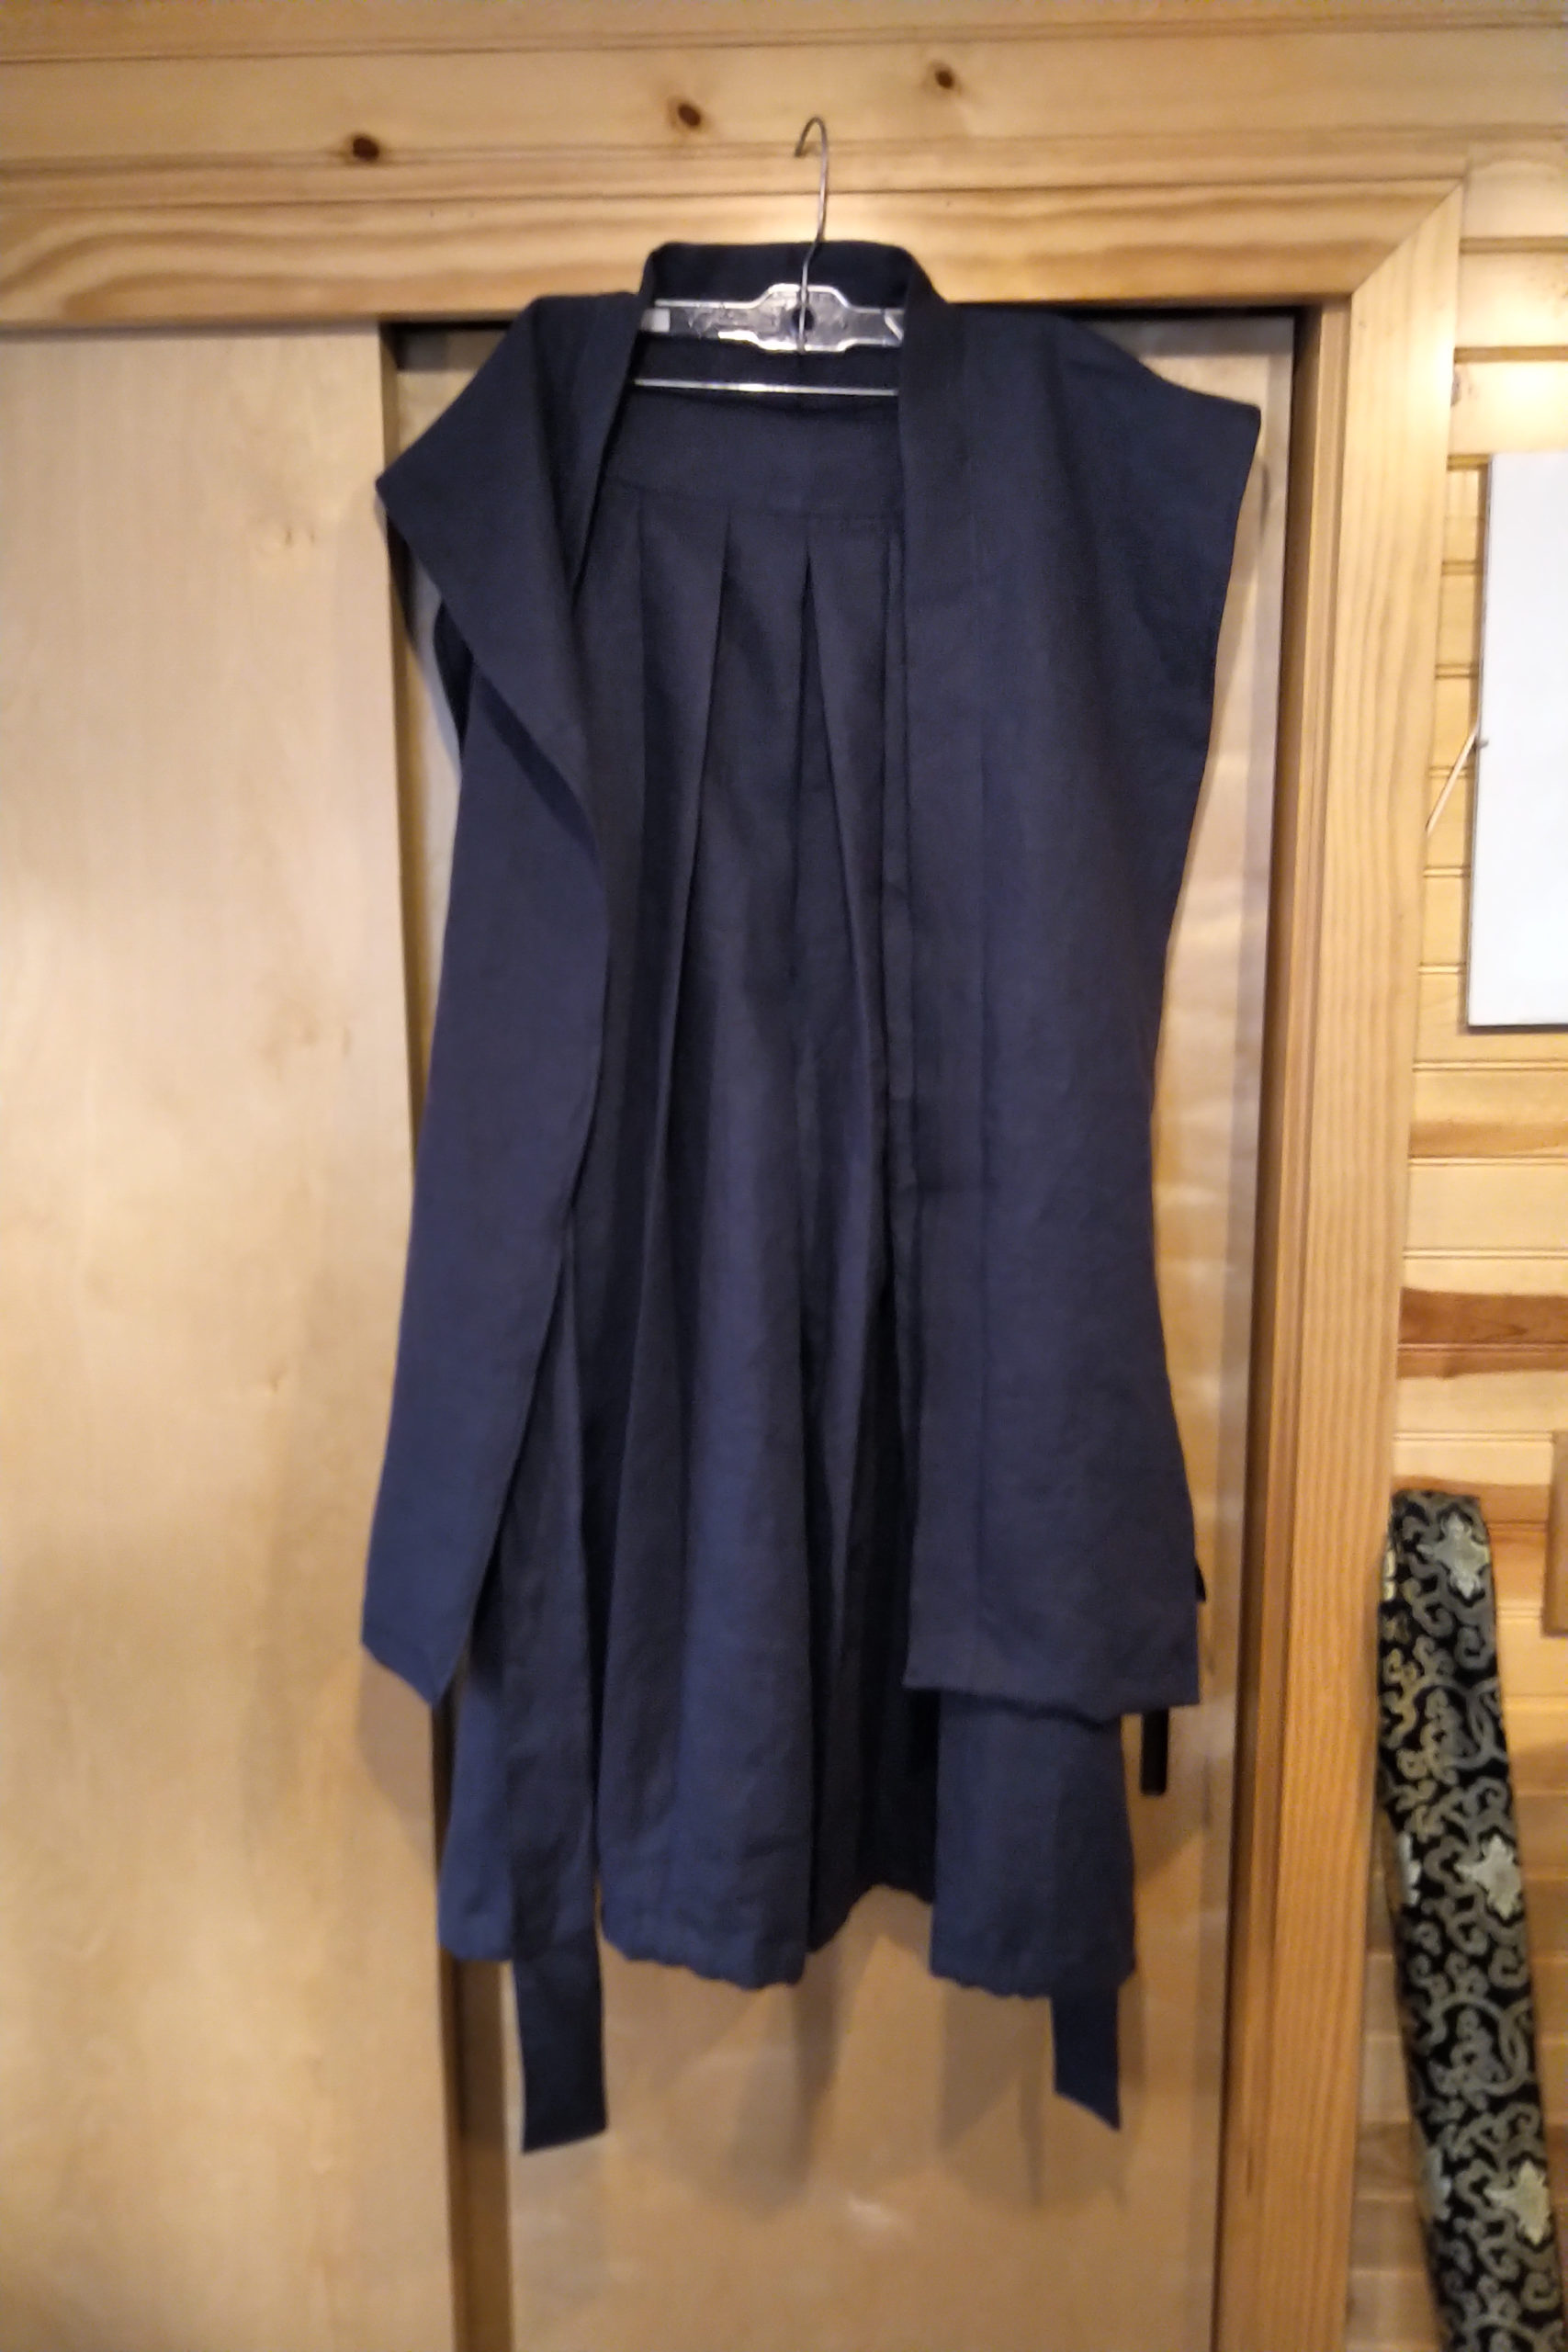
It has been a while (like, more than a year) since I made a basic medieval Japanese men’s garb outfit for myself, and my old stuff has started to look a little worn. So, I decided to make these hakama pants and kataginu vest out of some nice dark blue linen.
Hakama and Kataginu in Blue Linen
When the tops and bottom of an outfit are made from the same fabric, it is referred to as a kamishimo.
Sorry this photo just shows them hanging together on a hanger. I’ll try to wear them sometime soon and get a better photo.