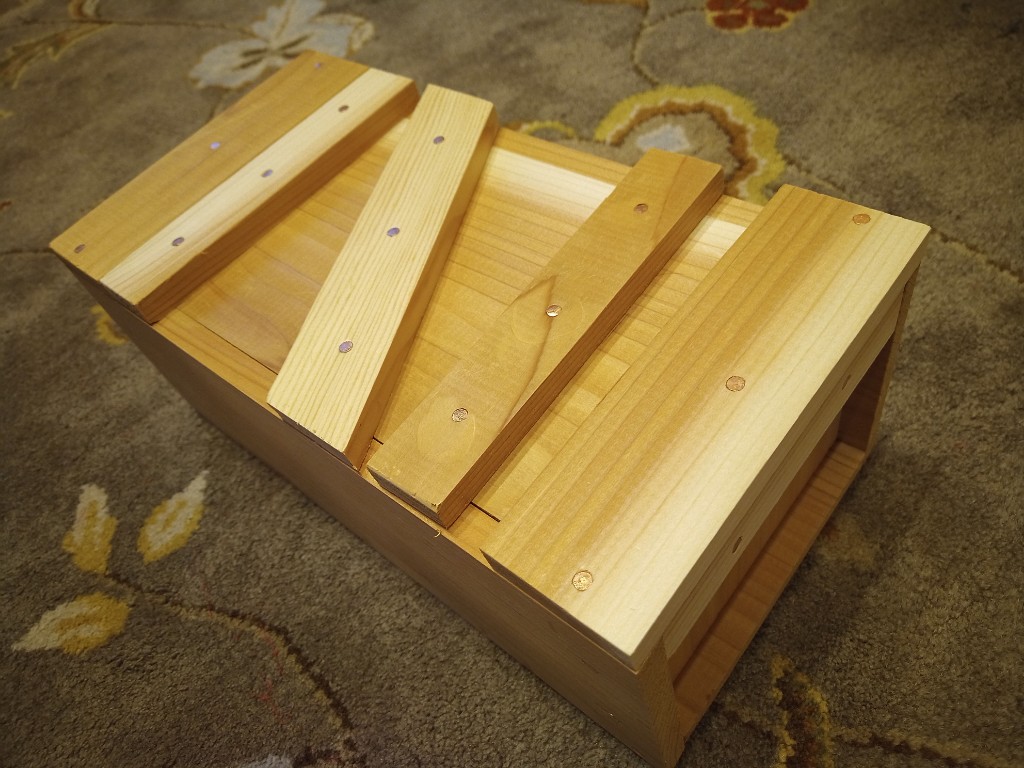
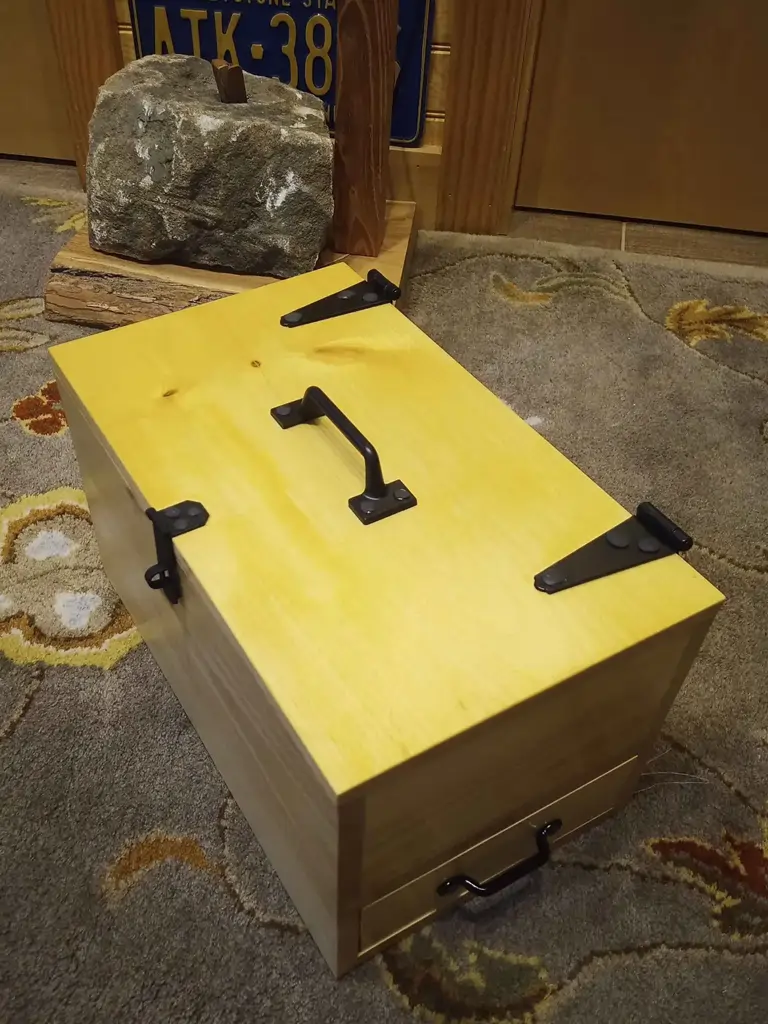
As you know, I have made quite a few Japanese style tool chests over the years, in several different styles. In addition to being useful for toting woodworking tools, they come in very handy when I need to take kumihimo supplies somewhere. If I have a a lot of supplies, a large or medium size chest is good, and if I only need a few small things I can use my little bamboo box. What I felt I was lacking was a box for somewhere in the middle. I had not yet made the Edo suzuribako, so I made this small chest from some half-inch thick cedar.
Small Cedar Tool Chest
You can’t really tell the size of that without context, so here it is with a pair of fabric shears.
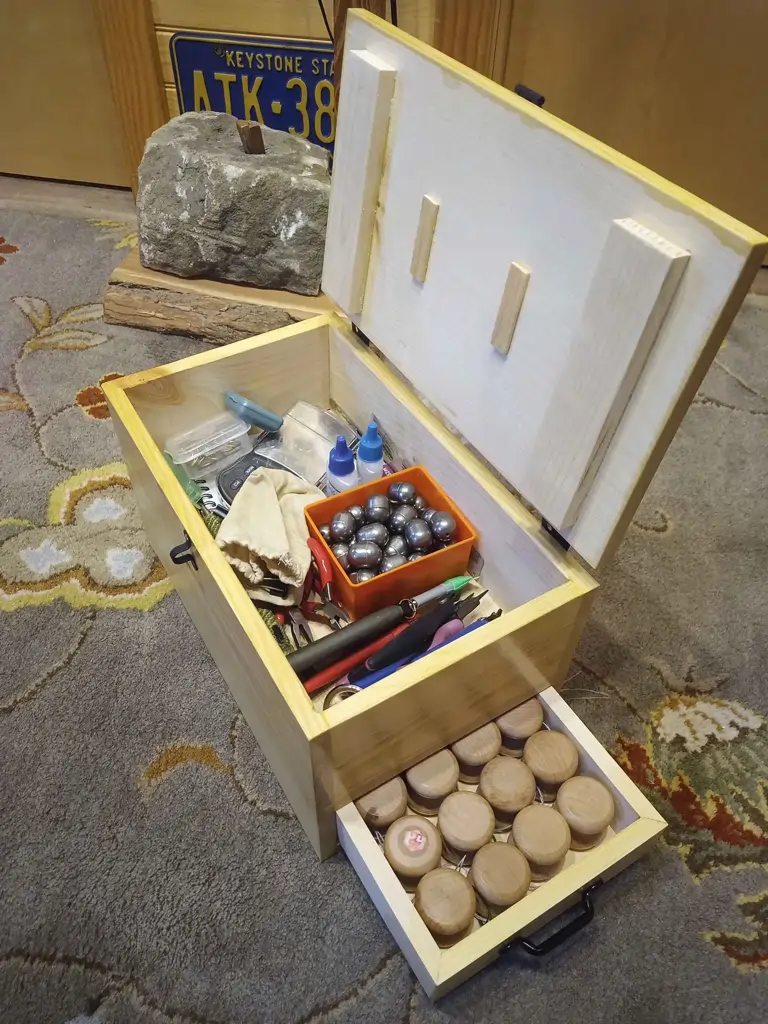
Small Cedar Toolchest Open
Overall, the chest is only 12.5″ long, 6.5″ wide, and 5″ tall. That is small enough to fit into the “double height” drawer slot of the small chest of drawers I have not documented because it is still kind of a work in progress.
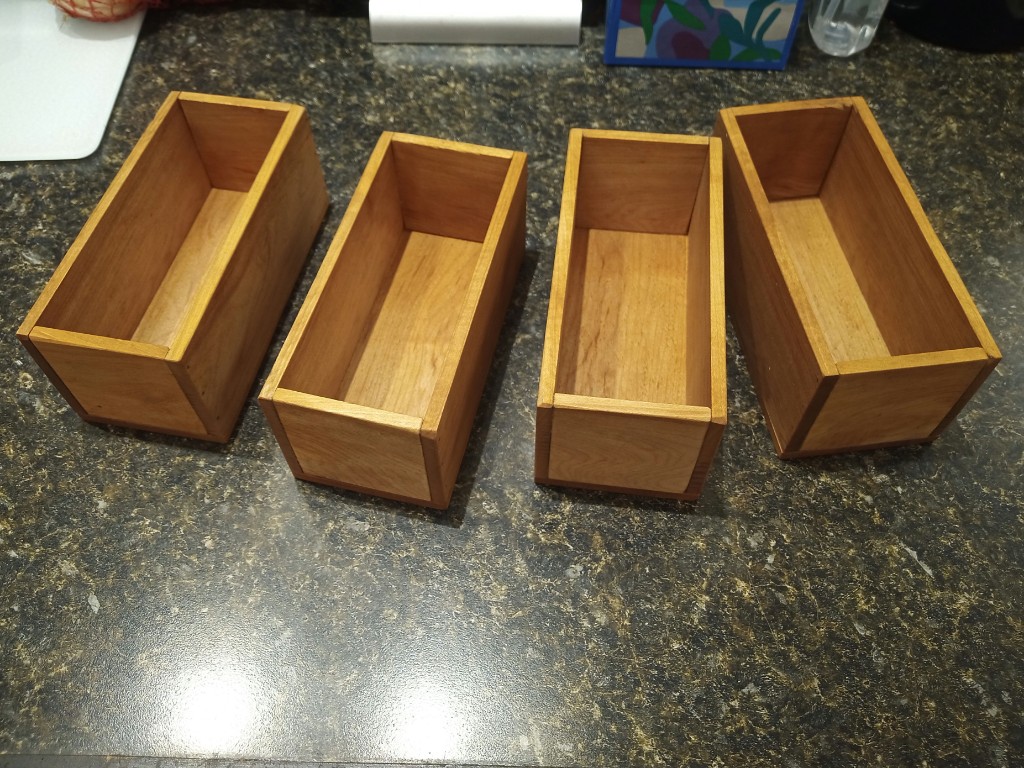
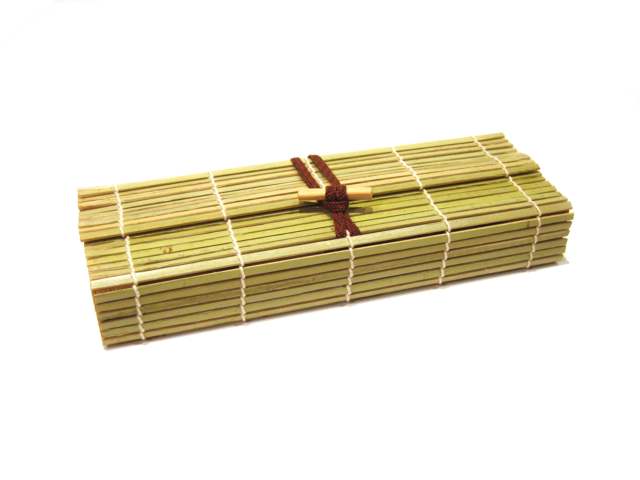
We’ve been using some of those little 3″x6″ bamboo boxes to keep measuring spoons and things organized in our kitchen drawers. The only problem is that some of the measuring spoons are too long to fit nicely in those boxes. Luckily, I still have some 1/4″ maple scants left over from something else. These new boxes are the same width, but they are 3/4″ longer and a little bit deeper to better hold our growing collection of measuring spoons and rubber vacuum stoppers.
Here is what they look like empty. I’ve learned to always make one or two extra.
The joinery is just simple butt joins, glued together and then pinned. The floors of the boxes are applied to the bottom of the walls, and similarly attached. I put a some mineral oil on them just to protect the wood a little bit from kitchen spills and the like.
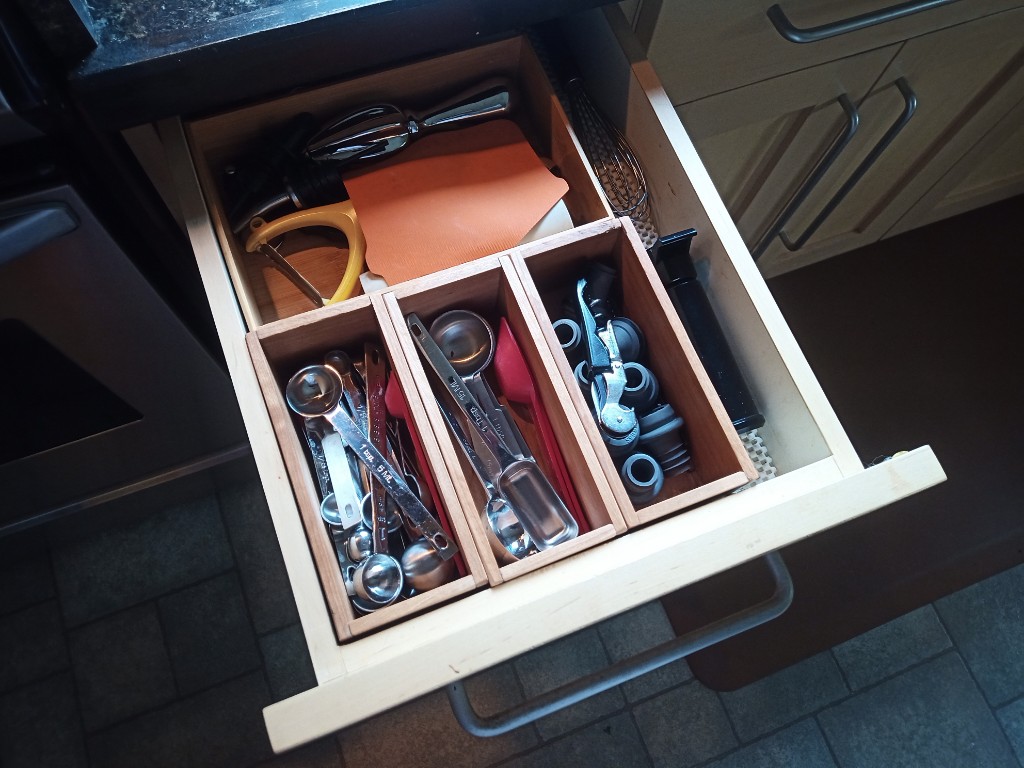
Here is what they look like in the drawer and filled with stuff.
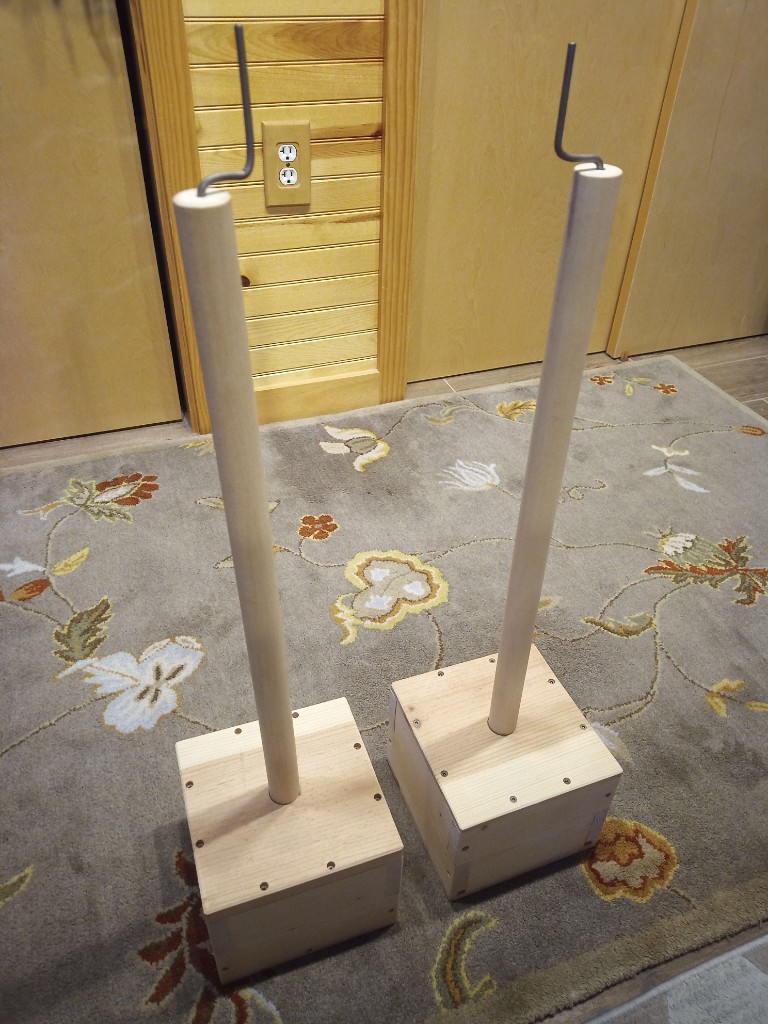
I’ve made several sets of small warping pegs, called bodai in Japanese, in the past, and even made this full-size pair some time ago. The only problem with those round bases is that they are too light. Subsequently, I made this new pair of bases for those bodai. Each base is weighted with 6 5-pound blocks of steel.
The benefit of these is that they can be placed an arbitrary distance apart, even if no tables or other clamping surfaces are available. If you need a 12-foot warp, just place these 12 feet apart and warp away. they can also be used as fixed points for kute-uchi loop-braiding if that’s more to your liking.
The new bases are made of pine. The bases are 7.75″ square and 6″ tall. Given the 0.75″ thickness of the lumber, that leaves a nice size void inside for the steel blocks, which are 3″x6″x1″ each. The boxes are held together with screws, which is not very attractive, but I wanted to be able to retrieve the blocks later if I need them for something else.
A kesa is a monk’s garment in the Japanese Buddhist tradition. It is the pieced-quilt kinda thing that hangs from the shoulder on a strap. Certain disciplines make this the only thing a monk wears, but most often it is seen as a kind of devotional garment or vestment. I don’t want to get too far into it, because you could spend many pages discussing the tradition and its changes over time. In modern times, there is a kind partial kesa called a hangesa which is essentially just the strap, worn as a collar. This is normally worn by lay members of an order to show their affiliation without implying that they are officially a monk.
In the SCA, we tend to wear medallions or belt favors to show our affiliations, but neither of these is really appropriate for Japanese persona. They may not be completely appropriate for SCA use, but I don’t think they are offensive at the level that, say, a full kesa would be.
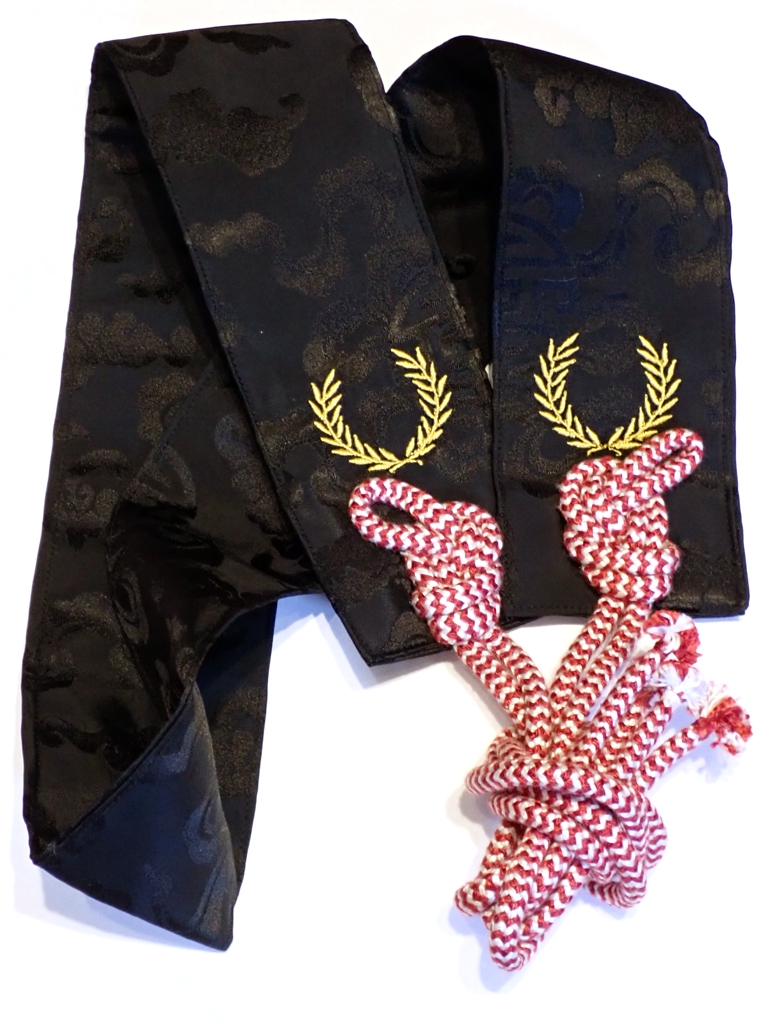
Anyway, here’s a hangesa I made for myself to show affiliation with the Order of the Laurel.
I used some left-over black silk brocade from my elevation garb, machine embroidered some Laurel wreaths near the ends, and attached some red and white (Kingdom colors) silk braids to act as himo. I actually made this at least a year ago, but I have gotten quite a bit behind on posting projects here.
I wanted a toolbox to hold my kumihimo (Japanese braiding) tools and supplies when I go traveling, so I made this one based on a Japanese suzuribako (scribal toolbox) from the Edo period. I had already made a bunch of pine trays custom-sized to hold 32 tama (weighted bobbins), so I made one more tray as the drawer, then designed the rest of the box around it. I didn’t want to spend the money to get an authentic set of hardware. I just bought hinges, handle, and hasp from the orange store. I might still add some corner braces to the outside if I can find some for a good price. The completed toolbox is 13″ long x 8″ wide x 7″ tall.
I bought two 6-foot 1x10s from the orange store and then planed them both down to 1/2-inch thick. even after trimming off the planer snipe this was plenty of lumber for the whole thing. All the joinery was cut on the table saw with a regular all-purpose blade. The corners of the drawer are miter cut and glued. Also, the two full-height corners of the box body have mitered corners. The floor of the tray is joined to the sides with 1/4″ x 1/4″ rabbets into matching dadoes. The two floors of the body are similarly joined, though the “front” of the box is flush and flat.
Battens on the underside of the lib will hopefully keep the lid from warping, and they provide solid anchoring for the hinge screws. The drawer pull is actually a “footman’s loop” from strapworks.com. I mostly used brass screws to attach the hardware. I did not like how the contrasting metal and philips heads looked, so I covered over all of the screw heads with “steel stick” epoxy putty. I could have done a better job with that, but it still looks better than screw heads.
Plenty of room inside stuff. Even though I planned the whole thing around the drawer, I had to sand quite a bit off the sides and bottom before it would fit in the body. As I have noted previously, sashimono (close fitting joinery) is really difficult.
You know those old folding tables from about 25 years ago? The kind with a chipboard top, wood grain printed vinyl surface, and rubber edge banding? The kind that look like garbage if they ever get wet? Well ours got wet several times and saw some hard use over the last 25 years or so and it really looked like garbage. Also, the edge banding shrinks over time and starts to come loose.
I really like how light, portable, and durable the newer folding tables are with their blow-molded plastic tops, but I don’t like that much plastic in my life. I mean… bletch.
So anyway, I figured I could remove the hardware from my old 6-foot table, make a new top from some 1×10 pine common boards, slather it with outdoor-grade polyurethane, re-use the old hardware, and have a new-looking table. So that’s what I did!
I started by straightening up the edges of the boards with a hand plane to make joining easier. Then, I drilled dowel holes into the edges using a cordless drill and drilling guide. (I like the Kreg guide for this job, since it has a 3/4″ slot on the underside that clips right onto the edge of the board to keep the hole straight and centered.) Next, I put dowels in the holes to keep the boards aligned, and glued all three together into a single surface. Overnight in the clamps for the glue to cure, then scrape off the squeeze-out. (Kunz glue scraper, accept no substitutes.) Finally, trim the ends with a hand saw so they all match up.
Construction complete, it’s time for shaping. I trimmed off the corners with a hand saw, because they were likely to get all busted up anyway. Next, I rough sanded everything with the random orbit sander and some 100-grit to remove the last of the glue and smooth out any uneven joinery. I used a cordless trim router with a 45-degree chamfer bit all the way around the top and bottom to break the edges. I also filled any gaps, holes, etc. with wood filler I made by mixing sanding dust into water-based rice paste. Another round of power sanding with 150-grit and it’s starting to look like furniture.
For me, finishing always starts with sealing. I like to use (General Finishes) water-based sanding sealer because it soaks in and hardens without getting gummy. Then, a round of 220-grit power sanding to make things smooth and ready for polyurethane. I pay special attention to the end-grain at this step. The sealer enables me to get this as smooth as the edges!
Now, start with the underside and add a coat of poly. I brush this on by hand, which is a lot of work, but I have done this so many times that it is very satisfying and almost pleasurable. Make sure to wipe off anything that drips over the edges, then apply a super-thin coat of poly to the edges themselves. Once that was dry I flipped it over onto blocks and did the same to the top. This dried for maybe a week because I didn’t have much time in the evenings after work.
Yesterday morning, I hand sanded both surfaces with 320-grit to rough up the poly and remove bubbles and nibs. I have one of those sanding pads that take the same velcro discs as my sander, and I really recommend them. I applied a second coat of polyurethane to the underside (and a third light coat to the edges) and let that dry for most of the day. Then I attached all the metal leg and apron hardware. One thing I discovered when studying the old tabletop is that this is not a precision job. None of the hardware is straight or even to begin with, so don’t stress too much about measuring and aligning the legs and brackets. I drew a single center-line on the underside, perpendicular to the long edges, aligned the feet to that by eye, then drove screws through the brackets into the wood. Then, I lay the apron/frame down, centered it up by eye, and screwed it down. Now I could unfold tthe legs, flip the table over onto its own four feet, and apply a finish coat of polyurethane to the top.
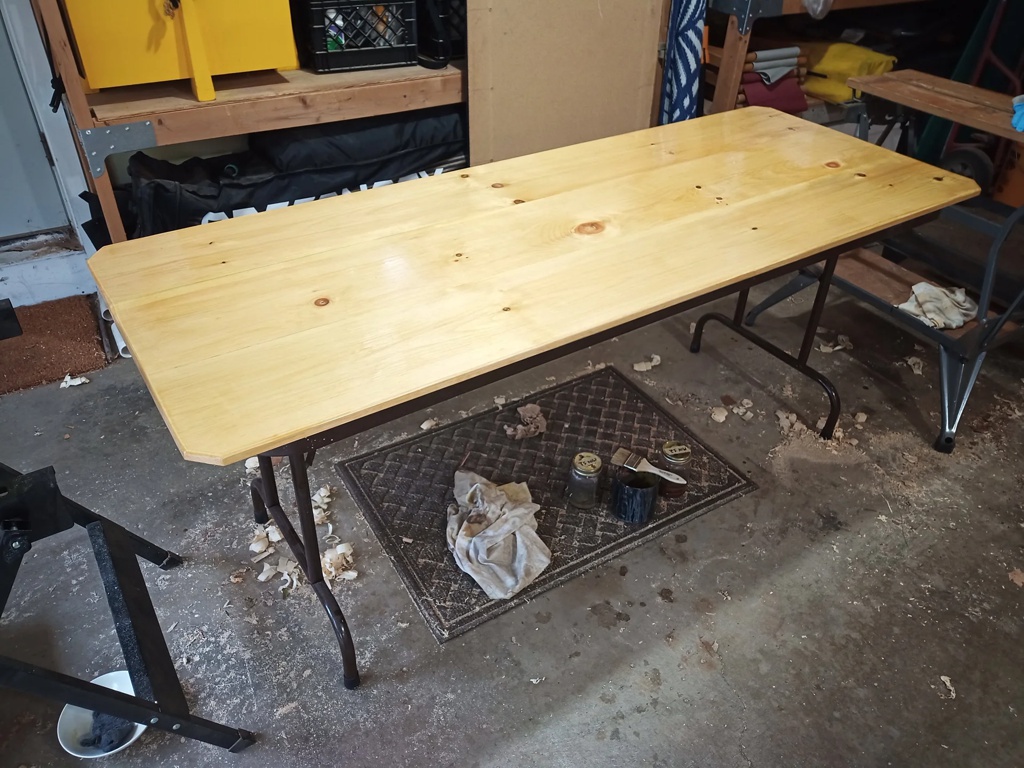
Now I have the nicest looking cheapass folding table in the neighborhood.
Folding Table with a Pine Board Top
I figure I will probably spend the next few years sanding the top and applying more polyurethane every Spring until a durable surface is formed. Any dings or scratches can be repaired instead of tolerated. I have saved the hardware from a $50 folding table using only $54 in lumber!
A few jobs ago, I started using DocBook XML for creating documentation. I had the benefit of taking over a extraordinarily well-formed documentation set that was created by a writer who had participated in the creation of DocBook, and I learned a great deal by observing those docs and using the extremely strict command-line publishing engine. One of the things about DocBook is that the tools that have been designed to make the creation and processing of the underlying XML easier for the writer vary widely in quality, ease of use, and completeness of implementation. By “hiding” or failing to implement the full capabilities of DocBook, these tools damage the reputation of DocBook. Almost every time I have run into a difficulty in DocBook, a more complete reading of the XSL specification or XML documentation has helped me solve the problem, unless that solution is simply unavailable in the tool or unknown to the other writers who are sharing tasks with me. There is so much in DocBook that is specifically designed to make life easier for us technical writers to do our jobs, but if I can’t use it in your tool, you are making my life harder.
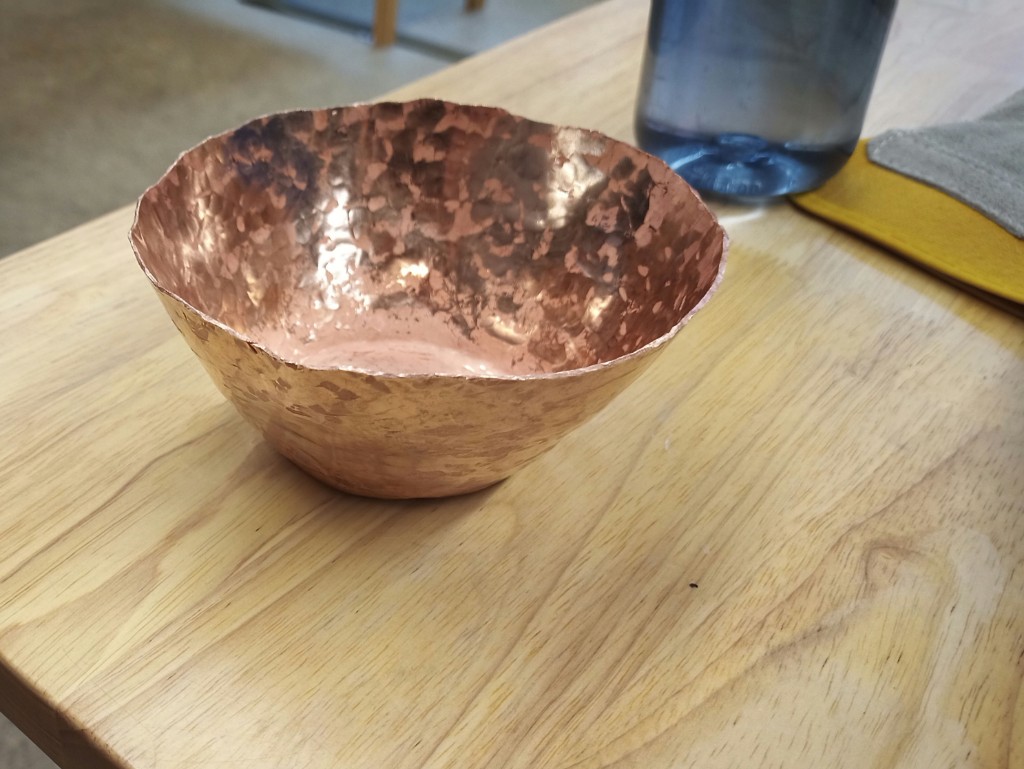
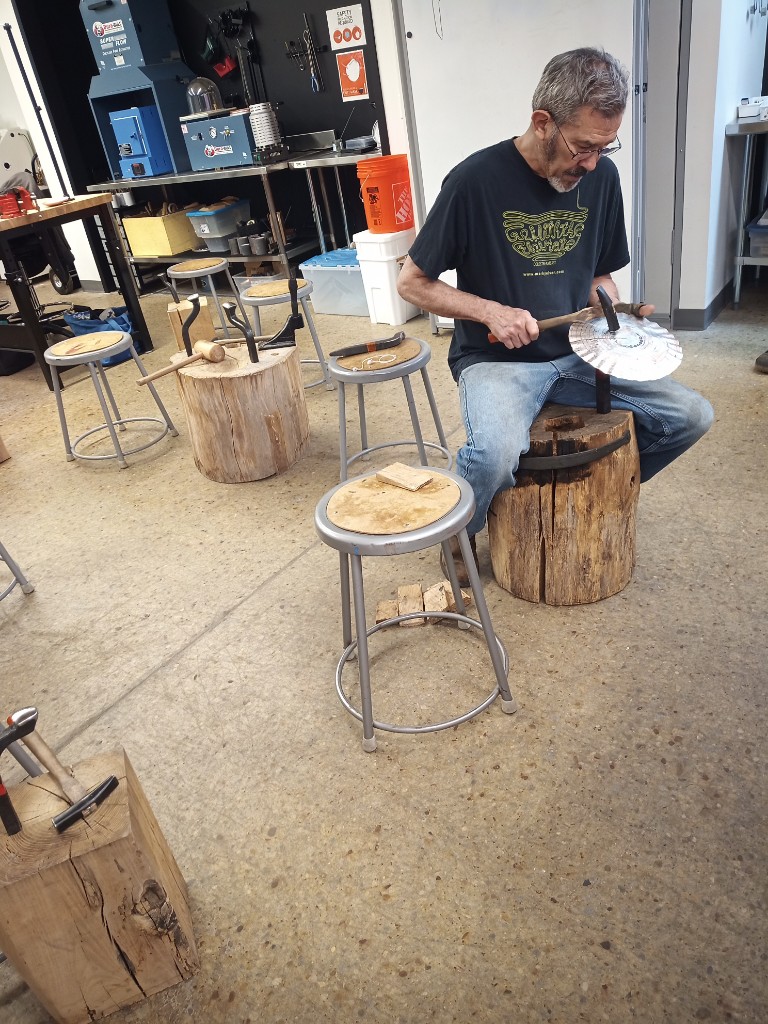
Last weekend I had my Saturday open up unexpectedly, so I signed up for a Japanese-style metal raising class that was being given at Contemporary Craft at their new Lawrencville location here in Pittsburgh. By “raising”, they mean starting from a flat disk of metal and hammering it near the edge of a stake anvil to “lift” the material out of the plane of the disk and shape it into a bowl, cup, or other hollow vessel. I wound up making this bowl!
Hammered Copper Bowl
Apparently, the difference between Japanese raising and Dutch raising is that in Japan they work from the center outwards in concentric rings, and the Europeans work from the edge inwards. Raising is different from other shaping and forming techniques in that instead of shifting the form overall, you are essentially shaping each little spot with precise hammer blows. You have to concentrate on applying a consistent amount of force with each strike, and work each strike into a continuous curve.
I’m really happy with my bowl overall, especially for a first time thing. I was having a little trouble in the class at first. There were some more experienced metalworkers in the class and I was such a newbie that I needed help with the torch for annealing. I was struck by how long it’s been since I actually learned a new skill completely from scratch. I kept with it and started to catch on, but it was really very helpful to recognize that the way I was feeling was normal, it’s just that I haven’t felt like that in a while.
This craft needs an awful lot of specialized tools, so I’m not sure how much of this kind of work I will be able to do at home. I certainly learned a lot in this one class, though. It was definitely a good opportunity to learn a new skill, and meet a new teacher.
I start a new job on Monday, so I decided to spend one of my dwindling supply of open weekdays going up to finally visit the Alben Sawmill. People have been telling me about the sawmill and Ray Alben for probably 20 years. The mill and lumber store are across the highway from Cooper’s Lake where Pennsic is, but I’ve just never made it over there. Part of the problem is that events at Cooper’s Lake are normally so busy that I never get a chance. Another part is that as a professional sawmill, they were never open on weekends so when I’m working its hard to get up there when I am not at an event.
Ray is retired now, and his son has teamed the mill up with another wood products business to sell hardwood flooring and moldings to the architectural trade. That leaves Ray free to take care of the family farm and run the lumber shop as needed. Ray says that he is even willing to open up the shop on Saturday if he’s not busy with the farm. I happened to catch him there, but he is mostly only open by appointment, so call first at 724–712–1371.
If you are familiar with how to get to Pennsic from Pittsburgh, the mill is easy to find. One way is to drive past the entry gates on Currie Road until you get to the North boundary of the campground. Turn right onto Zion Church Road and take that until it ends at West Park Road. Turn right on West Park, cross over the highway, and the shop will be on your left. It’s about a five minute drive. More directly from I79, take exit 99 and head East (away from Currie Road) on route 422. You’ll pass under West Park Road, take the ramp on the right, then turn right onto West Park. Take West Park up past the park entrances until you get to the mill on your right. If you miss it like I did, you can turn around at Zion Church.
When I was there, Ray had plenty of lumber in stock. Most of it is raw cut, but it’s all nicely dried and in the barn. He had several different kinds of wood. I saw pine, oak, cherry, and something else (maybe ash? hickory?). Most of it is in 10-foot lengths and 8 to 12 in widths. He sold me the lumber equivalent of two 10-foot 1x10s in cherry for $25 each. These were arrow-straight, surfaced four sides (S4S) boards almost an inch thick (4/4). They would cost easily eighty bucks apiece anywhere else. Beautiful grain, too. He trimmed them down so they’d fit in my car, then he added in a couple of smaller pieces as lagniappe. It was an excellent experience. If I have some time later this summer, I’m going back to get some thicker pieces for furniture.
The Alben family has been on that land for about 150 years. Ray’s great-grandfather started the farm, and Ray’s dad opened the mill. Ray’s grand-kids help out in the mill and on the farm, so the tradition continues.
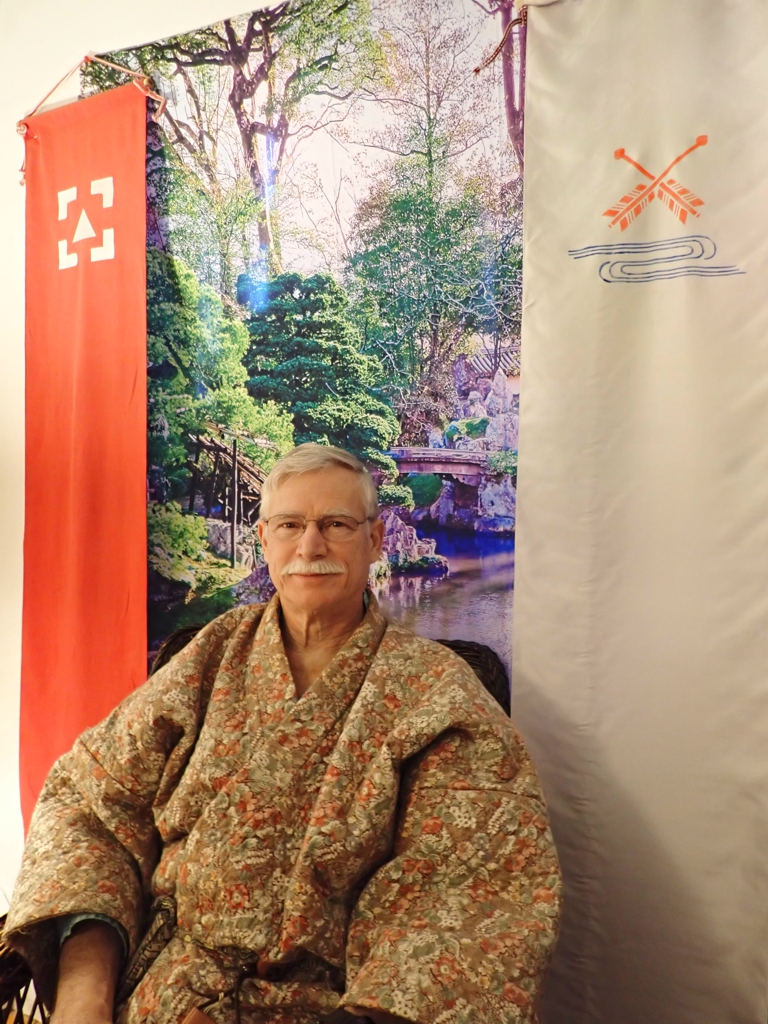
Our friend Kusunoki Yoshimoto (or “Yoshi” as we call him) who lives in the East Kingdom of the SCA, received a writ for the Order of the Pelican. He’s a pretty good friend of ours, and we camp right next to him at Pennsic. He made Sharon’s crossbow and her first set of bolts, and he helped her figure out the best shooting style for her. He does a lot of service to the archery community in the East and elsewhere, and it was really good to see him recognized.
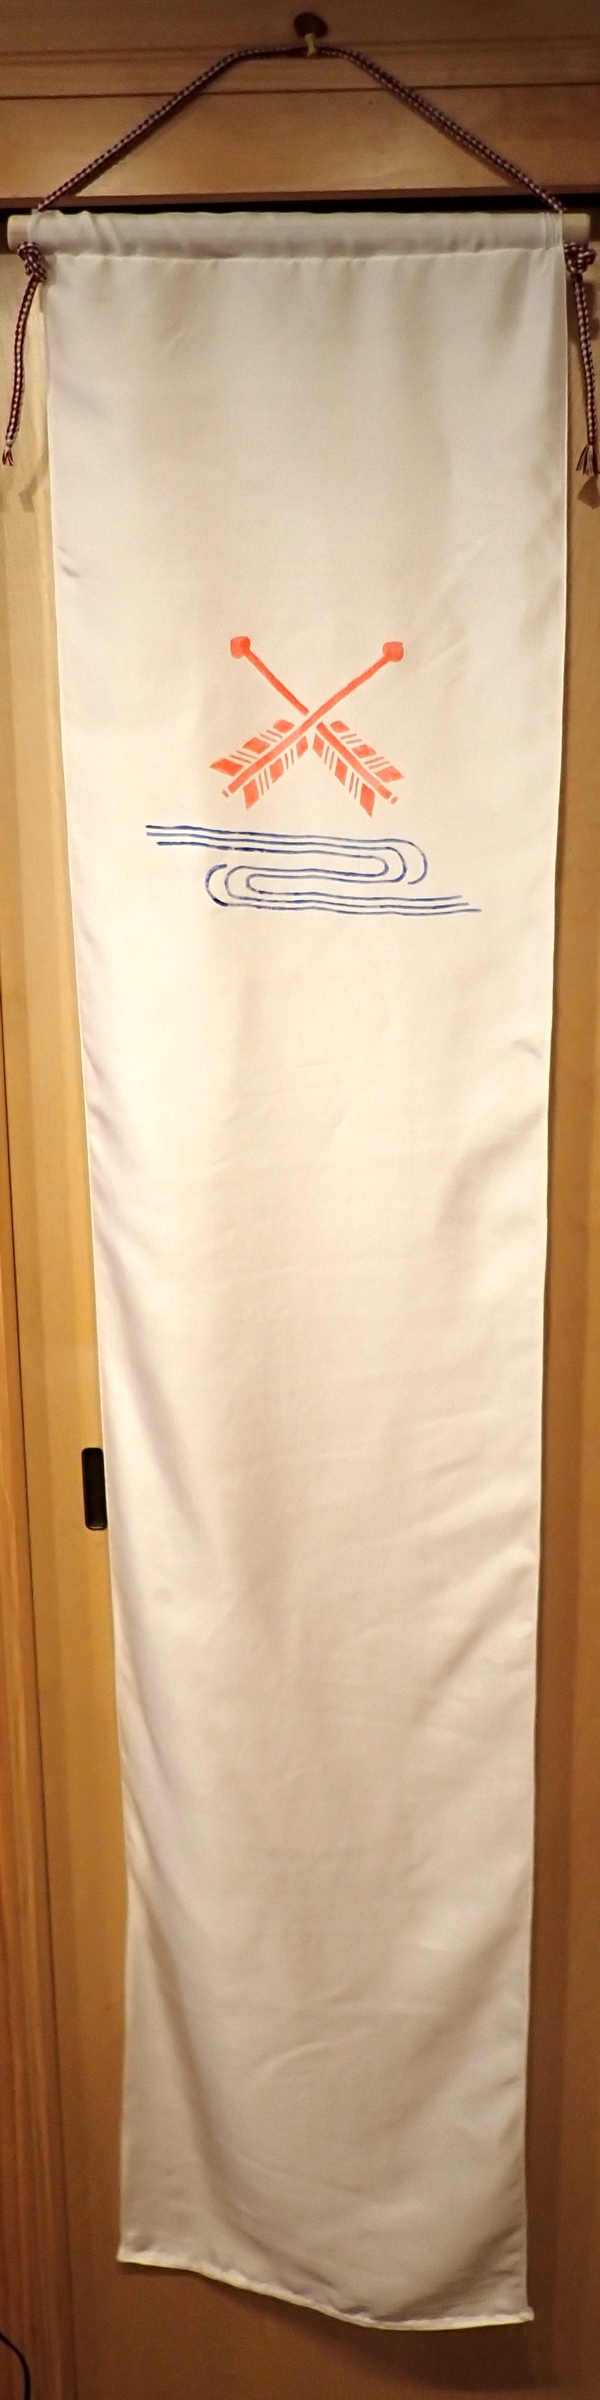
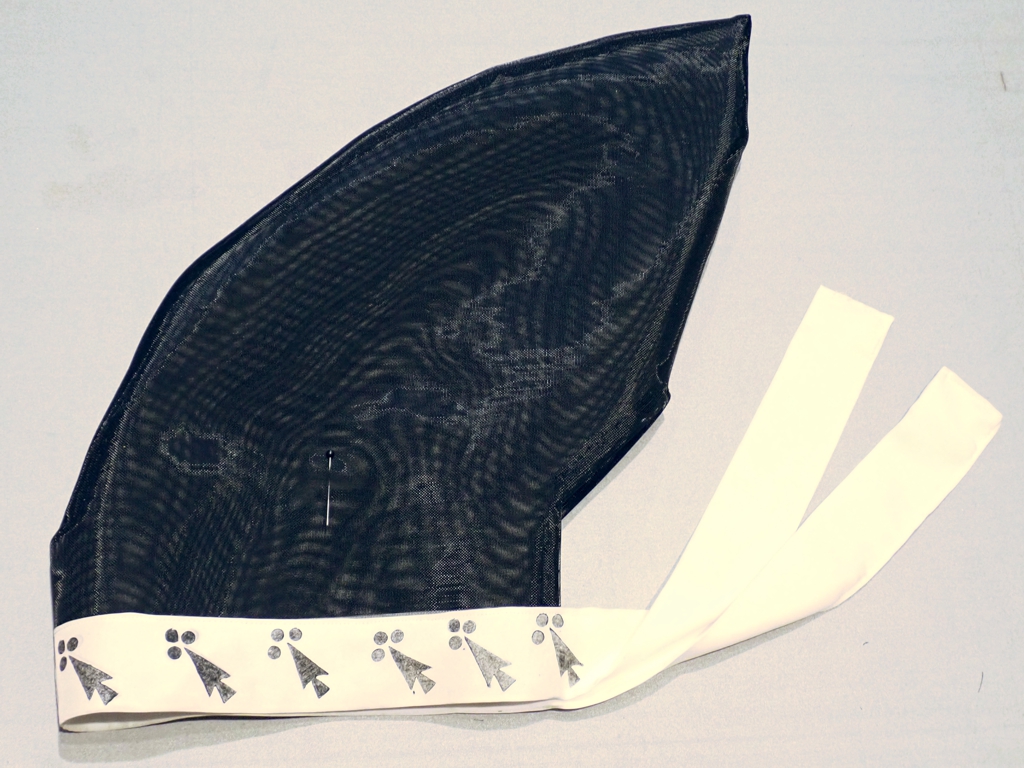
We were tapped to create a few items for his elevation. Sharon made his elevation garb, which was a full hitatare sugata including undergarments, and his “Pelican Cloak” which was styled as a dobuku coat. I wound up making a silk hata-jirushi banner with his heraldry and his “Cap of Maintenance” which was styled as a hikitate eboshi with ermine spots block-printed on the band.
Silk Banner with Yoshi’s Device
Eboshi of Maintenance
The eboshi was so tall, the King had to stand on a bench to get Yoshi’s Pelican medallion around his neck!
Here is what everything looked like in action:
Yoshi in Vigil, with Banners
Yoshi and Hara in their Pre-Elevation Garb (Braided embellishments by Forveleth Dundee)
Yoshi During the Elevation (Printed fabric designed by Morikawa Rei)
It was a wonderful event, and a great elevation. We were so happy for Yoshi’s elevation to the peerage, and to have our work be a part of it. Travel to Bangor, Maine and back was a terrible experience, but the day itself was wonderful.


