I was recently inspired to start painting SCA scroll blanks again, like I did (gulp!) six years ago. My first recent efforts were these, traced from a photo I took of some Azalea blooms in Sharon’s garden.
Original images are all about 8.5″x5.5″ in size. These are all done with Sumi ink and watercolors on 9″x12″ hosho paper. I’m still in love with my “Kolinsky small” brush from Kuretake. Preserve the kolinsky!
The third picture is probably the least “medieval Japanese” of all these, but I think it’s the most attractive. It is difficult to get good shading and depth in watercolor, and I’m just not good enough yet. The outline form is a little easier to achieve.
When you buy an actual physical CD from a band you want to support that doesn’t have their music in physical stores, they often include a thank-you note, which is a charming bit of memorabilia.
Thank You note
‘Wintergatan’ is a band from Sweden. Martin Molin is the composer of (all?) their music, and the designer/builder/operator of the musical Marble Machine in this now classic YouTube video. He is currently working on the next generation Marble Machine X, and posting videos of the whole process. I decided to buy a physical copy of their 2013 album to support the process while they can’t get into the studio to record their next album or go on tour.
Such exciting things come out of musicians these days, if you ask me.
Does this sound like something that happened recently?
Initial analysis, repeated by top government officials, indicated that the attack spontaneously arose from a protest. Subsequent investigations showed that the attack was premeditated—although rioters and looters not originally part of the group may have joined in after the attacks began.
At first, the protestors planned a symbolic occupation, in which they would release statements to the press and leave when government security forces came to restore order. This was reflected in placards saying: “Don’t be afraid. We just want to sit in.” When the guards brandished firearms, the protesters retreated, with one telling them, “We don’t mean any harm.” But as it became clear that the guards would not use deadly force and that a large, angry crowd had gathered outside to cheer the occupiers and jeer the hostages, the plan changed.
An organized attack. Anybody who tells you that what happened was as a result of a protest, you should ask them why they think that. That’s the first version of events we heard. That does not seem to explain what happened that night or by the facts or the more facts we get.
Each year, as I acquire new music (Still mostly purchased on CD then ripped to MP3, though an increasing amount of music is only available as digital downloads.), I add new tracks to a yearly playlist for occasional review and December retrospective use. This was 2020 (in order of acquisition):
Bladerunner 2049 Original Soundtrack Hans Zimmer and Benjamin Wallfisch
Arrival Original Motion Picture Soundtrack Johann Johannsson
The Blue Notebooks Max Richter
Decksanddrumsandrockandroll Propellerheads
Ad Astra Original Motion Picture Soundtrack Max Richter
Asbury Park Live 8/8/13 They Might Be Giants
2020 Zombi
Les Revenants Mogwai
Beethoven or Bust Don Dorsey
Chemical Chords Stereolab
Cloud Atlas Original Motion Picture Soundtrack Tom Tykwer, Johnny Klimek, and Reinhold Heil
Pieces in a Modern Style 2 William Orbit
Good Morphine
Adrian Legg Live Adrian Legg
Dead Bankers Adrian Legg
The Ambient Collection Art of Noise
Evans City Zombi
Interstellar; Original Motion Picture Soundtrack Hans Zimmer
As usual, lots of soundtracks and old friends. Both Sharon and I adore the movie Arrival, which set off a big Max Richterkick for us this year. Some of the artists I like who have strong followings, but not large enough followings to interest major music outlets, have switched to online self-releasing, like They Might Be Giants and Adrian Legg. Zombi put out their first new album in years, followed by an EP of some work they did for a Night of the Living Dead (Filmed in Evans City, PA. Check out that “Sound Engineer” credit for Sharon’s dad.) tribute event. I also found an online site for a chain of stores in Maine that had a bunch of CDs that have been on my “Wanted” list for years, just to explain some of the older stuff (8 through 13) on here. The Art of Noisealbum was the only thing I saw that I wanted on the new Tower Records online store.
Back in December of 2017, I was working for the Uber Advanced Technologies Group (ATG) here in Pittsburgh. This was the self-driving vehicle research arm of Uber. The group threw a holiday party at the Pittsburgh History Museum, and as a party favor they gave us all custom “Magic 8-Ball” toys that had answer dice filled with ATG catch-phrases and in-jokes. Now that the ATG is no longer a division of Uber but is now a part of Aurora Innovation, perhaps it is time to post the 20 “answers” here. I can’t find them anywhere else on the ‘net.
Ask The Julies
Catching Rain Water
Cheerful Transparency
Chicken Bucket
I Aaron Doubt It
I Do Not Concur
Keep on Truckin’
Krypton Says No
Let’s Have An All Hands
Letwin Will Fix It
No Swag For You
Reorg
Super Sprint
That’s a HW Problem
That’s a SW Problem
Winter’s Coming
Xenon Says Yes
Your Answer Is At CRU
You’re a Boron
#UberOn
Keep in mind that I was hired as part of the third or fourth wave of hiring at the ATG, so some of these jokes refer to things that were before my time. Some of them are just startup anxiety phrases, like “Reorg” and “Let’s Have An All Hands”. Some of them are somewhat specific to autonomous vehicles, like “Catching Rainwater” and “Winter’s Coming”.
“Boron”, “Krypton”, and “Xenon” were the code names of the three test platforms at the time. “Chicken Bucket” was the nickname for the large spinning LIDAR unit on the roof of each vehicle. Kryptons were the Silver vehicles that Uber bought from Volvo, and were the most numerous. A Krypton is what hit that lady in Arizona.
“CRU” was the name for the “Crucible Building” which the ATG moved into when they outgrew their original startup space. By the time I left the ATG, Uber had five or six buildings down in the Strip District. Very few people had been in all of them. I’d been in more of them than most people had, since I started in Operations and later moved to Engineering. Each was a few blocks away from the others, so if your answer was in another building that could be tiresome.
“[Nick] Letwin” and “Aaron Doubt” are the names of a couple of influential ATG engineers. “The Julies” were the two main HR people at the ATG. Troubles with HR were the main reason I left.
The ATG’s “SPA” building, with a “Boron” test vehicle
The first incarnation of this blog had a lot of politics on it, and I’ve tried to keep politics off the blog this time because politics is everywhere now and I really didn’t feel the need to bring it here, but now things have changed.
Republicans in Pennsylvania actually want to go to the Supreme Court to get my vote, cast legally and in good faith by mail in the recent election, thrown out because their favored candidate for President lost.
Not that I was ever likely to vote for a Republican candidate, but this makes it certain that I will never vote for a Republican candidate in any election at any level for the rest of my life.
Just forget it. You people take your Superspreader in Chief, Total Landscaping Lawyers, and Zodiac Killer Senators and just forget that.
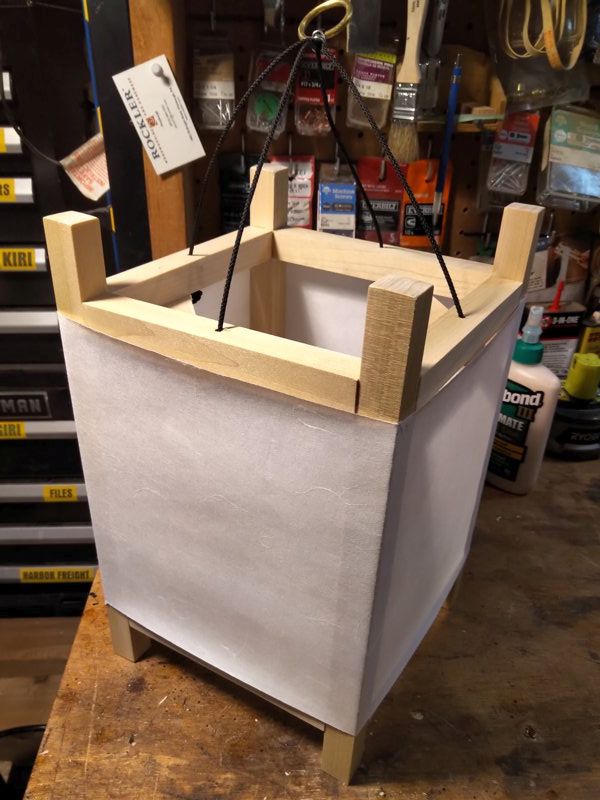
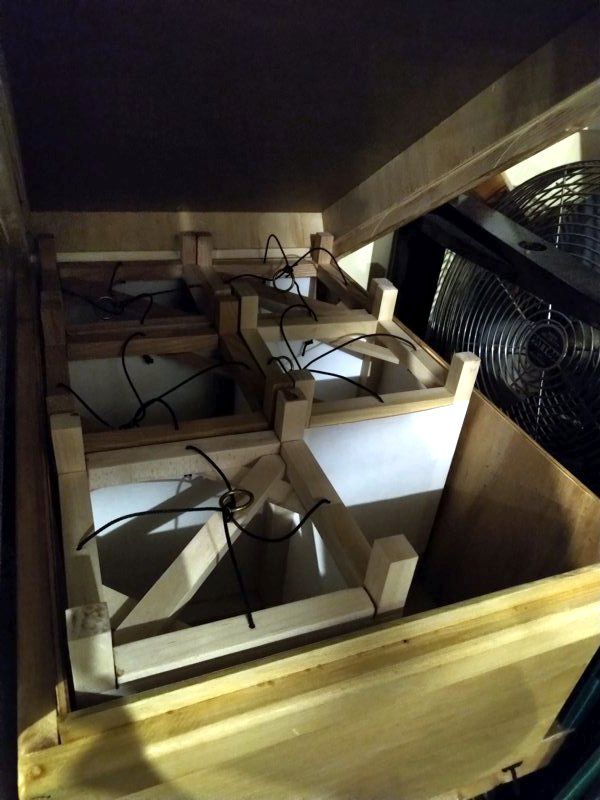
Progress on the wood frame lanterns to fit the solar flicker lighting units continues! I completed the fifth of six planned lanterns recently, this one made from some surplus poplar lumber I had in the garage.
Andon in Poplar
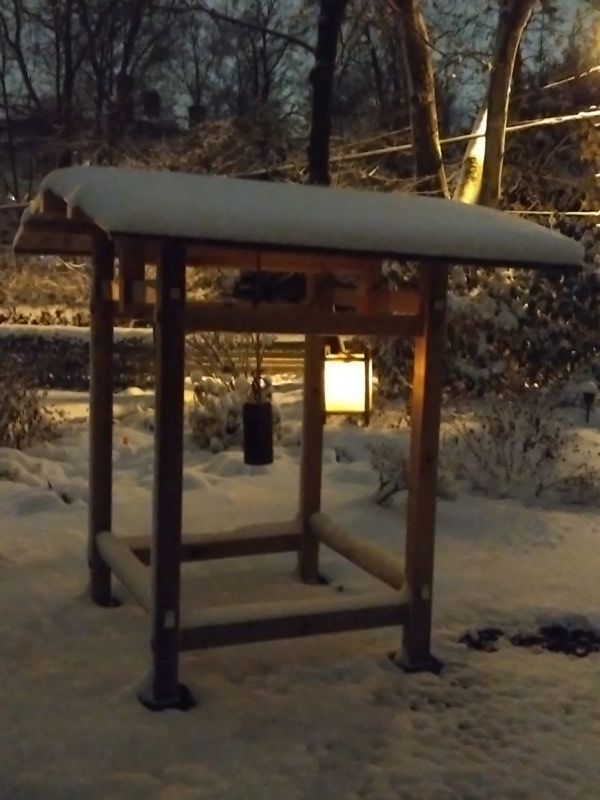
Here is the lantern hanging in the Shourou at night after a recent snowfall:
I started working on another lantern today, and I thought I’d show you how I use a Japanese kanna block plane to remove the marks left on the wood by the band saw that I use to mill the lumber into pieces. You can hear the vibration at first, that eventually gives way to smooth shaving noises.
I spin the piece around part way through so that the blade is cutting at an angle across the grain instead of into the grain. This yields a smoother cut. You can see that at the start, the grain lines are pointing up and to the right. Then, after the spin, they are pointing down and to the left.
You can also see that the piece I am planing is not clamped down at all. Since you’re pushing down on the plane, and so down on the piece, the only thing that’s necessary is the planing stop that you can see screwed down to the “planing beam”. My planing beam is simply a length of 2by4 held in my bench vise. My planing stop is 3 inches of 1/8″ welding iron that I drilled a couple of holes in so that I could screw it down. I did have to file the edge of the iron so that it wasn’t rounded over.