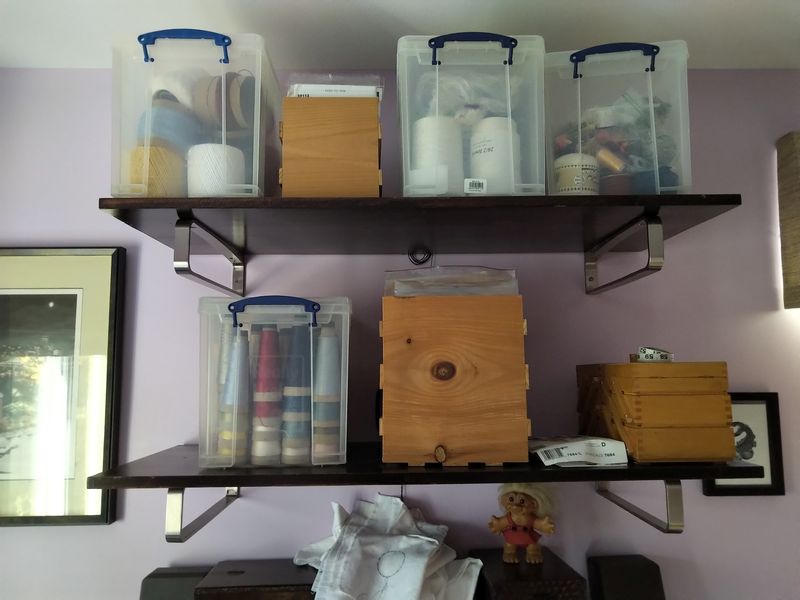
Back at the old house, we had six shelves in the guest/sewing room. They were made from edge-glued pine panels, stained with a water-based “rosewood” stain, and finished with water-based polyurethane. Here at the new house, we only needed two of them, so the other four shelves were in storage waiting for a good project.
Two Shelves
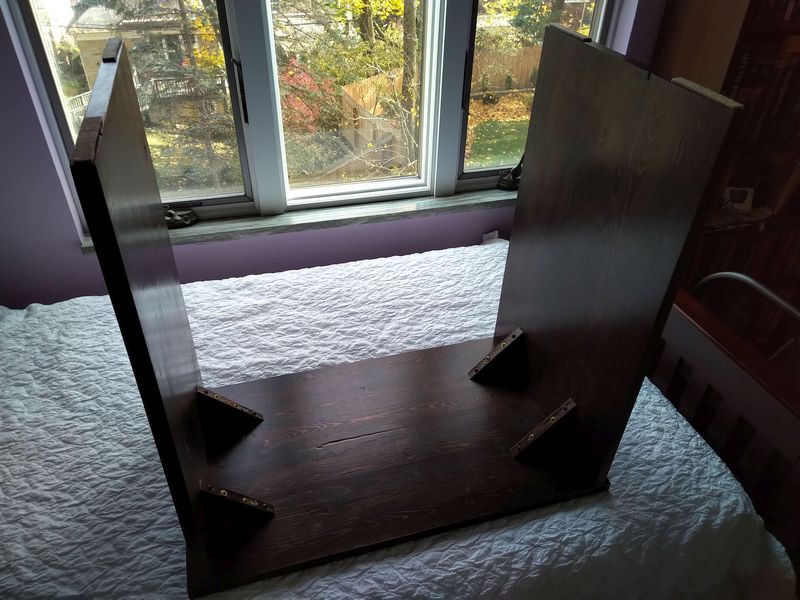
A few months ago, the Sweetie asked if I could make a bedside table for the guest room here at the new house. The only real requirements were that it matched the room furniture, and had enough space underneath to fit this hamper that also lives in the room.
Shelf Table
I took three of the surplus shelves, cut them to length, joined them with dowels, and glued them together. Of course, that was pretty-rickety. so I added some diagonal braces that I cut from one of the offcut pieces of shelf.
Underside of Shelf Table, showing bracing
Not very fancy, but it saved us a trip to the furniture box, and we know it matches the shelves!
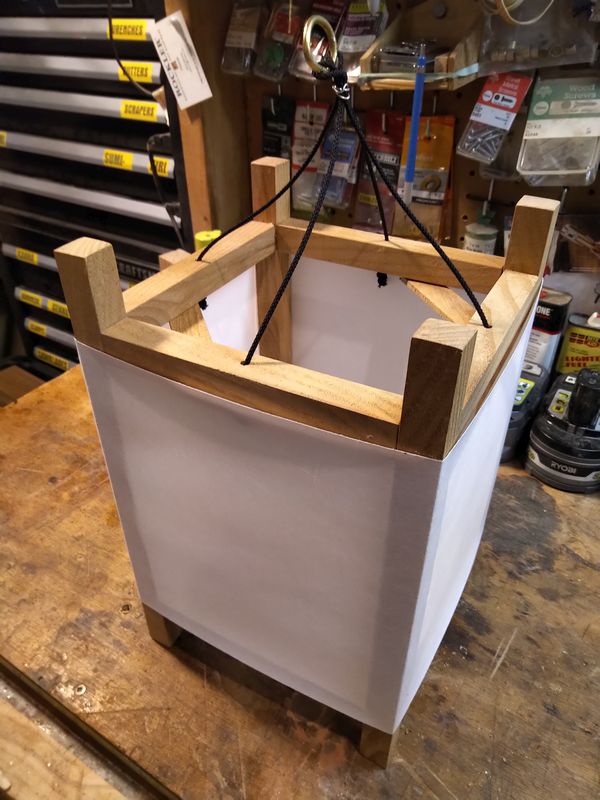
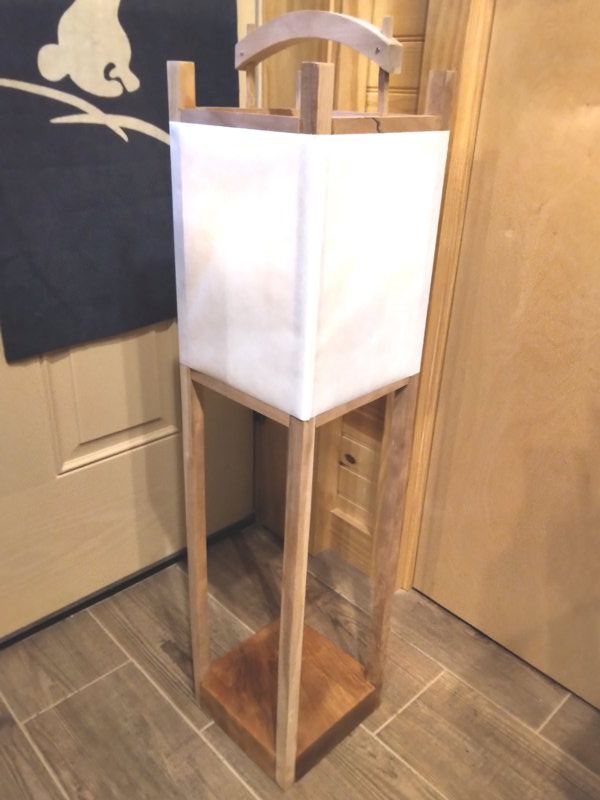
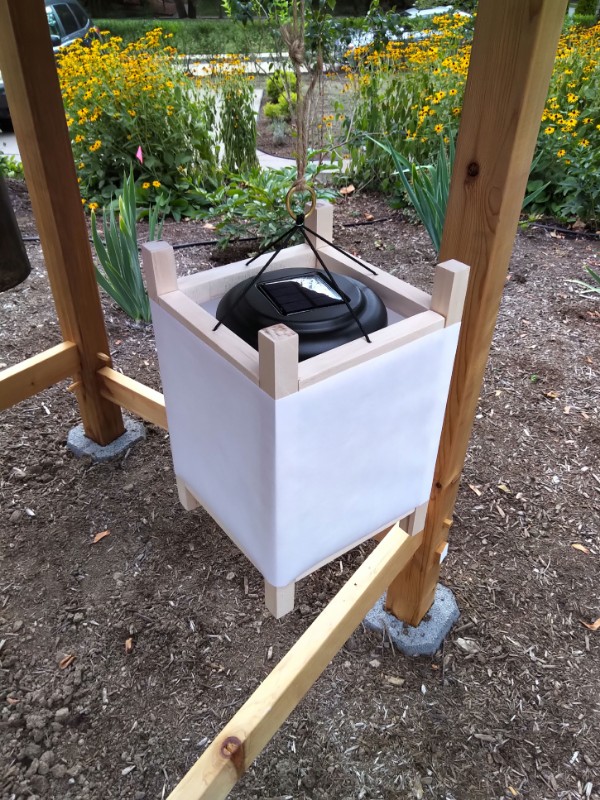
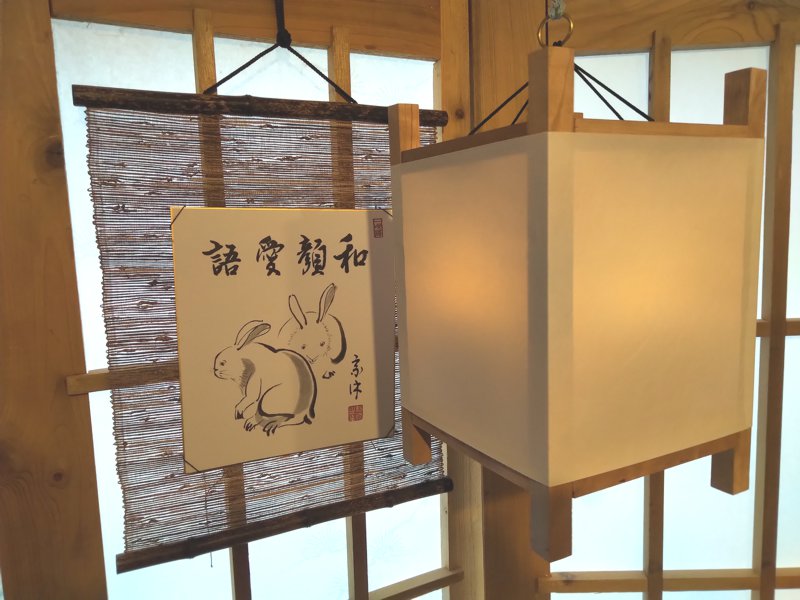
I just completed another lantern for the “six lanterns” project. The frame of this one is made out of mulberry wood. I had a small plank of this that Mr. Arimoto gave to me probably about seven years ago, and it seemed like a good project to use it on.
Andon in Mulberry
Of course, with the paper on it like that, you can barely see any of the wood. The fibers in this plank were very rough and wavy, but in the places where my plane got a good shaving, the surface is super-nice.
Frame of Mulberry Andon
I rough-milled the sticks from the plank using my band saw, then hand planed them down to 3/4″ square rods. There really wasn’t enough wood in the plank to make it entirely from mulberry. To compensate, I made some of the stretchers a little shorter than normal, and used dowel joinery instead of my usual mortise and tenon joinery. This was a little easier, since it meant cutting short lengths of dowel instead of cutting 16 tenons, but it meant drilling twice as many mortises, half of them into the ends of stretchers. I could not have done it without my drill press.
Anybody who knows me well enough to read this here blog knows that I enjoy reading books by Neal Stephenson. Some people, including people I otherwise respect, consider him to be long-winded and tiresome. “Long-winded” I cannot argue against, but I find him to be endlessly entertaining.
DODO is 742 pages of epistolary diachronical action. It is chock full of manuscripts, emails, journal entries, after action reports, radio transcripts, running around, helicopters, car chases through the streets of Boston, boat rides, sex scenes, battles, beer drinking, quantum physics, holiday parties, and team meetings.
It took me more than a month to grind through it all, but I enjoyed the whole thing.
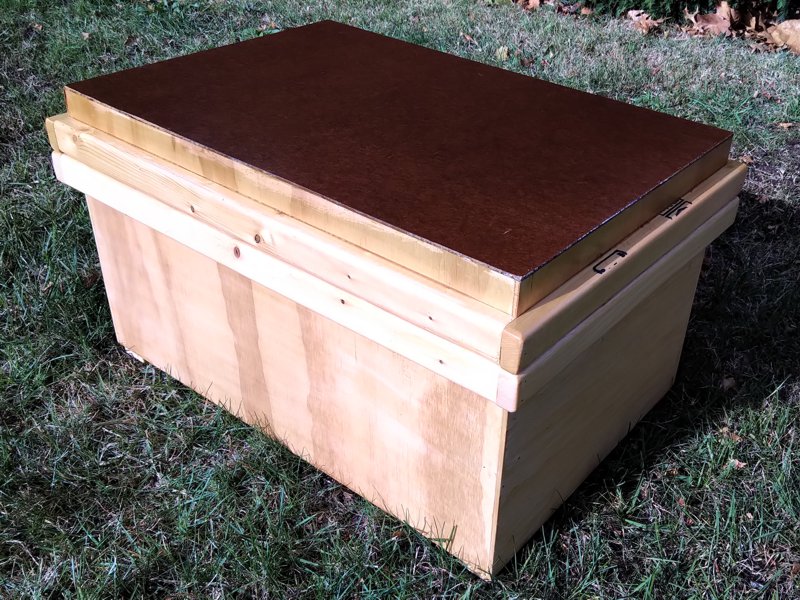
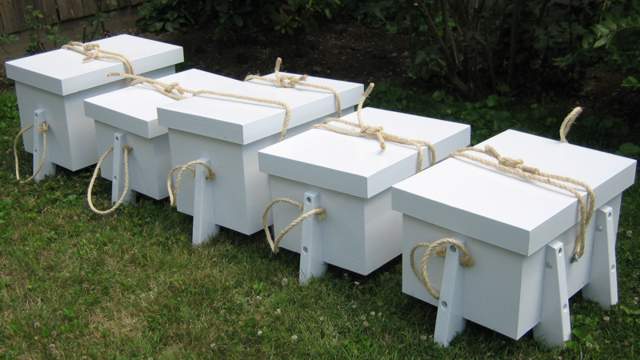
I’ve only made three of these lanterns so far, but I intend to make six, so eventually I will need something to transport and store them all in, or they are going to get pretty beat up. So, another box.
Lantern Box, Closed
This was also yet another exercise in using up surplus materials from other projects. I wound up having to use a piece of MDF for the lid, because that was the biggest piece of anything I had left. The edges are off-cut from 2-by-4 lumber from when I was making pole by cutting square pieces from 2-by-4. It awfully satisfying to use up some of that stuff.
Lantern Box, Open
You can see that the extra height of the lid makes it easy to get the lanterns in and out of the box. There’s an extra half inch in each direction, so the lanterns fit snugly but not tightly.
The whole thing is finished on the outside with spar polyurethane, especially the MDF on the lid, to give it a little more water resistance than a cardboard box. I glued some blocks of wood to the bottom to serve as feet, so it won’t be resting entirely in any puddles.
Basically, the whole thing is constructed with glue and nails form the nail gun. The bottom is thicker plywood to make it bottom-heavy, and the rim on the body both supports the lid and reinforces the corners of the box. This is a design and method I’ve used before with some success.
A lot of the sizing of pieces can be done while you’re building. For instance, I make the body of the box, then I measure the outside of the top before cutting the pieces for the lid. That way the lid is sized to fit the actual box, and not just my best hope.
The whole thing is kind of rough, because it’s not supposed to be anything special. You can see in the photos that I didn’t even sand off the mill markings.
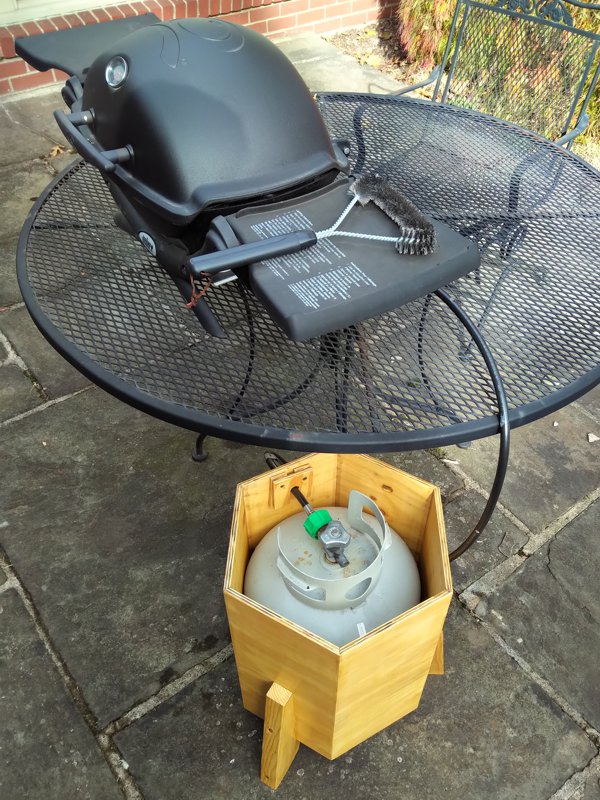
We have a small propane-fueled grill that spends all summer out on the patio. Eventually, we decided that it wasn’t super cool to have a tank of propane just sitting out in the rain and sun, so I decided to build a storage box.
6-sided 3-leggad Storage Box for a Propane Tank
The box is mostly made from exterior-grade 3/8″ plywood. It’s hexagonal, which is more work, but actually uses less wood. I’m especially happy that I was able to keep track of all the pieces and their orientation, so the face grain of the plywood flows around the corners nicely.
The floor and lid of the box are 3/4″ plywood for durability. The edges of the lid are made from pine 1-by-4. Once you have the blade angled over to cut the 30 degree angle for the sides, you can use that angle for the lid edges, too. The 3 legs are pieces of 2-by-4 cut into my standard karabitsu leg shape on the band saw.
There is a large hole cut in one side of the box for the propane hose to pass through. A couple of smaller pieces inside block most of the hole and secure it once the tank is in place.
Open box showing the hose arrrangement
There are also some hols drilled in the bottom to allow any leaked propane to escape. I glued some nylon mesh over the holes to keep bugs from crawling inside.
The whole thing is finished in heavy-duty oil-based polyurethane. I had though about painting the box, but after I saw how interesting the grain was, clear satin it was.
A little closer up
It will also come in handy in the winter. We can clean up the grill itself and store it in the garage, but you really should not bring propane tanks inside like that. With the polyurethane I used, this thing can probably just sit outside on the patio all winter.
Having worked in two different industries where proprietary, custom-built, custom-programmed, programmable logic controllers (PLCs) were the order of the day, it is difficult for me to describe how accurate the name “Revolution” is for this product line.
Revolution Pi
Industrial controls based on open hardware and free software really do have the potential to change entire industries. I mean, they probably won’t, but they could.
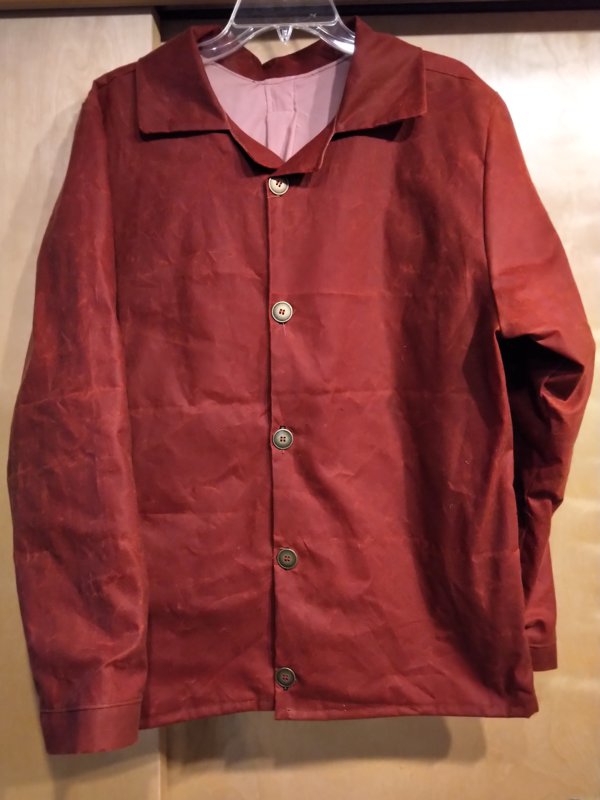
I decided that I wanted to make one more shop coat. The other two are great, even though I have less opportunity to wear them lately, but I thought that a third coat made from oilcloth would be a handy thing to have. The oilcloth would make it water resistant, if not waterproof.
Then, I had to find a source of oilcloth. Most oilcloth you can find on the net is not real cloth, it’s that flannel-backed vinyl that people use as tablecloths. Real oilcloth is real cloth (usually cotton canvas) that’s been soaked in boiled linseed oil and allowed to dry. It’s easy (if pricey) to buy garments made from oilcloth, but not so easy to find the raw material, and I didn’t want to make it myself.
At least one of the merchants at Pennsic usually carries oilcloth, but there was no Pennsic this year and none of the merchant websites listed oilcloth. Eventually I found Hamilton Dry Goods. They have a selection of real cotton oilcloth in stock and their service was reasonably fast.
Anyway, here’s the coat:
Burgundy Oilcloth Shop Coat
Because it’s meant to be worn in wet conditions, exterior pockets seemed like a bad idea. Because the oilcloth feels a little greasy even when it’s dry, I decided to put a lining in the coat, and put pockets on the lining.
Lining with Pockets
I had some of this rosy poly-cotton fabric all the way down in the bottom of one of my fabric supply bins, held in reserve for a project I was unlikely to ever make. It was a good hue match for the burgundy shell fabric, and a better feel against the skin.
The pattern doesn’t include instructions for adding a lining, so I had to figure all that out on my own. I only messed it up a little bit, at the lapels. I managed to effect a save without ripping out all the collar stitching.
A quick trip to the fabric store for some brass buttons, and this project was complete. Some time I need to figure out how to make one of these with a zipper instead of buttons. Not soon, though.
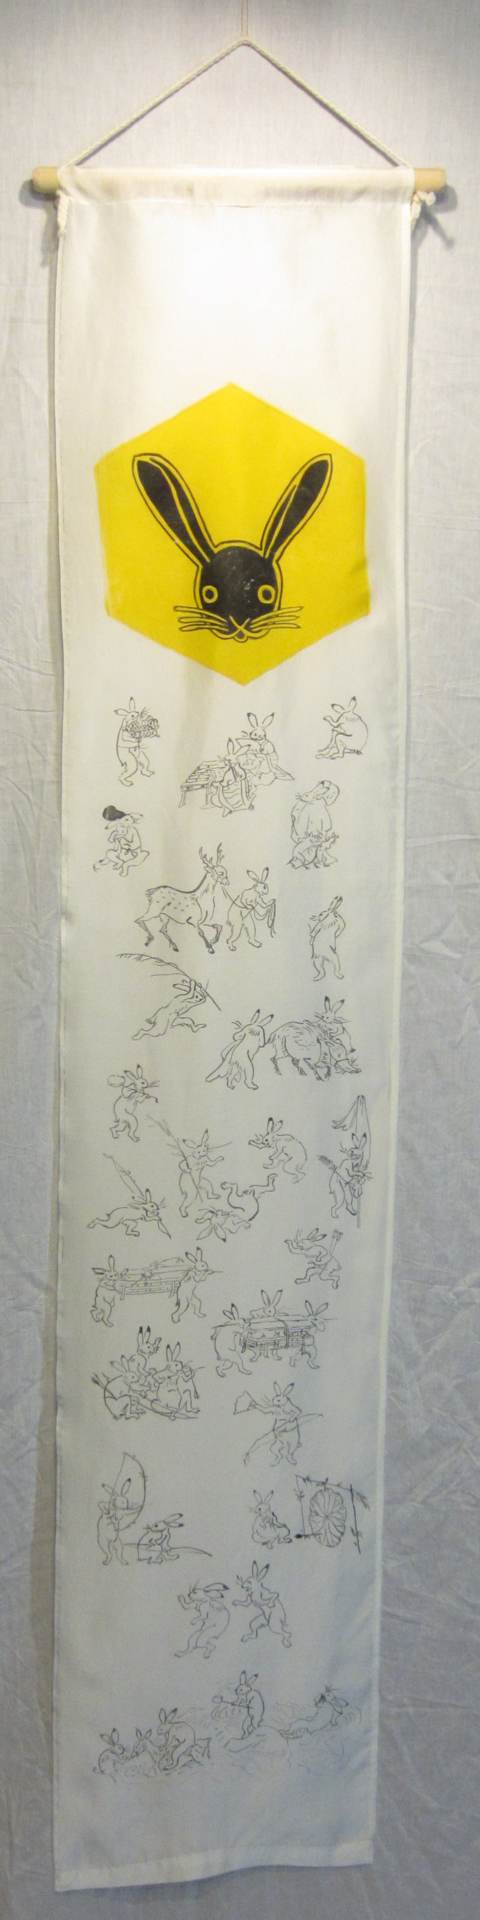
My old shibori-dyed personal banner is getting a little faded, and my silk banner is too delicate to hang outside in the rain, so I decided to make a durable banner that I can mistreat.
Banner in trees
It’s 15 inches wide and 6 feet long of cotton duck fabric in this wonderful deep-yellow color. The black parts of the design are painted on with Jacquard Textile Color, with details on the bunny in gold Jacquard Neopaque fabric paint. The textile color is a really thick pigment type paint, that doesn’t forma film the way the acrylic Neopaque does.
I made a simple 8-strand suspensory braid in some polyester yarn, so that I won’t have to worry about it, either.
An andon is a type of Japanese lantern that is usually used indoors by people who are seated on the floor. I think that, technically, any “framed paper” lantern is an andon, but the word is most often used to refer to the floor-standing version. That may be because most hanging lanterns you see are the collapsible paper chochin type.
I’ve been wanting to make a tall, floor standing andon for about five years, and took the opportunity to cut pieces for this one when I was preparing materials for the Cherry Solar Flicker Lantern project.
Andon, from cherry
This andon is about 34 inches tall and 7.5 inches deep/wide. It’s made from cherry. To keep it from being tippy, the base is a solid block of cherry two inches thick. It uses a different lighting system than the hanging lanterns. This one is designed to suspend a NEBO Tools “BIG Poppy” lantern inside.
The view inside
Here you can see how the Poppy is suspended from the diagonal crossbeam. This is also a better view of the handle. I cut the through-mortise into a rectangular block first, then cut the curved handle from that block. You can also see the seam where the paper is taped closed at the front corner. Even in the light it doesn’t look bad.


