
One of our friends is really into embroidery. She has taken classes all over the place, gotten certifications from international guilds, and all that fancy stuff. For larger-scale projects, she has acquired a couple of oak embroidery frames. These are great, but it turns out they are not big enough for some of the projects she would like to attempt. Woodworking friend to the rescue!
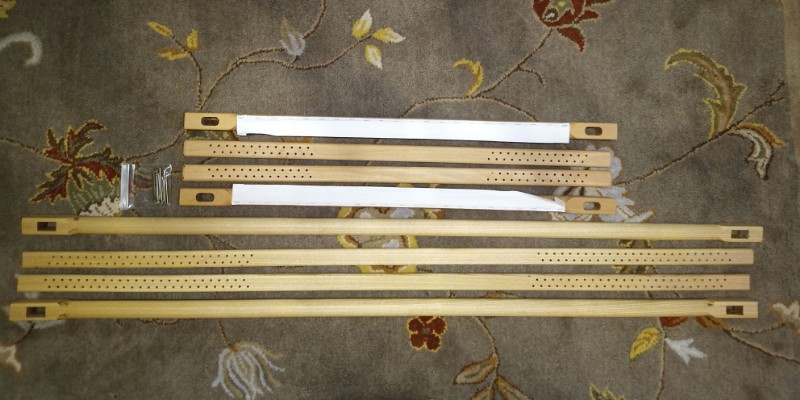
Each frame has four pieces. The pieces for the original are the shorter ones above. The pieces for my larger version are the ones below.
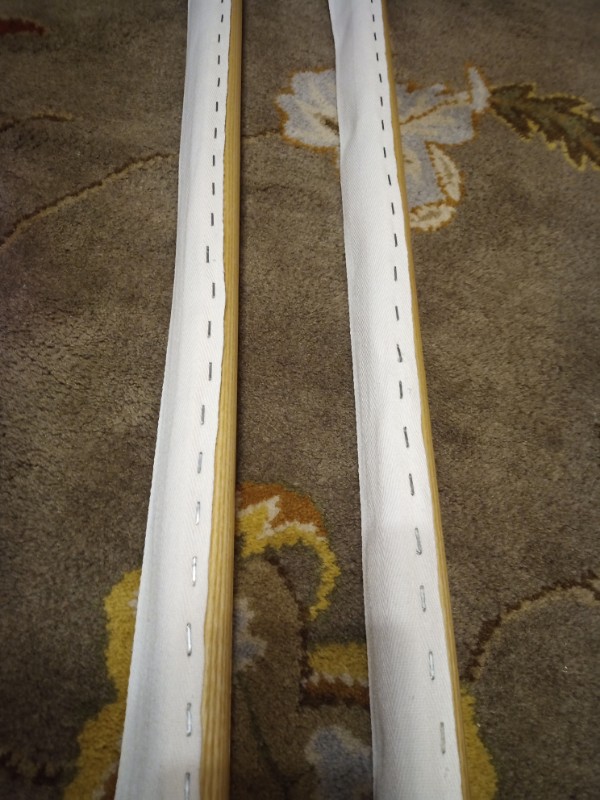
The pieces with the big mortises and the round middle portion are the rollers. You stitch the ends of the fabric to the twill tape along the rollers, and you can roll very long pieces of fabric up and work on them in sections. In the picture, I have not yet attached the tape to the rollers.
The pieces with many small holes are the stretchers. They fit through the mortises, and you put pins into the holes to keep the rollers separated and under tension.
Here is what the frames look like when they are assembled:
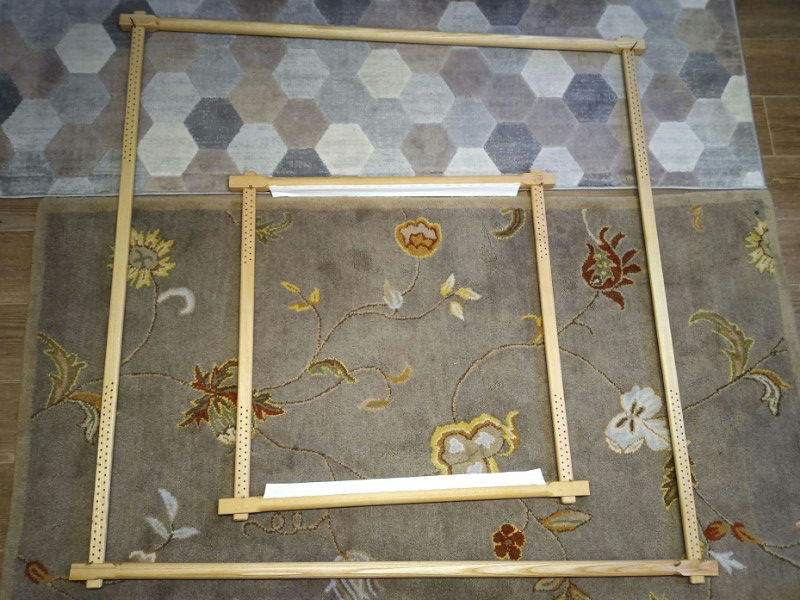
You can see how much more workable area my copy provides. The pieces for the original frame are about 30 inches long, so she can work on panels about 2 feet wide. The pieces for my copy are 54 inches long, so she can work on panels about 4 feet wide. That is 4 times as much working area! I tried to make all the pieces interchangeable, so she will have even more flexibility.
Her original is made from oak. My copy is ash, which is a little less dense than oak but still strong, and less expensive. I started from a 1.5″-thick slab about 5 feet long, planed it down to the 1.25″ thickness I needed, and then rip cut the pieces I needed off of that. All the corners are rounded off with various router bits to make them more pleasant to handle.
The through-mortises in the rollers are rectangular instead of rounded, because I used a chisel mortiser and not a router. I had never done “rounded beam with square ends” thing before, so I had a little trouble with that, but I don’t think the problems are structural just cosmetic. I did get the hang of it eventually, but the first batch are a little shaky. I used the original stretchers as drilling guides for the new stretchers, so the holes are evenly spaced. I put two coats of Osmo PolyX on all the pieces as a finish. It’s the first time I have ever used PolyX, and I’m pretty happy with the results.
I did eventually get the tape for the rollers. I was just using a manual staple gun, so it was quite a lot of work to put a staple every inch on both rollers. My lines of staples are little crooked, but not too bad.
Before anybody suggests it, no I will not make and sell these. I was happy to make one as a favor for a friend, but this is somebody else’s design I’m outright copying. I could probably come up with my own design if I needed to, but it would be pretty different.


