Finally getting around to my annual post of all the music I bought during the year. Much of the year was concerned with catching up on the output of old friends The Orb, and Eric Johnson. The Orb and Sigur Ros released new albums, so there’s that.
The Orb
No Sounds Are Out of Bounds (2018)
The Abolition of the Royal Familia (2020)
Guillotine Remixes (The Abolition of the Royal Familia) (2021)
Prism (2023)
Eric Johnson
EJ Vol. II (2019)
The Book of Making (2021)
Yesterday Meets Today (2022)
Sigur Ros
Atta (2023)
Not a lot of music purchases overall. I should get into some new bands. Old friends Zombi are releasing a new album in a couple of months. That should be fun.
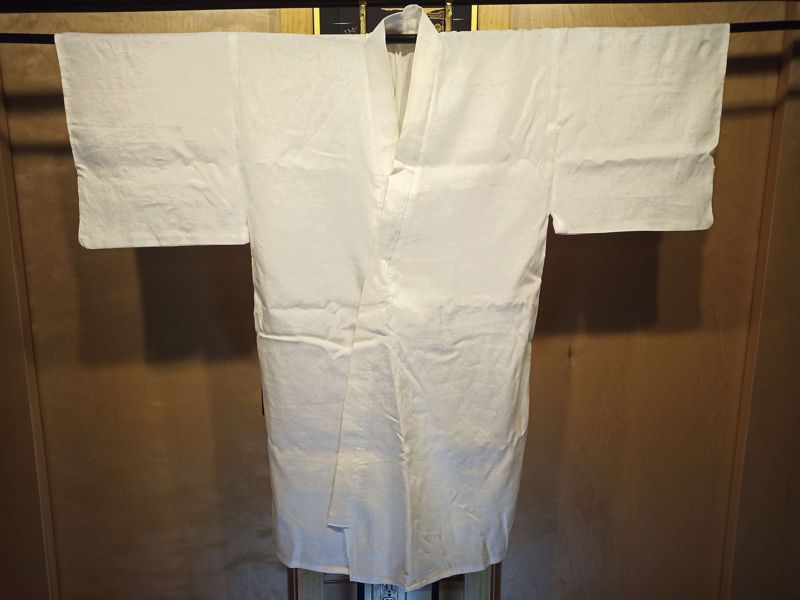
With the Pandemic lightening up enough for the SCA to start having regular events once again, I decided to restart some of my garb-making activities. The last new white under-kosode I made was way back in 2020. Anyway, I finished this kosode back in mid-December. It is entirely white linen, some very nice white linen I purchased at Pennsic 50.
Kosode from white linen
There’s nothing much special to this kosode, other than it conforms a little better to what we now think a kosode should be. The sleeves are almost entirely attached to the body. The overlaps are still “old-style”, but I’ll work on that for the next one.
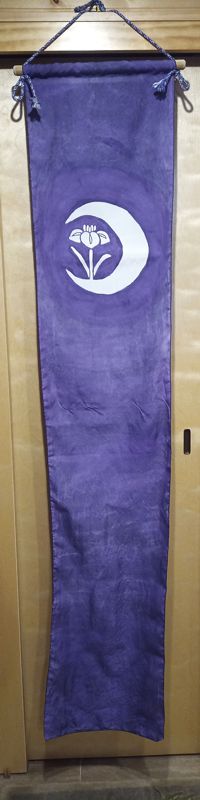
Painted silk banners are one of the things I do in the SCA. This past weekend there was an SCA event where there were four elevations, and I made banners for three of the four.
Banner for Oribe Tsukime
Back in the summer, I made this banner for Oribe Tsukime. One cool thing about this banner is that I painted the design on in water-based resist, then painted purple around it. Normally, I would start with purple fabric and paint the design on in white, or do a gutta resist around the design and flood the outside area with color, but the detail on the iris was too fine for that method.
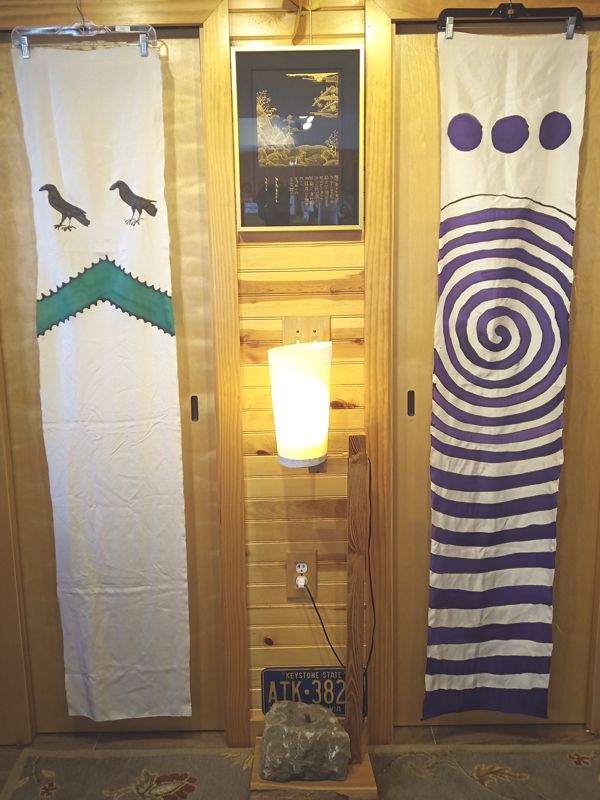
Banners for Markus skalpr Grimsson & Sumayya al Ghaziyya
For these two banners, I was able to use the normal method of applying a black gutta resist and fill the interiors of the designs with paint. Doing the layout and resist for the gurges on Sumayya’s banner was quite a lot of work, but I like how it came out. Thank you Markus for registering a design that was significantly less work to paint than most people’s. Hara did the edging and the braids for these two banners, so I could focus on other projects.
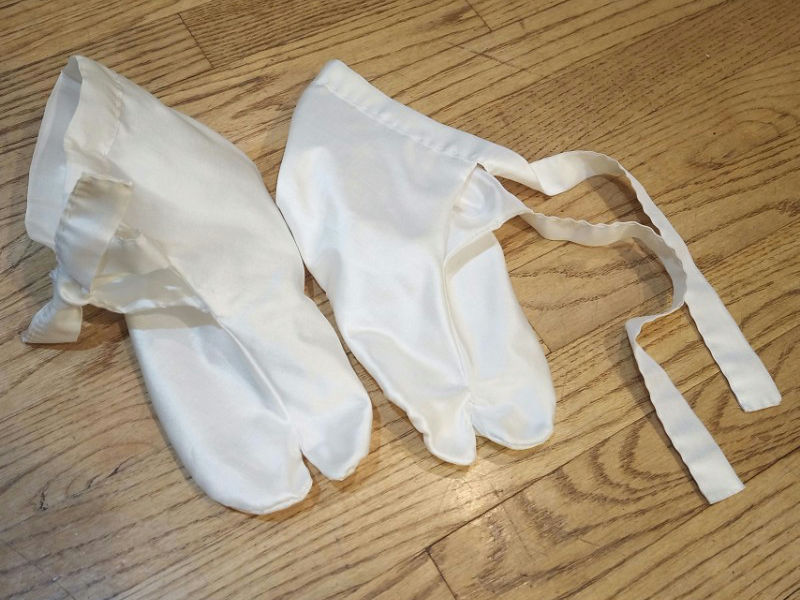
One of our friends in the SCA, Oribe Tsukime, received a writ for elevation to the Order of the Laurel. The writ was issued back in the Spring, but she was not able to have her actual elevation until this past weekend. This gave me plenty of time to make these white silk tabi for her to wear as part of her elevation garb.
Tabi in fine white silk
This was the first time I had ever made tabifor another person, the first time I had made tabi in a few years, and the process was complicated by Tsukime living somewhat far from my home. Footwear is always difficult to fit, and trying to do it by sending prototypes back and forth in the mail took a few months.
I was able to complete this project with days to spare, however, and she wore them during her vigil and elevation ceremony. They are all fine silk left over from the uenohakama project, sewn by hand with white silk thread. I don’t know how long they will last, and they probably never can be washed, but I was asked to make them and they were ready in time, so I am happy.
Normally, I try to hand over these things by Agincourt, but with Baronial Investiture just weeks later I wound up holding off on presenting these until I could present them to the new Baronage.
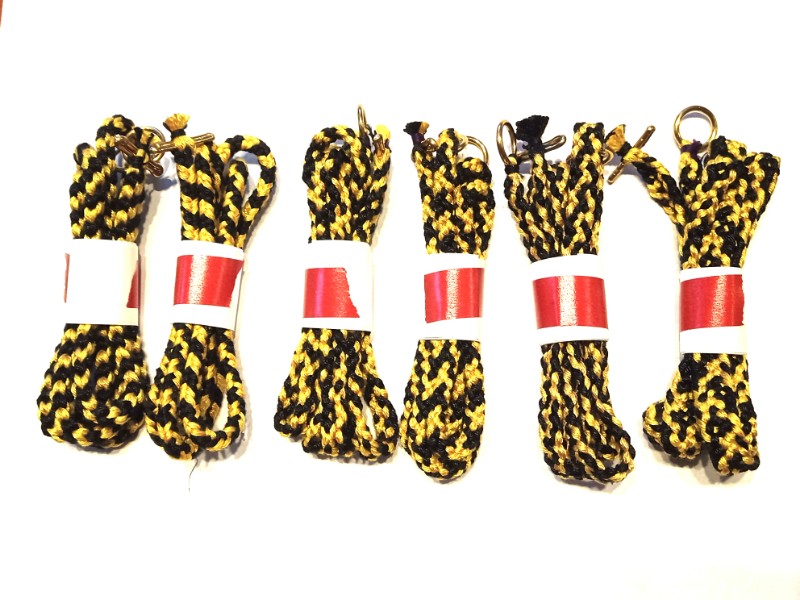
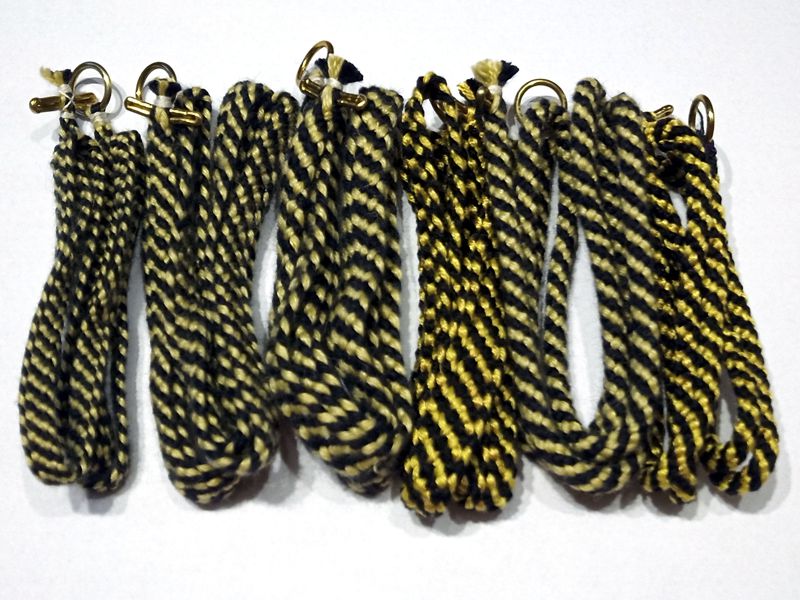
First is this set of six silk braids I completed in September. These are all 8-strand marudai braids done in silk.
Second is this set of 8-strand marudai braids I completed in October. Some of these are done in silk, and some of them are done in this super-soft silk/alpaca blend yarn we bought back in January. I wanted to experiment and compare 3 ends of silk/alpaca yarn per strand to the 8 ends of lace-weight silk yarn per strand that I normally use.
Finally is this set of eight machine-embroidered belt favors for the Baronial Comet awards. These apparently came in handy, as I saw several of them handed out later in the day.
On Saturday, at the Baronial Investitureevent of our local group, I was inducted into the Kingdom‘s Order of the Millrind. This is a grant-level order for service. It was entirely unexpected, and I am thrilled that my service is considered to be at the level of the other members of this order. Previously, I have received two local service awards (Order of the Gold Comet, Order of Copernicus) and the Kingdom AoA-level award (Order of the Keystone), but did not imagine that my service was so appreciated. Here is my awesome scroll:
Composition, calligraphy, and illumination by The Honorable Lady Lisabetta de Rossi; translation by Mouri Tsubakie-dono and the Teahouse; with thanks to Morikawa-dono Rei for advice and design of hanko seals.
Twelve years ago, when I was inducted into the grant-level order for arts and research, I don’t think I understood how big a deal these Kingdom polling orders really are. I do now, and I am honored.
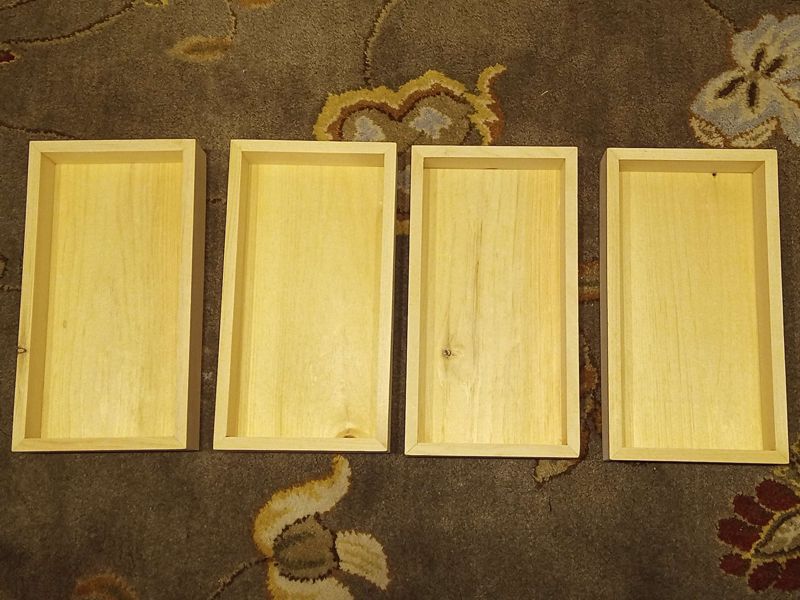
Through a combination of gifts, purchases, and gift purchases, I have acquired 64 of the 100g tama from Braiders Hand. Right now, they are all in use, but eventually, I may have to put them in something for storage. Since boxes are easier to make than tama, I retreated to the garage to make these storage trays.
Four pine storage trays for tama
They are made from 1/2-inch thick pine boards, and each can hold 32 tama. My general rule for storage options is that you should always plan for twice as many whatevers as you have now. The corners are mitered, and the bottom is rabbeted and then set into a dado that goes all the way around. This lets the bottom expand and contract with humidity changes while still being 1/2-inch thick. There are no fasteners in the tray, just glue. I can make two trays from a single 6-foot 1-by-10.
Four pine storage trays, stacked
It takes a while, though. Plus, it takes a planer (to turn 3/4-inch 1-by into 1/2-inch lumber), a table saw (to cut all the pieces and joinery), and a sander (so that everything looks nice and smooth). These trays might someday become become drawers in a kind of kotansu, but that day is probably far off.
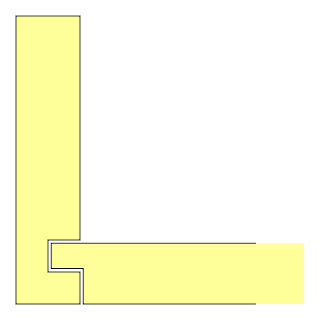
Update: I realize that I did not do a very good job of describing how the bottoms of the trays are joined to the walls. I made a diagram –
As is my tradition, I made some braided silk medallion cords to donate to the Barony at Agincourt. These braids are all 8-tama braids with 8 “ends” of lace weight silk yarn per tama. The braids are all standard 8-tama braids (kaku genji, kaku, shippou, Edo yatsu, yatsu se, shige uchi) with 4 tama of each color, and I set them all up with the same color positioning (KK GG GG KK) so that I could compare how the colors move through these different braids. I gave them my standard “ring and toggle” closures, and added a jump ring for any medallion.
Six silk braids for Agincourt
This is the last Agincourt for our current Baronage, so I’m not sure that they will need all of these cords themselves, but I’ll make more for the next Baronage anyway.


