
Almost two years ago, I received what is called my “Laurel Writ”, which is basically a command to present myself to the Crown of the local SCA Kingdom and accept (or decline) elevation to the Order of the Laurel. The Laurel is a “peerage” level award, recognized Society-wide but awarded at the Kingdom Level. In terms of rank, it is the equivalent of a Knighthood, but for arts and research instead of for fighting prowess and chivalrous conduct.
My “elevation garb” was a “Bunkan Sokutai“, the fanciest and most formal outfit my SCA persona would ever have had reason to wear. There are a lot of parts to this outfit, meaning not only several layers of garments, but several vital accessories. Sharon did all of the important layers of garments, and I did most of the accessories. One accessory I did not have ready in time is the gyotai.
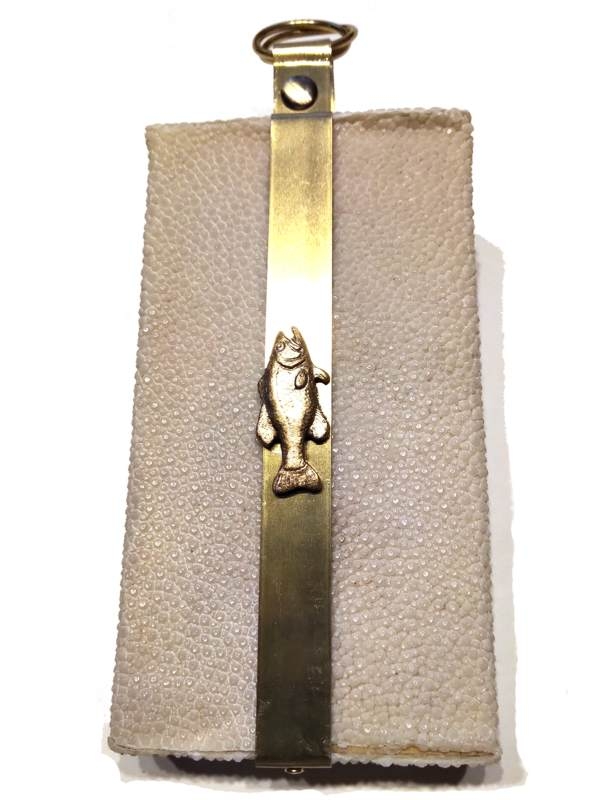
Gyotai translates as “fish bag”. This accessory is reserved for courtiers of high enough rank that they have access to the Imperial palace. Apparently, it started as a belt-hung charm that was actually shaped like a fish, but eventually became what you see below.
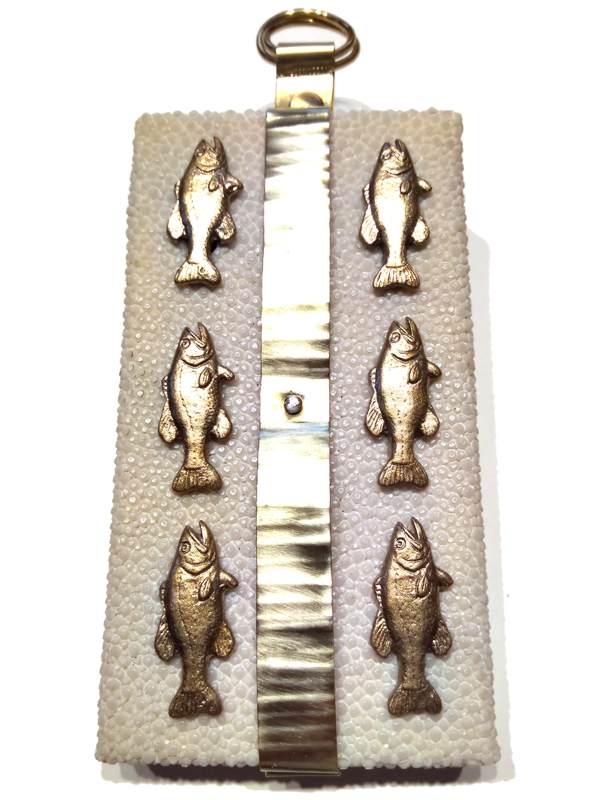
I started with a block of red oak, 2.5 inches by 4.75 inches. Then, I covered it in real ray skin, attached with epoxy adhesive. Then, I hammered the brass strip for texture, and nailed it in place. It is bent over at the top, and riveted to hold the ring for hanging. The fish are pewter buttons. I had to paint them gold, and spray coat the gold paint for durability. On the other hand, the shanks of the buttons made it very easy to drill a few holes and attach the fish to the surface. There is one more fish on the back of the gyotai, and the brass strip covers up the terrible seam in the rayskin.
So, this project was two years in the intention, but it really only took two days in the shop to get all the work done. Considering that I haven’t even seen one of these in a museum, it feels so good to have one of my very own.


