I bought a woodturning lathe more than ten years ago, but I set it up so rarely that I have not made very much progress on learning how to do anything interesting with it. There are three things that most people want to do with lathes: spindles, handles, and bowls. I will have plenty of use for spindles when I get back into making marudai, but they are not really a part of my woodworking needs. Handles don’t interest me very much because they are mostly a way for companies to sell you hardware you don’t really want to make tools you don’t really need. I don’t really need bowls, but bowls are cool, right? How hard can they be, right? They don’t have any hardware, so they won’t make you buy more stuff, right?
OK, so totally wrong on most counts. I had to buy a real chuck for the lathe so that I could start the exterior of the bowl using what is called a woodworm screw to hold the bowl blank steady. Then, of course I had to buy a special gouge, and special scrapers to cut the interior of the bowl. Then, of course I had to buy better jaws for my chuck so I could hold the size bowl I wanted to make. Also, the lathe spent so much time sitting around that I had to order a new drive belt from the lathe manufacturer because the old one was falling apart.
Anyway, bowls are still cool. A pain, and a risk to life and digits, but cool. The value of these handmade bowls justifies the hundreds of dollars I have spent on stuff to make them, right?
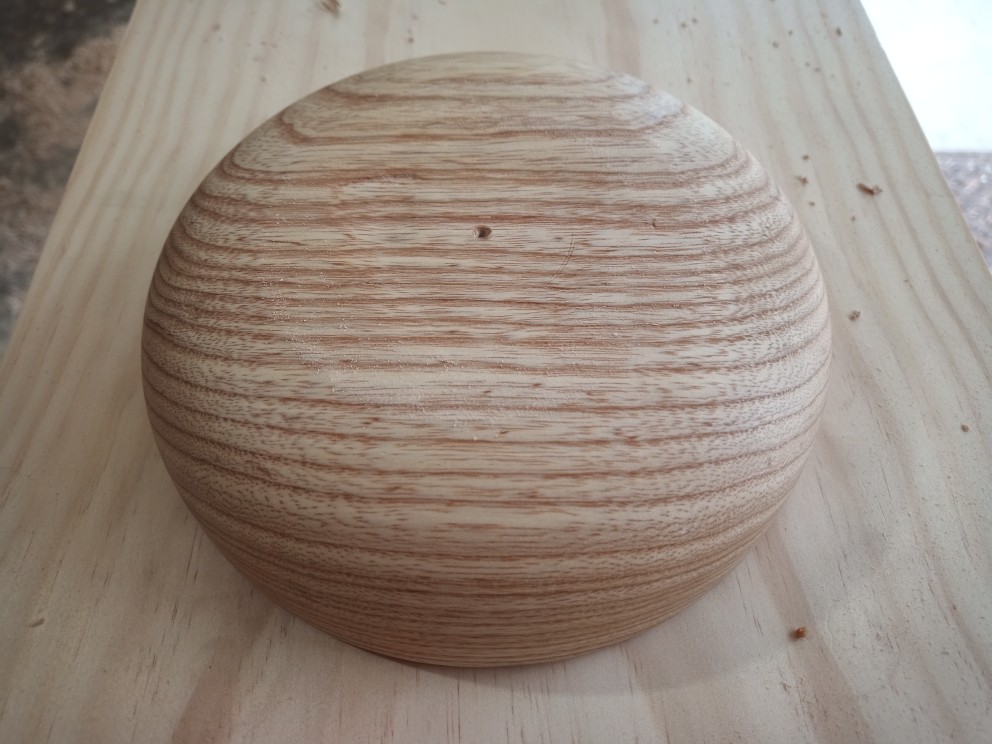
The first bowl is turned from some surplus ash. It is about seven inches in outer diameter and two inches tall. The foot was damaged during turning, but I just removed it with a chisel and sanded the bottom mostly smooth so it is hard to notice.
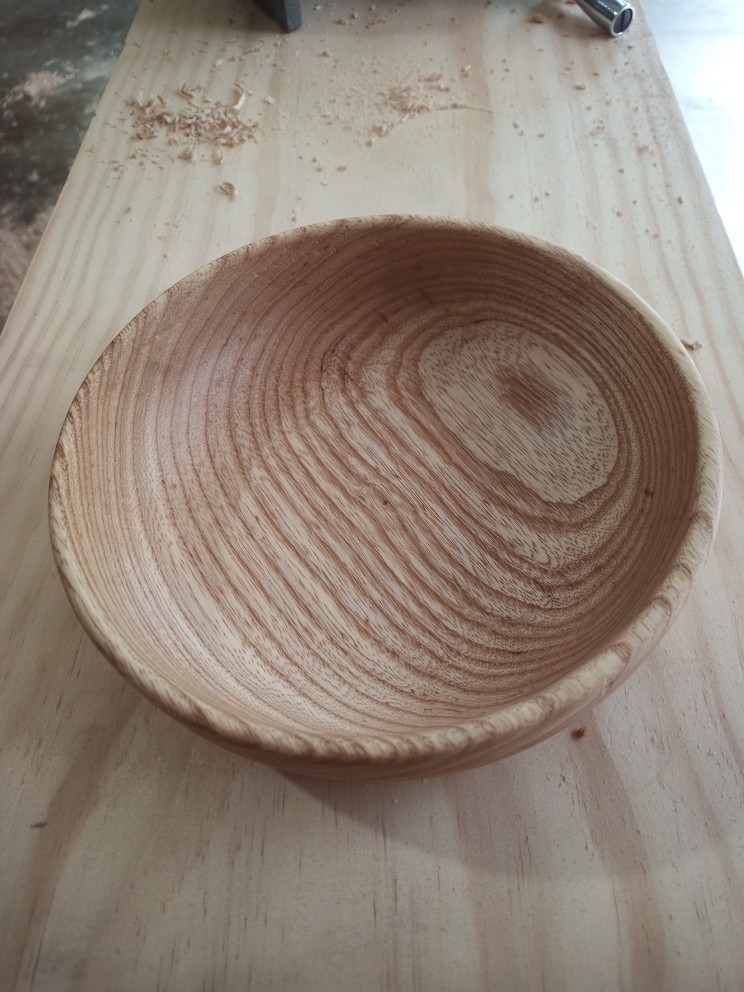
I really like the way the angled grain in the blank produces those cool ripples in the finished bowl. There’s some food-safe beeswax finish on the which really makes that grain pop, I think.
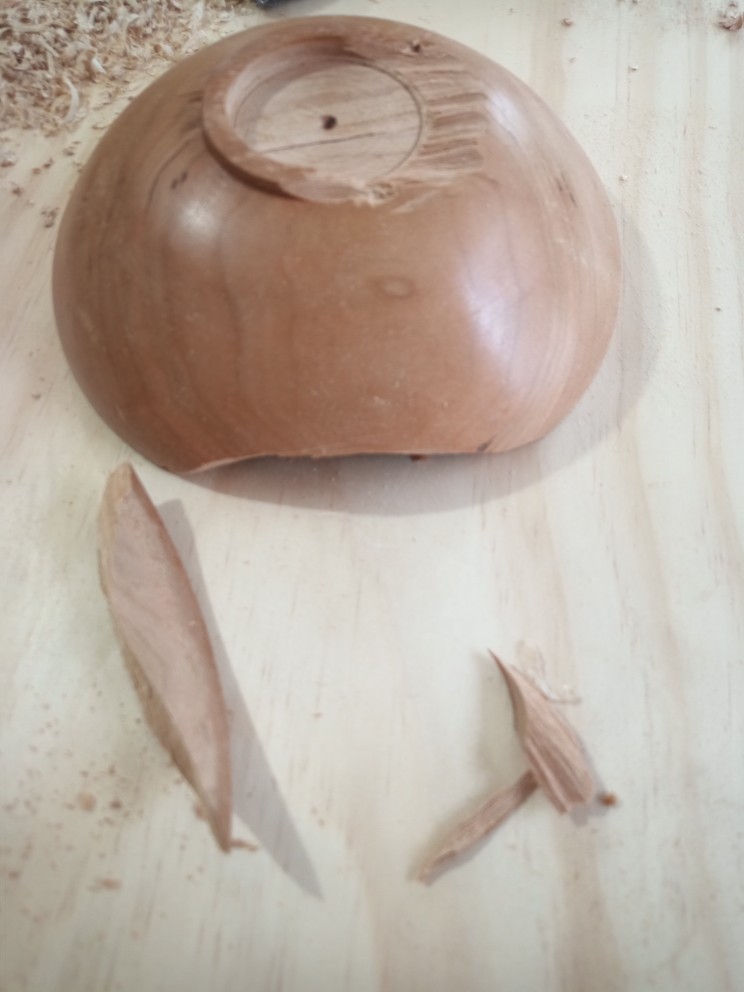
The next bowl was a spectacular failure and a waste of about an hour’s work. What happened was that after shaping the exterior and switching to the inside, the scraper caught (technical term) along the rim of the interior (visible in photo) and wrenched the bowl off of the chuck jaws, breaking the foot of the bowl. Then, when the spinning bowl hit the concrete of the shop floor, the rim broke.
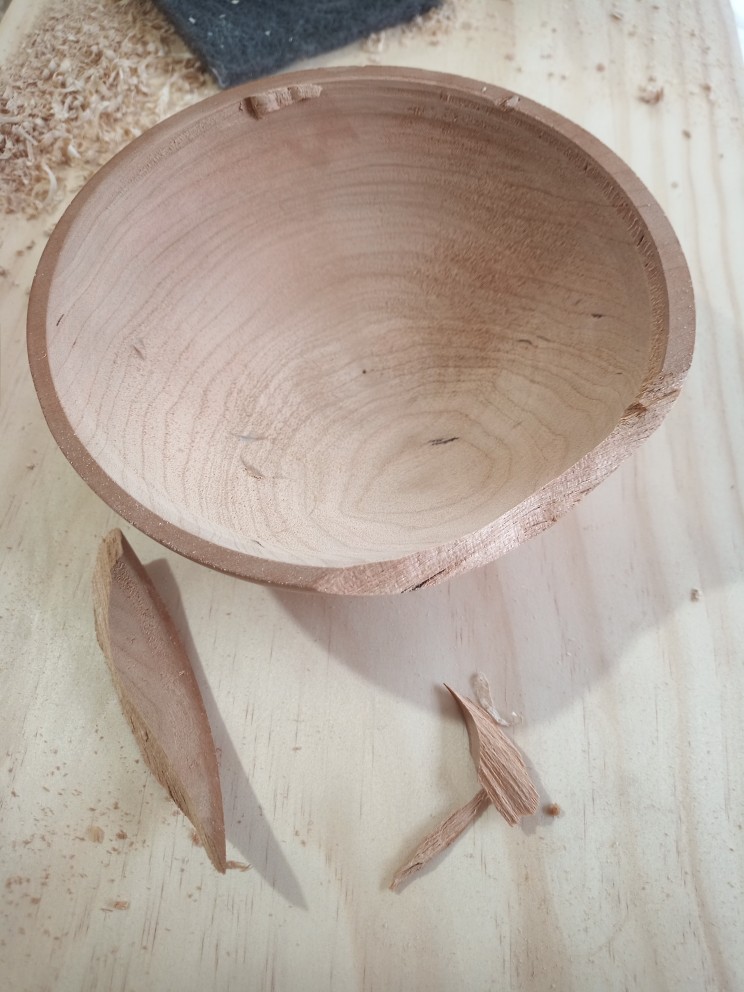
I declared this bowl a loss and put it in the burn bin. It’s frustrating to spend time on something, and just look at that grain, and then throw it away, but I really could not figure out how to salvage it after so much of the foot was lost.
Luckily, I had one more blank to go. This one got started at some point, then I must have had problems with it, so it wound up on the shelf. I drilled out the center for the woodworm and got started. Learning from the two earlier bowls, I left a much beefier foot on the bottom so it did not fail even when I had problems with my tooling.
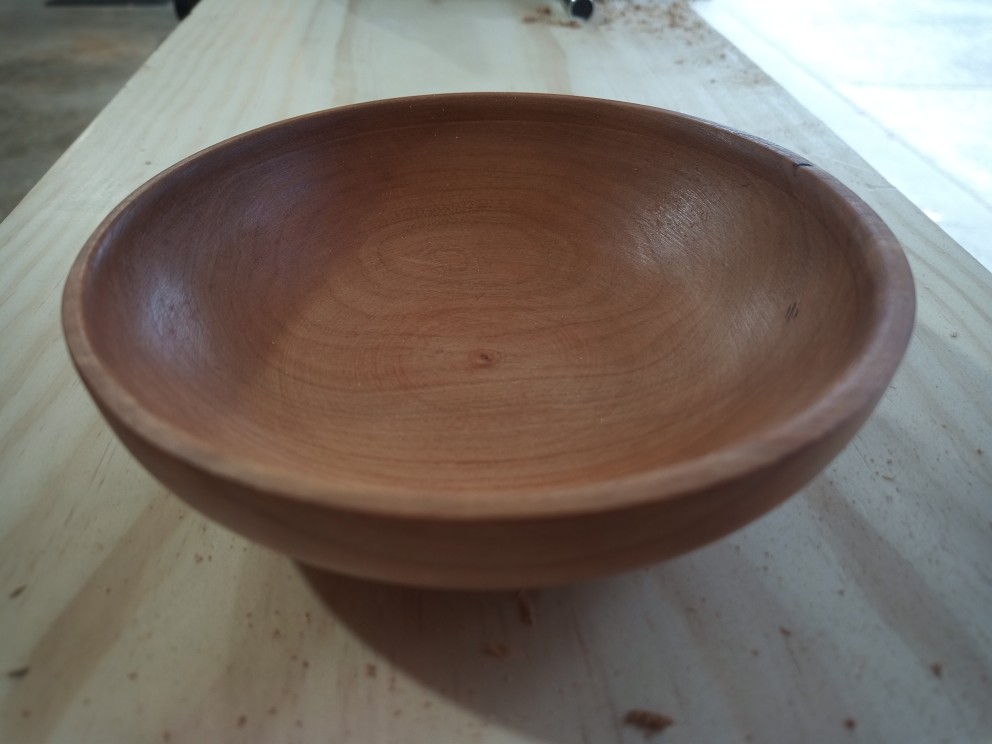
Third time lucky, I guess. I’m pretty happy with this one. No major problems, no major errors or failures, just a simple little bowl.
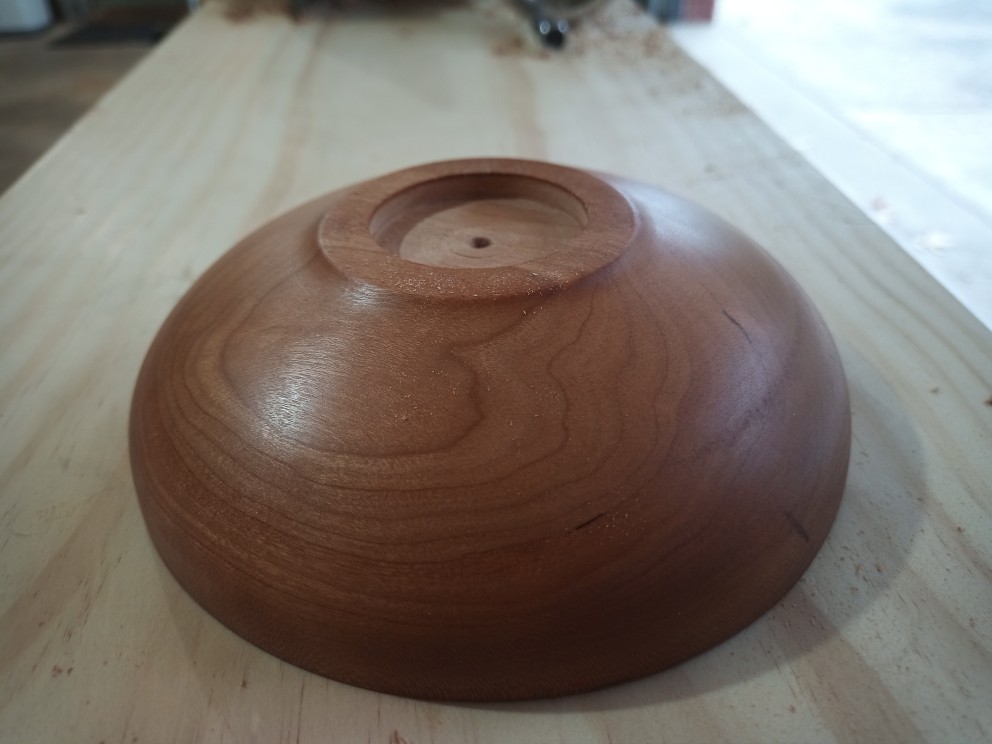
I mean, you can really see how much thicker and better supported the foot is on this one. It really gave me the stable grip the chuck needed for me to work the rest of the bowl.
I feel like I learned a lot during these three bowls, including how I have been possibly mis-using one of my tools. Now I have two usable bowls, too.