
Following on the heels of my Oak Solar Flicker Lantern, is this almost identical lantern made from maple.
I eventually need to make a half dozen or so of these, so I might as well use them as a study in materials.
Following on the heels of my Oak Solar Flicker Lantern, is this almost identical lantern made from maple.
I eventually need to make a half dozen or so of these, so I might as well use them as a study in materials.

I had meant to leave this year’s white kosode half-finished, so I could use it as a demonstrator for a class I was going to teach at Pennsic on kosode construction. Instead of leaving it to fester while we’re waiting to see if there will be a Pennsic next year, I decided to complete it so that I could wear it if we ever happen to have an SCA event ever again.

Gosh that all sounds pessimistic, I know, but there it is. Really, I’m much more optimistic about the future of the SCA than that. I think we will have to reconsider what makes an event and how we run them, but I’m sure we will have events in the future. They might just be very different from the kind of events we’ve had in the past, though.
Anyway, this year’s kosode, in white ramie. I’ve already made two kosode from the white ramie I ordered a couple of years ago. When it became time to make my 2020 kosode, I thought about getting some new fabric, but I realized I still had plenty of this terrific 150 gram ramie linen from Morex Fabrics, so why not use it? The pattern is my standard men’s kosode method, starting from 14.5″ panels. For my technically-minded friends, I continue to use half-panel overlaps and three-layer collars.
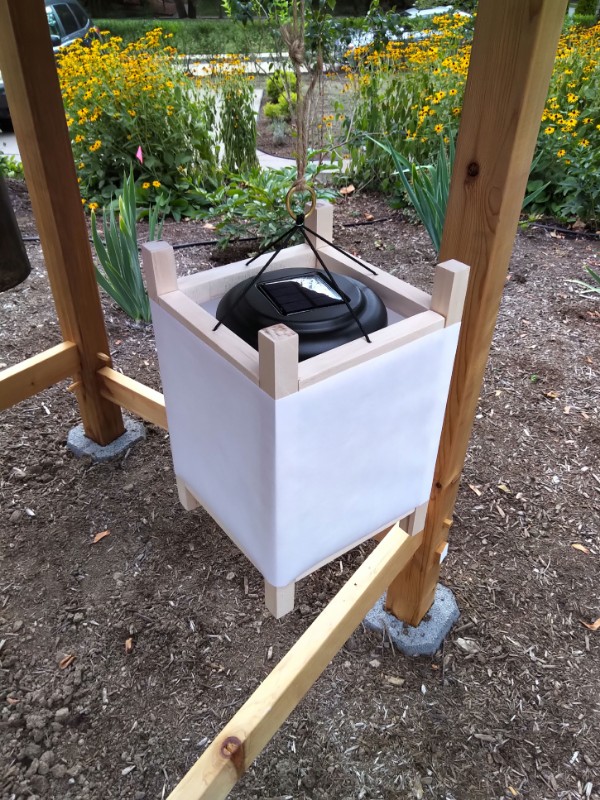
This Japanese-style lantern is very similar to a few others I have made, but this one is sized to accept a solar-rechargeable flicker LED path light.

This lantern is mostly made from some surplus 3/4″ oak I had in the garage. It uses the same mortise-and-tenon frame I’ve used for the other lanterns, except for the two diagonal braces just under the top rails. The suspension mechanism is also a little different, just some 1/8″ nylon rope inserted through drilled holes, and a brass ring.
The exterior is some Warlon Taf-Top shoji “paper”. This paper is coated with polyester fibers, making it water resistant and more durable than paper. It’s good stuff, and not that much more expensive than regular shoji paper. The paper is just wrapped around the outside and held in place with double-sided tape.

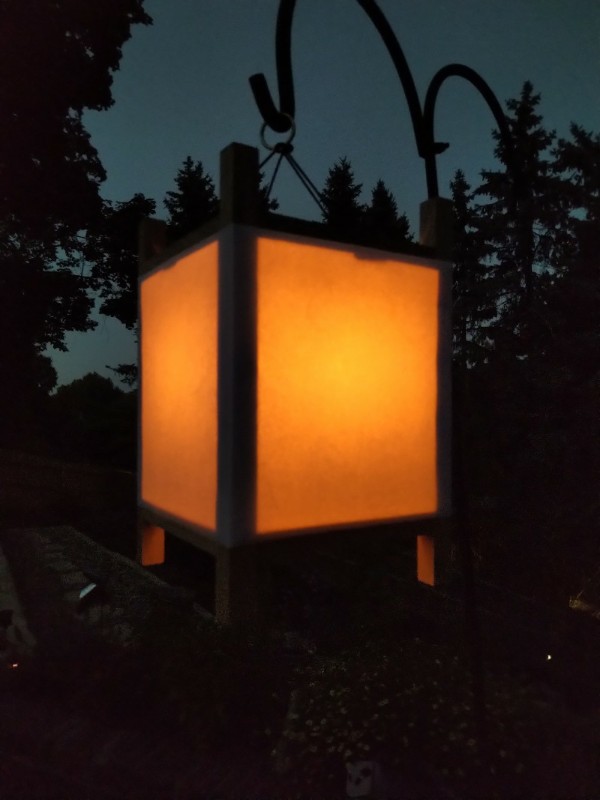
The top part of the garden light drops into the top of the lantern and rests on the diagonal braces. The top part has the solar panel, battery, and bulb; and is itself sealed against weather. This makes it the ideal lighting unit for this kind of project. The bulb is actually a cob of dozens of LEDs that play a little flame animation. It’s very realistic.
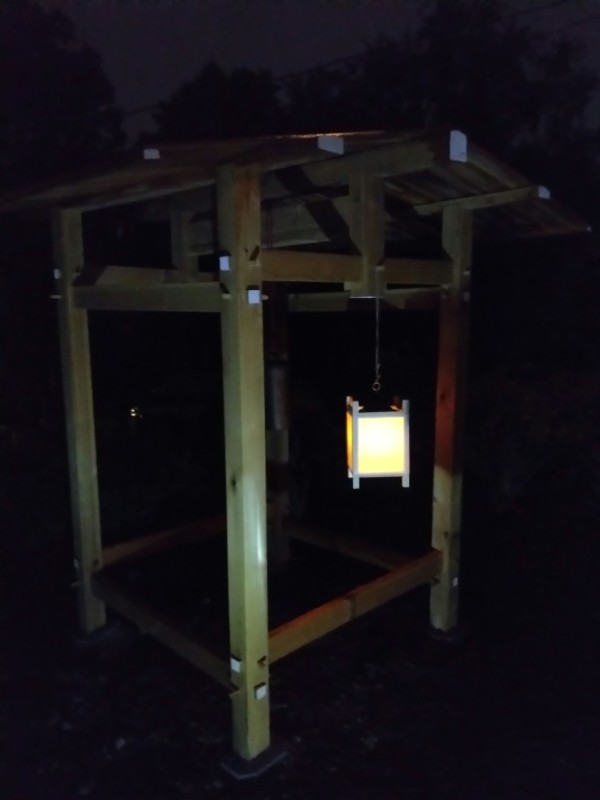
At Pennsic, the group we camp with likes to hang lanterns out in front of camp. Solar lanterns means we don’t have to worry about burning anything down or changing batteries. I’ll need to make a bunch more of these lanterns before Pennsic returns next year, if Pennsic returns next year.
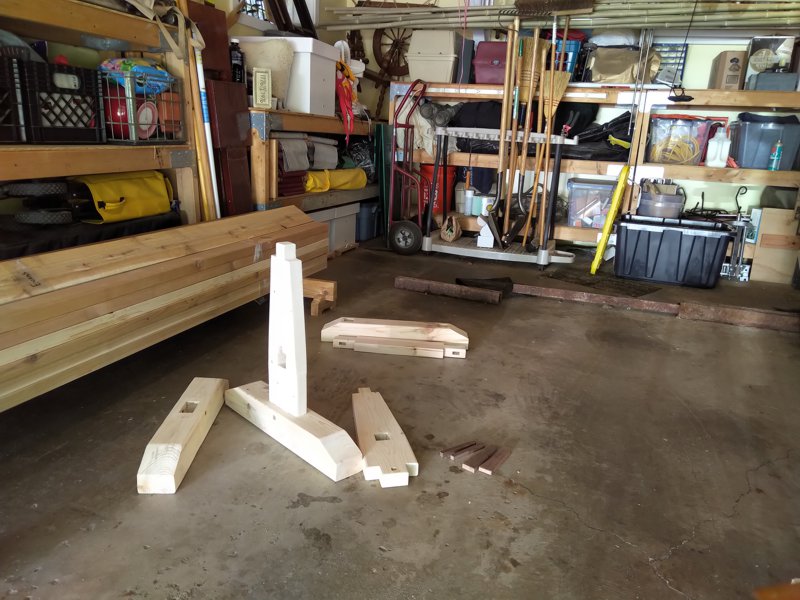
I realized that it might be a little mysterious how those sawhorses I made actually fit together. Here are some assembly instructions.
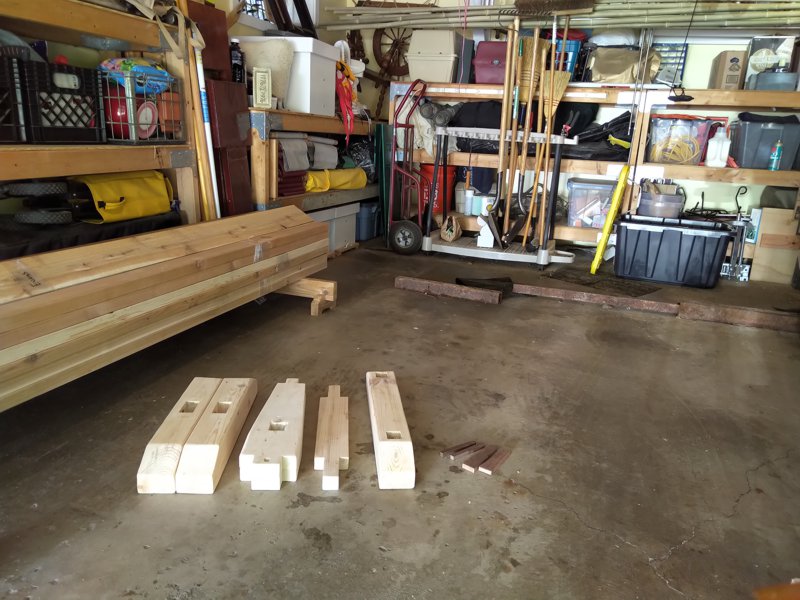
You’re going to need two feet, two legs, one stretcher, one top, two pegs, and two wedges. The legs have a wide end and a narrow end. The feet have one mortise in their top sides. The top has two mortises in its underside. you’re also going to need a small hammer or mallet.
Insert the wide tenon of one leg into the mortise in the top side of one foot. It is very tempting to hammer the top of the narrow tenon, but this may mash it making ti difficult to insert later, so resist the urge.

Use the mallet to hammer a peg all the way through the sideways through-mortise in the foot. These are designed to be drawbores, which means that the mortise in the leg does not line up perfectly with the mortises in the foot. This makes it more difficult to hammer in the peg, but as you do so it draws the joint tighter.

Repeat those steps to assemble a second leg/foot combo.

Insert the stretcher between the two legs, sliding the tenon at each end of the stretcher entirely through the sideways mortise in each leg. Note that the wide dimension of the 2×4 is vertical. The mortises and tenons are square, so make sure the stretcher isn’t sideways.There’s no “inside” or “outside” to the legs, so whichever way fits better, just go with it.
Insert a wedge into the through mortises that run vertically through the tenons at each end of the stretcher. Hammer these nice and snug, or the resulting horse will be wobbly.

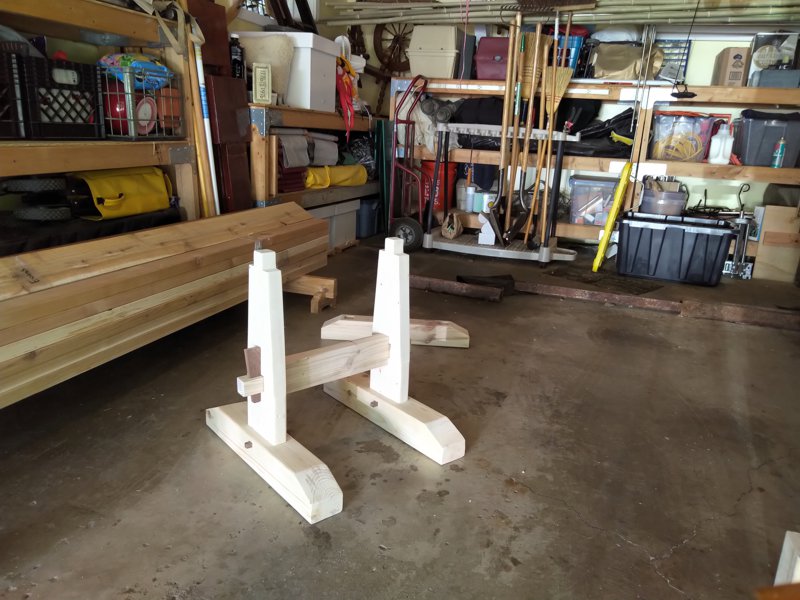
Slide the top down onto the tenons at the narrow ends of the legs.There should be enough tension in the assembly to hold the top firmly in place once the horse is assembled. If there is too much tension, and the top just won’t go on, remove the wedges to release the tension, add the top, then replace the wedges.
Ta-da! Now do it three more times. You made four, correct?
I sewed the Daimon Hitatare Sugata some time ago, and added some kotsuyu embellishments and munahimo some weeks ago, but only got around to taking new pictures recently.
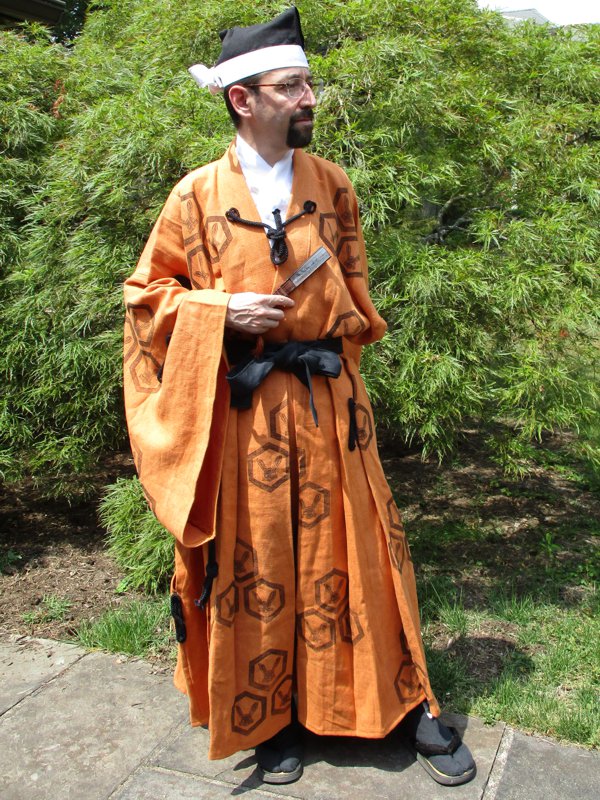
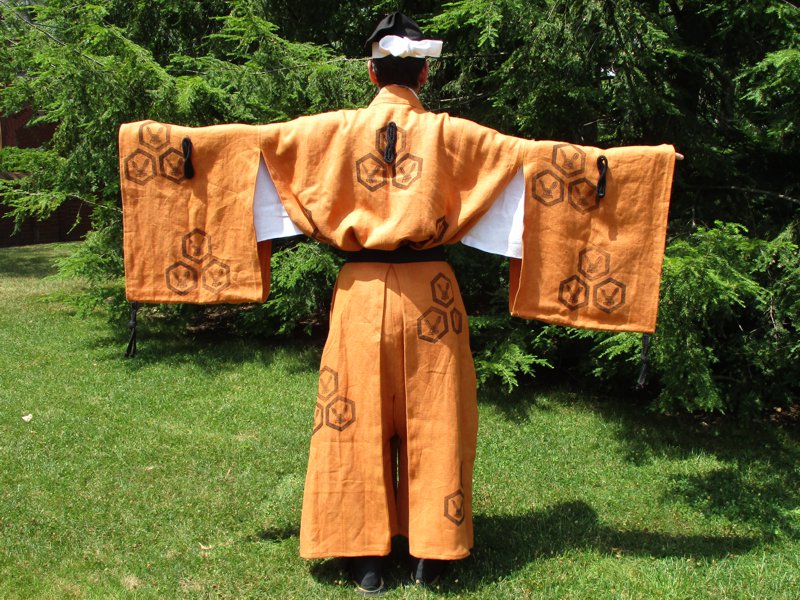
While the scroll I based this outfit on does not show these cords, I feel they are necessary. I am guessing that the scroll does not show them because the warrior in the image was not rich enough to afford them.
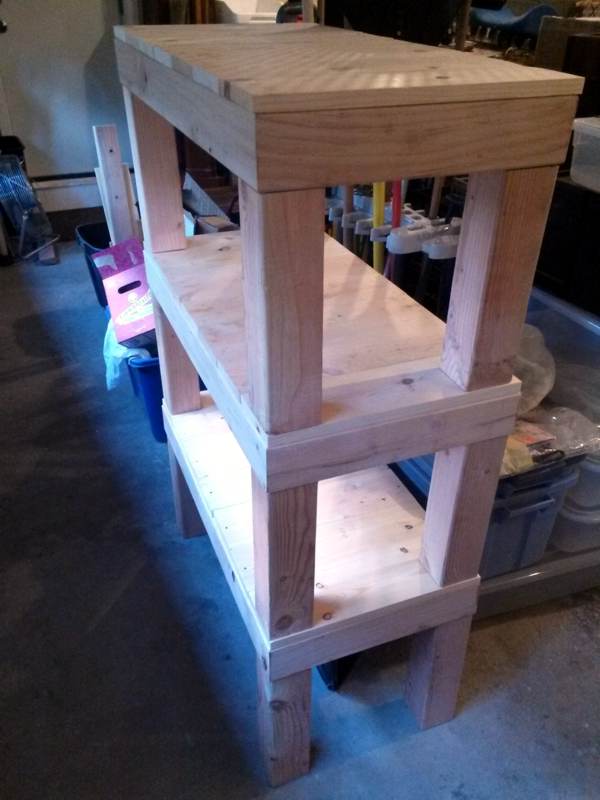
Some years ago, I made a pair of low Japanese sawhorses for my workshop. They’ve been great, and very useful (mostly for keeping lumber off the floor in the garage), but it was time to take the next step up. My rickety western sawhorses spend most of their time sitting outside in the rain and snow, so they are not in very good shape. A set of mid-height Japanese sawhorses would be nice to have, because they are designed to break down into pieces for transport and storage.

These sawhorses are about 24 inches tall, 24 inches long, and 22 inches wide at the feet. This height is just short enough that I can put my knee on a board to hold it while sawing, but tall enough that I don’t need to worry about scraping my saw along the ground. All the joinery is mortise and tenon, and there is no metal hardware in anything.
They are made almost entirely from pine. Given their modest stature, I could cut all four horses from three 4×4’s, two 2×6’s, and one 2×4. This means that there is only about forty dollars of material in the whole set. The pegs that secure the feet to the legs and the wedges that secure the legs to the stretchers are made from some surplus walnut I had in the shop. It’s always best to make the fasteners from wood that’s harder than the wood it is securing, but maybe walnut was an extravagant choice.
I wanted to make these from cedar instead of pine, but it turns out that these days cedar is five times as expensive as pine. It used to be only twice as expensive as pine. My next big woodworking project is going to cost me $500 instead of $100 for the lumber alone. Gasp.
I cut all the pieces to length by hand, but I used the mortising machine to cut nearly all of the mortises, and the band saw to cut nearly all of the tenons. I smoothed the walnut fasteners with a hand plane, though. After completing all of the shaping and joining, it took me about three hours with the orbital sander to clean everything up and remove most of the saw marks.
When taken apart, I can fit all the pieces for three horses into a single large (27 gallon) storage tote. This means that in the winter I can put the horses away in the garden shed instead of having them sit outside like the old ones.

The tachi is a type of Japanese sword that is similar to a katana, but it is worn differently, has different fittings, and is usually used as a more of a formal/ceremonial sword compared to a warrior’s katana. I bought a small tachi as part of my mission to recreate a full bunkan sokutai.
When not in being worn or in storage, the tachi would have been displayed nearby the bearer in a vertical stand called a tachi kake. These are readily available to buy, both as new items and antiques, but of course I wanted to make one myself. I was able to settle on a design, and I still have an excess of surplus wood in the garage.

Here’s what it looks like after cutting and shaping, but before finishing. It’s a little easier to see the shapes of the pieces. This is all pine lumber. The upright and the bracket at the top are just 3/4″ thick cut from 1by. The brace at the bottom of the upright is 1/2″ thick pine I had around; most of the examples I see online are only 1/4″ thick. The base is cut from some surplus 2by, to keep it bottom-heavy when unoccupied. The brace is fitted in a slot that I cut all the way through the upright. Tenons at either end of the upright fit into through-mortises for ease of assembly and disassembly.
All told, this item is about 26 inches tall when fully assembled. The tapering curve on the upright piece is one of my favorite shapes ever. I did almost all of the cutting on the band saw, though, because it made things like this curve so much faster to make. I also used a router to bevel and round over all the edges on all the pieces to give it a softer look.
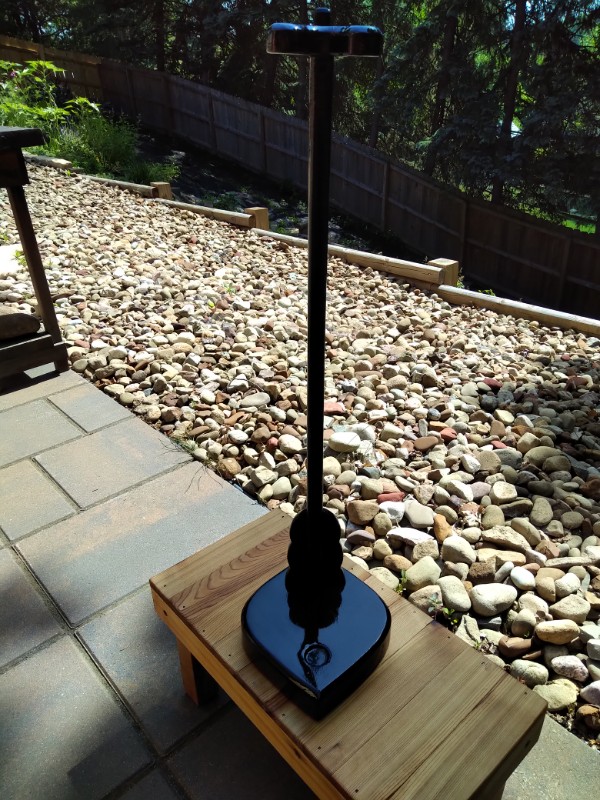
Here it is after about a half-dozen coats of black-tinted polyurethane. This stuff makes a good affordable lacquer substitute, and it dries in hours instead of weeks. I sanded the finish between every couple coats, but it still needs some final polishing. I also want to add some embellishment like I did for the kyousoku arm rest, but that might not happen until autumn.
For a better sense of scale, here’s another picture of the tachi kake before finishing, with my ko-tachi in the stand like it is supposed to be:

About two years ago, when I was preparing to be elevated to the Order of the Laurel, I was searching everywhere to try to buy a Kanmuri. The Kanmuri (which translates as “crown”) is the correct piece of headgear to wear with the Bunkan Sokutai that was to be my elevation garb. I eventually found an antique store in Japan that was willing to sell me one, however, theirs was in Thailand and would need to ship directly from there. I wound up picking it up at the post office the day before we went up to Pennsic. Since then, it has lived in a cardboard box, which was not the best place for this antique hat. Finally, I was able to make a couple of boxes to store and protect the pieces of the kanmuri.
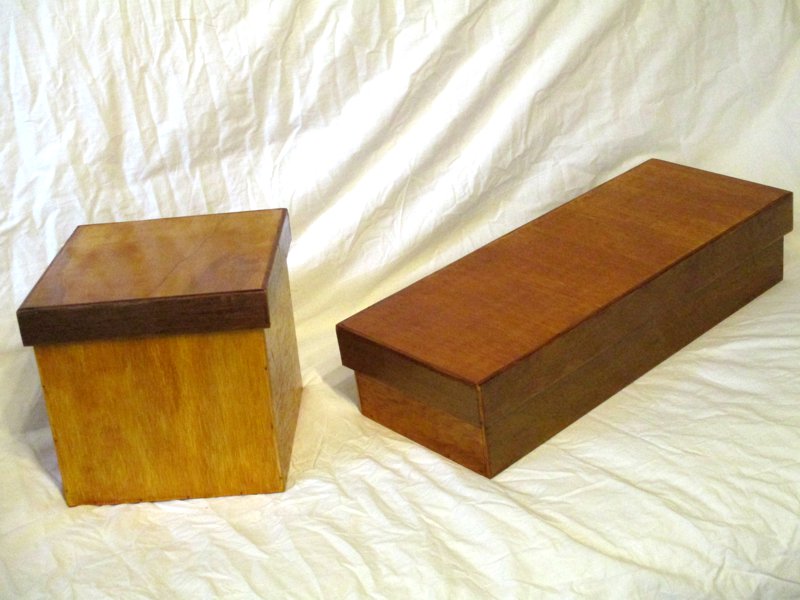
That’s what they look like closed. They’re just simple lidded boxes made from plywood and finished with shellac. I have a stack of smallish plywood scraps from the last 20 years of larger projects, so this project was also an opportunity to use up some of that.

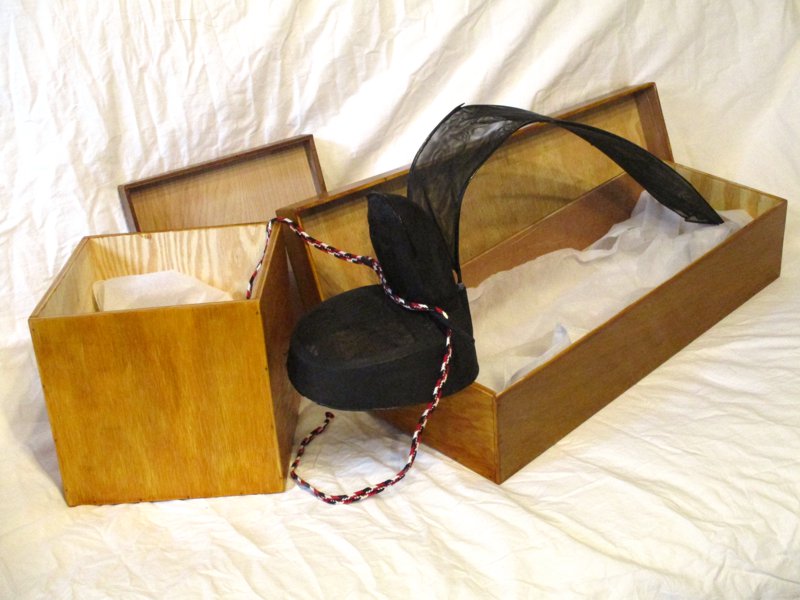
Here they are with the lids off, so you can see the kanmuri pieces nestled cozily inside. On the left is the “pillbox” portion with its upright and pin (All three pieces are attached on this kanmuri.), and on the right is the tail. There’s a lot of empty space inside the tail’s box, but I wanted the box to help maintain the proper shape of the tail, and I wasn’t up for trying to make a proper bentwood box.
In case you’re unfamiliar with the kanmuri as an object, here’s what it looks like when all the pieces are assembled. The cord drapes over the pin and ties under your chin to keep the hat in place. You can see that this kanmuri is not in the best shape. I’ll embark on a restoration project eventually,
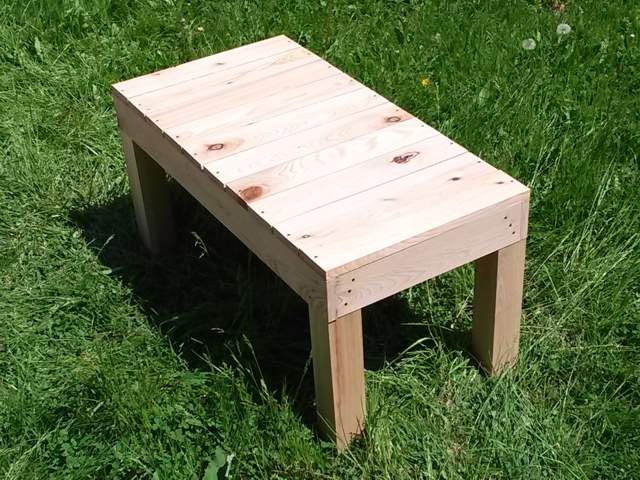
Long-time fans of my work my remember the nine endai benches (one, two, three through five, and six through nine) that I’ve made in the past. These are great, but they are 18 inches tall. As the endai is a half-step between the ground and the en of a Japanese dwelling, I wanted to make something that was a half-step between the ground and an endai. Even though there’s no Pennsic this year, I wanted to tackle this little project and get it off my list. I recently sorted through all of the surplus wood I have, so I knew I had enough lumber on hand to tackle this project without having to go and buy anything.

It’s entirely red cedar, and much of a style with endai six through nine, but roughly half-scale. Instead of being 36″ long, 18″ deep, and 18″ tall; this one is 18″ long, 9″ deep, and 9″ tall. The legs are 2×2 instead of 4×4. It’s a mini-bench.
I’m a bit disappointed about the external fasteners on the legs. I wasn’t able to do the joinery I usually do on the legs, and there isn’t a lot of room inside the apron for screws. Even with four screws on the interior of each leg it was a still a little rickety, so I gave in and put some screws in from the outside.
I put a bit of boiled linseed oil on it, to enhance the color and keep the wood from drying out. I’m pretty happy with it.
It’s not even half-way through the year, and I already have this year’s tabi foot coverings finished.
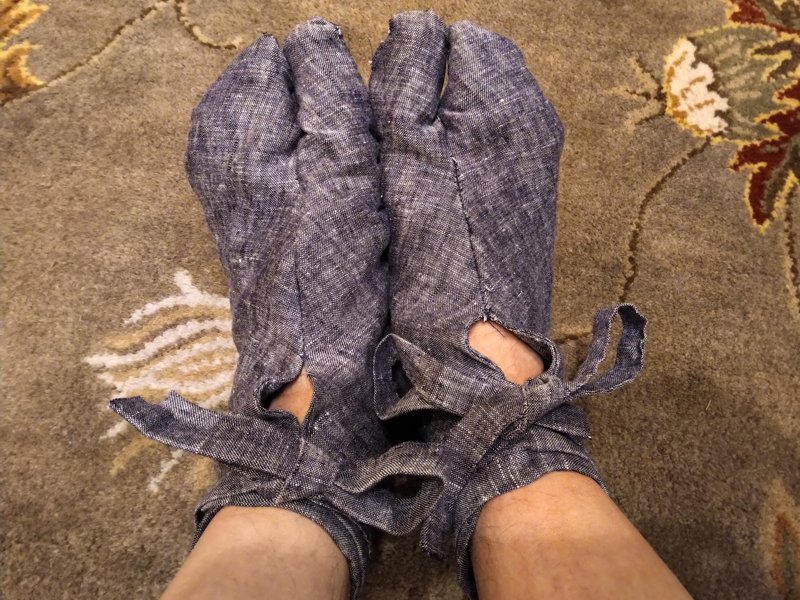
For those of my readers who are not familiar with this tradition, I started sewing my own tabi a few years ago to go with my Japanese garb. They are usually made from leftover fabric from garb projects, but it’s just regular fabric, so they tend to wear out pretty quickly. I found that if I make a pair a year, I can keep ahead of the curve and always have at least a few pairs of tabi that are not worn out and shabby looking. Usually, I wind up finishing a year’s tabi in January or February of the following year. Not this year! Free time and your wife hosting local sewing circles can do that.
These are made from the blue linen I used for the hippari top I made for the field clothing outfit from this past December. They’re sewn entirely by hand, including attaching the himo ties, which I normally do by machine. This was not a decision to be a stickler about it, just that I was sewing these to have some sewing to do while being social, so why not stretch it out a little bit?
These are apparently the eleventh or twelfth pair of tabi I have made for myself. Scary. Maybe the next pair will be impractically fancy. We still have some really nice silk brocade sitting around.